
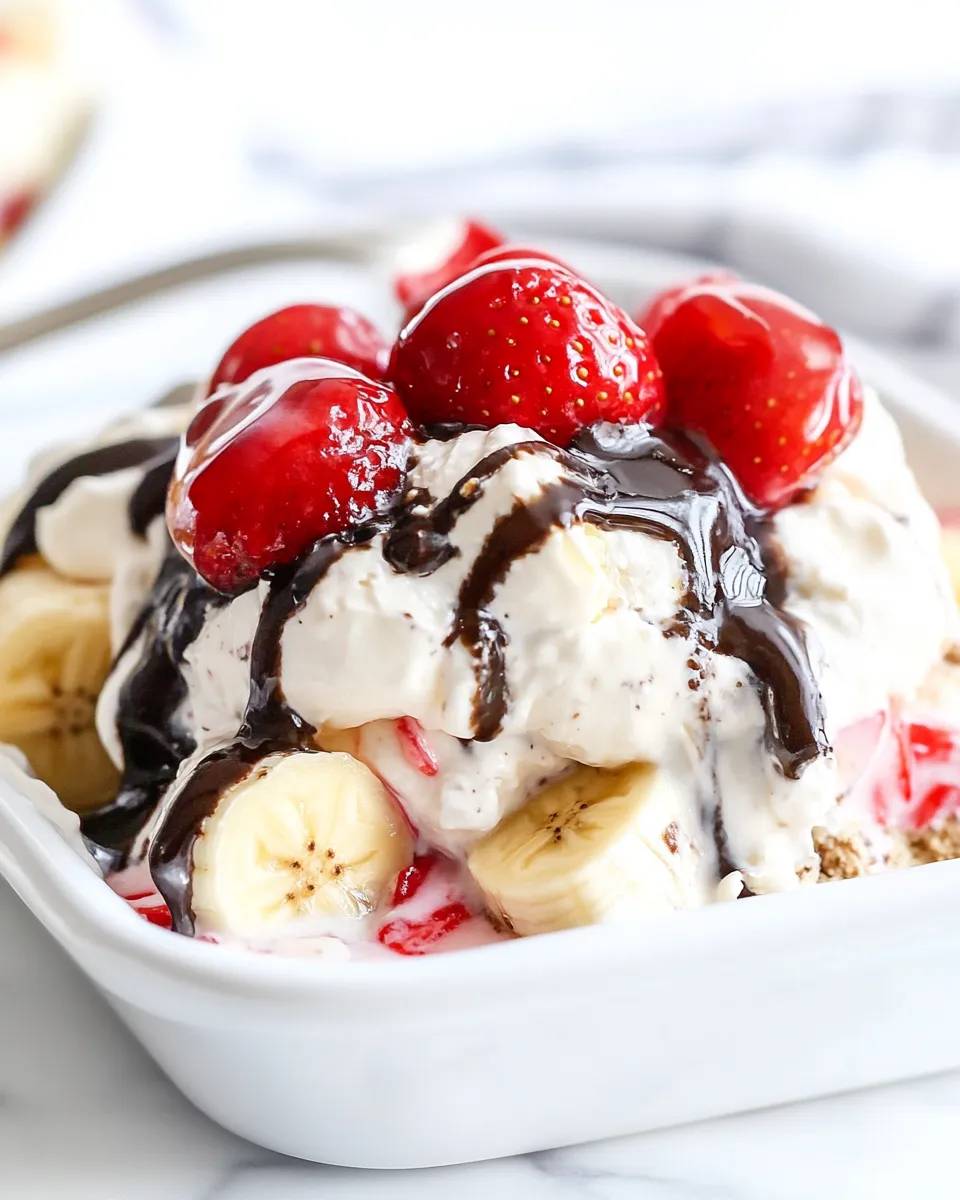
This banana split-inspired tray dessert takes everything you love about the classic and turns it into an easy-to-slice, crowd-friendly recipe. It layers a buttery graham crust with pineapple-spiked cream cheese, strawberries, bananas, and clouds of whipped cream. Finish with chocolate, nuts, and maraschino cherries and you have something nostalgic and reliably delicious.
I write recipes that I’ll actually make on a weeknight and bring to a potluck without a panic. This one fits both cases. Prep is straightforward and mostly hands-off after assembly; chilling does the heavy lifting. The flavors are bright but familiar: tangy pineapple, soft cream cheese, sweet strawberries and bananas, and a whipped cap that ties everything together.
Below you’ll find a practical shopping guide, a clear ingredients list taken directly from the recipe, step-by-step directions (kept exactly as written), troubleshooting tips, sensible gear suggestions, and ways to adapt the dessert for different situations. Read through once, then make a shopping list and get baking.
Your Shopping Guide
Buy ripe but firm bananas so they don’t brown and stay easy to slice. Look for fresh, fragrant strawberries—size matters less than flavor; hull and slice them at home for the best texture. A standard 9×13-inch pan is the right size: nothing fancy, just one that fits in your fridge.
Two items that will make or break the base are graham cracker crumbs and softened cream cheese. Buy a box of graham crackers and crush them at home for the freshest crumb, or pick up pre-made crumbs if you’re short on time. For the cream cheese, remove it from the fridge at least 30 minutes before you start so it blends smooth with the drained crushed pineapple.
Other notes: choose heavy cream with at least 36% fat for stable whipped cream. If you like salt, pick a slightly salted nut for the topping; otherwise go with plain. The maraschino cherries are a small but classic finish—buy a can and drain them well right before you plate.
Ingredients
- 1 1/2 cups graham cracker crumbs — forms the crunchy, buttery crust base.
- 1/2 cup butter, melted — binds the crumbs and adds richness; a little can be reserved to grease the pan.
- 1/4 cup sugar — sweetens the crust and balances the tang of cream cheese.
- 2 (8 ounce) packages cream cheese, softened — creates the creamy middle layer; room temperature for easy whipping.
- 1 (8 ounce) can crushed pineapple, drained — adds moisture and bright pineapple flavor to the cream cheese layer.
- 1/4 cup sugar — used in the cream cheese mixture to sweeten and stabilize.
- 16 ounces strawberries, hulled and sliced — fresh fruit layer; drains a bit of juice into the cream cheese for extra flavor.
- 3 sliced bananas — classic banana split element; slice just before assembling to reduce browning.
- chocolate syrup — finish for a familiar sundae note; drizzle right before serving.
- nuts — add crunch and contrast; chop or leave whole depending on preference.
- maraschino cherries, (around a 8 ounce can) — classic garnish; drain and pat dry before placing.
- 2 cups heavy cream — whipped into the fluffy topping; stop at soft peaks for the right texture.
- 1/2 cup powdered sugar — sweetens and helps stabilize whipped cream.
- 1 teaspoon vanilla extract — adds depth and a gentle perfume to the whipped cream.
Cooking Banana Split Dessert: The Process
- Lightly grease a 9×13-inch baking dish (you may use a small amount of the 1/2 cup melted butter) or line it with parchment; set the dish aside.
- Make the crust: in a medium bowl, combine 1 1/2 cups graham cracker crumbs, 1/2 cup melted butter, and 1/4 cup sugar. Mix until the crumbs are evenly moistened.
- Press the crumb mixture firmly and evenly into the bottom of the prepared 9×13-inch pan to form the crust. Place the pan in the refrigerator or freezer while you prepare the filling to help the crust set.
- Prepare the pineapple cream cheese layer: drain the 1 (8 ounce) can crushed pineapple well. In a mixing bowl, beat the two (8 ounce) packages of softened cream cheese with the drained crushed pineapple and 1/4 cup sugar until smooth and well combined.
- Spread the pineapple cream cheese mixture evenly over the chilled graham cracker crust.
- Layer the fruit: arrange the 16 ounces sliced strawberries evenly over the cream cheese layer, then top with the 3 sliced bananas in an even layer.
- Make the whipped cream: in a large bowl, beat 2 cups heavy cream, 1/2 cup powdered sugar, and 1 teaspoon vanilla extract until soft peaks form. Stop as soon as soft peaks hold to avoid overwhipping.
- Spread the whipped cream evenly over the banana and strawberry layer.
- Chill the assembled dessert in the refrigerator for at least 1 hour (longer is fine) to set before serving.
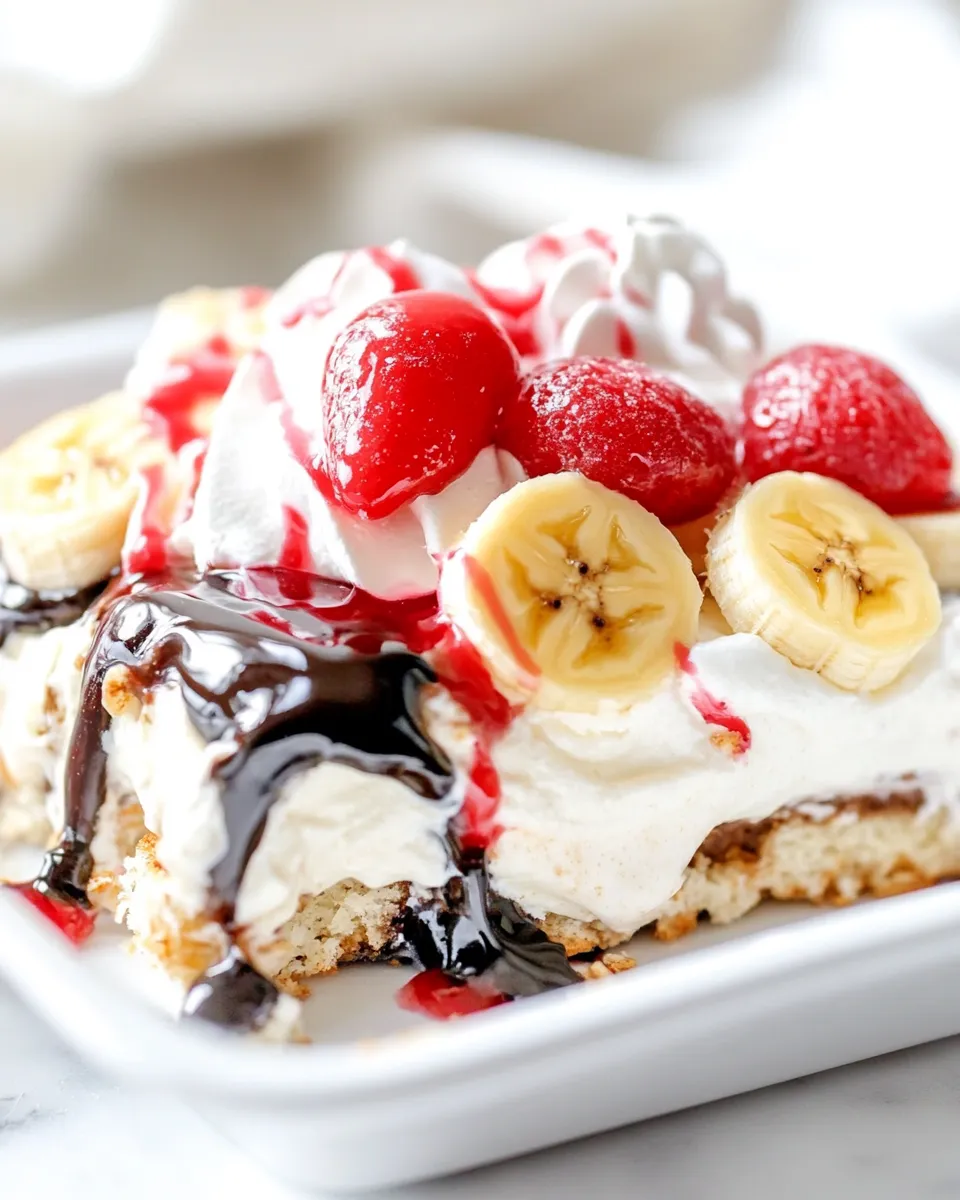
- Just before serving, drizzle chocolate syrup over the top, sprinkle with nuts, and place maraschino cherries (drained from the can) on the dessert or on individual slices as desired.
The Upside of Banana Split Dessert

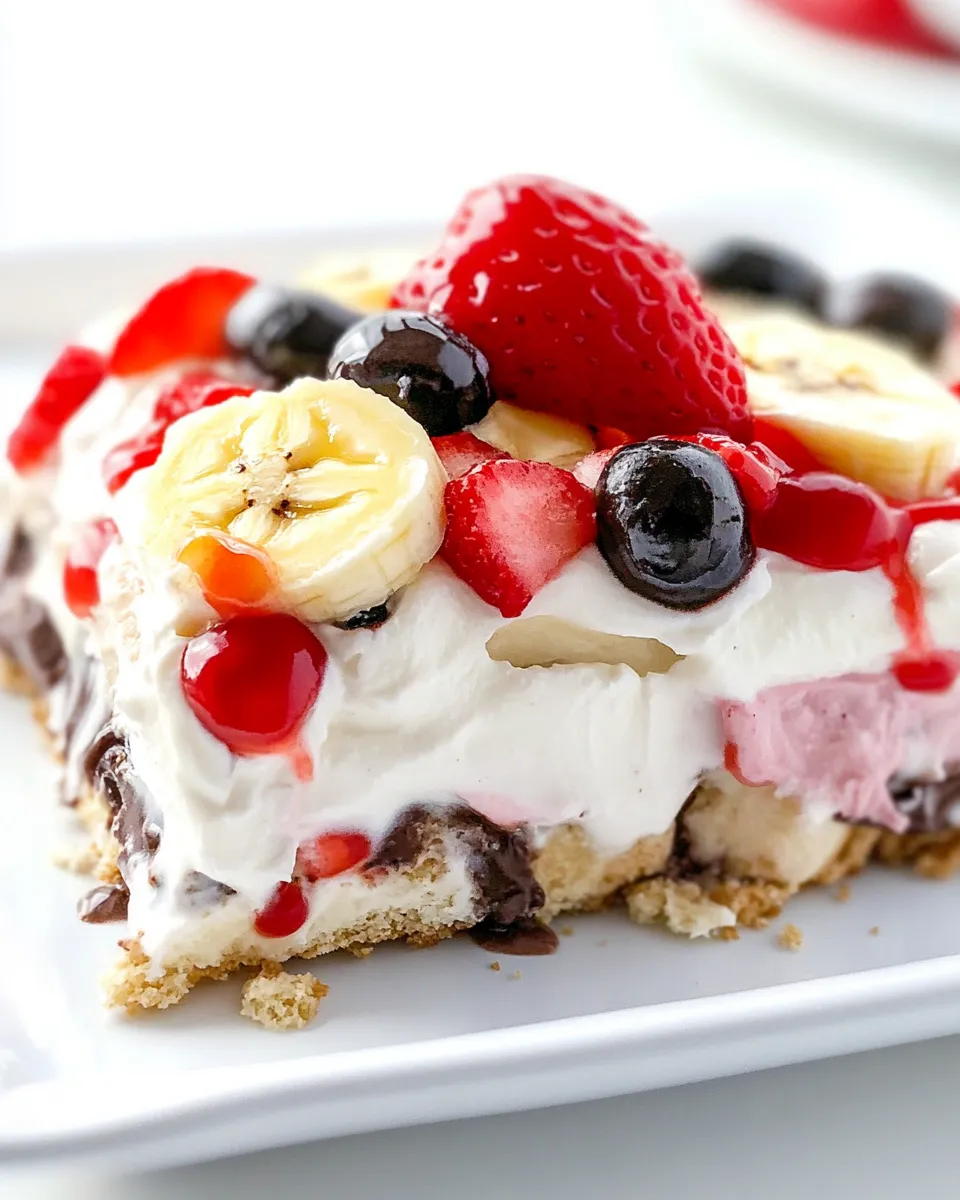
This dessert scales beautifully. A 9×13-inch pan feeds a crowd without you having to stand at the stove. It’s portable and stable: the chilled layers hold their shape, making slices presentable. The flavor profile is layered—there’s the buttery base, tangy pineapple-cream layer, fresh berries and banana, then a clean whipped top. Each forkful gives you contrast: creamy, crunchy, juicy.
Furthermore, assembly is straightforward and forgiving. You can premix the crust and pineapple-cream layer ahead of time. Chill, then add fruit and whipped cream the day of service. That splits prep between days, which is ideal for parties.
Flavor-Forward Alternatives
If you want to nudge this toward a different flavor without changing structure, consider adjusting the toppings and finishing touches. Swap the chocolate syrup for a thicker fudge sauce if you prefer deeper chocolate flavor. Toast the nuts briefly for a warmer, more aromatic crunch. Add a scatter of extra sliced strawberries just before serving for a fresher look and brighter bite.
For a tropical turn, scatter a few extra pineapple bits on top with the cherries. If you like more acidity, a quick squeeze of lemon over the banana layer will slow browning and add brightness. Keep the layers and amounts the same; these are finishing notes rather than structural changes.
What’s in the Gear List
- 9×13-inch baking dish — required size for even layer proportions.
- Mixing bowls — at least two: one for the crust and one for the cream cheese mixture; a larger one for whipping cream helps contain splatter.
- Electric mixer or stand mixer — speeds up making the pineapple cream cheese layer and whipping the cream to soft peaks.
- Spatula and wooden spoon — for pressing crumbs and spreading layers smoothly.
- Measuring cups and spoons — accuracy matters for the crust and cream components.
- Can opener and strainer — to drain the crushed pineapple and maraschino cherries.
Learn from These Mistakes
- Skipping refrigeration for the crust — If you don’t chill the crust it can crumble when you slice. Put the pan in the fridge or freezer while you make the filling.
- Overwhipping cream — Whip to soft peaks only. Overwhipped cream turns grainy and can separate into butter.
- Not draining the pineapple well — Excess juice will make the cream cheese layer too loose and can overly moisten the crust.
- Slicing bananas too early — They brown quickly. Slice right before layering for best appearance.
- Using cold cream cheese — Cold blocks won’t blend smoothly. Allow the packages to soften at room temperature for easier mixing.
Dietary Customizations
Here are practical swaps to fit different needs while keeping the essence of the dessert:
- Lower-sugar — Reduce the added sugar in the crust and cream cheese layer by half, or use a sugar substitute suitable for baking. Keep in mind that sweetness balances the pineapple and fruit.
- Dairy-free — Use dairy-free cream cheese alternatives and a non-dairy whipping product crafted for stability. Texture will vary, so chill well before serving.
- Nuts-free — Omit the nuts for allergy-sensitive crowds. Replace the crunch with toasted coconut flakes if acceptable, or extra graham crumbs sprinkled at the end.
Cook’s Notes
Room temperature ingredients blend better—softened cream cheese and room-temperature butter will mix into a smoother filling and crust. Drain canned pineapple thoroughly; pressing between paper towels helps remove extra liquid. When pressing the crust, use the bottom of a flat measuring cup for an even, compact layer.
If the strawberries are particularly juicy, drain them briefly in a colander to avoid seeping too much liquid into the cream layer. When it comes to the whipped cream, keep an eye on it: stop as soon as soft peaks form. A short, light spread gives a clean, smooth top that looks great after the final drizzle and nut sprinkle.
Shelf Life & Storage
Store the assembled, chilled dessert covered in the refrigerator. It will keep well for 2–3 days. The bananas will slowly brown over time; for best presentation, serve within 24 hours. If you need to prepare parts in advance: make the crust and pineapple cream layer up to 48 hours ahead. Keep the fruit and whipped cream separate until assembly on the day you plan to serve.
If you must freeze, freeze individual slices tightly wrapped to avoid texture changes, but note that whipped cream and fresh fruit lose quality when frozen and thawed. Refrigeration is the preferred method.
Quick Q&A
- Can I make this in a different pan? — A different rectangular pan will work, but proportion changes may affect layer thickness. A smaller pan will make taller layers.
- Can I swap the strawberries for other fruit? — Yes, but choose fruits that hold up in refrigeration. Berries are the safest swap; grapes or canned fruit will change texture.
- How long to whip cream? — Until soft peaks form. Check frequently; stop immediately when peaks hold but still bend at the tip.
- Can I assemble a day ahead? — Yes. Assemble fully and chill overnight for convenience; add chocolate syrup and cherries right before serving for best appearance.
Final Thoughts
This Banana Split Dessert is a modern, tray-friendly take on a classic sundae—comforting and straightforward. It plays well for potlucks, family dinners, and casual celebrations. Follow the steps closely for best texture, keep an eye on timing when whipping cream and slicing bananas, and remember that chilling is your friend. A small assembly effort yields a dessert that looks impressive and serves a crowd without drama.
Make it your own with the final drizzles and nuts, but trust the structure: a sturdy graham crust, a pineapple-cream layer, fresh fruit, and a cloud of whipped cream. Simple, reliable, and worth making more than once.
Banana Split Dessert
Ingredients
Ingredients
- 1 1/2 cupsgraham cracker crumbs
- 1/2 cupbutter melted
- 1/4 cupsugar
- 2 8 ounce packagescream cheese, softened
- 1 8 ounce cancrushed pineapple, drained
- 1/4 cupsugar
- 16 ouncesstrawberries hulled and sliced
- 3 slicedbananas
- chocolate syrup
- nuts
- maraschino cherries (around a 8 ounce can)
- 2 cupsheavy cream
- 1/2 cuppowdered sugar
- 1 teaspoonvanilla extract
Instructions
Instructions
- Lightly grease a 9x13-inch baking dish (you may use a small amount of the 1/2 cup melted butter) or line it with parchment; set the dish aside.
- Make the crust: in a medium bowl, combine 1 1/2 cups graham cracker crumbs, 1/2 cup melted butter, and 1/4 cup sugar. Mix until the crumbs are evenly moistened.
- Press the crumb mixture firmly and evenly into the bottom of the prepared 9x13-inch pan to form the crust. Place the pan in the refrigerator or freezer while you prepare the filling to help the crust set.
- Prepare the pineapple cream cheese layer: drain the 1 (8 ounce) can crushed pineapple well. In a mixing bowl, beat the two (8 ounce) packages of softened cream cheese with the drained crushed pineapple and 1/4 cup sugar until smooth and well combined.
- Spread the pineapple cream cheese mixture evenly over the chilled graham cracker crust.
- Layer the fruit: arrange the 16 ounces sliced strawberries evenly over the cream cheese layer, then top with the 3 sliced bananas in an even layer.
- Make the whipped cream: in a large bowl, beat 2 cups heavy cream, 1/2 cup powdered sugar, and 1 teaspoon vanilla extract until soft peaks form. Stop as soon as soft peaks hold to avoid overwhipping.
- Spread the whipped cream evenly over the banana and strawberry layer.
- Chill the assembled dessert in the refrigerator for at least 1 hour (longer is fine) to set before serving.
- Just before serving, drizzle chocolate syrup over the top, sprinkle with nuts, and place maraschino cherries (drained from the can) on the dessert or on individual slices as desired.
Equipment
- 9x13 inch Baking Dish
- Mixing Bowl
- Parchment Paper
- Refrigerator
Notes
The bananas will begin to discolor once they make contact with the air. For best results, don't add the fruit until a couple of hours before serving.


