
I test desserts for a living, and this no-bake cheesecake is the one I reach for when I want something that looks special but won’t steal my whole day. It sets in the fridge, requires no oven babysitting, and delivers that classic creamy texture everyone expects from a cheesecake — without the cracks and stress that come with baking.
The recipe is straightforward, forgiving, and very adaptable. If you follow one rule, let it be this: use full-fat brick-style cream cheese and cold heavy cream — those two ingredients control texture. Beyond that, it’s mostly about gentle folding and patience while it chills.
I’ll walk you through the ingredients, the exact method (step-by-step), smart swaps, and the small mistakes that trip people up. Read the method once, prep your mise en place, and the results will reward your attention.
Ingredient Breakdown
Ingredients
- 7 tablespoons unsalted butter, melted — binds and firms the graham crust; use unsalted so you control the salt level.
- 1 ½ cups graham cracker crumbs — the base flavor and texture for the crust; finely crushed for an even press.
- 2 tablespoons granulated sugar — adds a touch of sweetness to the crust and helps it crisp slightly when chilled.
- 24 ounces brick-style cream cheese, softened (Do NOT use lite, reduced fat, fat-free, or spreadable cream cheese) — the heart of the filling; full-fat brick-style gives structure and a true cheesecake mouthfeel.
- ½ cup granulated sugar — blends into the cream cheese to sweeten without gritty texture; add gradually and taste if you like it less sweet.
- 1 cup confectioner’s sugar — helps stabilize and smooth the filling; sift if it’s lumpy or packed.
- 2 teaspoons vanilla extract — balances the tang and rounds the flavor; pure vanilla is worth it here.
- 2 teaspoons lemon juice, freshly squeezed — brightens the filling and cuts richness; use fresh for the cleanest flavor.
- 1 ¼ cups heavy whipping cream, cold — whipped to stiff peaks to aerate and lighten the filling; temperature matters — keep it cold for best volume.
The Method for No-Bake Cheesecake
- Make the crust: melt 7 tablespoons unsalted butter in a microwave-safe bowl or glass measuring cup (about 1 minute on high).
- In a medium bowl, combine 1 ½ cups graham cracker crumbs and 2 tablespoons granulated sugar. Pour in the melted butter and toss with a fork until the crumbs are evenly moistened.
- Transfer the crumb mixture to a 9-inch springform pan. Press the crumbs firmly into the bottom of the pan and about halfway up the sides using your fingertips or the bottom of a measuring cup. Place the pan in the freezer while you prepare the filling.
- Prepare the cream cheese base: in the bowl of a stand mixer fitted with the paddle attachment (or using a hand mixer), add the 24 ounces softened cream cheese. Beat on medium-high speed until smooth and free of lumps. Stop once and scrape down the sides and bottom of the bowl.
- Add ½ cup granulated sugar to the cream cheese and beat on medium speed about 1 minute until combined. Scrape down the bowl.
- Add 1 cup confectioners’ sugar, 2 teaspoons vanilla extract, and 2 teaspoons freshly squeezed lemon juice. Start mixing on low speed to avoid sugar dust, then increase to medium and mix until incorporated. Stop and scrape down the bowl so the mixture is smooth. Set this bowl aside.
- In a separate medium bowl, pour in 1 ¼ cups cold heavy whipping cream. Using the whisk attachment (stand or hand mixer), whip the cream on medium-high speed until it increases in volume and forms stiff peaks, about 7–8 minutes (timing varies by mixer). Stiff peaks means the cream holds a pointed peak when the whisk is lifted.
- Fold the whipped cream into the cream cheese mixture: transfer about one-third of the whipped cream into the cream cheese bowl to lighten it, fold gently with a rubber spatula by cutting down through the center, sweeping along the bottom, and folding the mixture over onto itself. Add the remaining whipped cream in two additions and continue folding just until mostly uniform and no large streaks remain. Do not overmix.
- Remove the crust from the freezer and pour the filling into the crust. Smooth the top with a rubber spatula or offset knife.
- Cover the springform pan tightly with plastic wrap or foil and refrigerate for at least 8 hours or overnight to fully chill and set. Do not use the freezer to set the cheesecake (it will change the texture).
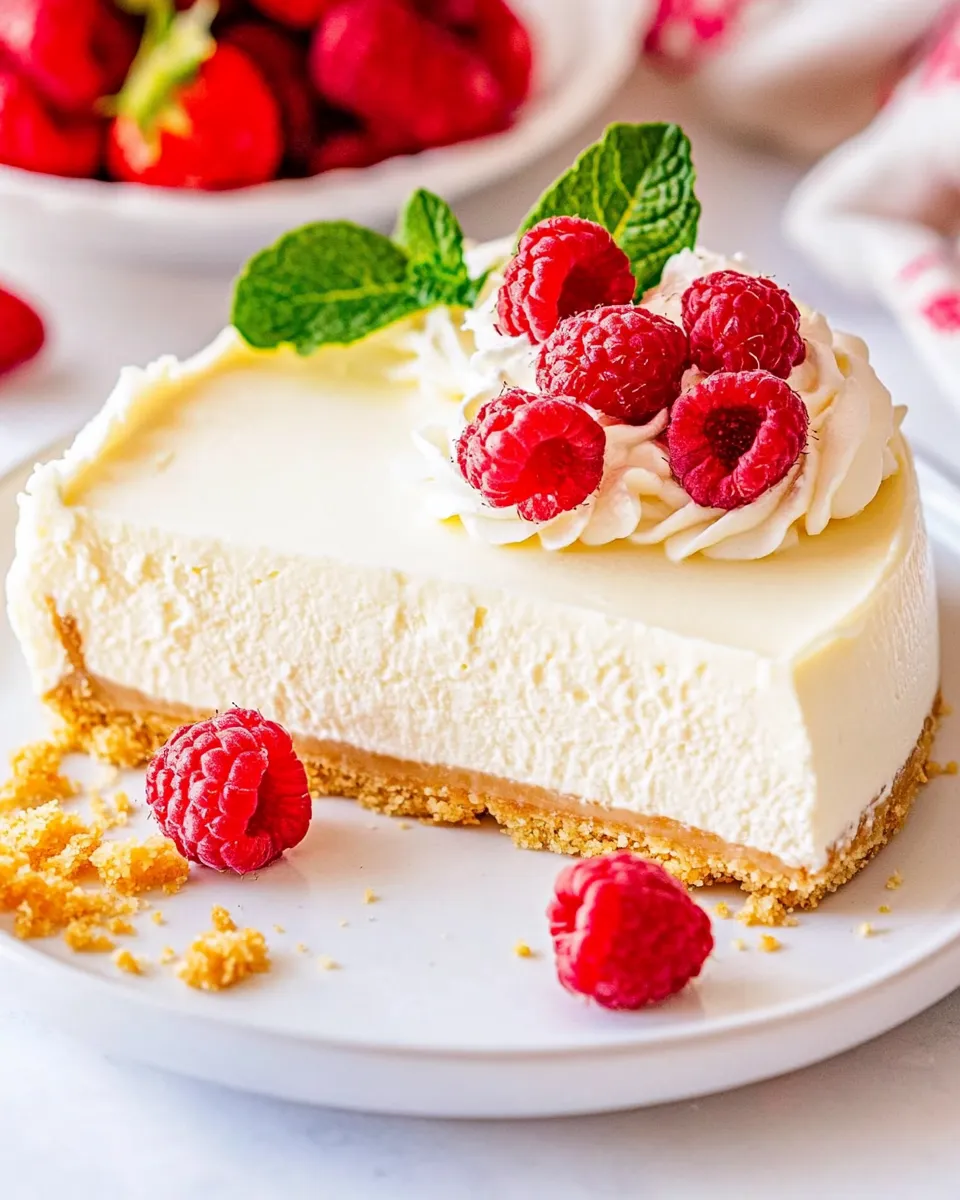
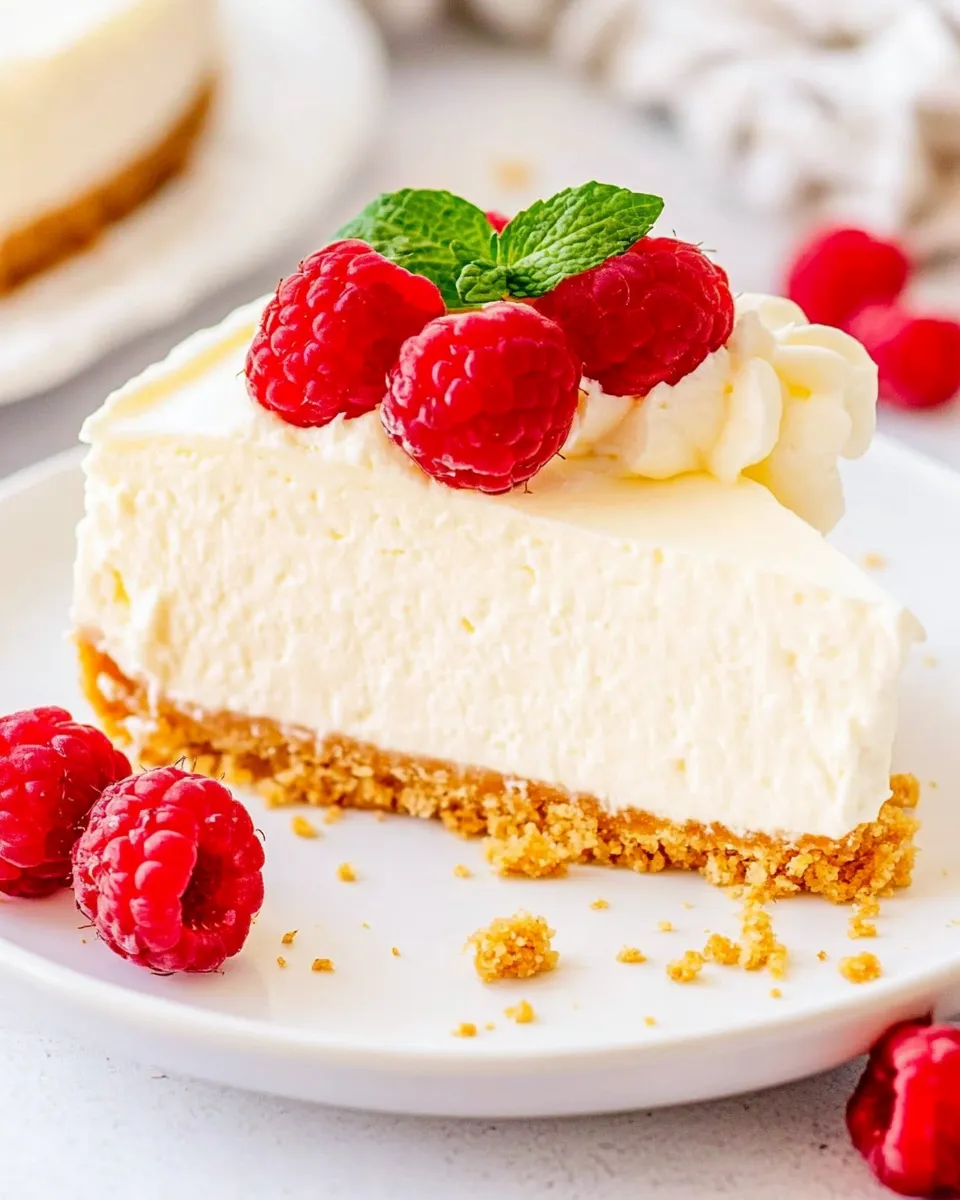
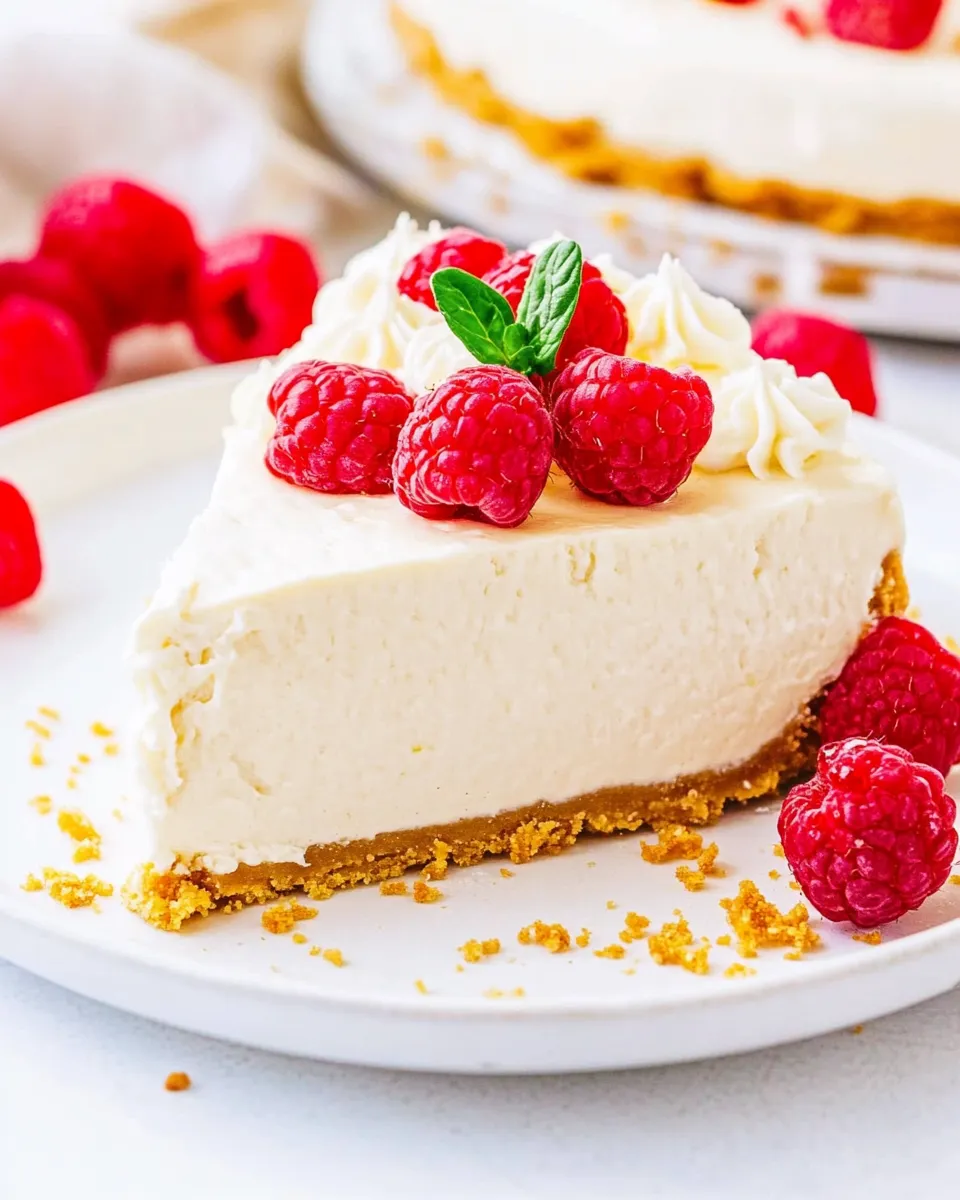
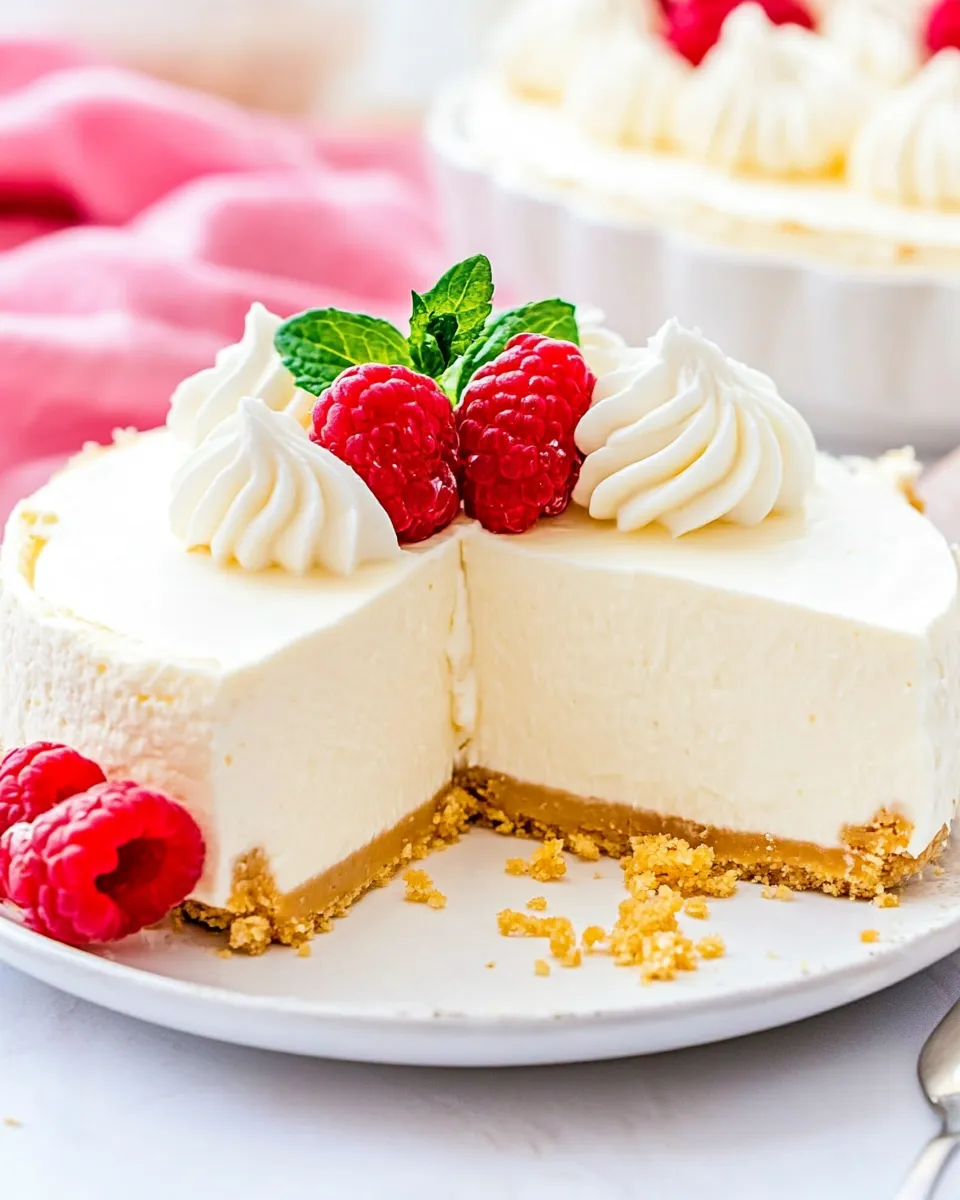
- To serve, run a butter knife around the inside perimeter of the springform pan, then gently remove the outer ring. Slice and garnish as desired.
- Store leftovers airtight in the refrigerator for up to 5 days. Once the cheesecake has set, it can be frozen airtight for up to 3 months; individual portions in sandwich bags or freezer-safe containers are easiest to thaw and serve.
Why It Deserves a Spot
This No-Bake Cheesecake earns kitchen real estate because it reliably produces the smooth, creamy texture people expect without oven drama. No cracks. No rushes. You control the chill time, and the set is forgiving — it firms up in the fridge while you sleep.
It’s also a crowd-pleaser. The base is familiar and buttery, the filling is lightly tangy from lemon and cream cheese, and the whipped cream keeps it airy so each slice doesn’t feel too heavy. For gatherings, it looks elegant and slices cleanly when fully chilled.
Quick Replacement Ideas
- Graham cracker crumbs — use digestive biscuits or another neutral cookie (crush finely) if graham crackers aren’t available.
- Unsalted butter — salted butter will work but reduce added salt elsewhere; for a dairy-free crust, melted coconut oil can be used in place of butter.
- Brick-style cream cheese — if you can’t find it, look for a full-fat, block cream cheese rather than the tub/spreadable versions; avoid low-fat variants for texture reasons.
- Confectioner’s sugar — a superfine fine sugar works in a pinch but confectioners gives the smoothest result.
- Heavy whipping cream — stabilize with a tablespoon of instant pudding mix if you need extra hold for hot-weather serving (adds a slight flavor change).
Equipment & Tools
- 9-inch springform pan — makes unmolding clean and easy.
- Stand mixer with paddle and whisk attachments or a hand mixer — paddle for the cream cheese, whisk for whipping cream.
- Rubber spatula and an offset knife — for gentle folding and smoothing the top.
- Measuring cups and spoons — accuracy matters for texture.
- Microwave-safe bowl or glass measuring cup — to melt the butter.
- Freezer and refrigerator — freezer holds crust firm while you prepare filling; fridge sets the cheesecake.
Slip-Ups to Skip
- Using spreadable or low-fat cream cheese — it won’t set right and the texture will be loose or grainy.
- Not softening the cream cheese enough — cold lumps in the bowl make for a lumpy filling. Bring it to room temperature but don’t overheat.
- Whipping the cream to soft peaks — the filling will be too loose. Aim for stiff peaks so the filling holds shape.
- Overmixing after adding whipped cream — you’ll deflate the aeration. Fold gently and stop when streaks mostly disappear.
- Trying to speed the chill in the freezer — the texture will suffer. Patience in the fridge yields the right mouthfeel.
Better-for-You Options
If you want a lighter version, there are a few sensible tweaks that won’t completely change the character of the dessert. Switch the crust to crushed oats or a blend of nuts and dates for more fiber; use a small reduction in sugar to taste; and serve smaller slices with fresh fruit to balance richness.
Be cautious substituting the cream cheese. Many reduced-fat or whipped cream cheeses contain stabilizers or extra water that change texture. If you must, test a small batch first so you know the result.
Insider Tips
Prep and timing
- Soften the cream cheese on the counter for about 30–60 minutes. It should be soft enough to beat smooth without warmth or oil separation.
- Keep the heavy cream very cold until you start whipping. Cold cream whips faster and yields higher volume.
- Chill the crust in the freezer—this firms it quickly so the warm filling won’t soften it when you pour it in.
Folding technique
- Use a large rubber spatula. Cut down the center, sweep the bottom, and fold the mixture over; rotate the bowl as you go. This keeps pockets of whipped cream intact so the filling stays light.
- Stop folding as soon as the filling is mostly uniform. A few faint streaks are fine — they’ll blend as the cheesecake settles.
Slicing like a pro
- Run a thin, clean knife under hot water, wipe dry, then slice. Repeat between cuts. This gives tidy slices without dragging filling.
Storage Pro Tips
Follow the recipe’s storage directions: once chilled and set, store airtight in the refrigerator for up to 5 days. For longer storage, freeze airtight for up to 3 months. I prefer freezing individual portions in freezer-safe containers or sandwich bags — they thaw faster and are convenient for single servings.
When thawing, move slices from the freezer to the refrigerator and allow several hours or overnight. Avoid thawing at room temperature; condensation can make the crust soggy and the filling weep.
Quick Questions
- Can I use whipped topping instead of whipping cream? It’s possible, but whipped topping has stabilizers and a different flavor profile. Use cold heavy cream for the classic texture and flavor.
- How long does it need to chill? At least 8 hours or overnight, as the method states. Rushing it will yield a softer, less structured cheesecake.
- Can I make it a day ahead? Yes. In fact, it’s better made a day ahead — the flavors meld and the set improves overnight.
- How should I garnish? Fresh berries, a thin fruit compote, chocolate shavings, or a drizzle of caramel are all good options. Add toppings just before serving to avoid soggy surfaces.
- Can I freeze it with toppings? Avoid high-moisture fruit on top before freezing. Freeze plain or portioned, then add fresh toppings after thawing.
The Takeaway
This No-Bake Cheesecake is dependable, elegant, and forgiving. Respect the key steps — softened full-fat cream cheese, cold whipped cream to stiff peaks, gentle folding, and a proper chill — and you’ll get a creamy, airy cheesecake without turning on the oven. Make it ahead for stress-free entertaining, slice with a warmed knife, and store leftovers airtight. It’s a reliable recipe that delivers consistently satisfying results.

Best No-Bake Cheesecake
Ingredients
Ingredients
- 7 tablespoonsunsalted butter melted
- 1 1/2 cupsgraham cracker crumbs
- 2 tablespoonsgranulated sugar
- 24 ouncesbrick-style cream cheese softened (Do NOT use lite, reduced fat, fat-free, or spreadable cream cheese)
- 1/2 cupgranulated sugar
- 1 cupconfectioner’s sugar
- 2 teaspoonsvanilla extract
- 2 teaspoonslemon juice freshly squeezed
- 1 1/4 cupsheavy whipping cream cold
Instructions
Instructions
- Make the crust: melt 7 tablespoons unsalted butter in a microwave-safe bowl or glass measuring cup (about 1 minute on high).
- In a medium bowl, combine 1 ½ cups graham cracker crumbs and 2 tablespoons granulated sugar. Pour in the melted butter and toss with a fork until the crumbs are evenly moistened.
- Transfer the crumb mixture to a 9-inch springform pan. Press the crumbs firmly into the bottom of the pan and about halfway up the sides using your fingertips or the bottom of a measuring cup. Place the pan in the freezer while you prepare the filling.
- Prepare the cream cheese base: in the bowl of a stand mixer fitted with the paddle attachment (or using a hand mixer), add the 24 ounces softened cream cheese. Beat on medium-high speed until smooth and free of lumps. Stop once and scrape down the sides and bottom of the bowl.
- Add ½ cup granulated sugar to the cream cheese and beat on medium speed about 1 minute until combined. Scrape down the bowl.
- Add 1 cup confectioners’ sugar, 2 teaspoons vanilla extract, and 2 teaspoons freshly squeezed lemon juice. Start mixing on low speed to avoid sugar dust, then increase to medium and mix until incorporated. Stop and scrape down the bowl so the mixture is smooth. Set this bowl aside.
- In a separate medium bowl, pour in 1 ¼ cups cold heavy whipping cream. Using the whisk attachment (stand or hand mixer), whip the cream on medium-high speed until it increases in volume and forms stiff peaks, about 7–8 minutes (timing varies by mixer). Stiff peaks means the cream holds a pointed peak when the whisk is lifted.
- Fold the whipped cream into the cream cheese mixture: transfer about one-third of the whipped cream into the cream cheese bowl to lighten it, fold gently with a rubber spatula by cutting down through the center, sweeping along the bottom, and folding the mixture over onto itself. Add the remaining whipped cream in two additions and continue folding just until mostly uniform and no large streaks remain. Do not overmix.
- Remove the crust from the freezer and pour the filling into the crust. Smooth the top with a rubber spatula or offset knife.
- Cover the springform pan tightly with plastic wrap or foil and refrigerate for at least 8 hours or overnight to fully chill and set. Do not use the freezer to set the cheesecake (it will change the texture).
- To serve, run a butter knife around the inside perimeter of the springform pan, then gently remove the outer ring. Slice and garnish as desired.
- Store leftovers airtight in the refrigerator for up to 5 days. Once the cheesecake has set, it can be frozen airtight for up to 3 months; individual portions in sandwich bags or freezer-safe containers are easiest to thaw and serve.
Equipment
- microwave-safe bowl or glass measuring cup
- Medium Bowl
- 9-inch springform pan
- stand mixer (paddle attachment) or hand mixer
- whisk attachment
- Rubber spatula
- offset knife
- Measuring Cup
- Fork
- Plastic wrap or foil
Notes
Able to accommodate the total amount of cheesecake fillingwhich would be too much for a regular 9-inch cake pan.
Great forreleasingthe no-bake cheesecake so there is no struggling or issue.


