
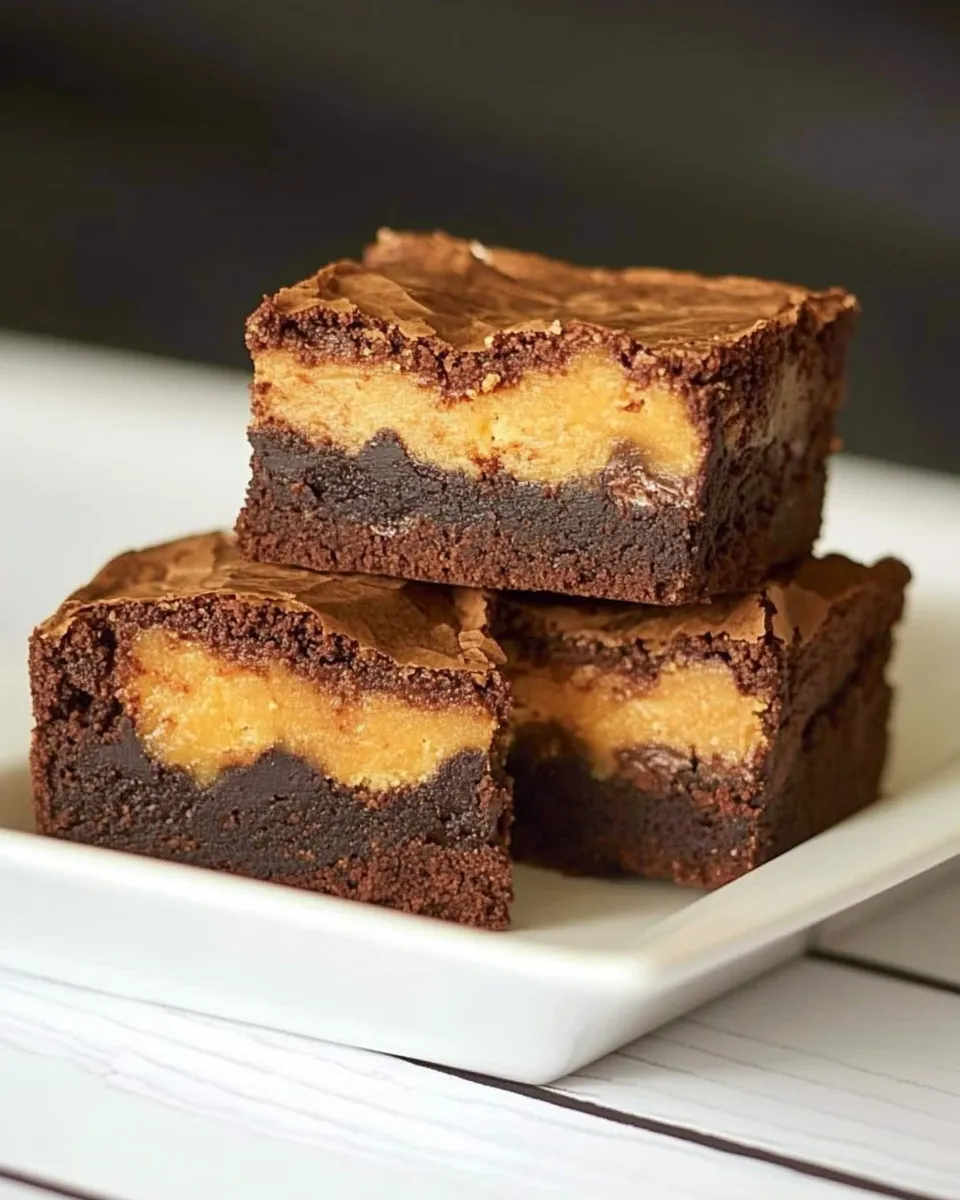
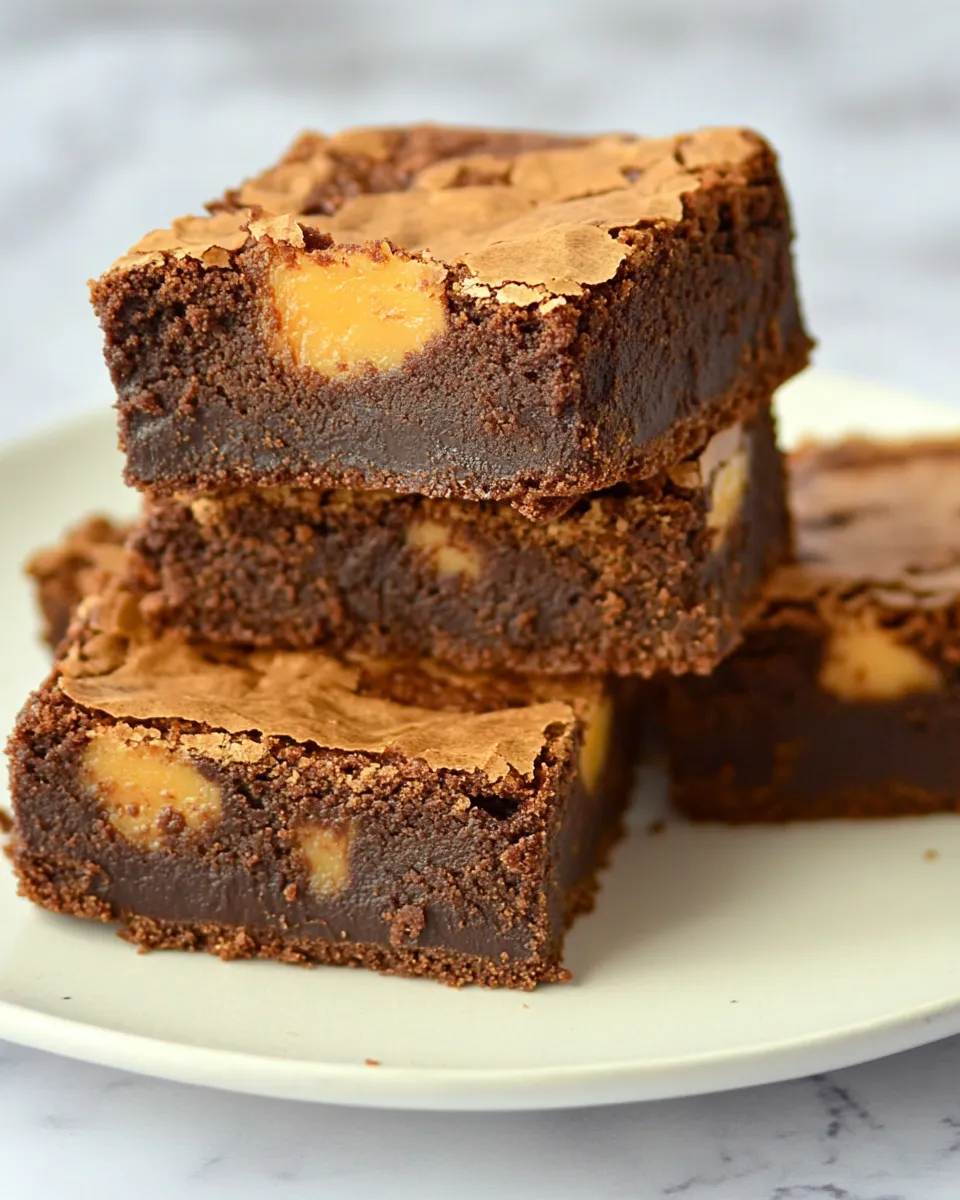
These brownies are the kind of dessert I make when I want something reliably chocolatey with a playful crunch. They hinge on a glossy, fudgy brownie base punctuated by a layer of chopped Butterfinger pieces — every bite has that satisfying contrast between dense chocolate and crisp, peanut-buttery shards. No fuss, just straightforward assembly and a solid payoff.
I like these for weeknight dessert duties and for bringing to gatherings; they travel well and cut into neat squares once chilled. The recipe uses pantry-friendly ingredients and a single 8×8 pan, so cleanup is simple. Follow the steps and you’ll end up with an impressive, crowd-pleasing tray.
Below I break down the ingredient roles, equipment, common missteps and a simple, guaranteed workflow. If you like brownies with texture and a candy-bar surprise, this is one you’ll keep making.
The Ingredient Lineup

Ingredients
- 4 ounces unsweetened chocolate; coarsely chopped — provides concentrated cocoa flavor and the backbone of the brownie’s chocolate intensity.
- 3/4 cup butter — adds richness and helps create the fudgy texture.
- 1 1/4 cups sugar — sweetens and contributes to the tender crumb and glossy top.
- 3 eggs — bind the batter and give structure; they also contribute to the fudgy finish when beaten into the chocolate.
- 1 teaspoon pure vanilla extract — lifts and rounds out the chocolate flavor.
- 1/4 teaspoon salt — balances sweetness and enhances the chocolate notes.
- 1 cup all-purpose flour — provides structure; stir just until combined to avoid toughness.
- 3 (2.1 ounce) Butterfinger candy bars, chopped into bite size pieces — the crunchy, peanut-buttery layer that gives the brownies their signature texture contrast.
Butterfinger Brownies Cooking Guide
- Preheat oven to 350°F. Line an 8×8-inch baking pan with foil and spray the foil with nonstick cooking spray.
- Place the coarsely chopped unsweetened chocolate and the butter in a large microwave-safe bowl. Microwave at 50% power (medium) for 3–4 minutes, until the butter is melted.
- Stir the mixture until the chocolate is fully melted and smooth. If needed, microwave an additional 10–15 seconds and stir again.
- Whisk in the sugar until combined. Whisk in the eggs, vanilla, and salt until smooth and uniform.
- Gradually add the flour and stir just until the batter is combined; do not overmix.
- Spread half of the batter evenly into the prepared pan. Scatter all of the chopped Butterfinger pieces in an even layer over the batter. Spoon or spread the remaining half of the batter over the Butterfinger layer, smoothing the top gently.
- Bake 30–35 minutes, until the edges are set and a toothpick inserted near the center comes out with moist crumbs but not raw batter.
- Remove the pan from the oven and place it on a cooling rack. Cool completely in the pan. Use the foil to lift the brownies from the pan, unwrap, and cut into squares.
What Makes This Recipe Special
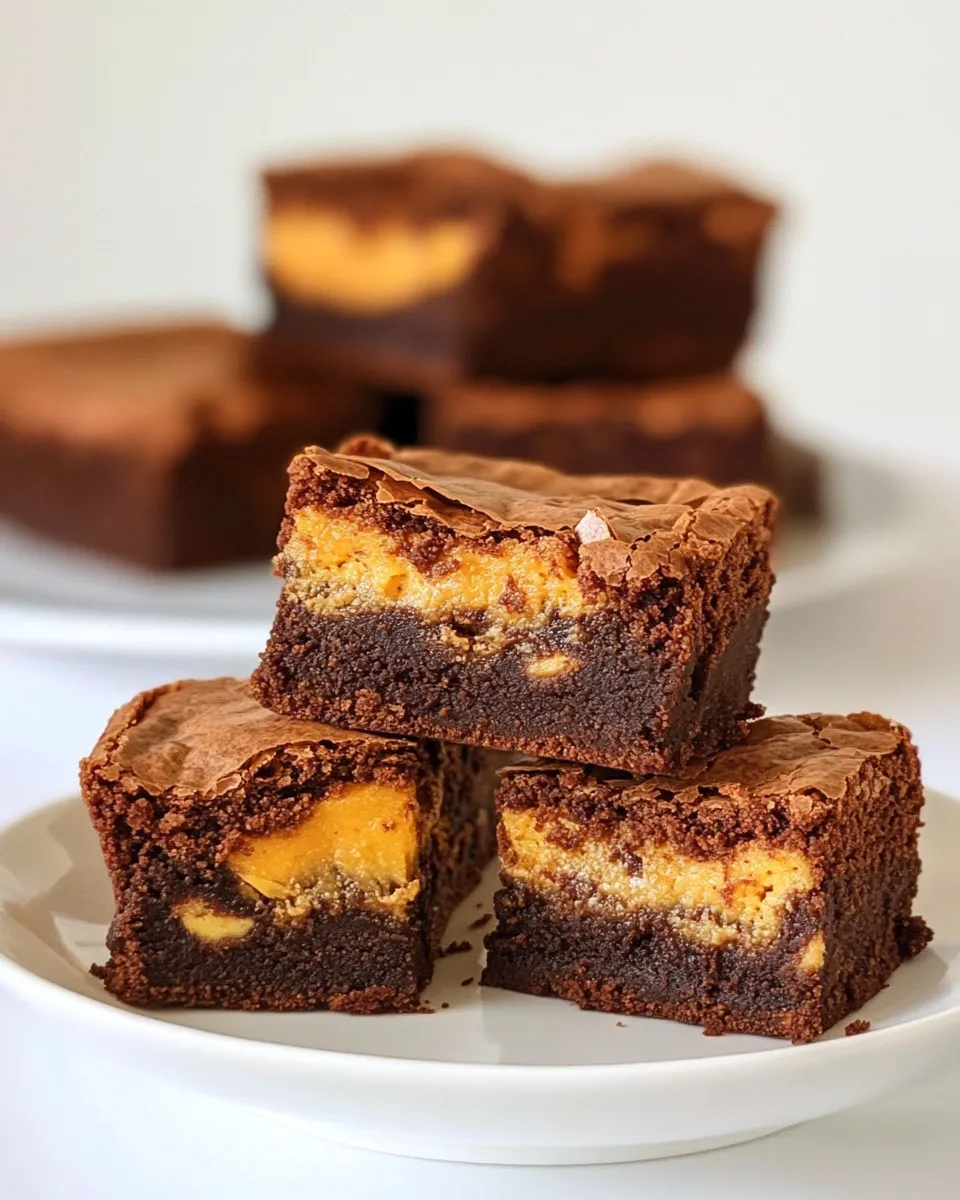
It’s all about contrast. The dense, fudgy brownie base gives a deep chocolate hit, while the Butterfinger layer adds crunchy texture and a toffee-peanut flavor that cuts through the richness. Instead of mixing candy into the batter where it can melt and soften, scattering it between two thin layers preserves that snap and creates a candy-studded middle.
There’s also a simplicity advantage: this recipe uses straightforward steps and one bowl for the chocolate and butter, so you get a bakery-style finish with minimal effort. The foil lift technique makes removing and cutting the brownies neat and easy — important when presentation matters.
If You’re Out Of…
Unsweetened chocolate: a bittersweet or semisweet chocolate will work in a pinch; your brownies will be sweeter and slightly less intense. Taste the batter (a little, since it contains raw egg — see FAQ) and adjust expectations accordingly.
Butter: stick with a solid fat for best texture. Substitutes like margarine will change flavor and mouthfeel; neutral oils will thin the batter and lose that classic brownie richness.
Butterfinger candy bars: any crunchy, peanut-butter-forward candy bar with a flaky, brittle interior will give a similar effect. If you prefer, you can stir a portion into the batter instead of layering, but expect less distinct crunch.
Equipment & Tools
- 8×8-inch baking pan — the recipe is scaled for this size; different sizes will change baking time.
- Foil and nonstick spray — for easy release and clean edges.
- Large microwave-safe bowl — melts chocolate and butter together safely.
- Whisk and rubber spatula — whisking for smoothness, spatula for folding flour and spreading batter.
- Measuring cups and spoons — accuracy matters for texture.
- Cooling rack and sharp knife — cool completely before slicing for clean squares.
Mistakes Even Pros Make
- Overmixing after adding flour — develops gluten and produces cakier, less fudgy brownies. Stir just until combined.
- Baking too long — a toothpick with moist crumbs is the target. Overbaking dries them out.
- Not cooling completely — cutting warm brownies causes the Butterfinger layer to shift and makes messy squares. Chill until firm.
- Using too-large candy pieces — if Butterfinger chunks are too big they can tear the top layer when you spread the second half of the batter. Chop to bite-sized pieces.
Make It Diet-Friendly
Small changes can make these feel lighter without losing the essence. Serve smaller portions and pair a square with fresh berries to add brightness and fiber. Swap the topping for a smaller amount of chopped candy to reduce sugar per serving. If you need to manage added sugars more strictly, consider using a higher cocoa-content chocolate base and reduce the visible candy layer so each bite focuses more on chocolate intensity than candy sweetness.
Flavor Logic
Understanding why this works helps you adapt it. Unsweetened chocolate brings pure cocoa solids and fat; combined with butter it creates a glossy, rich matrix for the sugar and eggs to work on. Sugar dissolves into this matrix and helps form that shiny top as it melts and re-crystallizes. Eggs provide structure and moisture; whisked in thoroughly they ensure a uniform crumb. Flour is the minimum needed to hold everything together — too much and the brownie becomes cake-like. The Butterfinger layer offers textural contrast and a concentrated peanut/toffee note that the chocolate base balances perfectly.
Freezer-Friendly Notes
These freeze very well. Once cooled and cut, arrange squares in a single layer on a baking sheet and flash-freeze until firm. Transfer to an airtight container or a resealable freezer bag with parchment between layers to prevent sticking. Thaw at room temperature or warm briefly in the oven at low heat if you want them slightly melted. Properly wrapped, they’ll keep well for several weeks; for best texture, consume within a month.
Your Top Questions
Can I make the batter ahead of time?
You can prepare the batter and refrigerate it in an airtight container for up to a day, but note that chilled batter may firm up and require brief resting at room temperature before spreading. If the Butterfinger pieces will be added between layers, keep them separate until assembly to preserve crunch.
Is the microwave method necessary for melting the chocolate?
No — you can use a double boiler on the stovetop to melt the chocolate and butter gently. The microwave is just faster and convenient; the goal is low, even heat so the chocolate doesn’t seize.
How can I tell when the brownies are done?
Edges should be set and pulled slightly away from the pan. A toothpick inserted near the center should come out with moist crumbs but no raw batter. If it’s wet batter, bake a few minutes more and check again.
Any tips for cutting clean squares?
Cool completely, then chill the pan for a firmer slice. Use a sharp knife wiped between cuts, or warm the knife under hot water and dry it before slicing for cleaner edges.
Ready, Set, Cook
These Butterfinger Brownies are straightforward to make and hard to keep on the counter for long. The real trick is resisting that first warm square; cooling yields cleaner cuts and a better textural contrast. Follow the cooking guide, prep your candy pieces bite-size, and give the pan time to cool. Serve them at room temperature so the chocolate is soft but the candy layer keeps its delightful crunch.
If you try them, make a note of any tweaks you like — fewer candy pieces, a darker chocolate base, or an extra minute in the oven for a firmer crumb. Enjoy the predictable comfort of a well-made brownie with a fun, crunchy surprise in the middle.
Butterfinger Brownies
Ingredients
Ingredients
- 4 ounces unsweetened chocolate
- coarsely chopped3/4 cup butter1 1/4 cups sugar3 eggs1 teaspoon pure vanilla extract1/4 teaspoon salt1 cup all-purpose flour3 2.1 ounce Butterfinger candy bars, chopped into bite size pieces
Instructions
Instructions
- Preheat oven to 350°F. Line an 8×8-inch baking pan with foil and spray the foil with nonstick cooking spray.
- Place the coarsely chopped unsweetened chocolate and the butter in a large microwave-safe bowl. Microwave at 50% power (medium) for 3–4 minutes, until the butter is melted.
- Stir the mixture until the chocolate is fully melted and smooth. If needed, microwave an additional 10–15 seconds and stir again.
- Whisk in the sugar until combined. Whisk in the eggs, vanilla, and salt until smooth and uniform.
- Gradually add the flour and stir just until the batter is combined; do not overmix.
- Spread half of the batter evenly into the prepared pan. Scatter all of the chopped Butterfinger pieces in an even layer over the batter. Spoon or spread the remaining half of the batter over the Butterfinger layer, smoothing the top gently.
- Bake 30–35 minutes, until the edges are set and a toothpick inserted near the center comes out with moist crumbs but not raw batter.
- Remove the pan from the oven and place it on a cooling rack. Cool completely in the pan. Use the foil to lift the brownies from the pan, unwrap, and cut into squares.
Equipment
- 8x8-inch baking pan
- Foil
- Nonstick Cooking Spray
- large microwave-safe bowl
- Microwave
- Whisk
- Spoon
- Cooling rack
- toothpick


