
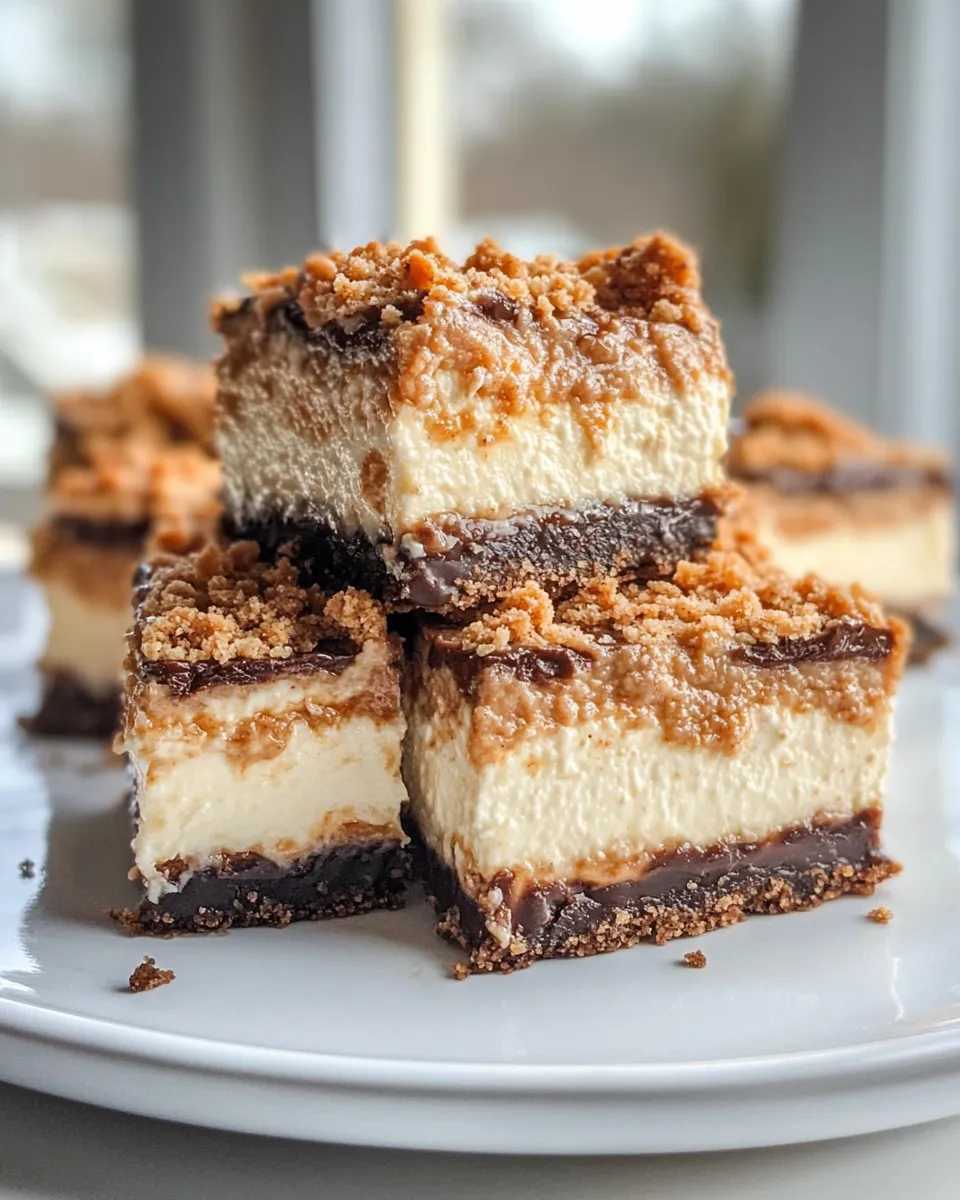
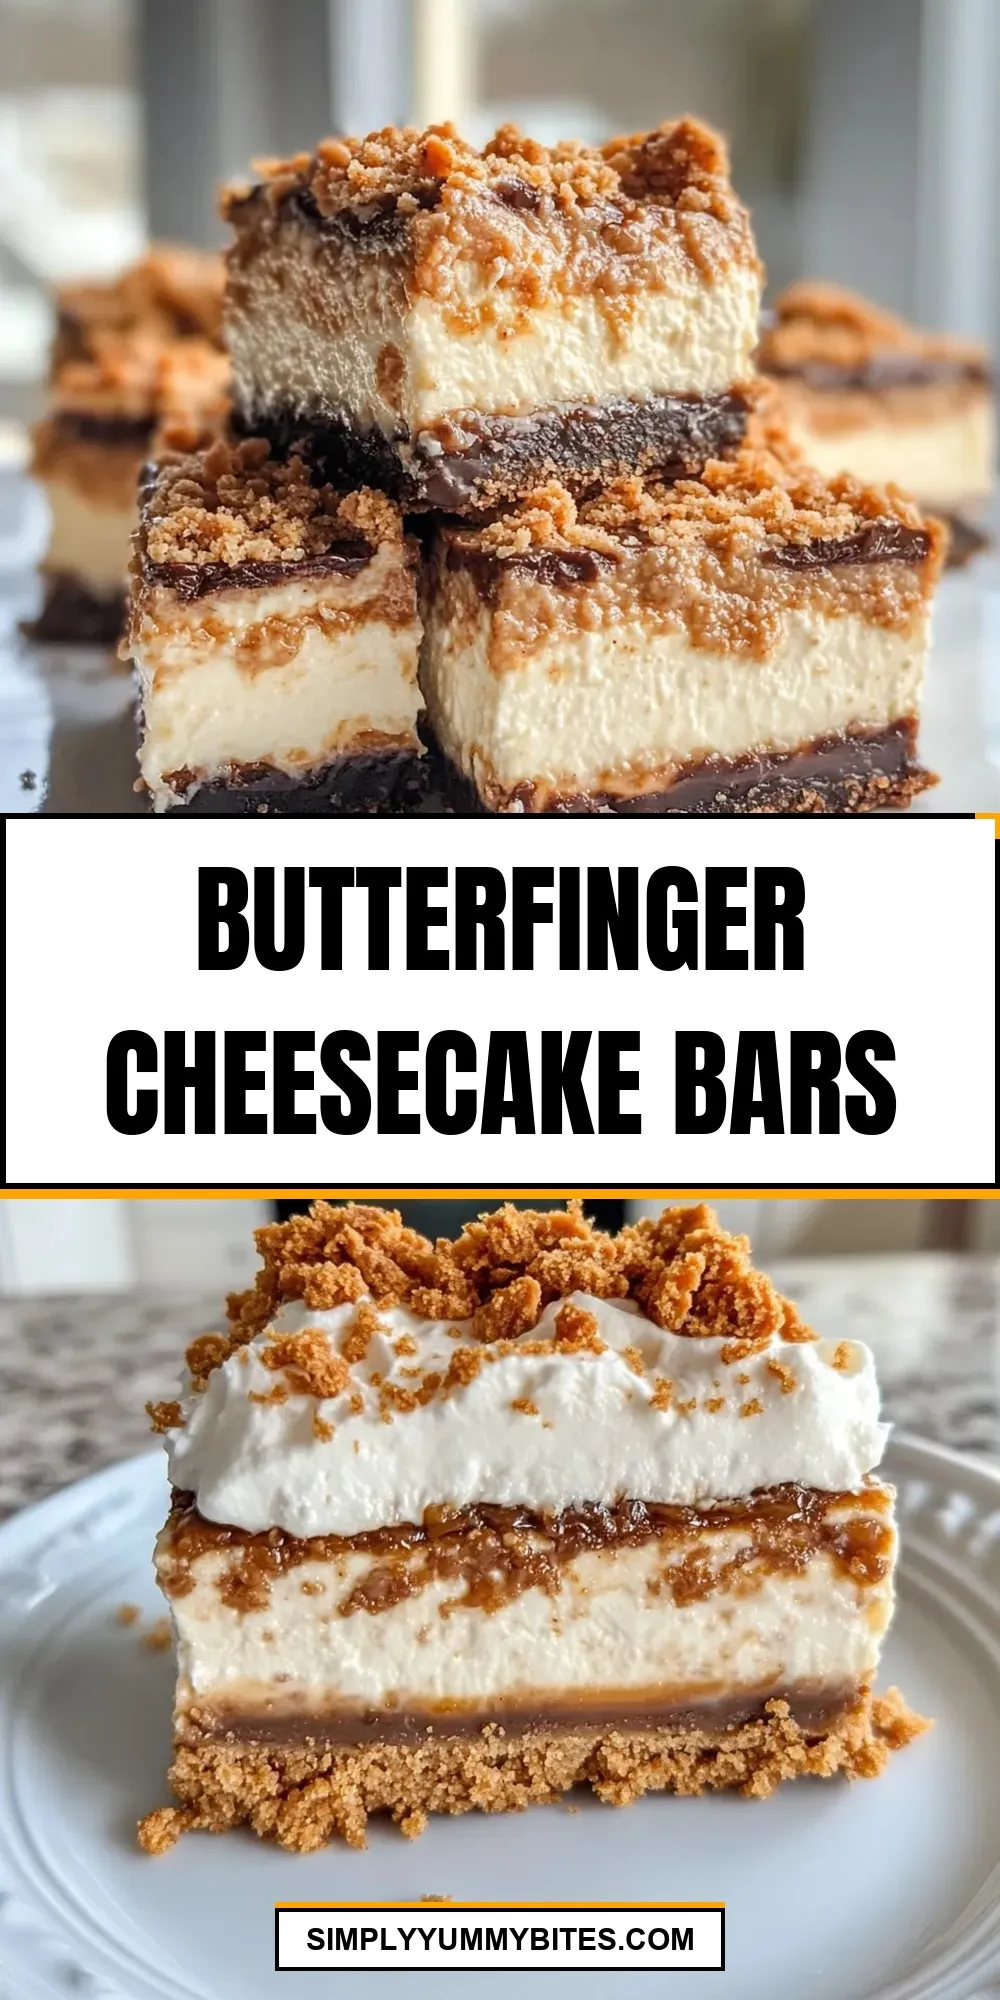
These bars are one of my go-to dessert wins: a quick crust made from cake mix, a silky cheesecake layer studded with Butterfinger, and a scatter of chips on top that get just a touch melty. They feel indulgent but come together without fuss, which means I make them for weeknight treats, potlucks, and the kind of last-minute company that deserves something homemade.
I like recipes that are practical first and pretty second — and this one checks both boxes. The crust uses a boxed cake mix and a bit of peanut butter and oil for a crunchy base. The filling is classic cream cheese, a little sugar, and sour cream for tang. The Butterfinger candy adds that flaky crunch and toffee-peanut flavor that keeps people sneaking second pieces.
Read through the steps before you start. The recipe is forgiving, but the cooling and chilling are essential for clean bars. I’ll walk you through ingredients, exact steps, common swaps, and the small mistakes to avoid so you get neat, flavorful bars every time.
Ingredient Rundown
- 1 Chocolate cake mix — the backbone of the crust; chocolate notes balance the butterscotch and Butterfinger flavors.
- 1 4oz butterscotch instant pudding mix — adds extra butterscotch flavor and helps bind the crumb mixture for a sturdy crust and topping.
- 1 egg — used in the crust mix to help bind the crumbs.
- 3 tbsp peanut butter — gives richness and a peanut note that echoes the Butterfinger.
- 3 tbsp canola oil — tenderizes the crust and makes it pressable; neutral-flavored oil keeps the butterfinger flavor front and center.
- 8 oz cream cheese, softened — the creamy base for the cheesecake layer; room temperature is key for a smooth filling.
- 1/3 cup sugar — sweetens the filling; balances the slightly salty peanut butter and bitter chocolate.
- 2 tbsp sour cream — adds tang and lightens the texture of the cheesecake filling.
- 1 egg — folded into the filling to set it when baked.
- 1/2 tsp vanilla extract — rounds and brightens the filling flavors.
- 1 butterfinger bar, chopped — folded into the filling for crunchy candy pieces throughout.
- 1/4 cup chocolate chips — melted slightly on top for chocolate pockets and shine.
- 1/4 cup butterscotch chips — paired with the chocolate chips for extra butterscotch glaze-like bits on top.
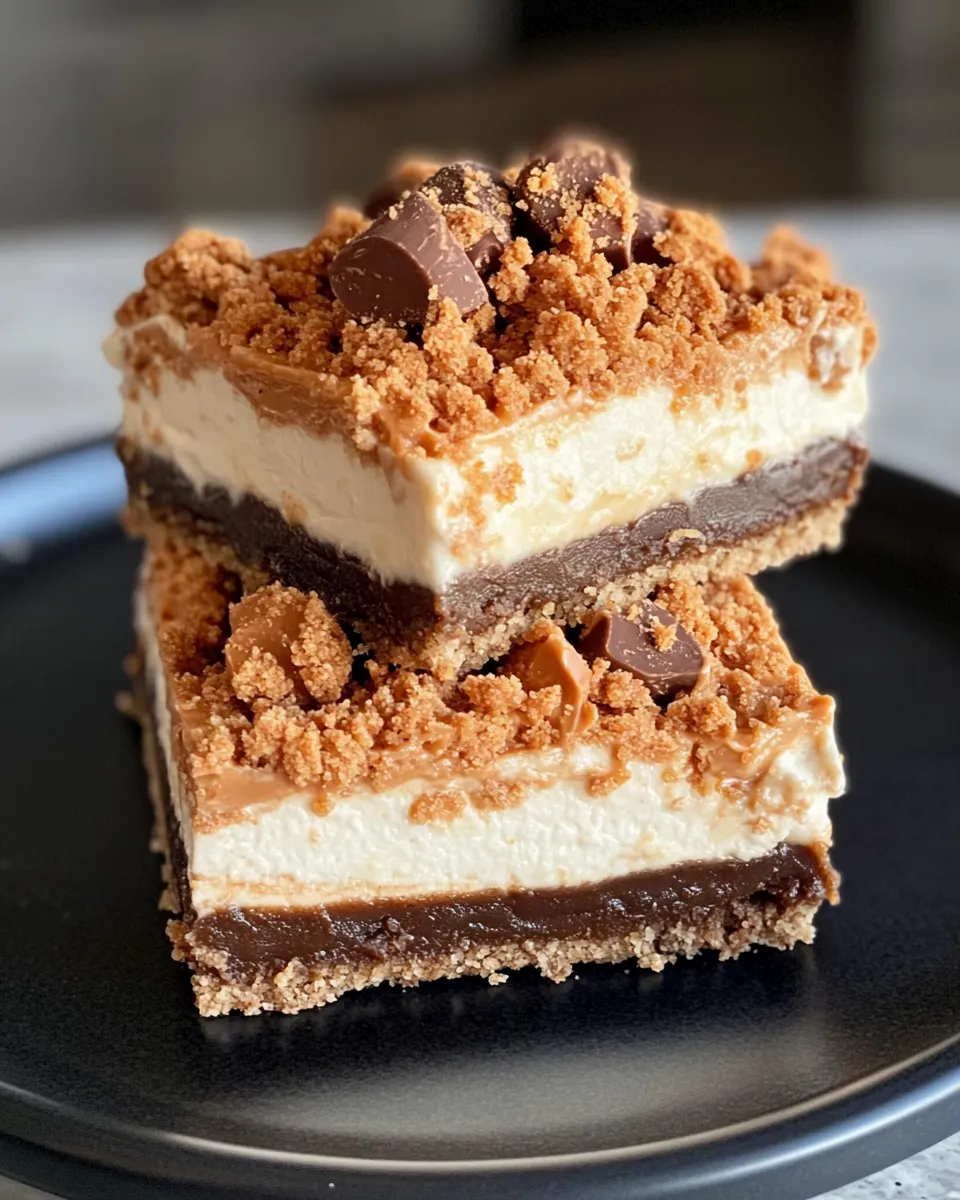
- 1/2 Butterfinger candy bar, crushed — sprinkled on top for texture and a candy-strewn finish.
From Start to Finish: Butterfinger Cheesecake Bars
- Preheat oven to 350°F (175°C).
- In a large bowl, combine the chocolate cake mix, butterscotch instant pudding mix, 1 egg, 3 tablespoons peanut butter, and 3 tablespoons canola oil. Mix until the mixture is crumbly. Reserve 1 cup of this crumb mixture for the topping.
- Press the remaining crumb mixture evenly into the bottom of an ungreased 9×13-inch baking pan to form the crust. Press firmly so the crust is compact.
- Bake the crust for 10 minutes. Remove from oven and transfer the pan to a wire rack to cool completely.
- While the crust cools, make the filling: in a medium bowl, beat the softened 8 oz cream cheese, 1/3 cup sugar, and 2 tablespoons sour cream with an electric mixer until smooth and creamy.
- Add the remaining 1 egg and 1/2 teaspoon vanilla extract to the cream cheese mixture. Beat on low speed just until combined. Do not overmix.
- Fold in the chopped Butterfinger bar (the 1 butterfinger bar, chopped) until evenly distributed. Spread the filling evenly over the cooled crust.
- Sprinkle the reserved 1 cup crumb mixture evenly over the filling.
- Bake for 15–20 minutes, or until the filling is set (the center should be mostly firm with only a slight jiggle).
- Remove the pan from the oven. Immediately sprinkle the top with the 1/4 cup butterscotch chips, 1/4 cup chocolate chips, and the crushed 1/2 Butterfinger candy bar. Return the pan to the oven and bake 1 minute longer to slightly melt the chips.
- Remove from oven and cool on a wire rack for 1 hour. Then refrigerate for at least 2 hours or until fully chilled.
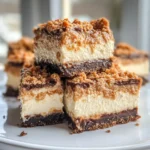
- Once cold, cut into bars and serve.
Why It’s Crowd-Pleasing
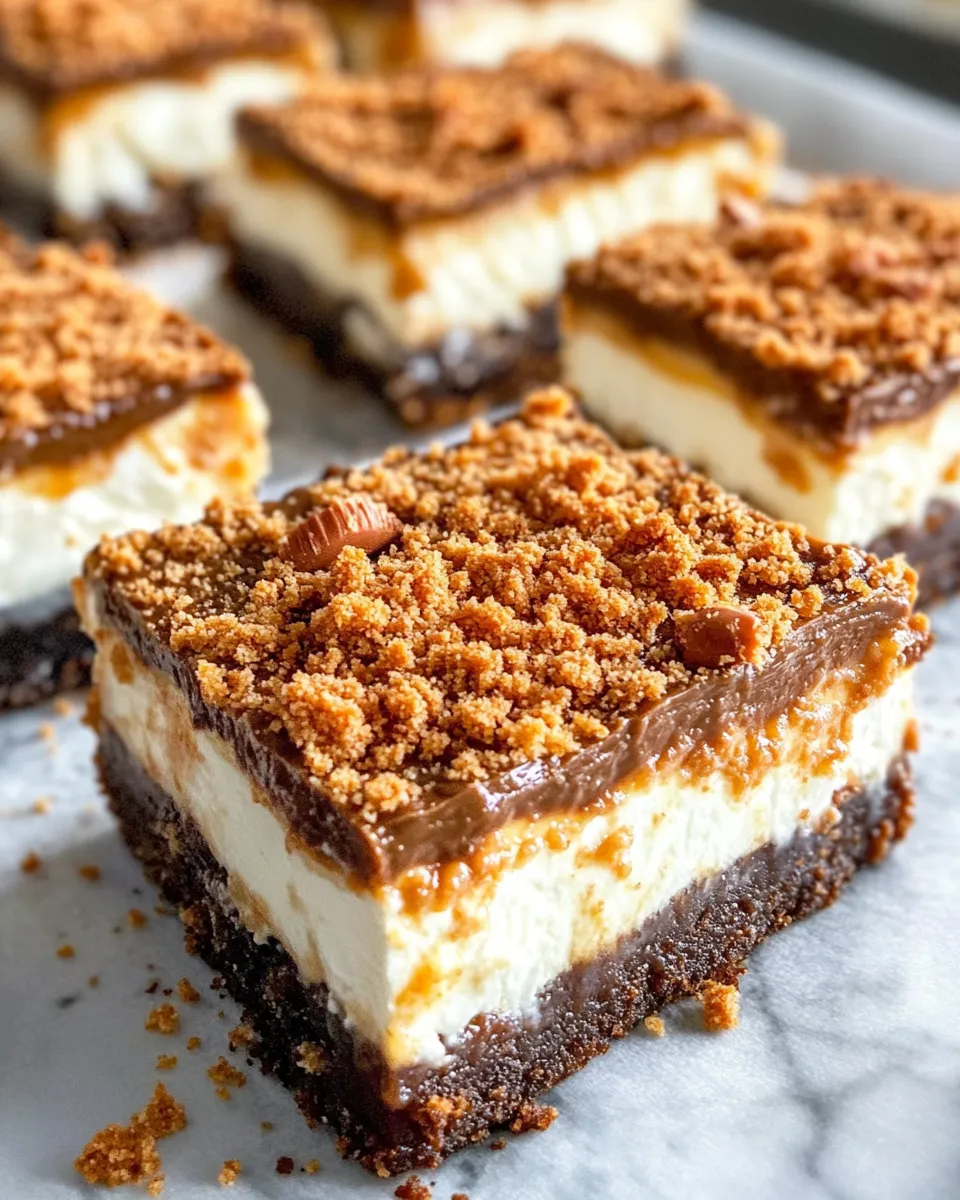
There are three big reasons these bars get devoured: texture contrast, familiar candy nostalgia, and low-effort richness. The crumb crust is crisp but not dry. The cheesecake layer is creamy and a little tangy, which prevents the whole dessert from feeling too sweet. Then you get those buttery, flaky Butterfinger shards in every bite — that crunch makes people smile.
They’re also easy to transport and slice into bars, which makes them a social dessert. Folks recognize the Butterfinger flavor right away so these bars feel both playful and polished. Finally, much of the “work” is hands-off — bake, cool, chill — which is perfect when you need a dessert that performs without babysitting.
Substitutions by Category
Crust & Binding
If you don’t have chocolate cake mix, a yellow or devil’s food cake mix will work — the flavor shifts a bit but the method stays the same. For a gluten-free option, use a gluten-free cake mix. If you prefer a scratch crust, graham cracker crumbs plus melted butter can replace the cake-mix crumbs, though you’ll need to adjust binding (add a touch more butter and reduce peanut butter).
Fats & Nutty Flavor
Peanut butter can be swapped for almond butter or sunflower seed butter for a nut-allergy consideration, though the finished flavor will change. Canola oil can be substituted with vegetable oil or melted neutral-tasting butter if you want a richer base.
Cheesecake Filling
Light or reduced-fat cream cheese will work if you want fewer calories, but texture will be slightly less rich. Greek yogurt or a mix of Greek yogurt and cream cheese can reduce fat while keeping tang. Sour cream can be replaced with an equal amount of full-fat yogurt for a milder tang.
Toppings & Candy
If you’re out of Butterfinger, other crunchy chocolate-peanut confections (or chopped peanut brittle) can mimic the texture. Swap butterscotch or chocolate chips for white chocolate or caramel chips depending on taste. For a less-sugary finish, skip one set of chips and add a light dusting of cocoa or a drizzle of melted chocolate.
Appliances & Accessories
- Oven — preheated to 350°F (175°C); consistent temperature is key for even set.
- 9×13-inch baking pan — the recipe sizing depends on this pan; a different pan will alter thickness and bake time.
- Electric mixer — makes quick work of smoothing cream cheese; a sturdy whisk and elbow grease can work but expect some lumps.
- Mixing bowls — one large for the crust mixture and one medium for the filling.
- Wire rack — essential for cooling so the bottom doesn’t steam and sog.
- Spatula and offset spatula — helpful for spreading filling evenly without tearing the crust.
- Measuring spoons/cups — precise tablespoon and cup measures keep texture consistent.
Frequent Missteps to Avoid
Don’t skip the cooling time for the crust. Spreading warm filling on a hot crust can cause it to sink or become greasy. Also, don’t overbeat the cream cheese once the egg has been added — overmixing incorporates too much air and leads to cracks or a cakey texture instead of a smooth bar.
A common mistake is under-chilling before cutting. If you slice these too warm, they’ll be messy. Chill the pan at least two hours, and if you want cleaner slices, refrigerate longer or briefly freeze before cutting. Finally, press the crust firmly and evenly into the pan so it bakes compact and slices hold together.
Nutrition-Minded Tweaks
To lighten these up without wrecking texture: use reduced-fat cream cheese and swap half the sour cream for plain Greek yogurt. Reduce the sugar by an ounce or two (start with a tablespoon less) — the Butterfinger and chips add plenty of sweetness. Replace half the chocolate or butterscotch chips with chopped nuts or leave them off entirely to cut sugar and calories.
For smaller portions, cut bars into more pieces to control serving size. If sodium is a concern, choose a reduced-sodium cake mix and lower-sodium candy options where available.
Cook’s Commentary
I make a version of these whenever I want something nostalgic but not fussy. My best tip is to chop one Butterfinger bar fairly small for the filling — big chunks are tempting but can create pockets that prevent the filling from setting evenly. Crumble the half-bar topping by hand or with a quick pulse in a sealed bag using a rolling pin; keep some larger fragments for visual texture.
When you sprinkle the chips and crushed candy on top and pop the pan back in the oven for a minute, watch closely. The goal is a slight melt and gloss, not a full meltdown. That second in the oven makes the toppings adhere without running into the filling.
Storage & Reheat Guide
Store bars covered in the refrigerator for up to 4–5 days. Keep them in the pan or transfer to an airtight container. For longer storage, freeze bars in a single layer on a baking sheet until firm, then stack with parchment between layers in an airtight container for up to 2 months. Thaw overnight in the refrigerator before serving.
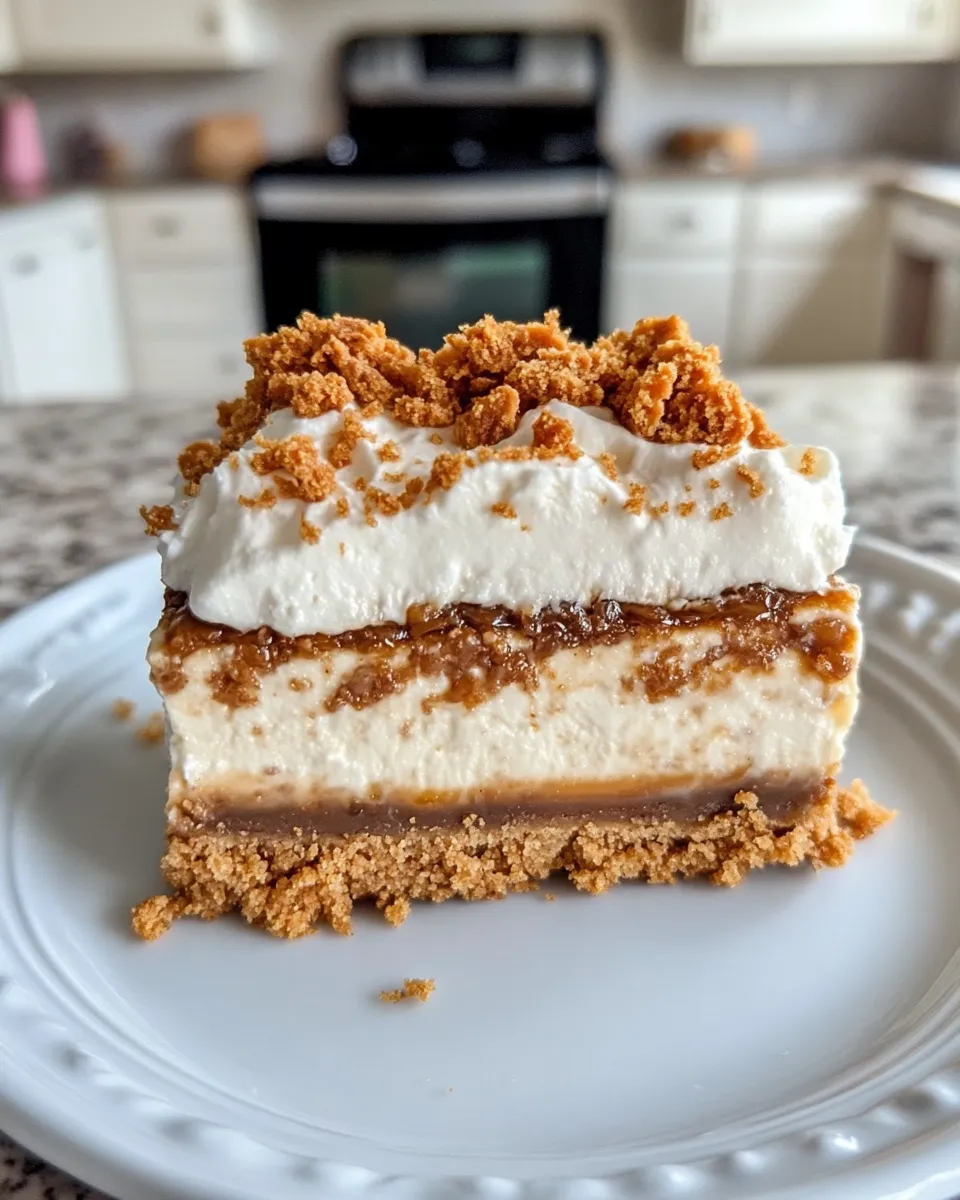
These are best served cold or at cool room temperature. If you prefer the chips gooey, let a single bar sit at room temperature for 10–15 minutes or microwave a piece for 5–8 seconds — watch closely to avoid melting the candy too much.
Quick Q&A
Q: Can I make these ahead? A: Yes. Bake, cool, and refrigerate overnight; they often slice cleaner after a full chill. For longer storage, freeze as described above.
Q: Can I double the recipe? A: You can make two pans using the same method. Bake in two 9×13 pans or bake one after the other; bake time and temperatures are unchanged.
Q: What if I don’t have a 9×13 pan? A: A slightly smaller pan will make thicker bars and extend bake time; a larger pan will thin them and reduce bake time. Adjust and watch for the filling set.
Q: Can I use a different candy? A: Yes — chopped peanut butter cups, chopped almond roca, or crushed toffee work; texture and flavor will change, but the technique is the same.
Q: Will the crust be too soft without butter? A: The peanut butter plus oil in the cake-mix crust creates a compact, slightly crisp base. If you want extra crispness, use a touch more peanut butter or swap part of the oil for melted butter.
Bring It Home
These Butterfinger Cheesecake Bars are easy to love because they’re forgiving, nostalgic, and reliably delicious. Follow the cooling and chilling steps for neat slices, and don’t be afraid to experiment with the toppings if you want different textures. If you make them, tell me how you adapted the recipe — I love hearing variations and serving suggestions. Enjoy a tray at your next gathering; they disappear fast.
Butterfinger Cheesecake Bars
Ingredients
Ingredients
- 1 Chocolate Cake Mix
- 1.4 ozbutterscotch instant pudding mix
- 1 egg
- 3 tbsppeanut butter
- 3 tbspcanola oil
- 8 ozcream cheese softened
- 1/3 cupsugar
- 2 tbspsour cream
- 1 egg
- 1/2 tspvanilla extract
- 1 butterfinger bar chopped
- 1/4 cupchocolate chips
- 1/4 cupbutterscotch chips
- 1/2 Butterfinger candy bar crushed
Instructions
Instructions
- Preheat oven to 350°F (175°C).
- In a large bowl, combine the chocolate cake mix, butterscotch instant pudding mix, 1 egg, 3 tablespoons peanut butter, and 3 tablespoons canola oil. Mix until the mixture is crumbly. Reserve 1 cup of this crumb mixture for the topping.
- Press the remaining crumb mixture evenly into the bottom of an ungreased 9x13-inch baking pan to form the crust. Press firmly so the crust is compact.
- Bake the crust for 10 minutes. Remove from oven and transfer the pan to a wire rack to cool completely.
- While the crust cools, make the filling: in a medium bowl, beat the softened 8 oz cream cheese, 1/3 cup sugar, and 2 tablespoons sour cream with an electric mixer until smooth and creamy.
- Add the remaining 1 egg and 1/2 teaspoon vanilla extract to the cream cheese mixture. Beat on low speed just until combined. Do not overmix.
- Fold in the chopped Butterfinger bar (the 1 butterfinger bar, chopped) until evenly distributed. Spread the filling evenly over the cooled crust.
- Sprinkle the reserved 1 cup crumb mixture evenly over the filling.
- Bake for 15–20 minutes, or until the filling is set (the center should be mostly firm with only a slight jiggle).
- Remove the pan from the oven. Immediately sprinkle the top with the 1/4 cup butterscotch chips, 1/4 cup chocolate chips, and the crushed 1/2 Butterfinger candy bar. Return the pan to the oven and bake 1 minute longer to slightly melt the chips.
- Remove from oven and cool on a wire rack for 1 hour. Then refrigerate for at least 2 hours or until fully chilled.
- Once cold, cut into bars and serve.
Equipment
- 9x13 inch Baking Pan
- Oven
- Electric Mixer
- Large Bowl
- Medium Bowl
- Wire Rack


