
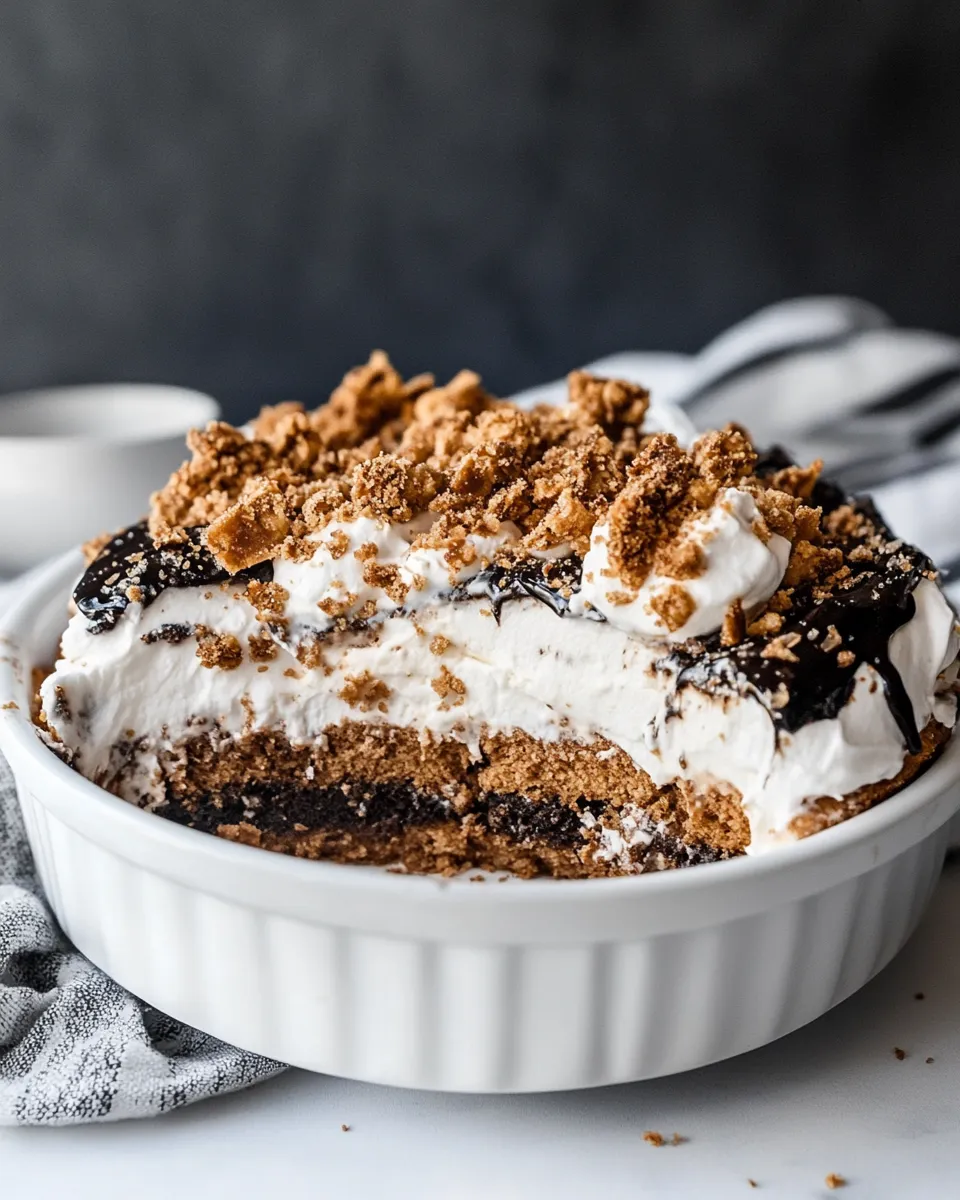
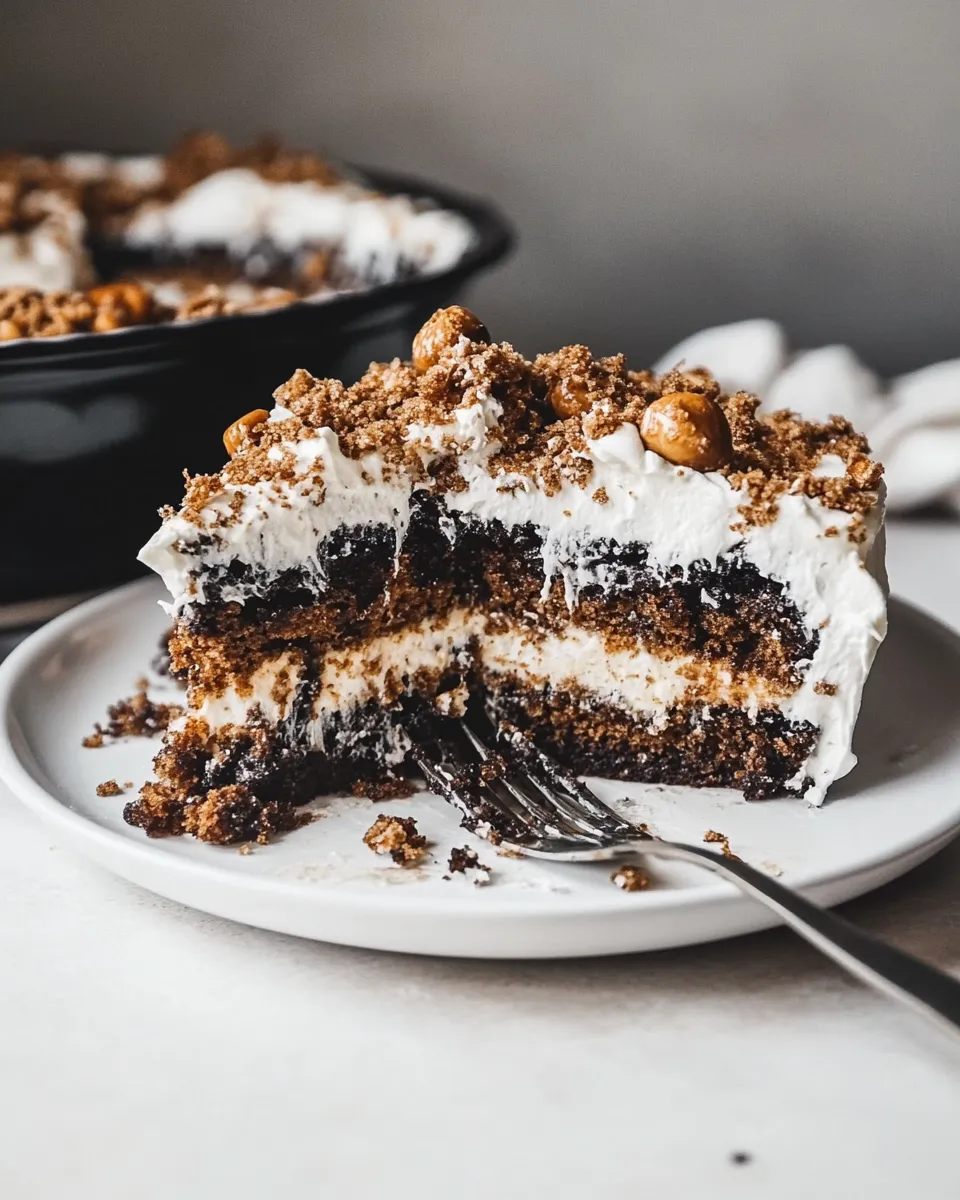
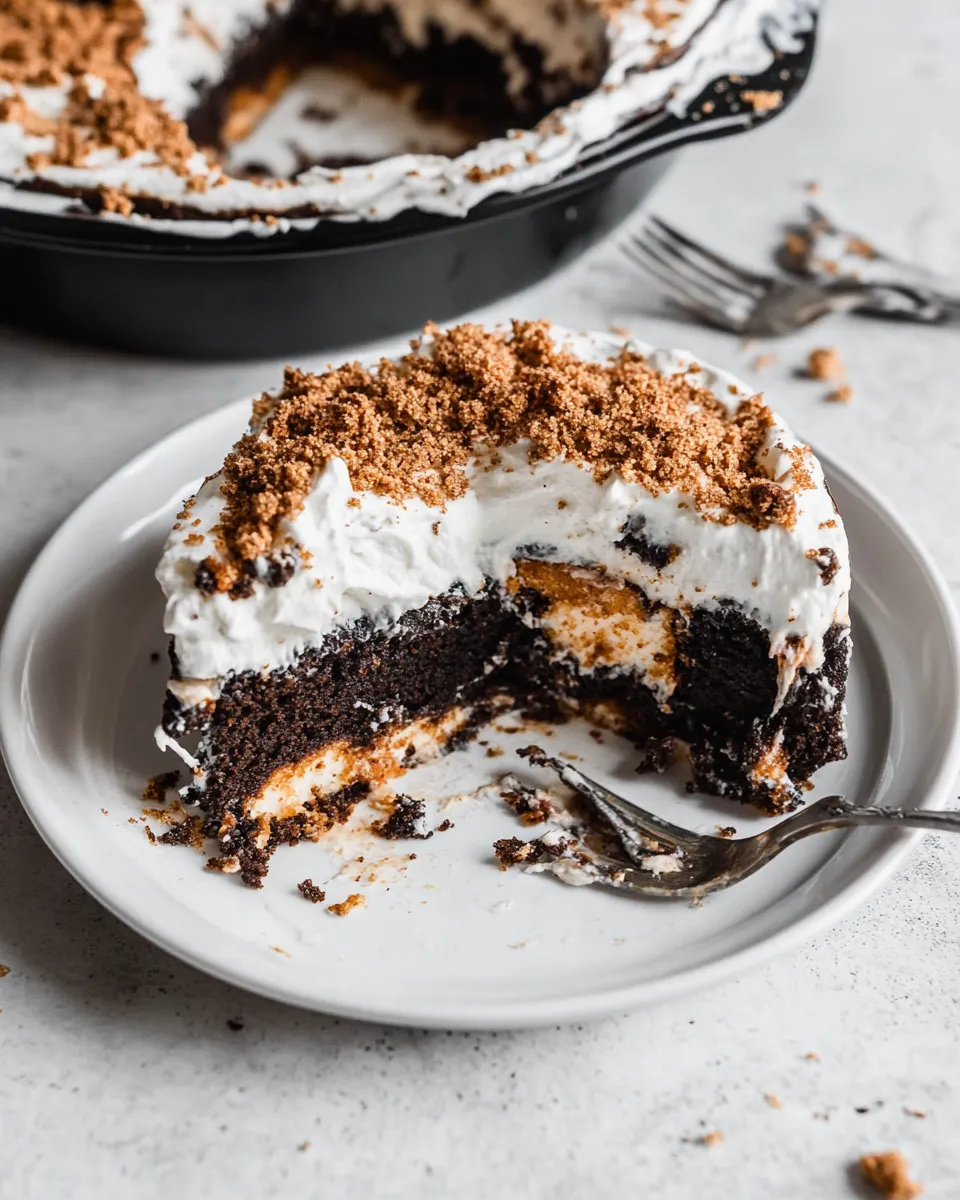
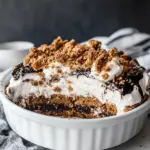
This is the Butterfinger Cake I turn to when I want a dessert that feels indulgent without being fussy. It’s built on a simple baked chocolate sheet cake, pierced to accept rich, sticky caramel and sweetened condensed milk, then finished with a fluffy peanut-butter whipped cream and a generous scatter of chopped Butterfinger bars. The result is layered, slightly gooey, and perfectly textural—crisp candy meets soft cake and cloud-like cream.
I like this for gatherings because most of the work happens up front. You can bake the cake and make the caramel in advance, then assemble the day you serve. It holds up well in the fridge and slices neatly once chilled. No special equipment required—just a mixer for the whipped cream and a 9×13″ pan.
Below you’ll find what I use, why each piece matters, and exact, foolproof steps for assembly. Read the ingredient notes, follow the method in order, and check troubleshooting if something feels off. Let’s get to it.
Ingredient Notes
Before you assemble, a few practical notes so everything goes smoothly. The cake should be fully baked and in a 9×13” pan. If it’s warm, give it a few minutes so the toppings don’t immediately break down. Use a good-quality caramel—either a homemade recipe that yields roughly a cup or a 16 oz jar. And keep your heavy cream cold for the best whipped texture.
Ingredients
- 1chocolate cake, baked in a 9×13” pan — the sturdy base; bake it fully and cool slightly before poking holes so it won’t crumble.
- 1recipecaramel sauce, or one 16oz jar caramel topping — provides gooey richness; pour evenly so it sinks into the holes.
- 7ouncessweetened condensed milk* — adds sweetness and moisture; the thickness helps the cake stay soft but not soggy.
- 1 1/2cupsheavy whipping cream — whips into the topping that lightens the cake; keep it cold for best volume.
- 1 ½Tablespoonscreamy peanut butter — folded into the whipped cream for flavor and structure; use creamy for a smooth finish.
- 1/4cuppowdered sugar — stabilizes and sweetens the whipped cream without grittiness.
- 3Butterfinger bars, chopped — the crunchy topping; chop evenly so every slice has texture.
The Method for Butterfinger Cake
- Place the baked chocolate cake in its 9×13” pan on a flat surface. If the cake is warm, let it sit a few minutes so it will not melt the toppings, then use a fork or wooden skewer to poke holes evenly across the top (about every 1–2 inches).
- Pour the caramel sauce (either the full amount called for by the caramel recipe or the contents of one 16 oz jar) evenly over the cake, then pour 7 ounces sweetened condensed milk evenly over the cake so the liquids sink into the holes.
- Set the cake aside and let it cool completely to room temperature so the sauces absorb into the cake.
- In a mixing bowl, combine 1 ½ Tablespoons creamy peanut butter and 1/4 cup powdered sugar. Beat until smooth.
- With the mixer running on low, slowly pour in 1 1/2 cups heavy whipping cream. Increase speed as needed and whip until stiff peaks form and the mixture holds its shape.
- Spread the peanut butter whipped cream evenly over the cooled cake.
- Sprinkle the 3 chopped Butterfinger bars evenly over the top.
- Refrigerate the cake for at least 1 hour, or up to one day, before slicing and serving.
Why This Butterfinger Cake Stands Out
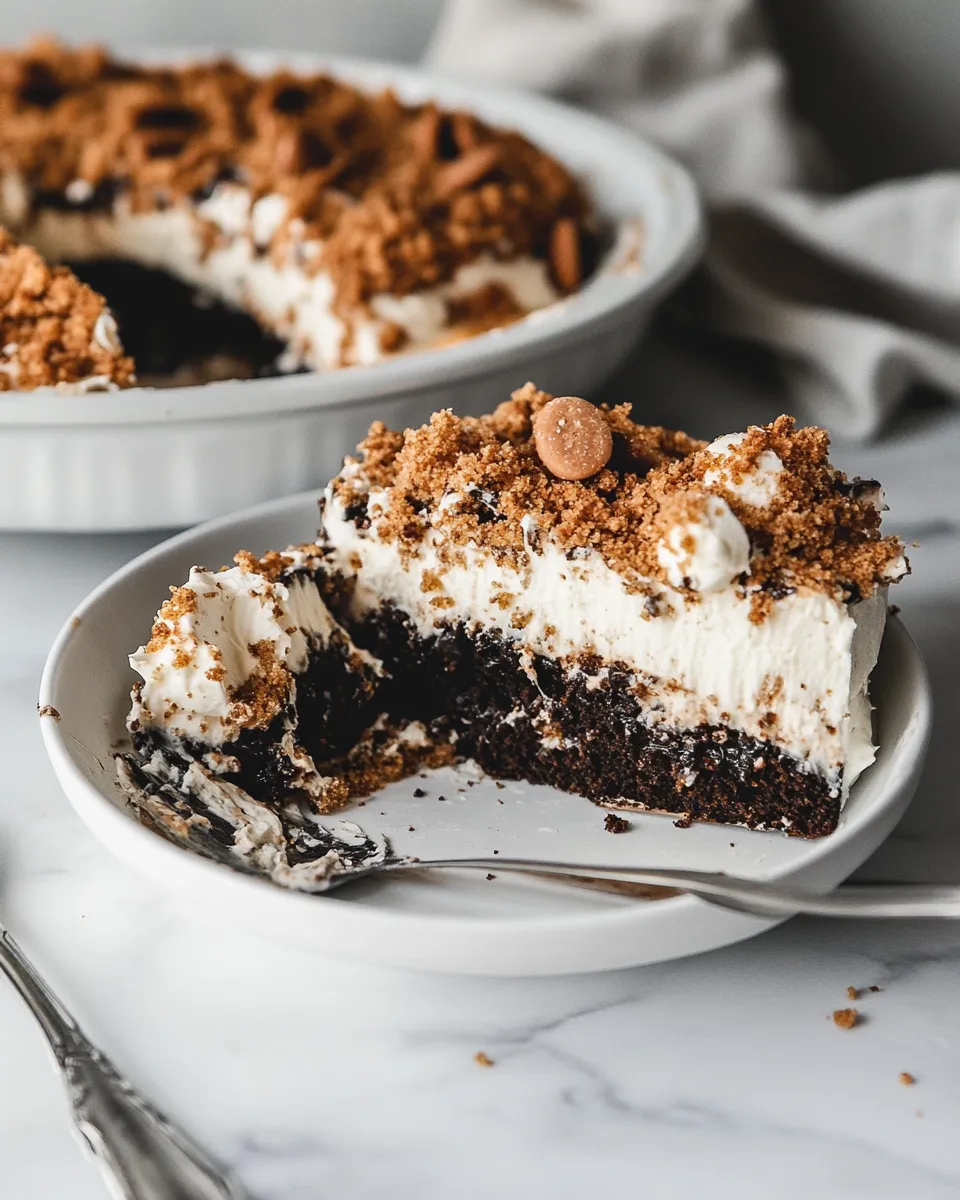
It’s the combination of textures and the straightforward construction. You get the lush moisture of a soaked cake, the velvety lift of a peanut-butter whipped cream, and the unmistakable crunchy, honeycomb-like shards of Butterfinger on top. Each element is simple on its own, but together they make a layered dessert that feels upscale without a long ingredient list.
The method—poking holes then pouring caramel and sweetened condensed milk—forces those liquids into the cake rather than leaving them on top. That technique is why this cake stays moist through serving and slicing. The peanut butter in the cream balances the sweetness and adds body so the topping doesn’t flatten or turn runny quickly.
Texture-Safe Substitutions
If you need to swap ingredients but want to keep the texture profile consistent, here are options that preserve structure and mouthfeel.
- Heavy whipping cream → chilled double cream (where available) for similar volume and stability.
- Creamy peanut butter → natural creamy peanut butter with a little extra powdered sugar if it’s runny. The key is a smooth spread to blend evenly with powdered sugar.
- Butterfinger bars → other crisp, peanut-brittle-style candy bars (such as chopped peanut butter crunch bars) if you need a substitute, but be aware flavor will shift.
- Caramel sauce jar → thick dulce de leche where available; it provides the same sticky, glossy coverage and won’t make the cake soggy.
What’s in the Gear List
- 9×13” baking pan — required; the cake and all liquids are sized to fit this pan.
- Mixer (hand or stand) — needed to make the peanut-butter whipped cream and reach stiff peaks.
- Fork or wooden skewer — for poking holes across the cake surface so sauces absorb.
- Spoon or small ladle — to pour caramel and condensed milk evenly.
- Offset spatula or large knife — to spread the whipped topping smoothly.
- Refrigerator space — the cake chills for at least an hour, so have a flat area available to store the pan level.
Troubleshooting Tips
If the cake is too dry
Either the cake wasn’t fully soaked or the caramel/condensed milk distribution was uneven. Use a spoon to pour additional caramel or a little extra condensed milk into dry spots, letting it sink in. Allow extra time for absorption before topping.
If the whipped topping separates or is runny
Make sure the cream was cold when you started. If it separates, chill the bowl and whisk for 10–15 minutes, then re-whip at medium speed. Adding a teaspoon of instant clear gelatin dissolved in a tablespoon of warm water can stabilize, but this is optional—often chilling fixes the issue.
If the Butterfinger topping gets soggy
Sprinkle the chopped candy just before serving when possible. If you must top in advance, store the cake uncovered in the fridge for the final hour so moisture doesn’t build up under the candy.
Warm & Cool Weather Spins
In warm weather, keep the cake chilled and serve straight from the refrigerator so the topping stays firm. You can also chop the Butterfinger into slightly larger pieces for better crunch when the air is humid; larger shards resist softening longer.
In cool weather, let the cake sit at room temperature for 10–15 minutes before serving so the caramel and cream soften slightly and flavors bloom. For a cozy variation, warm a small amount of the caramel and drizzle a thin ribbon over each slice at service—just enough to add gloss, not so much that it soaks the cake further.
Author’s Commentary
I’ve made this cake many times for potlucks and weeknight dessert duties. It’s one of those crowd-pleasers that travels well and slices neatly if chilled. The first time I tried the poke-and-pour technique, the cake felt transformative—so much more luxurious than a simple frosted sheet cake.
I prefer the peanut-butter whipped cream because it adds flavor without weighing the cake down. If you’re not a peanut butter fan, plain sweetened whipped cream works too, but the peanut element ties the candy topping to the rest of the dessert and keeps it interesting.
Best Ways to Store
Short-term (same day)
Keep the cake refrigerated, covered loosely with plastic wrap or a cake keeper, for up to 24 hours. Chilling firms the topping and makes cleaner slices.
Up to one day
The recipe allows refrigeration for up to one day before serving. Beyond that, the candy topping will begin to lose its crispness and the whipped cream may start to settle.
Transporting
If you need to move the cake, slide the pan into a shallow cardboard box or a cake carrier. Keep it level in your car and avoid long periods at room temperature—heat will soften the whipped topping and caramel.
Questions People Ask
- Can I make this ahead? — Yes. Assemble and refrigerate up to one day before serving. Wait to chop and sprinkle the Butterfinger bars until close to service if you want maximal crunch.
- Do I have to use sweetened condensed milk? — It’s part of what keeps the cake moist and gives that dense, sweet layer. Skipping it will change the classic texture.
- Can I use a boxed cake mix? — A baked chocolate cake from a box will work fine as long as it’s baked in a 9×13” pan and fully cooled; the assembly remains the same.
- What if I don’t like peanut butter? — Substitute plain lightly sweetened whipped cream, but expect a different flavor profile. The peanut butter adds a savory counterpoint that I find essential.
Bring It to the Table
Slicing this cake into squares and arranging on a platter is simple and effective. Serve chilled or just slightly cool—ten minutes at room temperature is perfect. A small extra drizzle of warm caramel at service adds drama, and a few extra Butterfinger shards on each plate read as intentional and generous.
If you’re serving a crowd, pair the slices with hot coffee or an espresso-based drink to cut the sweetness. For a kid-friendly table, skip the drizzle and let the candy speak for itself. Either way, make sure to cut with a large, sharp knife and wipe between slices for tidy presentation.
Butterfinger Cake
Ingredients
Ingredients
- 1 chocolate cake baked in a 9×13” pan
- 1 recipecaramel sauce or one 16 oz jar caramel topping
- 7 ouncessweetened condensed milk*
- 1 1/2 cupsheavy whipping cream
- 1 1/2 Tablespoonscreamy peanut butter
- 1/4 cuppowdered sugar
- 3 Butterfinger bars chopped
Instructions
Instructions
- Place the baked chocolate cake in its 9×13” pan on a flat surface. If the cake is warm, let it sit a few minutes so it will not melt the toppings, then use a fork or wooden skewer to poke holes evenly across the top (about every 1–2 inches).
- Pour the caramel sauce (either the full amount called for by the caramel recipe or the contents of one 16 oz jar) evenly over the cake, then pour 7 ounces sweetened condensed milk evenly over the cake so the liquids sink into the holes.
- Set the cake aside and let it cool completely to room temperature so the sauces absorb into the cake.
- In a mixing bowl, combine 1 ½ Tablespoons creamy peanut butter and 1/4 cup powdered sugar. Beat until smooth.
- With the mixer running on low, slowly pour in 1 1/2 cups heavy whipping cream. Increase speed as needed and whip until stiff peaks form and the mixture holds its shape.
- Spread the peanut butter whipped cream evenly over the cooled cake.
- Sprinkle the 3 chopped Butterfinger bars evenly over the top.
- Refrigerate the cake for at least 1 hour, or up to one day, before slicing and serving.
Equipment
- 9x13-inch pan
- Mixing Bowl
- Mixer
- fork or wooden skewer
Notes
Cake:Try aYelloworVanilla Cakebase instead of chocolate.
Better than Sex Cake, with Heath bits
Butterfinger Cookie Bars
Nut Allergy:Omit peanut butter, and top cake with a different crushed candy bar or cookie crumbs.


