
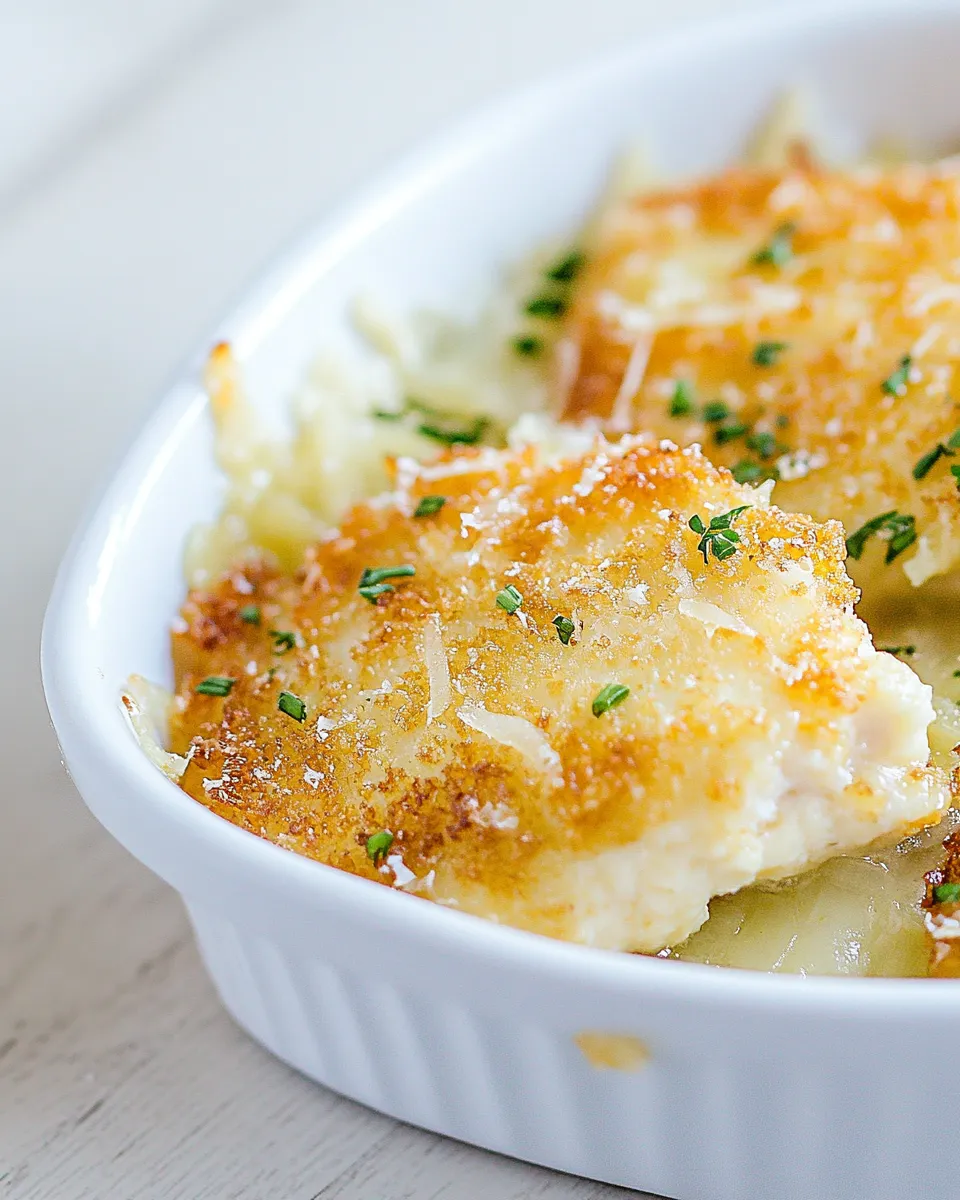
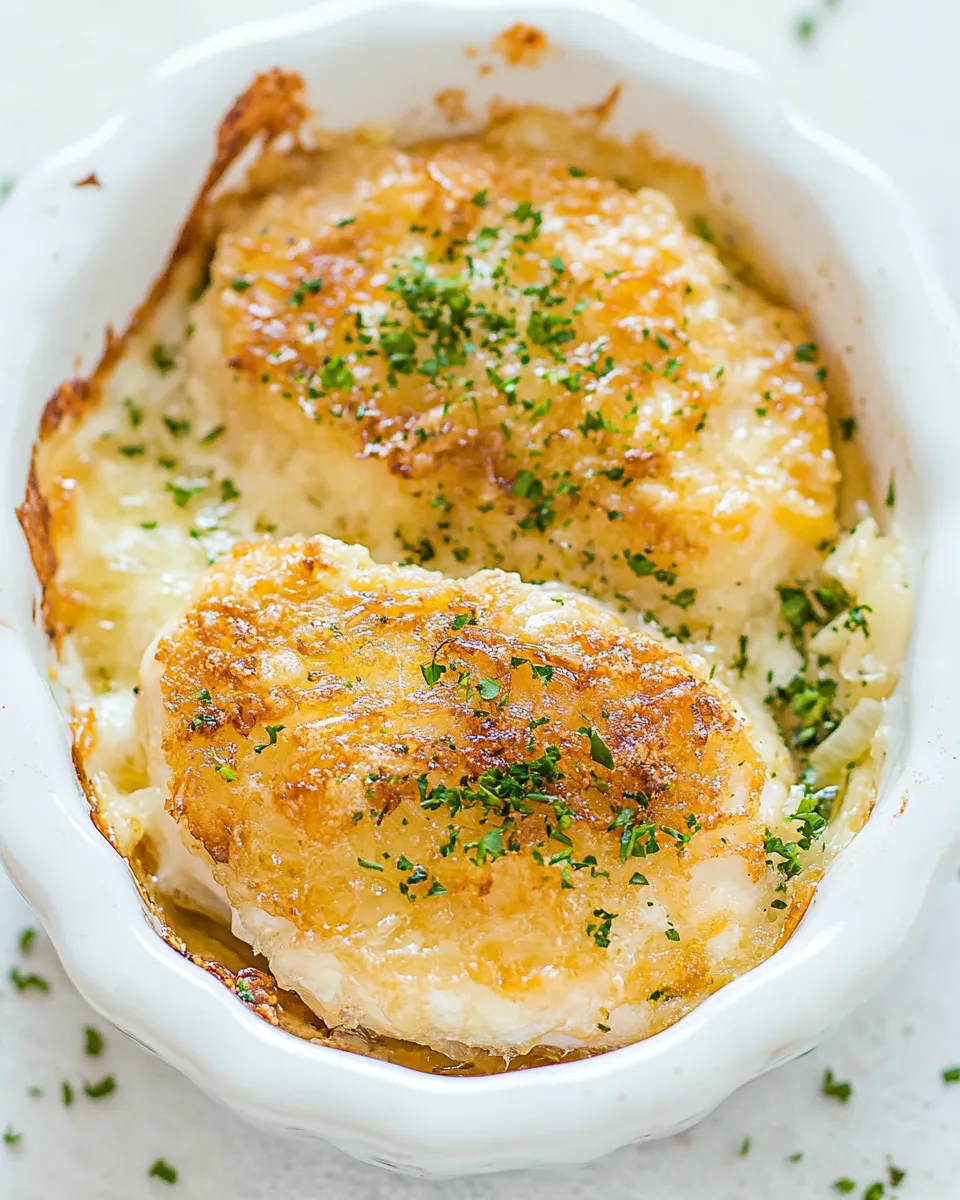
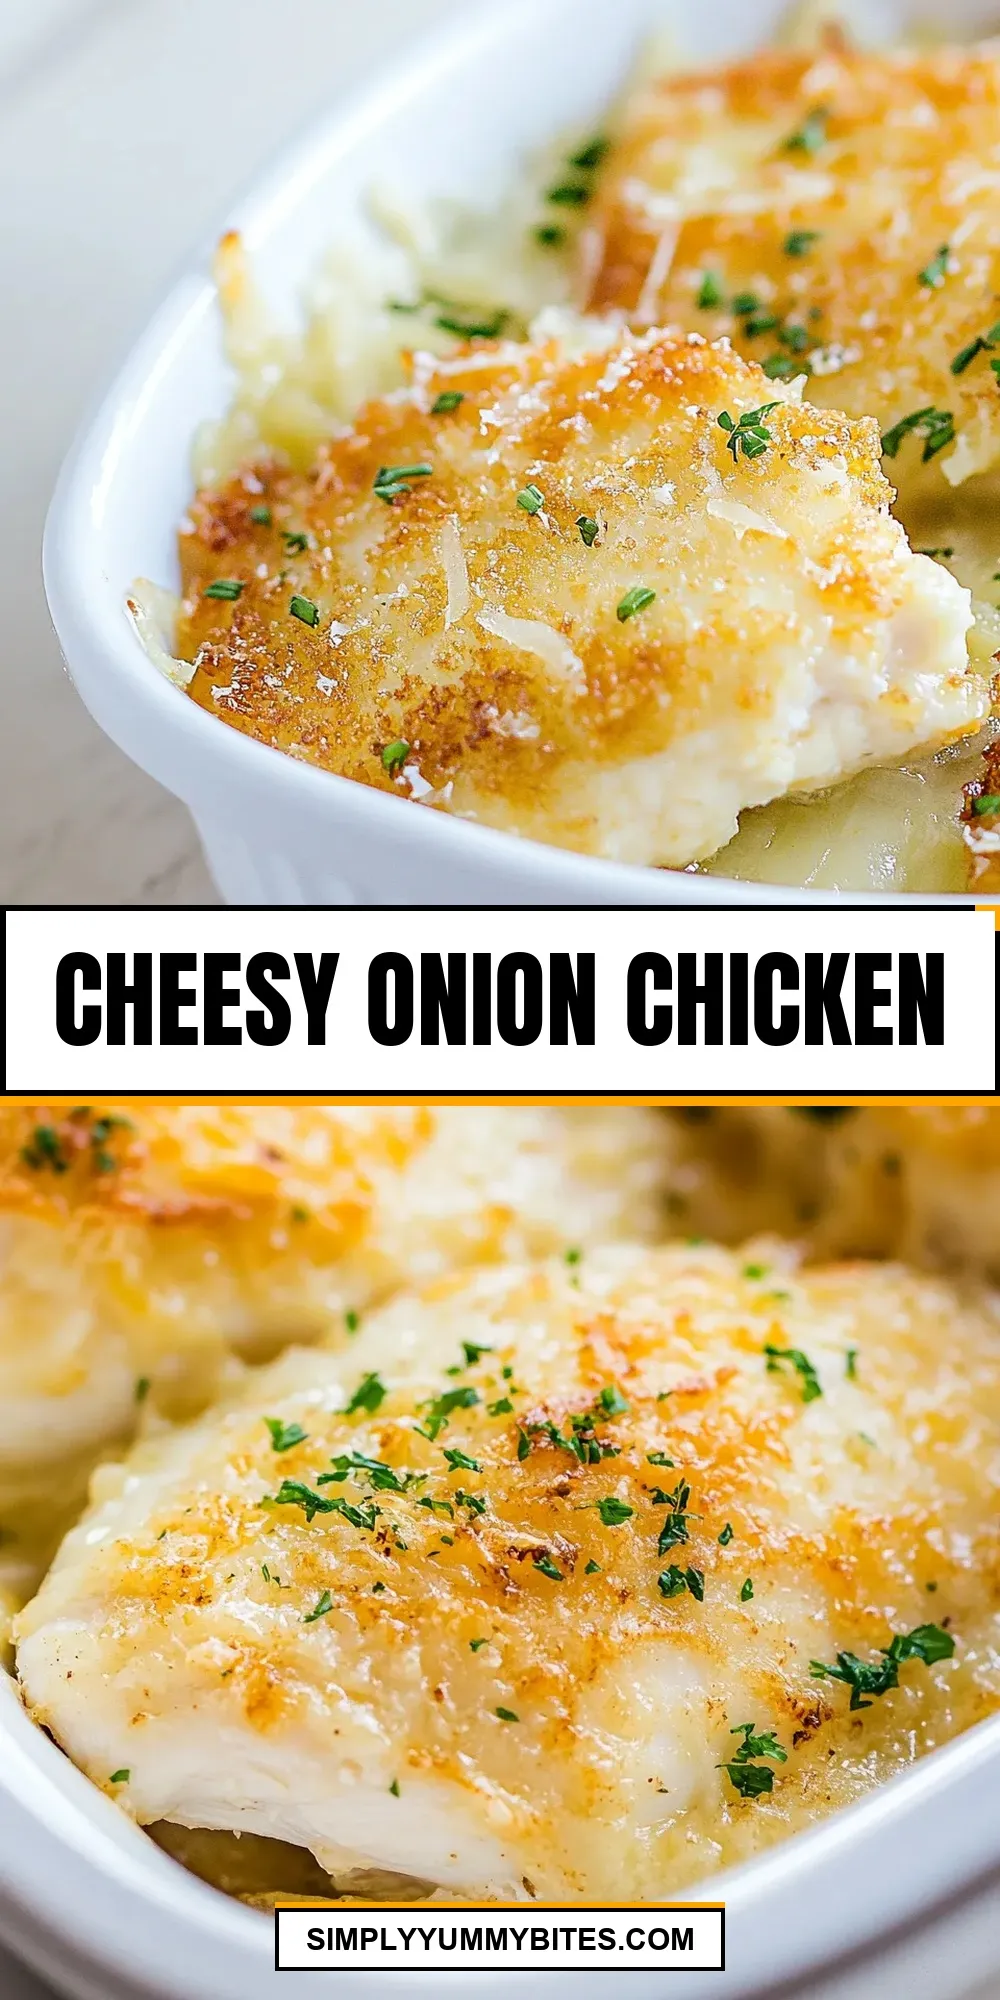
This Cheesy Onion Chicken feels like a family favorite from the first bite: crunchy, savory, and straightforward enough for a weeknight. It’s built around pantry-friendly ingredients and a method that gives reliably golden, crispy results without deep frying. If you want crunchy outsides with tender chicken inside, this recipe gets you there every time.
There’s real intent behind the ingredient list — fried onions for instant crunch, Parmesan for salty umami, and a thin mayo-egg binder to help the coating cling. The technique uses three shallow dishes for a rinse-dip-coat rhythm that’s quick once you’ve set everything up.
Expect about 25 minutes in the oven and a short 3–5 minute rest. That pause makes the juices settle and keeps the coating crisp. I’ll walk you through the ingredients, the exact steps, substitutions, troubleshooting, and storage so you can make this again and again.
Ingredient Rundown

- 2 lb chicken tenders — the star protein; tenders cook fast and stay tender.
- 1 (2.8-oz) package French’s fried onions, crushed — gives the recipe its signature crunchy, toasted-onion flavor.
- 3/4 cup grated parmesan cheese — adds savory salt and helps the crust brown.
- 1/4 cup panko bread crumbs — light, flaky crumbs that boost crunch without turning dense.
- 1/2 tsp garlic powder — background garlic flavor without added moisture.
- 2 eggs, lightly beaten — the wet binder that helps the coating adhere.
- 2 Tbsp mayonnaise — a bit of fat in the egg mix for richness and better browning.
- 2 Tbsp water — thins the egg-mayo mix so it evenly coats the meat.
- 1/4 cup flour — the initial dredge that gives the egg something to grab onto.
Cheesy Onion Chicken — Do This Next
- Preheat oven to 400°F. Line a baking sheet with non-stick foil and set aside.
- In a shallow dish, combine the crushed French’s fried onions, grated Parmesan, panko bread crumbs, and garlic powder; stir to mix.
- In a separate shallow dish, lightly beat the 2 eggs, then whisk in the 2 Tbsp mayonnaise and 2 Tbsp water until blended.
- Place the 1/4 cup flour in a third shallow dish.
- Working one chicken tender at a time, dredge it in the flour and shake off excess. Dip it into the egg mixture, allowing excess to drip off, then press it into the onion-Parmesan mixture to coat evenly. Transfer the coated tender to the prepared baking sheet. Repeat with remaining tenders.
- Lightly spray the coated chicken with cooking spray.
- Bake for 20–25 minutes, until the coating is golden and the chicken is cooked through (internal temperature 165°F or juices run clear).
- Let the chicken rest 3–5 minutes before serving.
Why You’ll Keep Making It
This version hits three reliable checkpoints: quick prep, crisp texture, and familiar flavor. You don’t need special skills. The dredge-dip-coat routine is predictable and repeatable. Even on a busy night you can have this on the table in under 40 minutes.
The crunchy exterior comes from two textures — the crushed fried onions and the panko — that play well together. Parmesan adds a savory note that keeps the coating from tasting one-note. The mayo in the egg mixture is a small step that pays off in a better crust and a slightly richer bite.
It’s also flexible. Serve it over rice, next to a green salad, stuffed into a sandwich, or alongside roasted vegetables. Leftovers reheat well and keep their texture if you use the oven or an air fryer briefly.
What to Use Instead

If you don’t have one of the ingredients, try these swaps without changing the recipe structure.
– Fried onions: Use finely crushed crispy shallots or even very finely crushed plain potato chips for crunch. – Parmesan: Any hard, salty cheese like Pecorino will work in similar amounts. – Panko: Regular dry breadcrumbs are okay; expect slightly less airy texture. – Mayonnaise: A neutral oil-based spread or plain yogurt will help adhesion if you prefer lower fat; reduce quantity slightly if using yogurt. – Eggs: For an egg-free option, make a thick batter with 1/4 cup plain yogurt thinned with a splash of water (note: this changes texture).
What’s in the Gear List
- Rimmed baking sheet — allows hot air to circulate and catches drips.
- Non-stick foil — makes cleanup simple and prevents sticking.
- Three shallow dishes or pie plates — for the flour, egg mix, and coating.
- Cooking spray — helps the coating crisp without frying.
- Instant-read thermometer — the fastest way to confirm the chicken reached 165°F.
Troubles You Can Avoid
Here are common problems and quick fixes so the first run turns out great.
Soggy coating: Don’t overcrowd the baking sheet. Give each tender a little space so hot air can crisp the coating. Lightly spraying the top with cooking spray helps the surface brown without adding oil.
Coating won’t stick: Make sure to shake off excess flour before dipping into the egg. If the egg mixture looks too thin, the mayonnaise may not be fully whisked in — whisk again until fully incorporated. Press the coating onto the chicken so it adheres before transferring to the sheet.
Undercooked centers: Thicker tenders will need more time. Use an instant-read thermometer and bake until the thickest part reads 165°F. If the coating is browning too fast before the center is done, lower the oven to 375°F and bake a few extra minutes.
Warm & Cool Weather Spins
Warm weather
Serve the tenders cold or room temperature on a salad with crisp greens, sliced cucumbers, and a lemony vinaigrette. They make a great portable summer lunch and keep well in a picnic cooler for a few hours.
Cool weather
Plate the tenders with mashed potatoes or a warm grain pilaf and a side of roasted vegetables for a comforting meal. A warm dipping sauce — like a garlicky gravy or a simple mustard cream — complements the crunchy coating nicely.
Chef’s Rationale
The method is intentionally straightforward and built for reliability. The flour step creates a dry surface the egg binds to. The egg, mayo, and water mixture is a thin, rich binder that helps the coating adhere without clumping. Pressing the coating on rather than sprinkling it ensures even coverage and fewer bare spots.
Using both crushed fried onions and panko gets you two different types of crispness: toasted onion flavor and airy crunch. Parmesan rounds out the profile and encourages browning. Baking at 400°F gives a quick, even cook that crisps the exterior while keeping the interior juicy.
Store, Freeze & Reheat
Cool the cooked chicken to room temperature before storing. Refrigerate in an airtight container for up to 3 days. To freeze, arrange cooled tenders in a single layer on a tray and freeze until solid, then transfer to a freezer-safe bag for up to 2 months.
Reheat from refrigerated: place on a baking sheet in a 350°F oven for 8–10 minutes, or until warmed through and crisp. From frozen: reheat in a 375°F oven for 15–20 minutes, flipping once, until heated through. An air fryer on 350–375°F for a few minutes also restores crispness quickly. Avoid microwaving unless you accept a softened coating.
Common Qs About Cheesy Onion Chicken
Q: Can I use chicken breasts instead of tenders?
A: Yes. Use thin-cut breasts or butterfly and pound thicker breasts so each piece cooks through in roughly the same time. Thicker pieces will need extra baking time and may require a lower temperature to avoid over-browning.
Q: Do I have to crush the fried onions myself?
A: The packaged fried onions can be used as-is or crushed in the bag for finer texture. Crushing helps the coating form a more even crust and stick better to the chicken.
Q: Will the coating fall off in the oven?
A: If you press the coating firmly into the egg-dipped tender and shake off excess flour beforehand, it will adhere. Transfer coated tenders carefully to the sheet and avoid shifting them during the first minutes of baking.
Q: Can I pan-fry these instead of baking?
A: You can shallow-fry for a crispier exterior, but you’ll need a neutral oil and watch the temperature so the coating doesn’t burn before the chicken cooks through. Baking is lower maintenance and produces a clean, crisp result.
The Takeaway
Cheesy Onion Chicken is a smart, weeknight-ready dish that delivers on texture and flavor without fuss. The recipe’s rhythm — flour, egg-mayo, press in the crunchy mix, bake — is simple to execute and forgiving. Keep the ingredients on hand and you’ll have a fast, crowd-pleasing meal that travels well to leftovers and adapts easily to what’s in your pantry.
Cheesy Onion Chicken
Ingredients
Ingredients
- 2 lb chicken tenders
- 1 2.8-oz package French’s fried onions, crushed
- 3/4 cup grated parmesan cheese
- 1/4 cup panko bread crumbs
- 1/2 tsp garlic powder
- 2 eggs lightly beaten
- 2 Tbsp mayonnaise
- 2 Tbsp water
- 1/4 cup flour
Instructions
Instructions
- Preheat oven to 400°F. Line a baking sheet with non-stick foil and set aside.
- In a shallow dish, combine the crushed French’s fried onions, grated Parmesan, panko bread crumbs, and garlic powder; stir to mix.
- In a separate shallow dish, lightly beat the 2 eggs, then whisk in the 2 Tbsp mayonnaise and 2 Tbsp water until blended.
- Place the 1/4 cup flour in a third shallow dish.
- Working one chicken tender at a time, dredge it in the flour and shake off excess. Dip it into the egg mixture, allowing excess to drip off, then press it into the onion-Parmesan mixture to coat evenly. Transfer the coated tender to the prepared baking sheet. Repeat with remaining tenders.
- Lightly spray the coated chicken with cooking spray.
- Bake for 20–25 minutes, until the coating is golden and the chicken is cooked through (internal temperature 165°F or juices run clear).
- Let the chicken rest 3–5 minutes before serving.
Equipment
- Oven
- Baking Sheet
- non-stick foil
- Shallow Dishes
- Mixing spoon
- Cooking spray


