
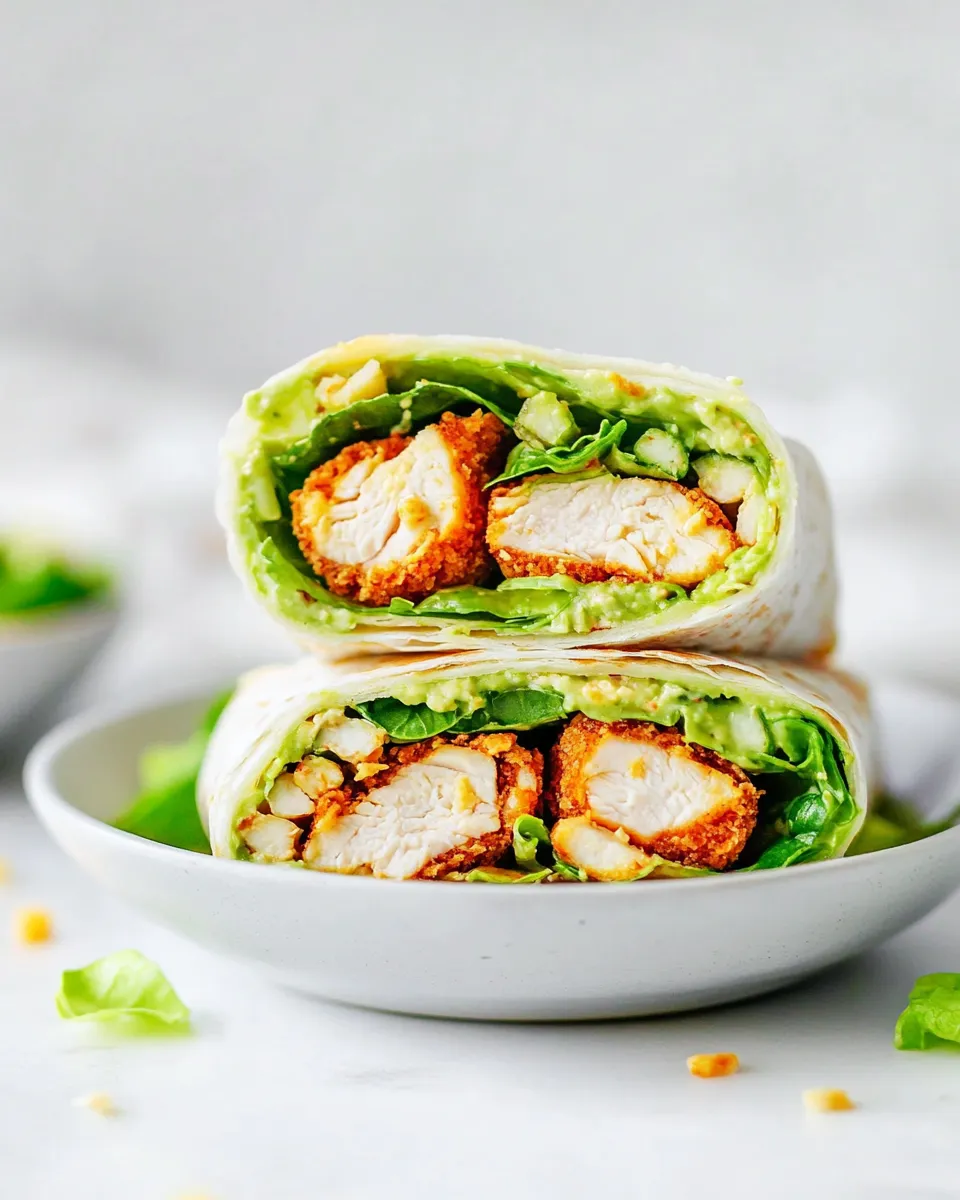
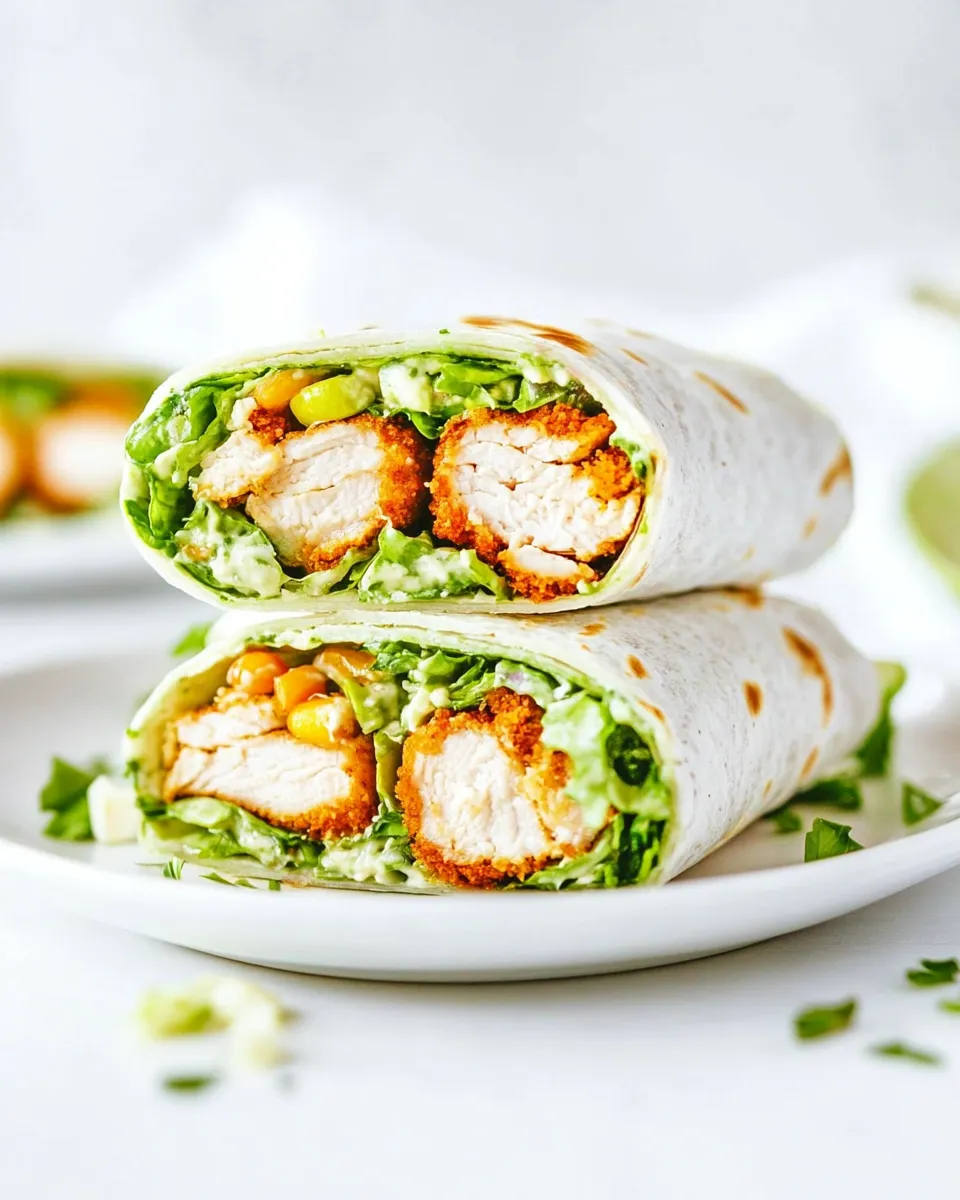
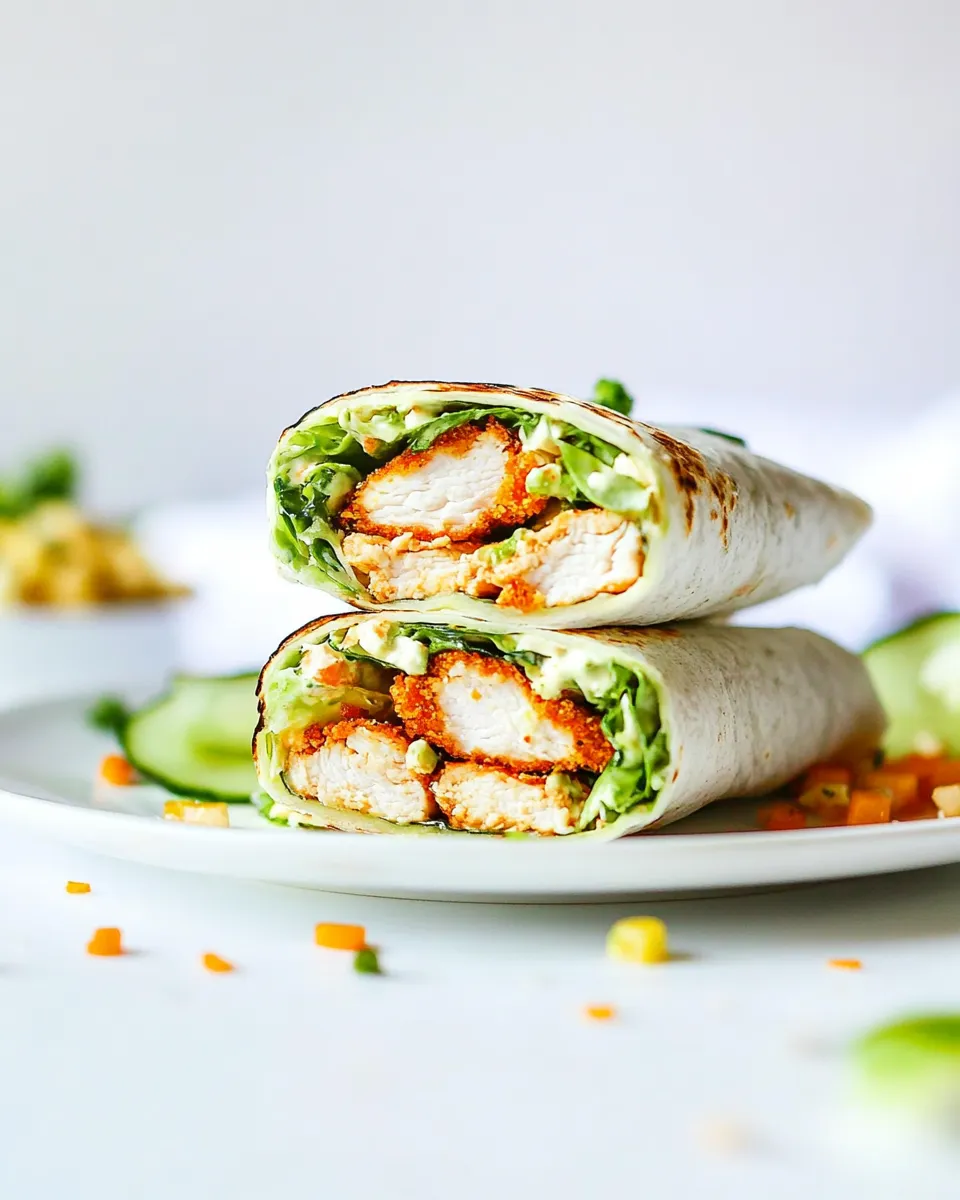
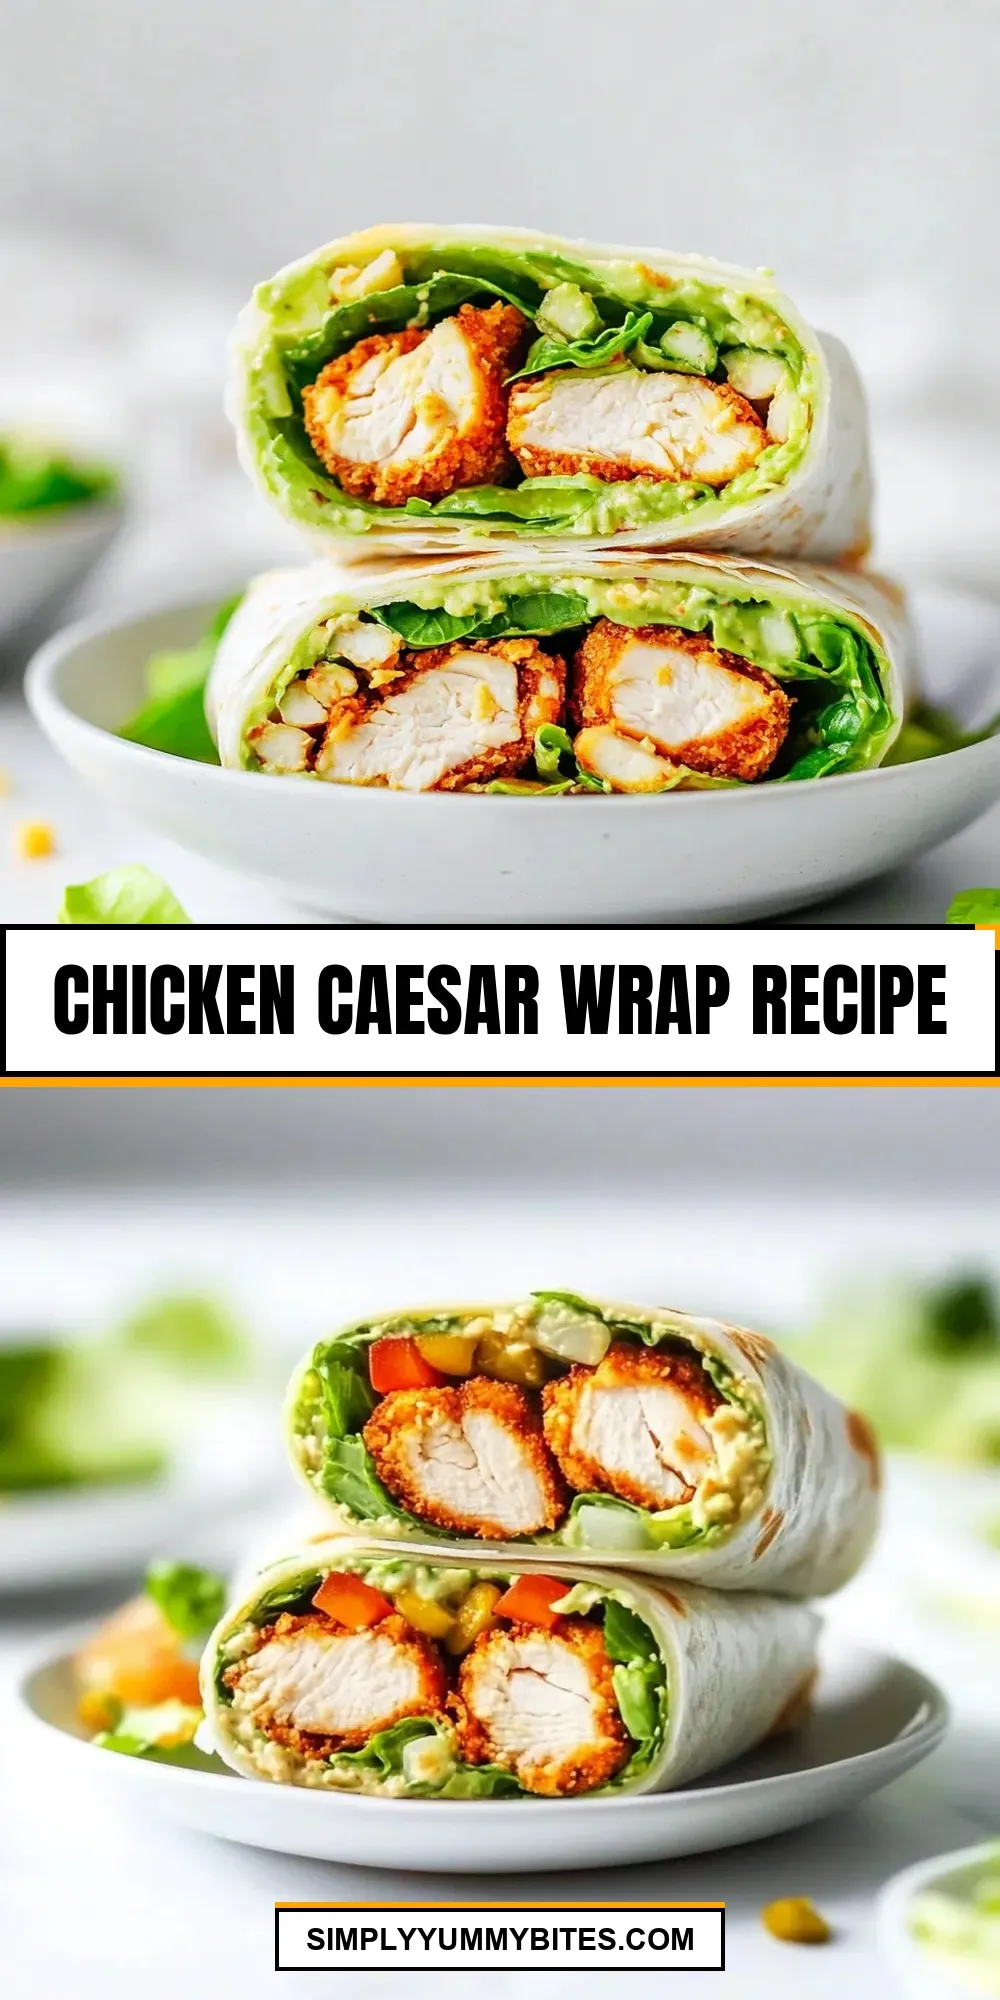
I love a meal that hits the sweet spot between weeknight convenience and something that actually feels made with care. This Chicken Caesar Wrap does exactly that: crisp chicken, crunchy romaine from the Caesar kit, ripe avocado, and a little tomato for brightness, all wrapped up in a soft flour tortilla. It’s fast, tidy, and reliably satisfying.
There’s no elaborate prepping or long cook times, which makes this my go-to when I want dinner on the table with minimal fuss. Use frozen crispy chicken strips for the fastest route, or pull meat from a rotisserie chicken if you prefer. Either way, the Caesar kit does most of the heavy lifting for the salad portion.
I’ll walk you through the ingredients, the exact steps (using the package directions where the recipe asks), what can go wrong, and smart shortcuts that keep the wrap tasting fresh. Practical, friendly, and useful—let’s make wraps you actually look forward to eating.
What’s in the Bowl
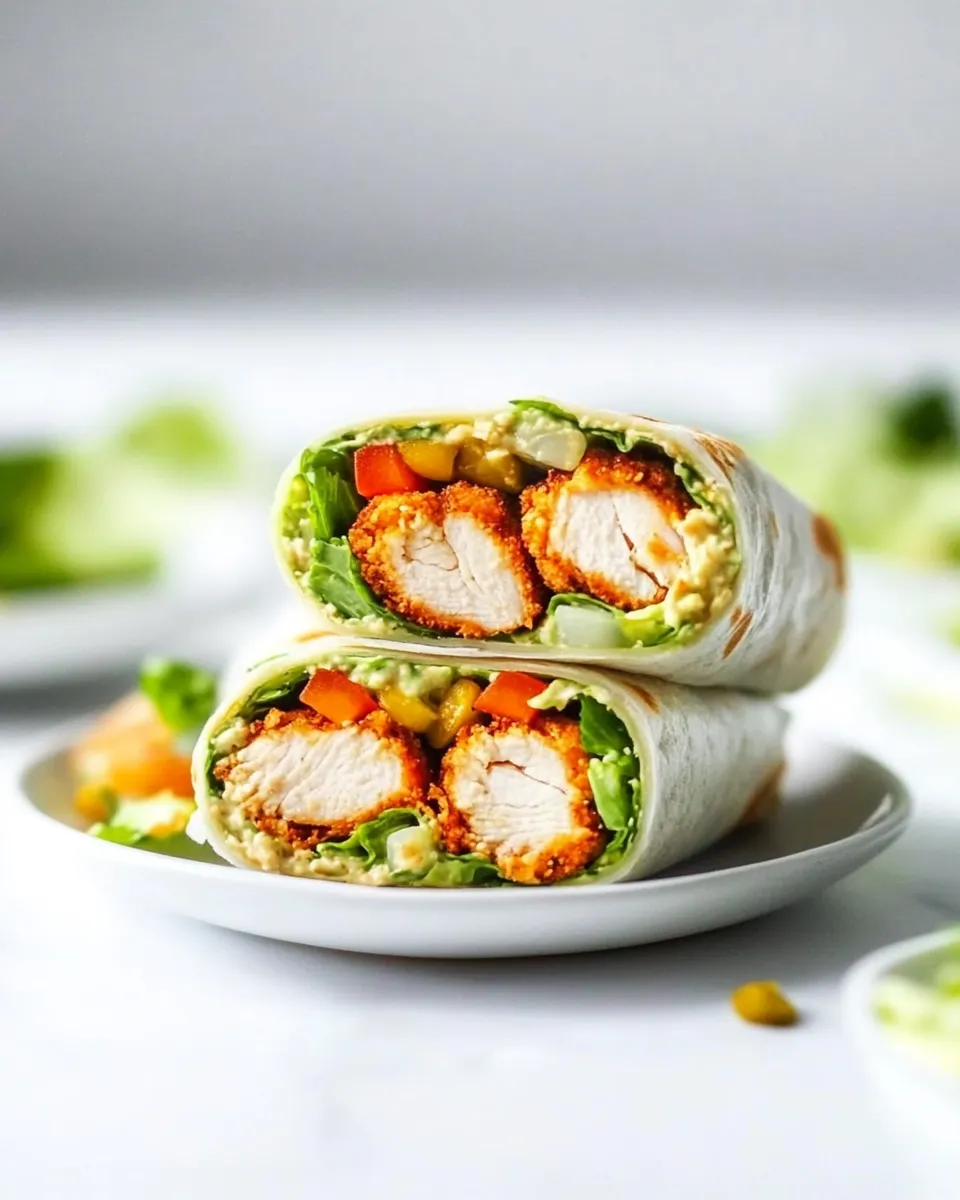
This is a wrap that relies on a few moving parts coming together: a Caesar salad kit for classic flavor and crunch, cooked crispy chicken for texture and protein, slices of avocado for creaminess, and tomato for acidity. The tortilla holds everything, so pick one that’s pliable and strong enough to roll without splitting.
Ingredients
- 5 flour tortillas — the vehicle: soft and pliable for rolling; warm briefly if needed.
- 1 (11.5-ounce) package Caesar salad kit — see note 1 — provides the greens, dressing, and crunchy bits for classic Caesar flavor without extra chopping.
- 1 avocado — adds creamy richness; slice thin so it distributes evenly in the wrap.
- 1 tomato — provides freshness and acidity to balance the dressing and chicken.
- 10 frozen crispy chicken strips or rotisserie chicken — see note 2 — frozen strips give crunch and speed; rotisserie chicken is a ready-cooked option.
Chicken Caesar Wrap Recipe: How It’s Done
- Preheat the oven or air fryer according to the package directions for the frozen crispy chicken strips. (If using rotisserie chicken, skip this preheating step.)
- Cook the frozen chicken strips following the package directions (oven or air fryer) until heated through and crispy. If using rotisserie chicken, remove the skin and slice or shred the meat as desired.
- While the chicken cooks, open the Caesar salad kit. Put the salad mix and all included components from the kit into a large bowl, add the kit dressing, and toss until the greens are evenly coated.
- Slice the tomato and the avocado into thin slices. (For the avocado: cut in half, remove the pit, and slice the flesh while still in the skin, then scoop out the slices.)
- Lay the 5 flour tortillas flat on a clean work surface. If you prefer, warm them briefly so they are more pliable.
- Divide the dressed Caesar salad evenly among the 5 tortillas. Top each portion with tomato slices, avocado slices, and an even portion of the cooked chicken.
- Tightly roll each tortilla to enclose the filling, then cut each wrap in half if desired. Serve immediately.
Why This Recipe Works
This wrap is about balance. The Caesar kit gives you dressed greens and crunchy crouton-like pieces in one step, so you get texture and flavor without fuss. Crispy chicken strips introduce a contrast in mouthfeel—hot and crunchy against cool, creamy avocado and crisp lettuce.
Using pre-prepared components (frozen strips or rotisserie chicken, and a salad kit) shortens cook time dramatically, but the assembly still relies on a few simple techniques: thin slicing for even distribution, warming tortillas so they don’t crack, and rolling tightly so the wrap holds. Those small details are the difference between a sloppy wrap and something you can pick up and enjoy.
International Equivalents
Wraps are a global concept, and while this is anchored in Italian-rooted Caesar flavors, you’ll find similar handheld meals across cuisines. Think of it as a portable composed salad—like a shawarma where cooked meat and pickles nestle into flatbread, or the Spanish bocadillo that layers protein and salad into crusty bread. The idea is the same: a starch pocket (tortilla, flatbread, or roll) encasing seasoned protein and fresh vegetables.
If you travel, look for the local version of “warm protein + salad + bread” — you’ll see the same structural logic, even if the seasonings change.
Tools of the Trade
- Oven or air fryer — required if you’re using frozen crispy chicken strips; follow package directions.
- Large mixing bowl — toss the salad kit and dressing here so the greens get evenly coated.
- Cutting board and a sharp knife — for slicing tomato and avocado neatly.
- Tongs or a spatula — to handle hot chicken without tearing the bread or burning fingers.
- Clean work surface — a clear area to layer tortillas and assemble wraps efficiently.
Things That Go Wrong
Soggy wraps: the most common issue. It happens when wet ingredients or too much dressing sit against the tortilla for too long. Solution: keep components separate until ready to eat when possible, or place a dry barrier—like a layer of lettuce—between the wetter ingredients and the tortilla.
Split tortillas: warming them briefly in a dry pan or microwave (wrapped in a damp paper towel) makes them more elastic and less likely to tear. Work gently when rolling.
Flat flavor: if everything tastes muted, check proportions. The Caesar kit contains dressing and crunchy bits; if you spread the salad too thin or overload with neutral-tasting avocado, you’ll lose the distinctive Caesar profile. Keep a good ratio of dressed greens to chicken to avocado.
Overcooked chicken: follow the frozen strip package directions closely. Overcooking makes the meat dry and defeats the purpose of a crispy strip.
Adaptations for Special Diets
Gluten-free: swap the flour tortillas for a certified gluten-free tortilla or a large lettuce leaf for a low-carb option.
Dairy-free: many Caesar dressings contain dairy (Parmesan and cream). Use a dairy-free Caesar-style dressing or a tangy vinaigrette instead if you need to avoid dairy. Note that changing the dressing changes the flavor profile; adjust other elements to taste.
Vegetarian: replace the chicken with a hearty plant-based alternative that matches the desired texture, or double up on avocado and add a roasted vegetable like mushroom or pepper for heft.
Low-sodium: use the rotisserie chicken option sparingly or look for low-sodium baked chicken strips. You can also rinse and pat rotisserie chicken to remove some surface salt before shredding.
Little Things that Matter
Warm your tortillas. It’s a small step but it prevents tearing and makes rolling neat. I prefer a quick 10–15 seconds in the microwave (wrapped) or 20–30 seconds per side in a hot, dry skillet.
Slice the avocado thin. That distributes creaminess evenly so you get a bite of avocado on every forkful rather than one chunk in the middle of the wrap.
Don’t overdress the greens. The Caesar kit includes dressing—toss until the leaves are coated, not drenched. You want a light sheen that brings everything together without making the tortilla soggy.
Cut at a diagonal. A diagonal cut reveals the layers and makes the wrap easier to hold and eat.
Make Ahead Like a Pro
Prep components separately. Cook the chicken and let it cool to room temperature before refrigerating in an airtight container. Keep the salad mix, dressing, avocado, and tomato separate. Toss the Caesar kit with its dressing only when you’re ready to assemble—this keeps the greens crisp much longer.
Assemble at the last minute. If you must assemble ahead, wrap tightly in plastic wrap and store in the fridge for a few hours. Expect some softening of the tortilla and a slight loss of crunch from the Caesar kit’s components over time. For travel or packed lunches, wrap tightly in foil to help maintain shape.
FAQ
- Can I use rotisserie chicken? — Yes. If you use rotisserie chicken, skip preheating the oven or air fryer and slice or shred the meat as desired.
- How do I keep the wrap from falling apart? — Roll tightly and, if needed, secure with a toothpick or wrap in parchment/foil. Cut after wrapping to maintain structure.
- Can I make these vegetarian? — Yes. Replace the chicken with a plant-based protein or a hearty vegetable filling.
- How long will leftovers keep? — Store assembled wraps in the refrigerator and eat within 24 hours for best texture. Components stored separately last longer: chicken for 3–4 days, salad kit per package guidance.
Ready to Cook?
These Chicken Caesar Wraps are straightforward to pull together and forgiving of small mistakes. Follow the package directions for the frozen chicken strips if you choose them, warm your tortillas, and assemble just before serving if you want maximum freshness. It’s a quick meal with restaurant-worthy balance: crunchy, creamy, tangy, and easy to eat on the go.
Make a batch, cut them in halves, and serve for a weeknight family dinner or a portable lunch. They hold up well and travel better than a plated salad. Enjoy—and if you try a swap or small tweak that works especially well, jot it down so the next run is even better.

Chicken Caesar Wrap Recipe
Ingredients
Ingredients
- 5 flour tortillas
- 1 11.5-ounce packageCaesar salad kitsee note 1
- 1 avocado
- 1 tomato
- 10 frozenfrozen crispy chicken stripsor rotisserie chicken see note 2
Instructions
Instructions
- Preheat the oven or air fryer according to the package directions for the frozen crispy chicken strips. (If using rotisserie chicken, skip this preheating step.)
- Cook the frozen chicken strips following the package directions (oven or air fryer) until heated through and crispy. If using rotisserie chicken, remove the skin and slice or shred the meat as desired.
- While the chicken cooks, open the Caesar salad kit. Put the salad mix and all included components from the kit into a large bowl, add the kit dressing, and toss until the greens are evenly coated.
- Slice the tomato and the avocado into thin slices. (For the avocado: cut in half, remove the pit, and slice the flesh while still in the skin, then scoop out the slices.)
- Lay the 5 flour tortillas flat on a clean work surface. If you prefer, warm them briefly so they are more pliable.
- Divide the dressed Caesar salad evenly among the 5 tortillas. Top each portion with tomato slices, avocado slices, and an even portion of the cooked chicken.
- Tightly roll each tortilla to enclose the filling, then cut each wrap in half if desired. Serve immediately.
Equipment
- Medium Bowl
Notes
Note 1
: I like the
chopped salad
bag for this recipe because the croutons are crushed and the lettuce is chopped smaller!
Note 2
: I use Bare Crispy Chicken or
Tyson® Crispy Chicken Strips
. Make sure to cook them in the oven or air fryer, not the microwave. You can also make
homemade crispy chicken strips
or just use shredded rotisserie chicken. You’ll use about 2 strips per wrap.
Storage
: For unwrapped wraps, store the salad mix and chicken in separate containers in the fridge for up to 2 days and add dressing just before eating. If wrapped, keep the sandwich in plastic wrap in the fridge and consume within a day.


