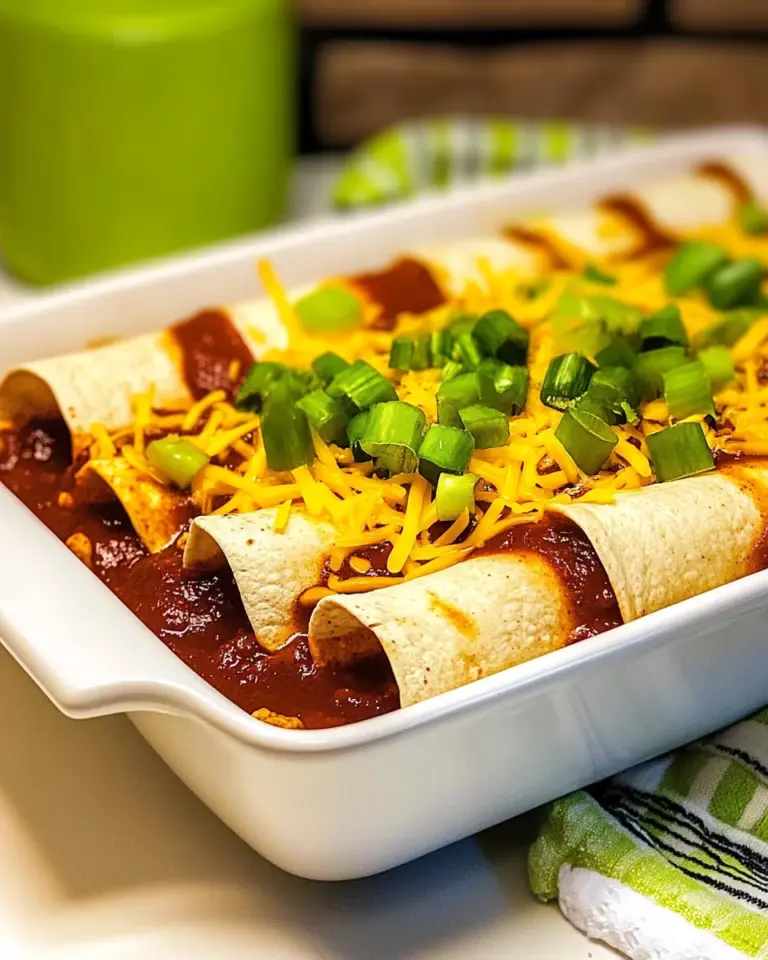
There’s something very practical and satisfying about turning last night’s chili into a crispy, melty burrito. It’s the kind of meal that hits all the marks: comforting, portable, and quick to assemble. You don’t need to reinvent anything — just a few sensible steps and a hot skillet will transform leftovers into a crowd-pleasing dinner.
I write this when I want dinner fast but with a little character. The chili brings deep, slow-cooked flavor; the rice stretches the filling and keeps it from getting greasy; the cheddar melts and binds everything together. Toasting the rolled burrito on the stove creates a crackling exterior that contrasts with the soft interior.
Below I’ve broken the process into tidy parts: the exact ingredients you need (no surprises), the step-by-step method I follow every time, and practical notes about what to do when things don’t go perfectly. If you like small variations, I also include substitution ideas and serving suggestions so you can adapt this to your pantry and the season.
Gather These Ingredients

Ingredients
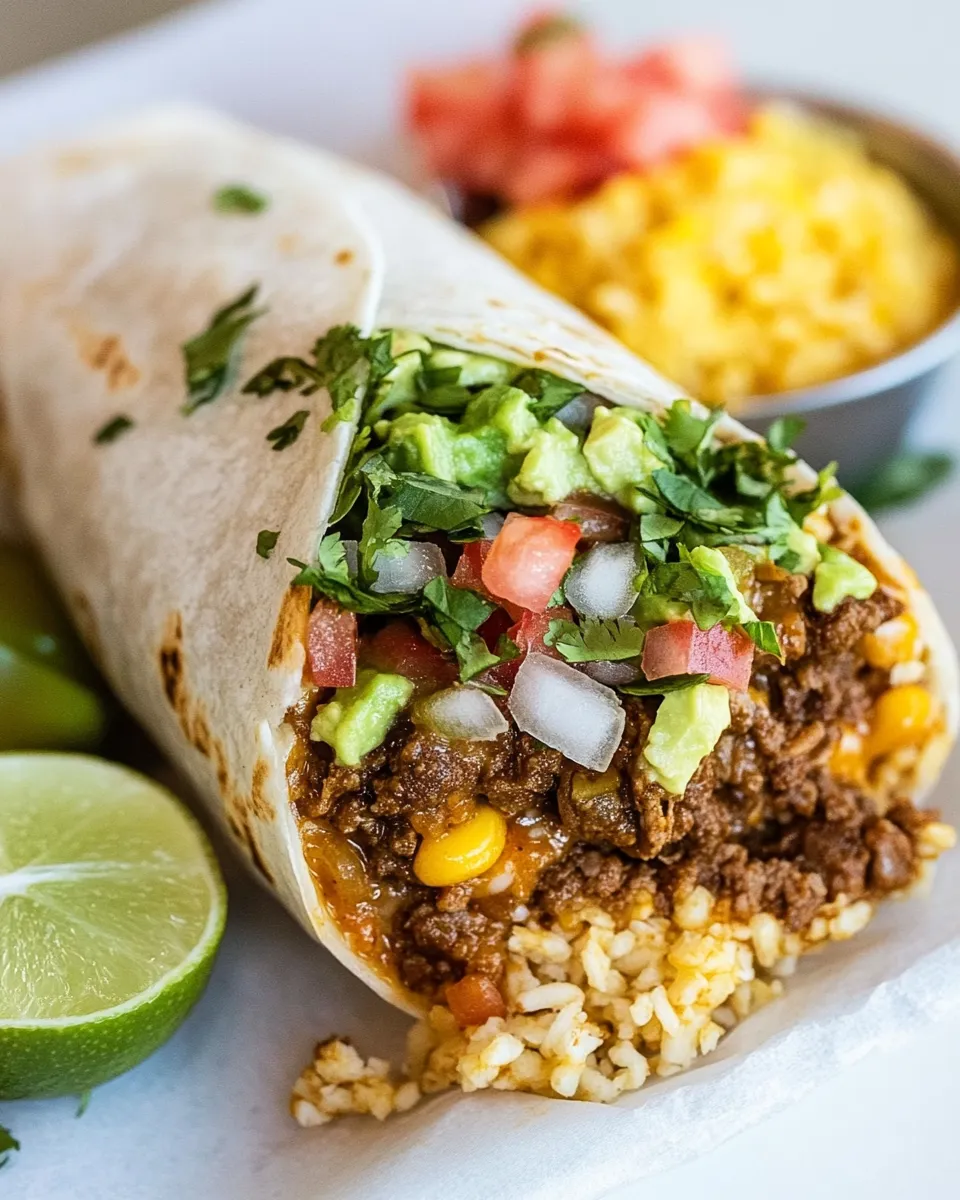
- 2 cups leftover chili (see note 1) — the core flavor; use chili that’s already seasoned and cooled slightly so it reheats cleanly inside the burrito.
- 4 (10-inch) flour tortillas (“burrito” size) — large, flexible wraps that hold the filling and toast well; warm slightly if they feel stiff.
- 2 cups cooked rice (see note 2) — stretches the chili and absorbs excess moisture; plain white or brown both work depending on preference.
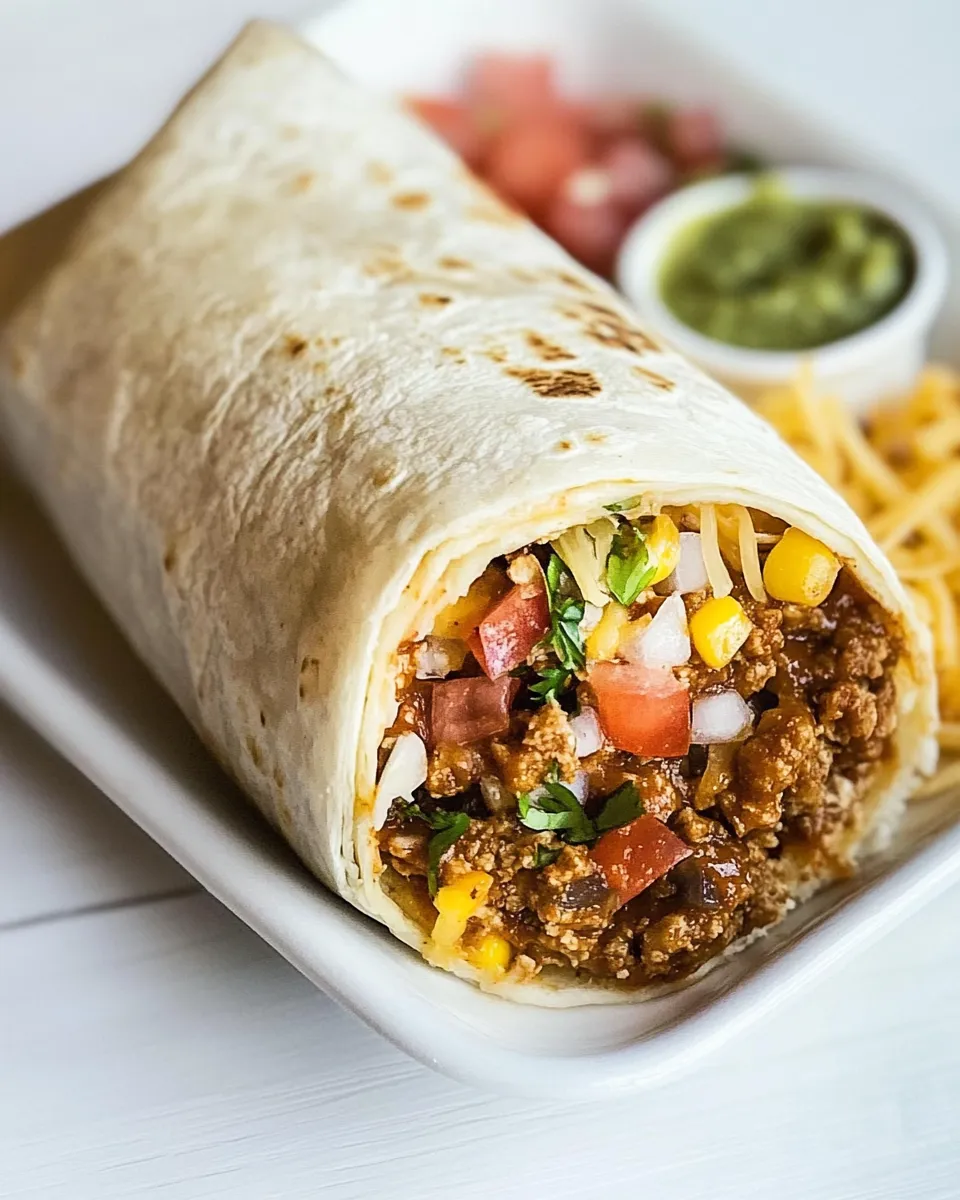
- 1 cup shredded cheddar cheese — melts to bind the filling and provide that classic cheesy pull; use a sharp cheddar for more flavor.
- minced fresh cilantro — optional; a little bright herb keeps the filling from feeling heavy.
- salsa and sour cream — for serving, optional; use them as a bright or creamy contrast when you plate the burritos.
Make Chili Cheese Burrito: A Simple Method
- Lay one 10-inch tortilla flat on a clean surface. Spoon 1/2 cup leftover chili into the center of the tortilla, top with 1/2 cup cooked rice and 1/4 cup shredded cheddar cheese, and sprinkle with minced fresh cilantro if using.
- Fold the left and right edges of the tortilla about 1 inch over the filling, then fold the bottom edge up over the filling and roll away from you until the burrito is sealed. Place seam-side down on a plate. Repeat steps 1–2 with the remaining tortillas and filling.
- Preheat a nonstick skillet over medium-high heat until hot (about 1–2 minutes). Lightly coat the skillet with nonstick spray if desired.
- Place the filled burritos seam-side down in the skillet without crowding (work in batches if necessary). Cook until the bottom is golden brown, 3 to 5 minutes.
- Carefully flip each burrito and cook the second side until golden brown and the cheese has melted, 3 to 5 minutes more.
- Remove burritos from the skillet and serve hot with salsa and sour cream, if desired.
Why This Recipe Works
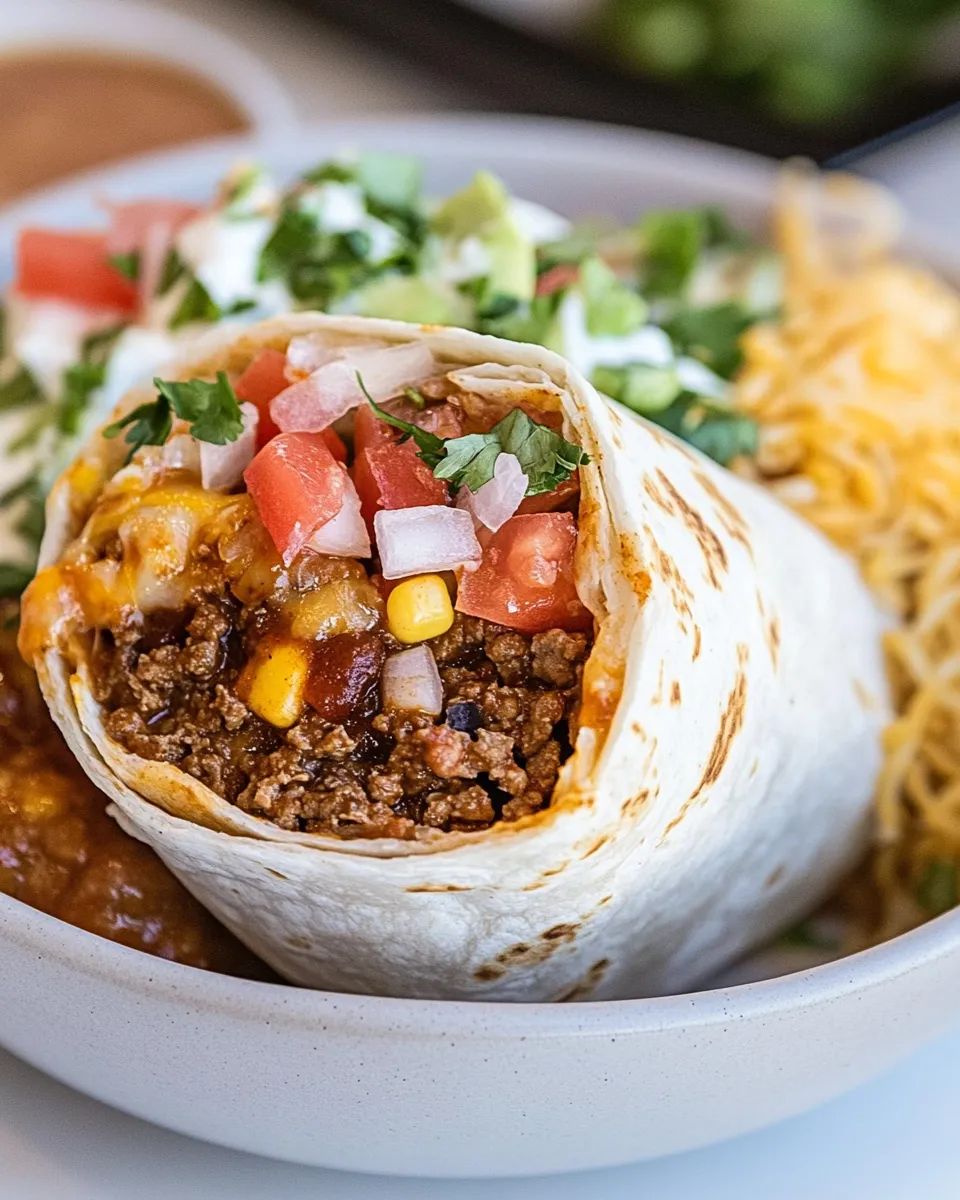
This recipe is built around balance and simplicity. The chili delivers concentrated, savory taste — protein, spices, and whatever vegetables were in it — while the rice soaks up moisture and keeps the burrito from becoming greasy. Cheese functions as glue: as it melts, it binds the components so nothing falls out when you slice or bite into the burrito.
Toasting the seam-side down first does two things. It seals the wrap so it stays closed, and it gives you a crisp outer shell that keeps the hot filling contained. The contrast between a crunchy exterior and a yielding interior makes each bite interesting. You get texture, temperature, and flavor in the same mouthful.
Finally, the recipe’s timing matters. Preheating the skillet and not crowding the pan preserve even browning. Moderate heat lets the cheese melt without burning the tortilla. All of these small choices add up to a reliable, repeatable result.
Texture-Safe Substitutions
If you need to adjust textures for dietary preferences or mouthfeel, here are safe swaps that won’t break the method.
- For a softer wrap: use a warmed tortilla that’s been covered with a damp towel for a minute. A warmed tortilla folds without cracking.
- For a gluten-free option: use a large gluten-free flatbread or tortilla in place of the flour tortilla. Check flexibility before assembling.
- For creamier filling: add a spoonful of cream cheese or mashed avocado inside each burrito. These add moisture but also cushion the filling.
- For a starch swap: replace cooked rice with cooked quinoa or cauliflower rice for a different bite and lower-carb option.
- For less chew: make smaller burritos with more rice and less chili if you prefer a gentler texture that’s easier to bite through.
Tools of the Trade
- Nonstick skillet — essential for even browning and easy flipping.
- Spatula — a wide, sturdy spatula helps flip without tearing the tortilla.
- Measuring cups — to portion filling consistently so burritos cook evenly.
- Plate or cutting board — for assembling and resting the rolled burritos.
- Kitchen towel or paper towels — useful to warm tortillas briefly and keep them pliable.
Watch Outs & How to Fix
Soggy filling
Problem: If the chili is too wet, the burrito can become soggy and fall apart.
Fix: Drain or reduce the chili slightly on the stove before assembling. Another option is to mix in a bit more cooked rice to absorb excess liquid, or spoon the filling onto a paper towel briefly to remove surface moisture before adding it to the tortilla.
Burst seam or overfilled wrap
Problem: Overfilling will make folding impossible and cause seams to pop during cooking.
Fix: Stick to the step amounts — the method calls for 1/2 cup chili, 1/2 cup rice, and 1/4 cup cheese per tortilla. If you need more filling, make a second burrito rather than overfilling one.
Tortilla tears or cracking
Problem: Cold or dry tortillas crack when folded.
Fix: Warm the tortillas for 10–15 seconds in the microwave covered with a damp paper towel or hold them briefly over an open flame to make them more pliable. That reduces tearing and makes folding easier.
Burnt exterior but unmelted cheese
Problem: High heat browns the tortilla before the cheese melts.
Fix: Lower the heat slightly and extend the cooking time by a minute or two per side. You want medium-high heat that gives you golden color without charring. You can also cover the skillet briefly after flipping to trap heat and help the cheese melt faster.
Holiday & Seasonal Touches
Chili cheese burritos are great blank canvases for seasonal flavors. In fall and winter, fold in roasted poblano or a spoonful of caramelized onion for deeper savory notes. In summer, add fresh grilled corn kernels and a squeeze of lime for brightness. For holiday gatherings, offer a toppings bar with pickled onions, chopped green onion, diced avocado, and small bowls of different salsas — it turns a simple dish into a make-your-own station that guests love.
On colder nights, serve the burritos with a bowl of warmed salsa or a smoky tomato sauce for dunking. For a festive brunch, slice them and arrange on a platter with a dollop of sour cream and a scattering of cilantro for a colorful presentation.
What I Learned Testing
When I first started making these, I treated the tortilla like a tortilla from a grocery pack and overstuffed everything. The result was messy. The discipline of the specific portions — 1/2 cup chili, 1/2 cup rice, 1/4 cup cheese — makes all the difference. Those amounts reliably fill a 10-inch tortilla without bursting it.
Another lesson: let the chili cool a touch if it’s straight from the fridge before spooning it into the tortilla. Cooler filling is easier to handle and won’t steam the tortilla during wrapping. Also, always cook seam-side down first. That contact point gets hot enough to seal quickly, preventing openings when you flip.
Finally, I discovered that a modest amount of cilantro brightens the whole burrito. Use it sparingly if you or your guests are cilantro-averse.
Store, Freeze & Reheat
To store: Wrap cooled burritos individually in plastic wrap or foil and keep them in the refrigerator for up to 3–4 days. Use airtight containers for shorter-term storage if you plan to eat them the next day.
To freeze: Wrap each burrito tightly in foil and place in a freezer bag. They keep well for up to 2 months. Label the bag with the date so you know what to use first.
To reheat from refrigerated: unwrap and reheat in a skillet over medium heat until warmed through and crisp, about 3–4 minutes per side. You can also microwave briefly (1–2 minutes) to heat through, then crisp in a skillet for texture.
To reheat from frozen: thaw overnight in the refrigerator if you can. If not, remove foil, wrap in a damp paper towel and microwave until heated through, then finish in a hot skillet to re-crisp the tortilla. Alternatively, bake foil-wrapped burritos at 350°F (175°C) until heated through; time will vary depending on oven and burrito size.
Chili Cheese Burrito FAQs
Q: Can I use fresh chili instead of leftover chili?
A: Yes. If the chili is fresh and still hot, cool it slightly before assembling so it doesn’t make the tortilla soggy. Taste and adjust seasoning as needed before assembling.
Q: Can I make these ahead and finish later?
A: Assemble the burritos and keep them covered in the refrigerator for a few hours. Toast them right before serving to preserve the crisp exterior.
Q: Are these suitable for meal prep?
A: Absolutely. They freeze well and reheat reliably — just follow the storage and reheating notes above.
Q: What if I don’t have cheddar?
A: Use any melting cheese you enjoy: Monterey Jack, Colby, or a mild shredded blend will work fine. Avoid cheeses that don’t melt well unless you like a different texture.
Serve & Enjoy
Serve hot, straight out of the skillet. Slice on a slight diagonal to reveal the melted cheese and colorful filling. Provide bowls of salsa and sour cream for dipping and a small plate of chopped cilantro or sliced green onions for garnish.
These burritos are hearty enough to serve on their own, but they also pair nicely with a simple green salad or a handful of tortilla chips for crunch. For casual entertaining, place a stack on a platter and let guests grab one. They reheat beautifully, so they work for leftovers the next day.
Simple, practical, and forgiving — Chili Cheese Burritos are a dependable way to turn leftovers into something everyone looks forward to. Enjoy the crisp, cheesy exterior and the comforting, seasoned center.

Chili Cheese Burrito
Ingredients
Ingredients
- 2 cupsleftover chili see note 1
- 4 10-inchflour tortillas("burrito" size)
- 2 cupscooked rice see note 2
- 1 cupshredded cheddar cheese
- minced fresh cilantrooptional
- salsa and sour creamfor serving optional
Instructions
Instructions
- Lay one 10-inch tortilla flat on a clean surface. Spoon 1/2 cup leftover chili into the center of the tortilla, top with 1/2 cup cooked rice and 1/4 cup shredded cheddar cheese, and sprinkle with minced fresh cilantro if using.
- Fold the left and right edges of the tortilla about 1 inch over the filling, then fold the bottom edge up over the filling and roll away from you until the burrito is sealed. Place seam-side down on a plate. Repeat steps 1–2 with the remaining tortillas and filling.
- Preheat a nonstick skillet over medium-high heat until hot (about 1–2 minutes). Lightly coat the skillet with nonstick spray if desired.
- Place the filled burritos seam-side down in the skillet without crowding (work in batches if necessary). Cook until the bottom is golden brown, 3 to 5 minutes.
- Carefully flip each burrito and cook the second side until golden brown and the cheese has melted, 3 to 5 minutes more.
- Remove burritos from the skillet and serve hot with salsa and sour cream, if desired.
Equipment
- nonstick skillet
Notes
Rice: Any kind of leftover rice works. I always keeps bag ofBaked Ricein the freezer at all times, but you can usecooked brown rice, leftoverMexican Rice, or evencooked quinoa.