
There’s something incredibly satisfying about a dish that tastes restaurant-rich but comes together in a home kitchen without fuss. This Mongolian Chicken hits that mark: crisp, saucy, a little sweet, and perfectly garlicky. It’s one of those dinner recipes I turn to when I want something impressive but not complicated.
I’ll walk you through the exact ingredients and the step-by-step method that works reliably—no guessing, no mystery techniques. You’ll learn how to get and keep the chicken crispy, how to finish everything in the pan so the sauce clings to each piece, and a few practical swaps and storage tips that make this recipe weeknight-friendly.
Ready to cook? Keep this page open on your phone or tablet while you work. Measure first, set everything in place, and you’ll have a crowd-pleasing meal in under an hour.
What’s in the Bowl
Ingredients
- ½ cup chicken broth (low sodium or no sodium added) — provides the liquid base for the sauce and lets you control saltiness.
- 2 tablespoons cornstarch — thickens the sauce to a glossy coating.
- 2 tablespoon brown sugar — adds caramelized sweetness and balances the soy.
- 3 tablespoon soy sauce (low sodium) — the savory backbone of the sauce; low-sodium keeps the dish from becoming too salty.
- 1 pound breast (boneless and skinless, chicken thighs can be used as well, cut into 1-inch cubes) — main protein; cutting into 1-inch pieces ensures quick, even cooking.
- ½ cup cornstarch — for coating the chicken so it fries up crispy.
- 4 cloves garlic (minced) — gives bright, aromatic flavor when sautéed briefly.
- 1 teaspoon ginger (minced) — adds warm, sharp notes that pair with the garlic.
- 6 red chilies (dried) — bring background heat and a slightly smoky flavor; omit for mild spice.
- 3 green onions (sliced) — folded in at the end for freshness and a mild onion bite.
- ⅓ cup vegetable oil (for frying) — used to crisp the chicken; you’ll pour most of it off before finishing the sauce.
How to Prepare Mongolian Chicken
- Make the sauce: In a medium bowl whisk together ½ cup chicken broth, 2 tablespoons cornstarch, 2 tablespoons brown sugar, and 3 tablespoons soy sauce until the cornstarch is dissolved. Set aside.
- Prepare the chicken: Place 1 pound cubed chicken in a bowl and add ½ cup cornstarch. Toss until each piece is evenly coated; shake off any excess cornstarch.
- Heat the oil: Pour ⅓ cup vegetable oil into a wok or large skillet and heat over medium-high until hot and shimmering.
- Fry the chicken in batches: Add chicken pieces in a single layer (do not overcrowd) and fry, turning as needed, until pieces are cooked through and slightly brown and crispy. Remove fried chicken to a paper towel-lined plate and repeat with remaining chicken.
- Remove excess oil: Carefully drain or pour off oil from the wok, leaving about 1 tablespoon of oil in the wok.
- Sauté aromatics: Add 4 cloves minced garlic, 1 teaspoon minced ginger, and 6 dried red chilies to the reserved oil and sauté, stirring, for about 30 seconds until fragrant.
- Add the sauce and simmer: Pour the prepared sauce into the wok, bring to a simmer, and stir constantly until the sauce thickens and the brown sugar is dissolved.
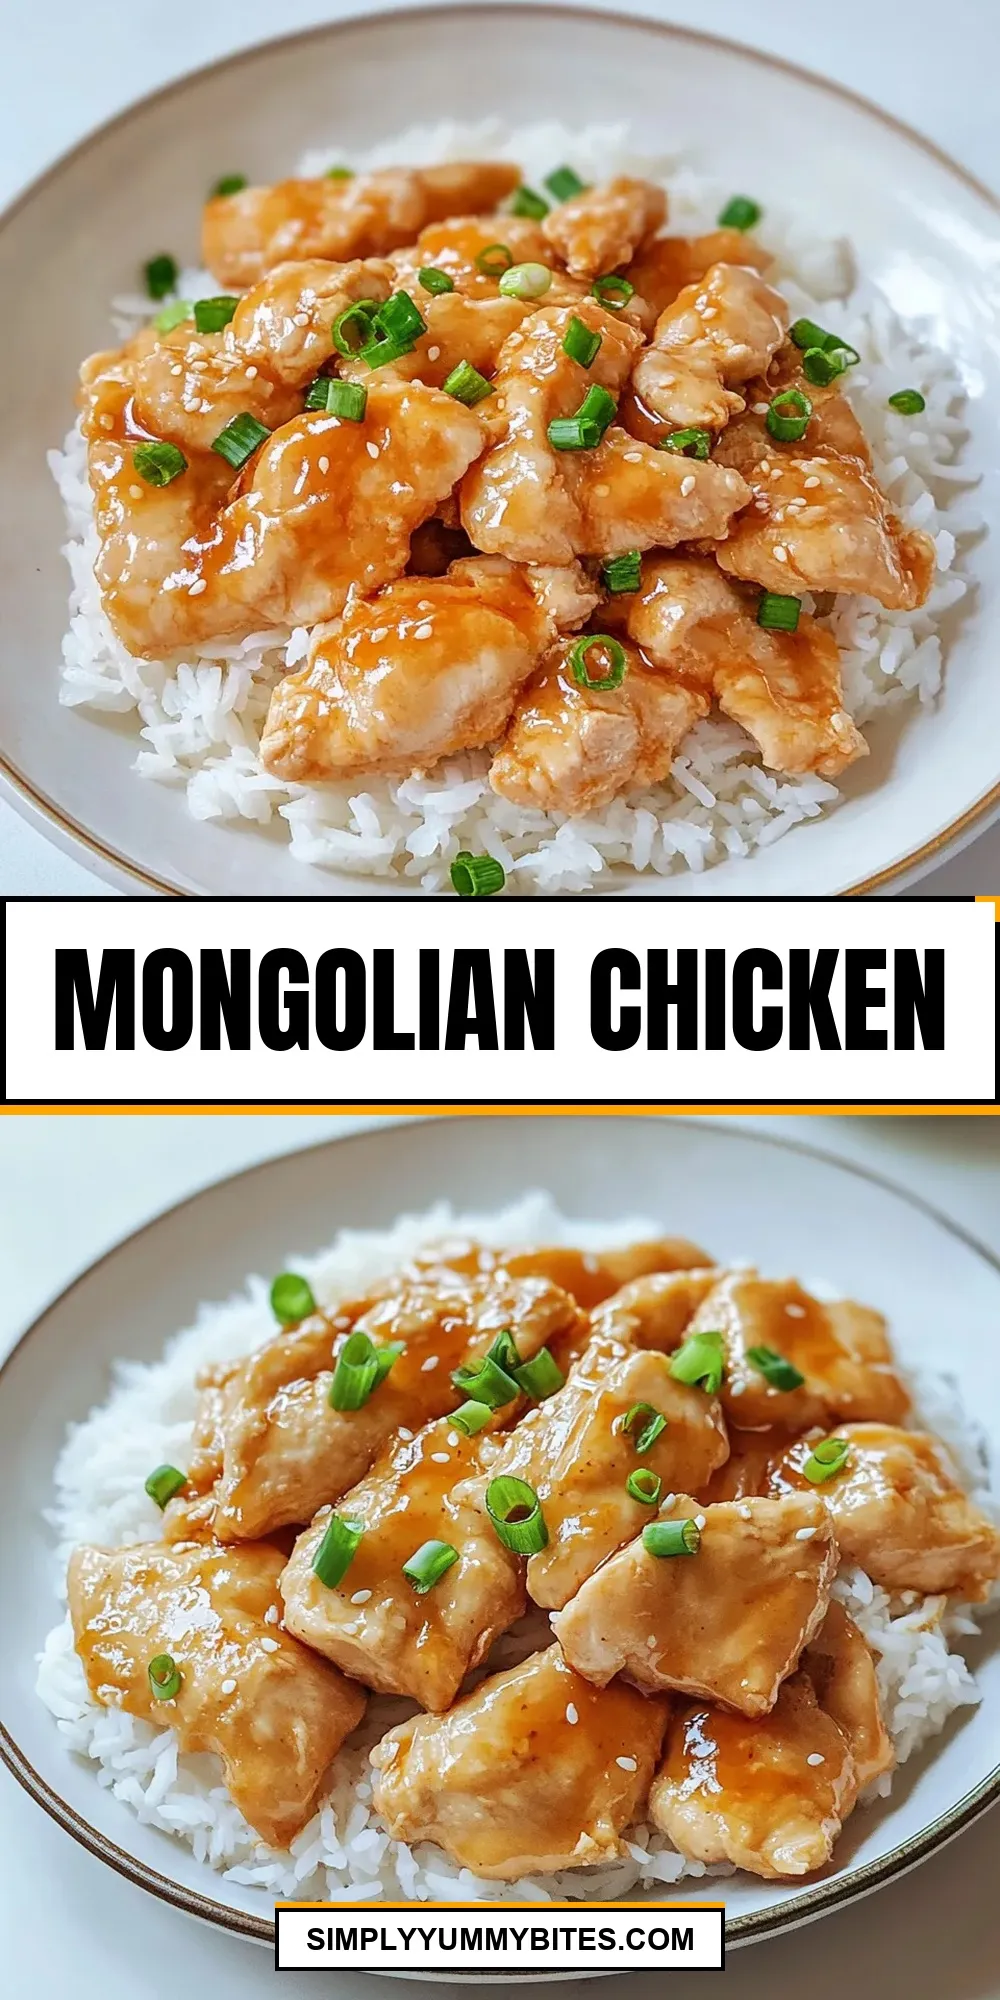
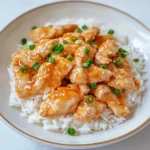
- Finish the dish: Return the fried chicken to the wok, add 3 sliced green onions, and toss everything together in the sauce for about 15 seconds to coat and heat through.
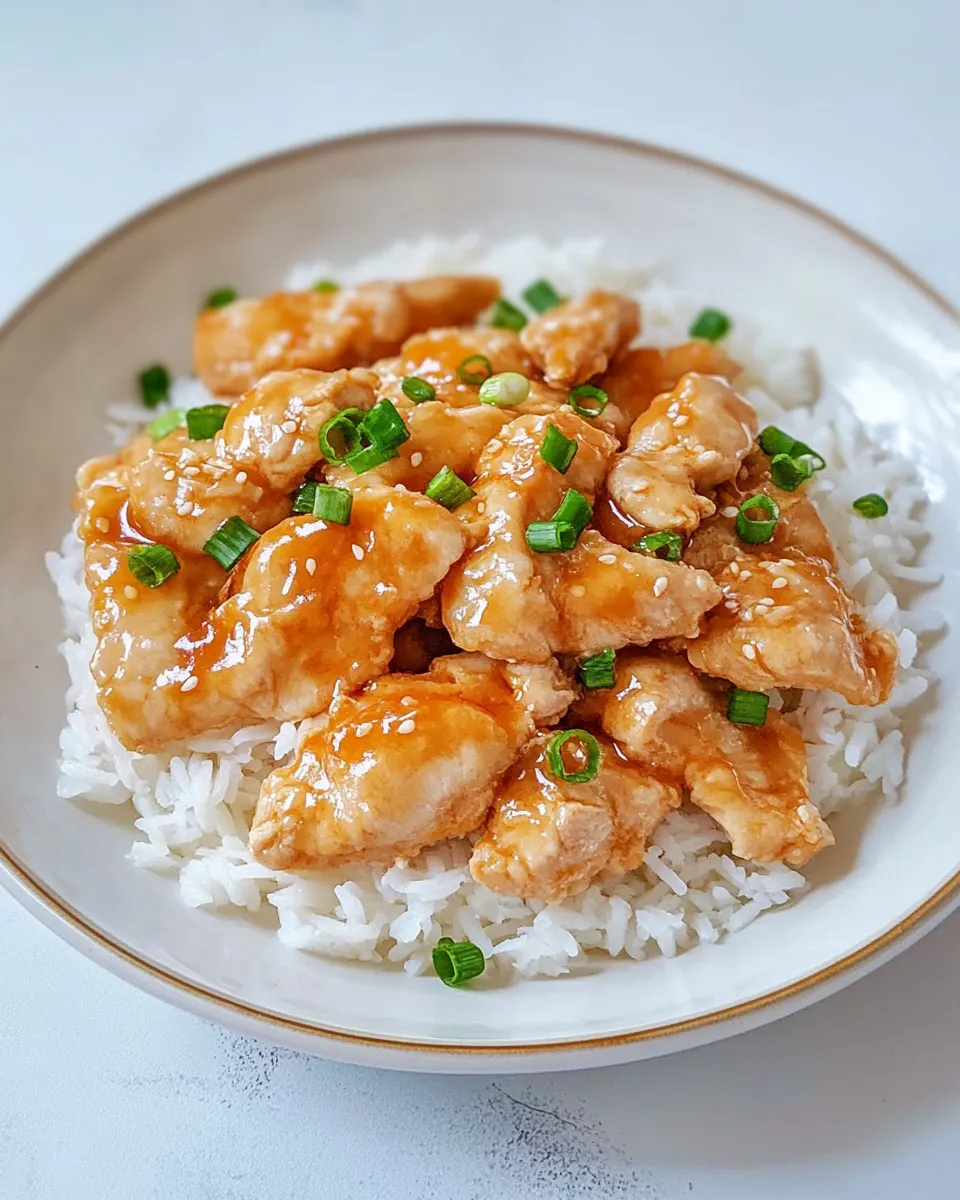
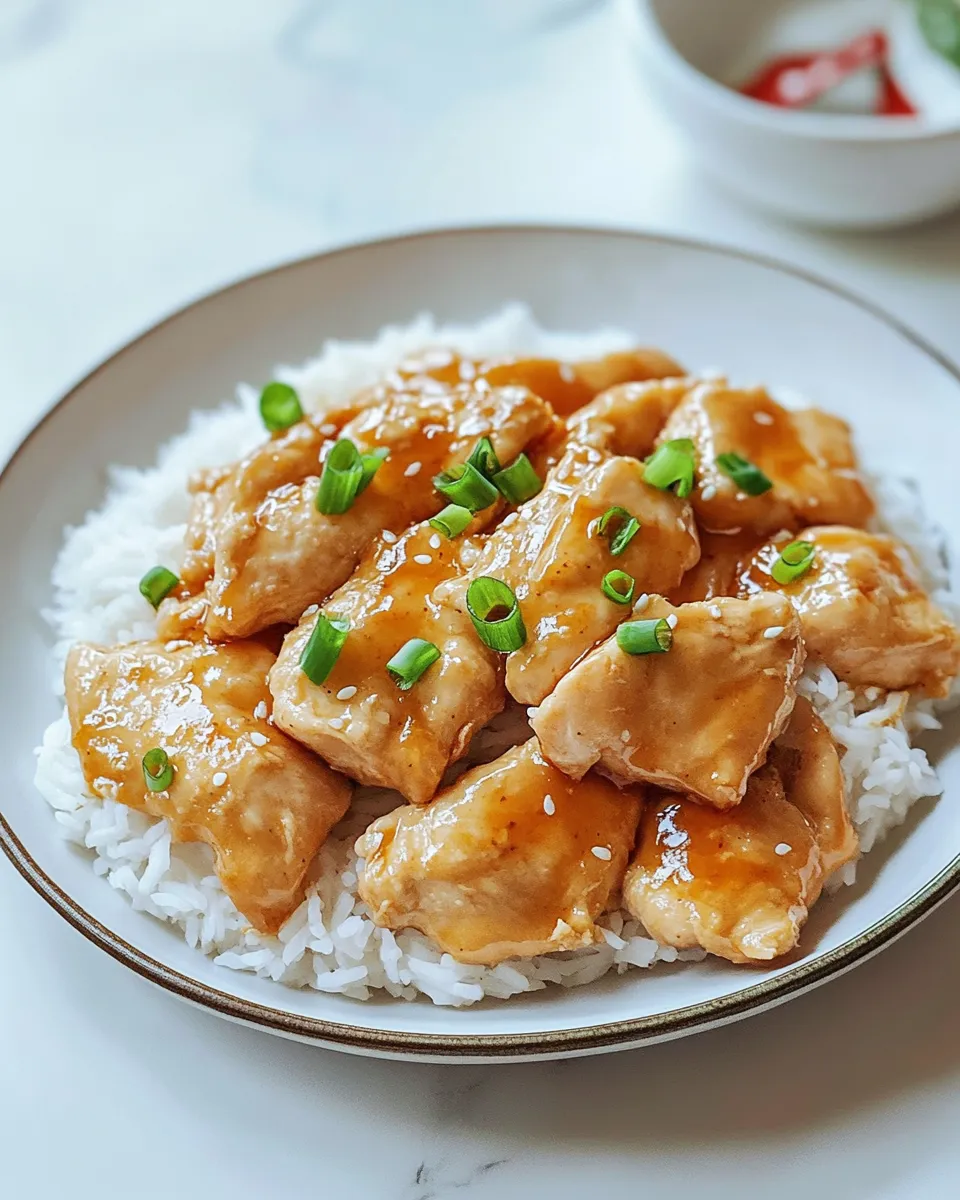
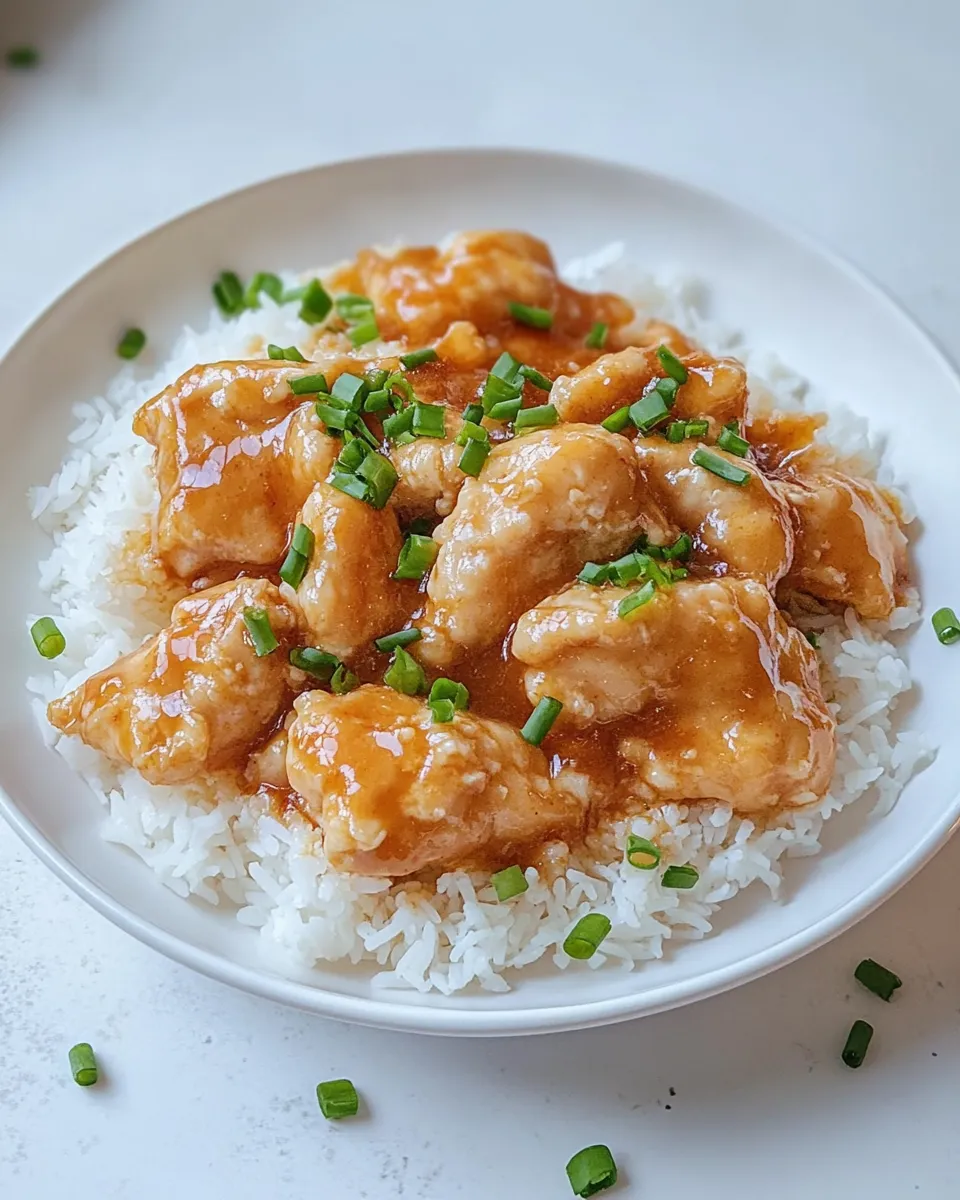
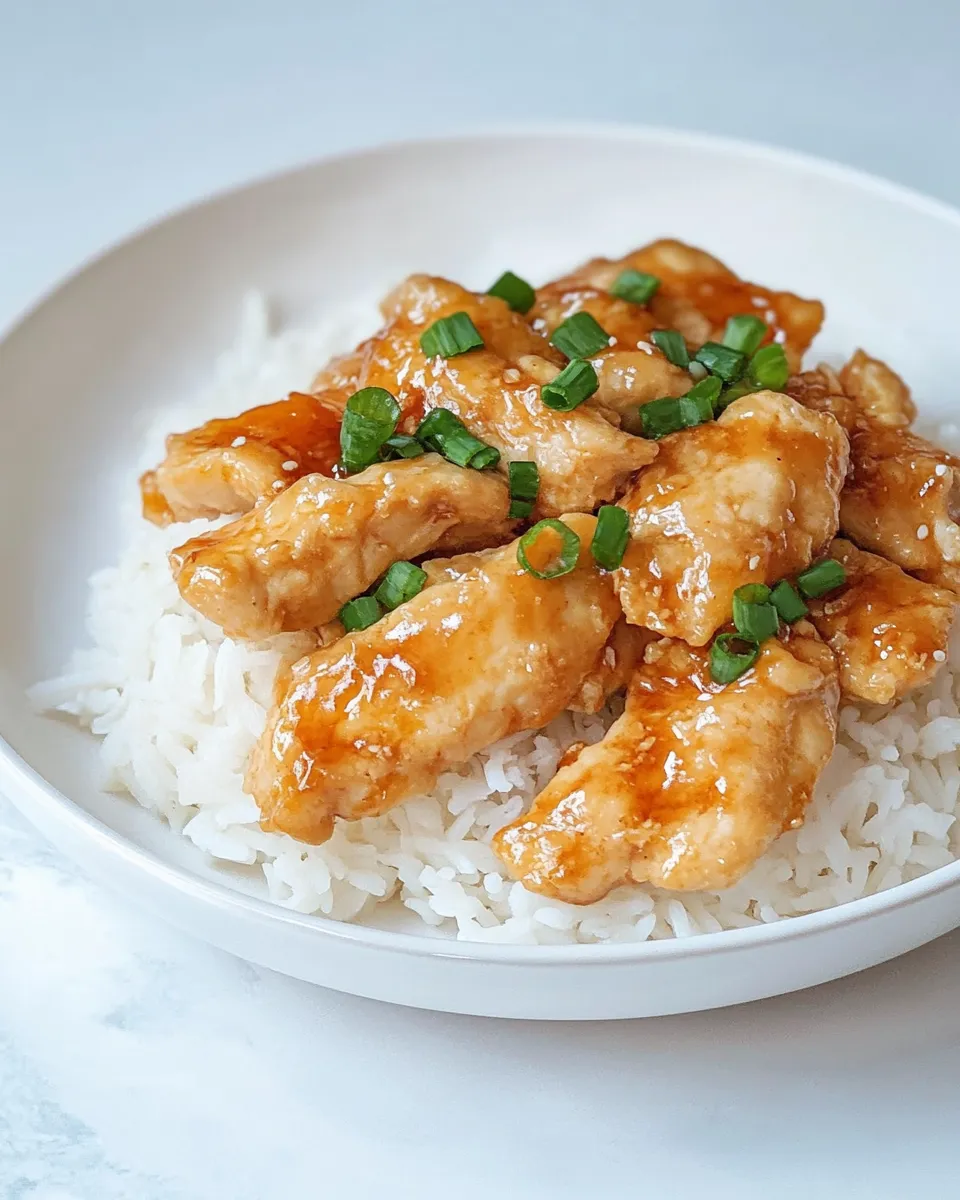
- Serve immediately over rice or noodles.
Why This Mongolian Chicken Stands Out
This version of Mongolian Chicken balances three things most of us care about: texture, flavor clarity, and speed. The cornstarch coating crisps the outside of each chicken cube, giving you contrast against the glossy sauce. That sauce is simple—broth, soy, brown sugar—but when reduced and thickened it becomes sticky and concentrated without needing a dozen extras.
Another reason it works so well is the timing. Frying the chicken in batches ensures every piece gets space to crisp instead of steam. Then you remove most of the oil so the aromatics bloom in a little fat before the sauce goes in. That step wakes up the garlic, ginger, and chilies and layers the flavors instead of burying them under oil.
Healthier Substitutions
- Use boneless, skinless chicken thighs instead of breast — they’re listed in the ingredient note and stay juicier if you prefer darker meat.
- Keep the low-sodium soy and low/no-sodium chicken broth already called for to reduce overall salt without losing the savory punch.
- To cut oil: use a nonstick pan and reduce the frying oil slightly, or blot fried chicken on paper towels well before returning to the wok. The recipe’s step to pour off oil already helps lower the final fat.
- Reduce brown sugar slightly if you want less sweetness; the sauce will still caramelize but be less sweet-forward. (No need to invent an alternative sweetener—small adjustments work fine.)
Equipment at a Glance
- Wok or large skillet — you need a wide surface to fry in batches and toss the final sauce.
- Medium mixing bowl — for whisking the sauce and for coating the chicken.
- Paper towels and a plate — to drain fried pieces and keep them crispy.
- Tongs or a slotted spoon — for turning and removing chicken from hot oil.
- Measuring cups and spoons — accurate amounts keep the sauce balanced.
Avoid These Mistakes
Don’t overcrowd the pan when frying. That’s the single most common misstep. If you pile too many pieces in, the temperature drops and the chicken steams instead of browning. Fry in batches and keep cooked pieces resting on paper towels.
Also, don’t skip pouring off most of the oil. Leaving too much fat in the wok will make the sauce greasy and prevent the aromatics from blooming properly. The recipe purposely asks you to leave about 1 tablespoon of oil so the garlic and ginger sizzle briefly without getting drowned.
Finally, don’t rush the sauce—stir constantly when you add it. Cornstarch can clump or give uneven thickness if you don’t stir until it’s fully dissolved and simmered.
Nutrition-Minded Tweaks
If you’re watching calories or sodium, small changes have big effects. Use the low-sodium soy and broth from the ingredient list to start. Blotting the chicken after frying and pouring off the oil (already in the method) reduces fat significantly. Cutting the brown sugar by a third will lower sugar without flattening the profile.
For more fiber and volume, serve over a base of brown rice or a mix of rice and steamed vegetables rather than plain white rice. That adds nutrients and keeps the portions satisfying.
Cook’s Notes
- Prep everything before you heat the pan. Once the oil is hot, steps move quickly.
- Shake off excess cornstarch but don’t try to wipe it off completely—the coating needs enough to crisp up.
- If you use thighs, they tolerate slightly longer fry times and are forgiving if you slightly overcook them compared with breast meat.
- Adjust heat to maintain sizzling but not smoking oil. Medium-high is the sweet spot for this method.
Make-Ahead & Storage
Make-ahead: You can prepare the sauce mix (broth, cornstarch, brown sugar, soy) and refrigerate it for up to 24 hours. Toss the chicken in cornstarch and keep it covered in the fridge for a few hours if you want to prep ahead, but for the crispiest finish fry just before serving.
Storage: Store leftovers in an airtight container in the refrigerator for up to 3 days. The sauce will firm up in the fridge; reheat gently in a skillet with a splash of water or broth and toss until warmed and loosened. Microwave works too—short intervals, stirring between—to avoid drying out the chicken.
Quick Q&A
- Can I make this less spicy? Yes—omit the dried red chilies called for in the recipe and the dish will be mild but still flavorful from garlic, ginger, and soy.
- Can I bake or air-fry the chicken to reduce oil? The provided directions rely on frying. If you prefer less oil, you can air-fry or bake the cornstarch-coated pieces until crispy, then follow the remaining steps to finish in the wok with the sauce. The sauce and finishing steps remain the same.
- Will the sauce thicken without cornstarch? Cornstarch is the thickener listed in the ingredients. Omitting it will produce a much thinner sauce. The recipe’s sauce uses 2 tablespoons cornstarch mixed into the broth to get the right glossy thickness.
Serve & Enjoy
Serve this Mongolian Chicken hot over steamed rice or tossed with noodles—either is called for in the final step. Garnish with the sliced green onions included in the recipe; they add color and a fresh bite. A side of steamed greens or a simple cucumber salad balances the sweet-savory sauce and makes the meal feel complete.
This is the kind of dish that travels well to the table and disappears quickly. Prepare the sauce, keep your mise en place, fry tidy batches, and you’ll have a dependable crowd-pleaser that tastes like you put in double the effort. Enjoy.
Mongolian Chicken
Ingredients
Ingredients
- 1/2 cupchicken broth low sodium or no sodium added
- 2 tablespooncornstarch
- 2 tablespoonbrown sugar
- 3 tablespoonsoy sauce low sodium
- 1 poundbreast boneless and skinless, chicken thighs can be used as well, cut into 1-inch cubes
- 1/2 cupcornstarch
- 4 clovesgarlic minced
- 1 teaspoonginger minced
- 6 red chilies dried
- 3 green onions sliced
- 1/3 cupvegetable oil for frying
Instructions
Instructions
- Make the sauce: In a medium bowl whisk together ½ cup chicken broth, 2 tablespoons cornstarch, 2 tablespoons brown sugar, and 3 tablespoons soy sauce until the cornstarch is dissolved. Set aside.
- Prepare the chicken: Place 1 pound cubed chicken in a bowl and add ½ cup cornstarch. Toss until each piece is evenly coated; shake off any excess cornstarch.
- Heat the oil: Pour ⅓ cup vegetable oil into a wok or large skillet and heat over medium-high until hot and shimmering.
- Fry the chicken in batches: Add chicken pieces in a single layer (do not overcrowd) and fry, turning as needed, until pieces are cooked through and slightly brown and crispy. Remove fried chicken to a paper towel-lined plate and repeat with remaining chicken.
- Remove excess oil: Carefully drain or pour off oil from the wok, leaving about 1 tablespoon of oil in the wok.
- Sauté aromatics: Add 4 cloves minced garlic, 1 teaspoon minced ginger, and 6 dried red chilies to the reserved oil and sauté, stirring, for about 30 seconds until fragrant.
- Add the sauce and simmer: Pour the prepared sauce into the wok, bring to a simmer, and stir constantly until the sauce thickens and the brown sugar is dissolved.
- Finish the dish: Return the fried chicken to the wok, add 3 sliced green onions, and toss everything together in the sauce for about 15 seconds to coat and heat through.
- Serve immediately over rice or noodles.
Equipment
- Wok or large skillet
- Medium Bowl
- paper towel-lined plate
Notes
Freezing:You can freeze this by storing it in an airtight container or freezer bags, once it has fully cooled. Store it in the freezer for up to2 months. To thaw, take it out of the freezer the night before and place it in the refrigerator. The next day when ready to serve, either heat it up in the microwave and add it to a skillet/wok and stir-fry until heated through.
Nutrition:Nutritional information does not include rice or noodles.


