
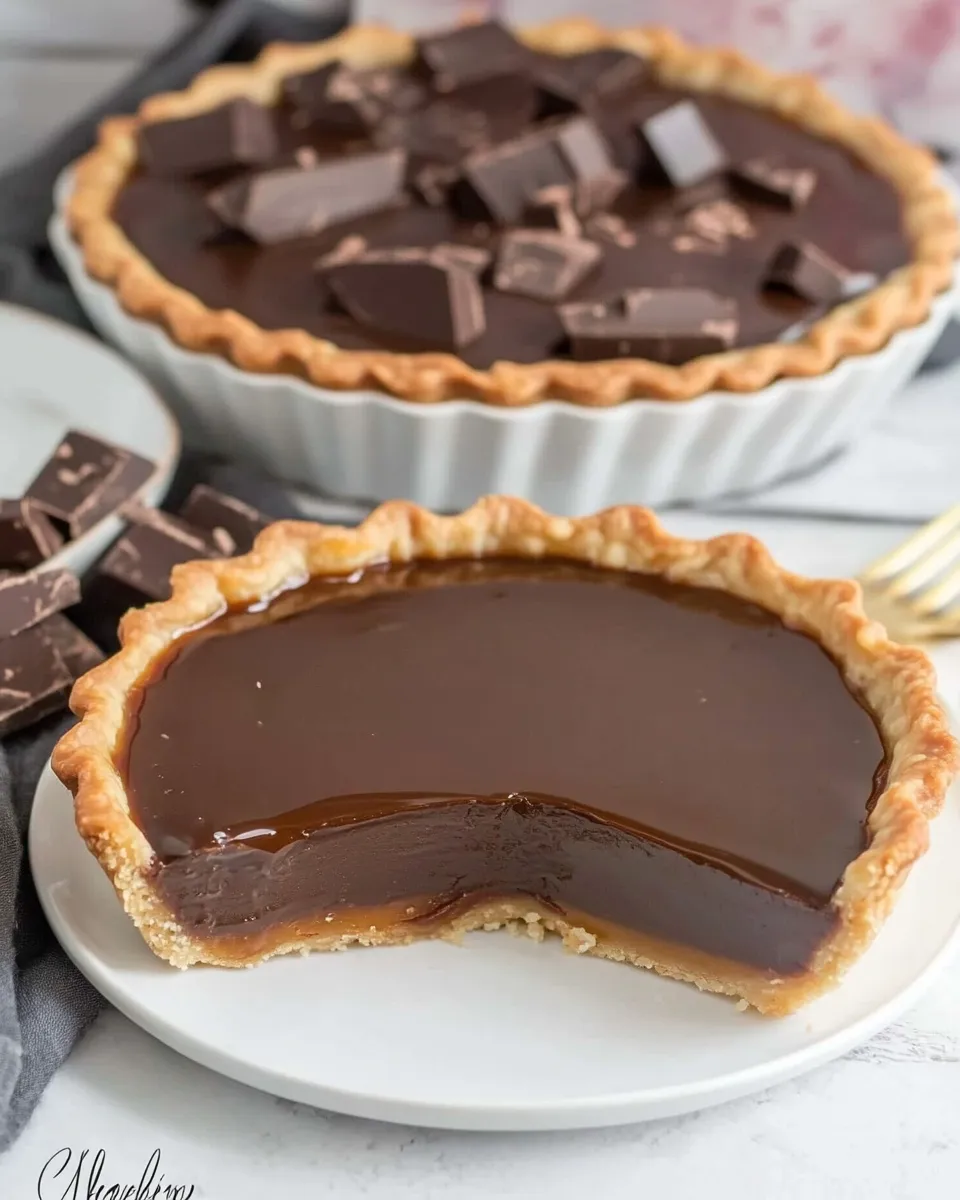
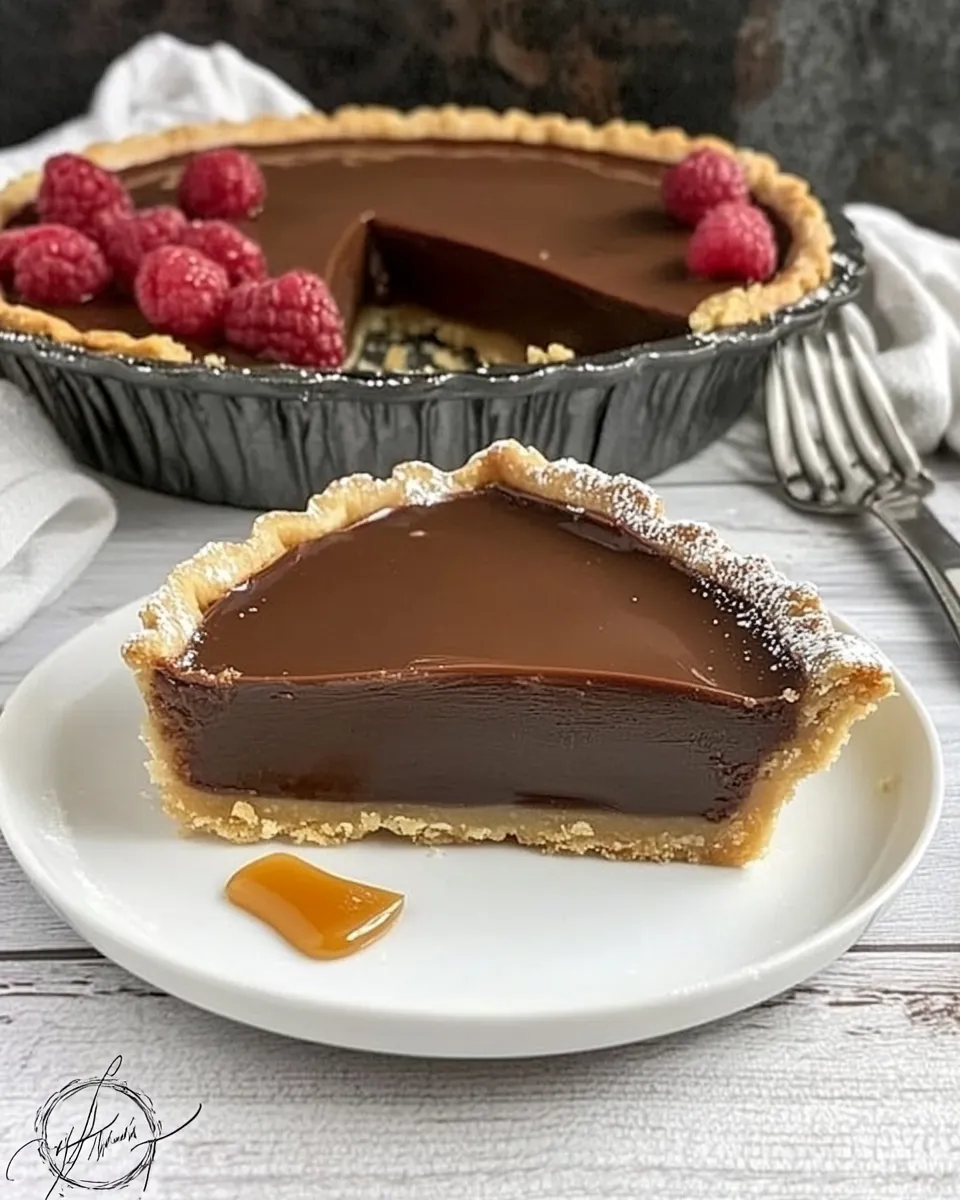
This tart is all about contrasts: a crisp, cocoa-scented pastry shell that frames a silky, sweet filling. The base is a rich chocolate shortcrust that bakes up firm and holds whatever you choose to fill it with — classic salted caramel and chocolate ganache are the obvious finishers, but the shell itself is worth celebrating on its own.
I keep this recipe close when I want a dessert that looks sophisticated without a long list of steps. The dough comes together in one bowl, chills quickly, and bakes without fuss. There’s room for make-ahead moves and swaps if you need to adapt to dietary needs.
Below I walk through the ingredients you’ll use, the precise steps to make the shell, and practical tips for finishing, storing, and troubleshooting. If you plan to fill the shell with caramel and ganache, note the recipe points that call for additional ingredients so you can gather them before you start.
What You’ll Gather
Ingredients
- 1 ½ cups flour — provides the structure for the tart shell; use level measurements for consistent texture.
- ¼ cup plus 1 tablespoon dutch-process unsweetened cocoa powder — deepens flavor and color; sift if lumpy.
- ¼ teaspoon kosher salt — balances sweetness and sharpens chocolate notes.
- 10 tablespoons butter, cut into pieces, at room temperature — gives tenderness and flakiness; room temperature makes creaming easier.
- ½ cup plus 2 tablespoons powdered sugar — sweetens and helps create a tender crumb; powdered sugar also adds a bit of lift when creamed.
- 2 egg yolks, at room temperature — bind the dough and add richness; room temperature yolks incorporate more smoothly.
- ½ teaspoon vanilla extract — lifts the cocoa and rounds the flavor.
Chocolate Caramel Tart in Steps
- Preheat the oven to 350°F (175°C).
- In a medium bowl, whisk together the flour, Dutch-process cocoa powder, and kosher salt; set the dry mixture aside.
- In a large bowl, use a handheld mixer to cream the room-temperature butter and the powdered sugar until the mixture is pale and fluffy, about 2–3 minutes.
- Add the 2 room-temperature egg yolks and the vanilla extract to the creamed butter mixture and mix until just combined.
- Add the dry ingredients to the wet ingredients and mix on low speed (or stir by hand) until a uniform dough forms. Do not overmix.
- Press the dough evenly into the bottom and up the sides of a 9-inch tart pan with a removable bottom, making the thickness uniform.
- Refrigerate the tart shell for 30 minutes to firm the dough.
- Remove the tart from the refrigerator. Prick the bottom of the crust a few times with a fork (do not prick the sides). If the edges appear likely to brown too quickly during baking, loosely tent them with foil.
- Bake the tart shell in the preheated oven for 20 minutes, until set. Transfer the tart pan to a wire rack and cool the shell to room temperature.
- The baked chocolate tart shell is ready to fill. Note: the original recipe’s caramel and ganache steps call for additional ingredients not listed here; obtain those ingredients before proceeding with fillings.
Top Reasons to Make Chocolate Caramel Tart

This tart is a compact showstopper that’s deceptively simple. Here’s why I reach for it.
- The crust is deeply chocolatey and holds up to wet fillings without getting soggy.
- It bakes quickly — you can have a baked shell ready in under an hour, leaving time for caramel or ganache finishing.
- It looks elegant and travels well: remove the tart ring and the edge presents cleanly for serving.
- The formula adapts. Use it as a base for caramel, fruit, mousse, or even a nut topping.
Dairy-Free/Gluten-Free Swaps

If you need to adapt the shell, here are practical swap ideas that keep texture and flavor in mind.
- Dairy-free butter alternative: Use a plant-based stick butter substitute measured 1:1. Choose one formulated for baking so water content and salt levels are similar.
- Gluten-free flour: Use a cup-for-cup gluten-free all-purpose blend that includes xanthan gum. The dough may be a touch more fragile; chill well before pressing into the pan.
- Powdered sugar alternative: If avoiding cane sugar, use a powdered sweetener designed for baking, but note texture and spread may vary slightly.
Tools & Equipment Needed
- 9-inch tart pan with removable bottom — crucial for clean release and easy serving.
- Handheld mixer — makes creaming butter and powdered sugar quick; a stand mixer works fine too.
- Medium mixing bowl and large mixing bowl — for dry and wet ingredient stages.
- Rubber spatula — for scraping the bowl and helping incorporate the dry mix into the wet.
- Fork — to dock the bottom before baking.
- Wire rack — to cool the tart shell evenly after baking.
Watch Outs & How to Fix
Shortcrust dough is forgiving, but a few missteps are common. Here’s how to spot and fix them.
- Overmixed dough — If the dough becomes elastic or glossy, you’ve likely overworked it. Stop mixing, chill it for 30–60 minutes, then press gently into the pan.
- Edges browning too fast — If the crust edges brown before the base sets, tent with foil partway through baking as instructed. You can trim any overly dark edges after baking if needed.
- Soggy base after filling — Make sure the shell is fully cooled before adding any wet filling. For extra protection, you can brush a thin layer of melted chocolate or temper a quick glaze into the shell to act as a barrier before pouring in caramel or ganache.
- Dough too soft to press — Chill until firm. If you’re in a rush, pop the pan with the pressed dough into the freezer for 10–15 minutes before baking.
Seasonal Ingredient Swaps
This shell pairs nicely with seasonal fillings and flavors. Consider these options depending on the time of year.
- Fall/Winter — Top a filled tart with toasted nuts (pecans or hazelnuts) and a pinch of flaky sea salt for contrast.
- Spring — Add fresh berries atop a thin layer of ganache for brightness.
- Summer — Serve with a scoop of vanilla or coffee ice cream; the chilled cream complements warm caramel beautifully.
Pro Tips & Notes
Little details make a big difference. These tips come from hands-on practice and save time in the kitchen.
Before you start
Measure ingredients accurately. Spoon flour into the measuring cup and level with the back of a knife rather than scooping, which compacts the flour and yields a dry, crumbly shell.
Dough handling
Room-temperature butter should be soft enough to press a finger into without leaving a large indentation. If it’s too warm and glossy, chill it until it’s slightly firmer. Over-chilling can make pressing difficult; aim for a pliable, cool dough.
Pressing into the pan
Work from the center out towards the edges, keeping thickness uniform. Use the bottom of a measuring cup to smooth the base and get even walls.
Cooling and filling
Cool the shell completely before filling; hot shells can melt caramel or ganache and cause runniness. If you prepare fillings that need pouring warm, allow them to cool slightly so they won’t leach moisture into the crust.
Prep Ahead & Store
This tart shell is an excellent make-ahead component.
- Make the shell up to 3 days ahead: wrap tightly with plastic wrap and refrigerate. Bring to room temperature before filling to avoid cracking when chilling filled tart.
- Freeze the baked shell for up to 1 month: wrap well and thaw overnight in the fridge before filling.
- After filling with caramel/ganache: store in the refrigerator for up to 3–4 days, covered. Bring to room temperature 20–30 minutes before serving to soften the filling and improve flavor.
Ask & Learn
Common questions I get when people try this shell:
- Can I bake this in a pie dish instead of a tart pan? Yes, but the removable bottom on a tart pan makes removing and presenting the tart much easier.
- Can I blind bake with weights? This recipe’s short baking time and the structure of the dough usually don’t require blind baking with weights; dock the bottom and tent edges if needed.
- How do I know when the shell is set? The surface should lose its raw sheen and feel firm to the touch. It may still be slightly soft at the center but should not be doughy.
That’s a Wrap
This Chocolate Caramel Tart shell is a reliable, chocolate-forward base that upgrades any filling you choose. It’s straightforward to prepare, forgiving to tweak, and rewards small finishing touches like flaky salt or toasted nuts. Gather the extra filling ingredients before you start—caramel and ganache take only a few more minutes, but they do require cream, sugar, and chocolate that aren’t listed here.
Make the shell ahead to simplify party day, or bake and fill the same day for a fresh, glossy finish. Either way, the crisp cocoa pastry and rich fillings are a winning combination. Happy baking — and if you try a filling or swap that worked for you, I’d love to hear about it.
Chocolate Caramel Tart
Ingredients
Ingredients
- 1 1/2 cups flour
- 1/4 cup plus 1 tablespoon dutch-process unsweetened cocoa powder
- 1/4 teaspoon kosher salt
- 10 tablespoons butter cut into pieces, at room temperature
- 1/2 cup plus 2 tablespoons powdered sugar
- 2 egg yolks at room temperature
- 1/2 teaspoon vanilla extract
Instructions
Instructions
- Preheat the oven to 350°F (175°C).
- In a medium bowl, whisk together the flour, Dutch-process cocoa powder, and kosher salt; set the dry mixture aside.
- In a large bowl, use a handheld mixer to cream the room-temperature butter and the powdered sugar until the mixture is pale and fluffy, about 2–3 minutes.
- Add the 2 room-temperature egg yolks and the vanilla extract to the creamed butter mixture and mix until just combined.
- Add the dry ingredients to the wet ingredients and mix on low speed (or stir by hand) until a uniform dough forms. Do not overmix.
- Press the dough evenly into the bottom and up the sides of a 9-inch tart pan with a removable bottom, making the thickness uniform.
- Refrigerate the tart shell for 30 minutes to firm the dough.
- Remove the tart from the refrigerator. Prick the bottom of the crust a few times with a fork (do not prick the sides). If the edges appear likely to brown too quickly during baking, loosely tent them with foil.
- Bake the tart shell in the preheated oven for 20 minutes, until set. Transfer the tart pan to a wire rack and cool the shell to room temperature.
- The baked chocolate tart shell is ready to fill. Note: the original recipe’s caramel and ganache steps call for additional ingredients not listed here; obtain those ingredients before proceeding with fillings.
Equipment
- 9-inch tart pan with removable bottom
- Handheld mixer
- Mixing bowls
- Wire Rack
- Fork
- foil (optional)


