
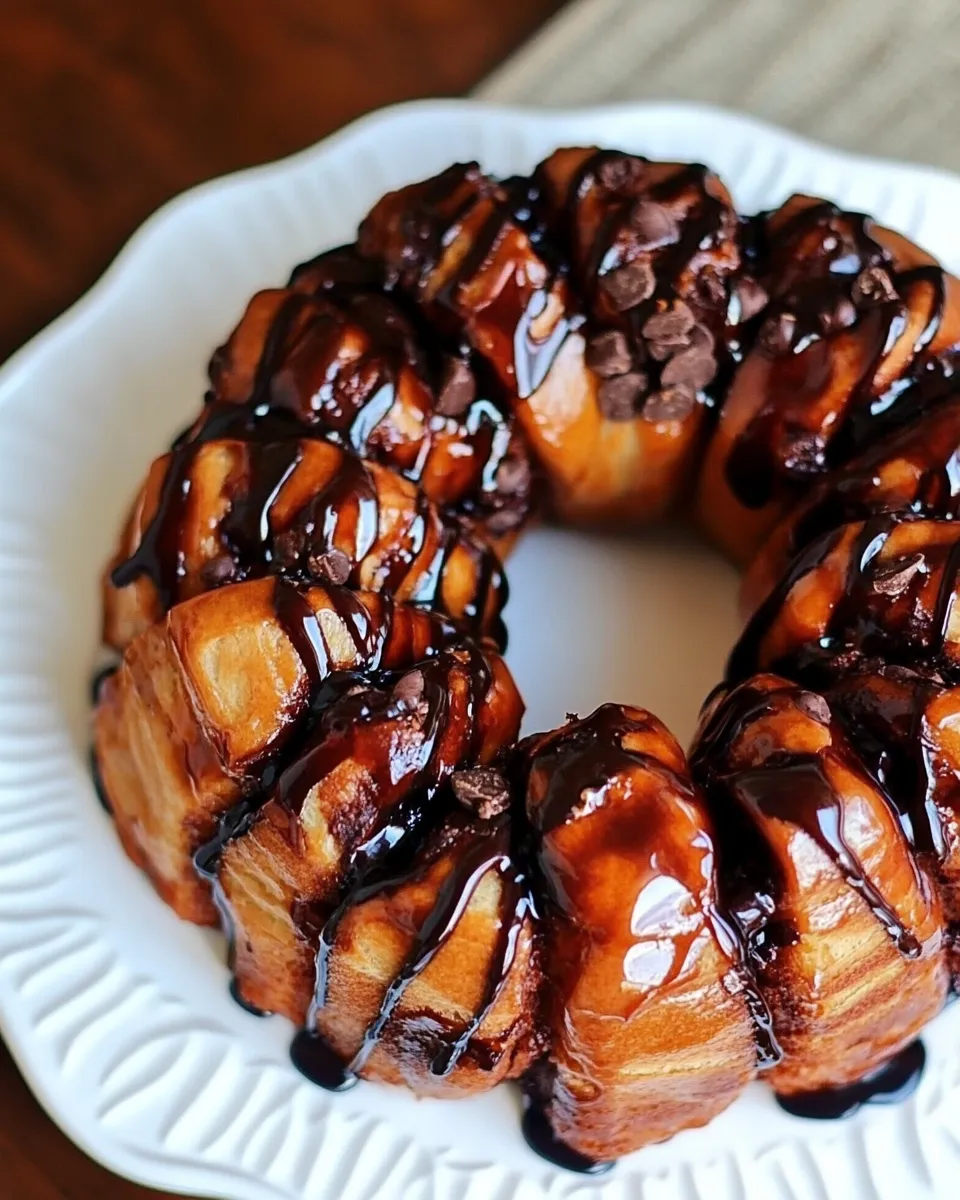
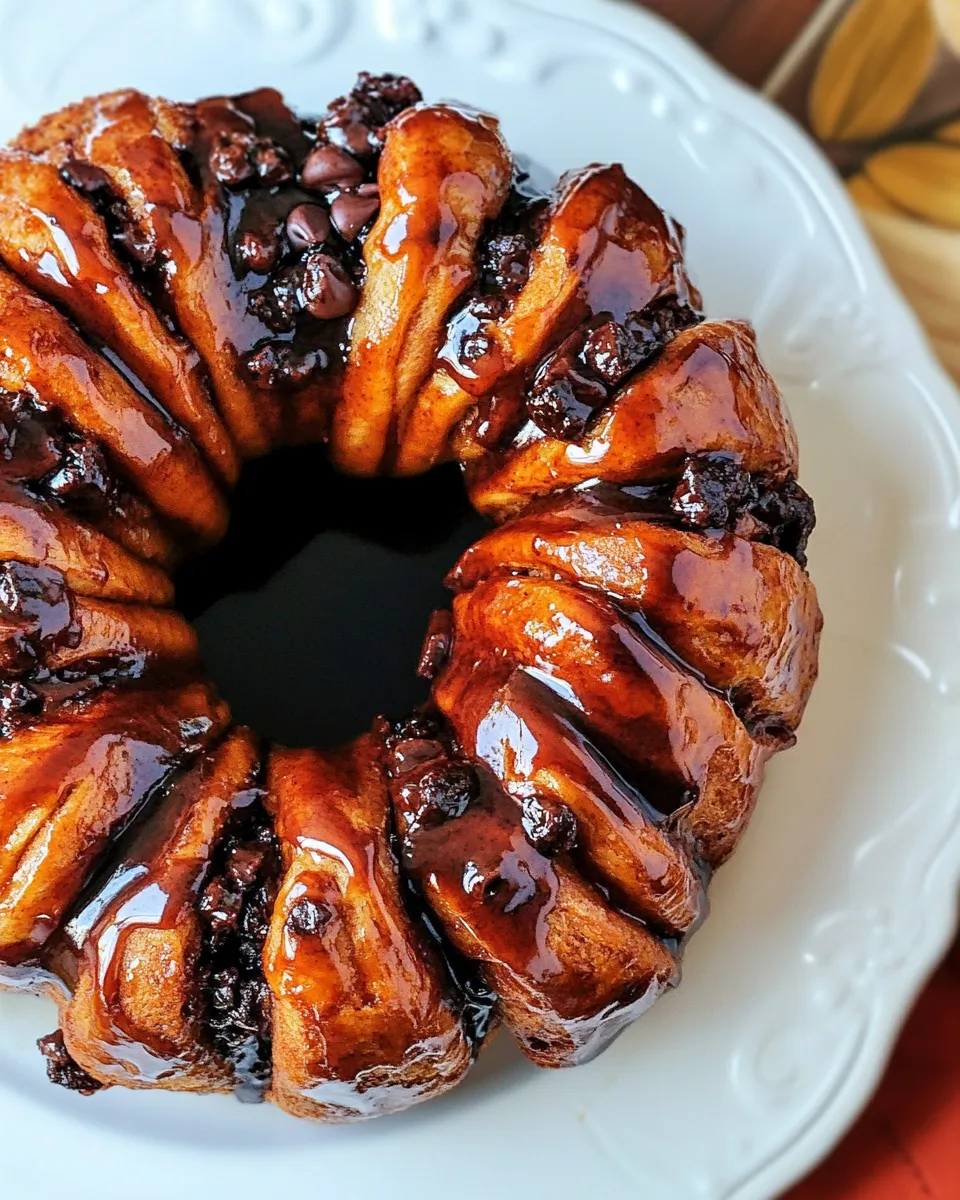
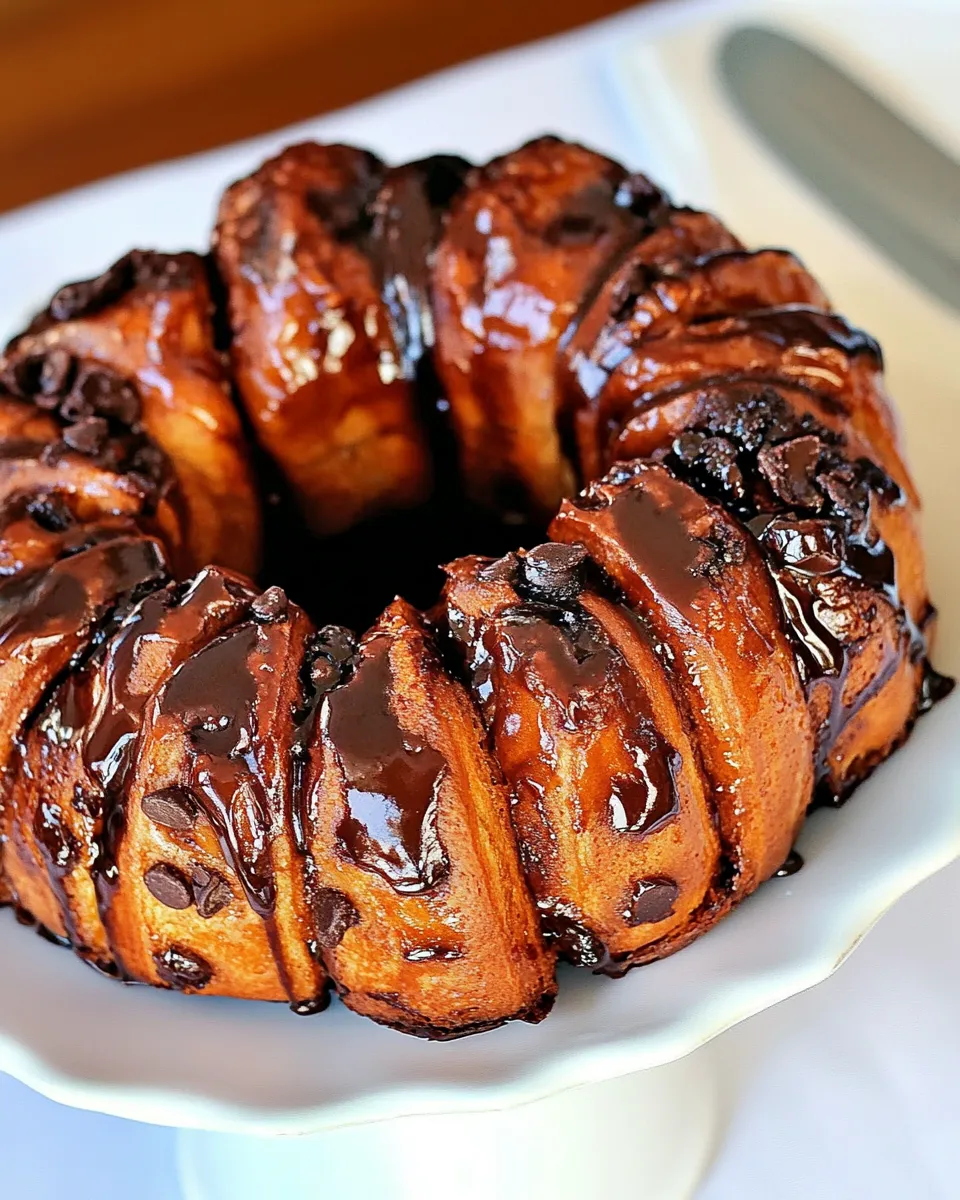
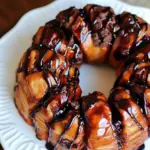
Sticky buns are the kind of thing you make when you want a dessert that feels indulgent without a lot of ceremony. This Chocolate Chip Sticky Bun Ring takes canned dinner rolls, a buttery maple glaze, brown sugar, cinnamon and mini chocolate chips and turns them into a pull-apart centerpiece that’s easy to assemble and quick to bake. It’s perfect for a weekend brunch or an after-dinner sweet that feeds a crowd.
I test recipes for a living, so I care about clarity and practical tips. The method here is straightforward: a caramel-like base in a fluted pan, coated rolls arranged in a ring, and a short bake. Timing and assembly matter more than complex ingredients — you’ll get glossy, gooey buns with minimal fuss.
Below you’ll find a precise ingredient list, step-by-step instructions taken exactly from the recipe source, and focused sections on what makes the dish work, easy swaps, equipment, troubleshooting and freezing notes. Read the steps once, assemble, bake, and enjoy warm, chocolate-speckled sticky buns that everyone will reach for.
What You’ll Need
- 1/2cup brown sugar — provides the caramelized base and deep sweetness.
- 1tsp cinnamon — adds warm spice to the brown sugar mixture.
- 1/4cup mini chocolate chips — pockets of chocolate throughout the ring; mini chips melt and distribute nicely.
- 3tbsp. butter, melted — creates the sticky glaze with maple syrup; use melted so it pours evenly.
- 1/2cup maple syrup — combines with butter to make the sticky, glossy coating.
- 2small tubes refrigerated dinner rolls — the easiest way to get uniform rolls that expand into a pull-apart ring.
Chocolate Chip Sticky Bun Ring in Steps
- Preheat oven to 375°F (190°C).
- Lightly coat a fluted (Bundt-style) pan to prevent sticking (you may use a small amount of the melted butter if you like).
- In a small bowl, combine the brown sugar, cinnamon, and mini chocolate chips.
- In a separate bowl, stir together the melted butter and maple syrup.
- Divide the brown sugar mixture into two equal portions. Spread one portion evenly over the bottom of the prepared pan.
- Divide the butter–maple syrup mixture into two equal portions. Pour one portion evenly over the brown sugar layer in the pan.
- Working one roll at a time, take each refrigerated dinner roll and lightly coat it in the remaining brown sugar mixture (toss or press gently so the coating sticks). Arrange the coated rolls in the pan in a circle to form a ring, using all rolls from the two tubes.
- Pour the remaining butter–maple syrup mixture evenly over the arranged rolls.
- Bake for 20 minutes, until the rolls are cooked through and golden on top.
- Remove the pan from the oven and let sit 3–5 minutes. Run a knife around the pan edge if needed, then invert the pan onto a platter to release the sticky bun ring.
What Makes This Recipe Special
This recipe shines because it combines speed with a feel of home-baked richness. Using refrigerated dinner rolls removes the laborious dough-making step but still yields that soft, pillowy interior everyone expects from sticky buns. The maple syrup and butter merge into a glossy, caramel-like sauce during baking, and the brown sugar-cinnamon mix brings classic depth.
Mini chocolate chips are the pivot that takes a traditional sticky bun into something slightly unexpected and kid-friendly: melted ribbons of chocolate tucked into the caramel pockets. The fluted pan encourages an even ring and helps the glaze pool attractively around each bun so every piece gets its share of sticky goodness.
Easy Ingredient Swaps
- Mini chocolate chips — swap for an equal volume of regular chocolate chips or chopped chocolate if you prefer larger pockets of chocolate.
- Maple syrup — you can substitute with honey or light corn syrup if that’s what you have on hand; texture will be similar but flavor will change slightly.
- Butter — use the same amount of margarine or a dairy-free butter substitute to make the glaze dairy-free.
- Refrigerated dinner rolls — if you want a slightly different texture, use canned cinnamon rolls (without icing) or homemade small dinner rolls of similar size, but bake time may vary.
Equipment at a Glance
- Fluted (Bundt-style) pan — important to get the ring shape and allow glaze to pool.
- Small and medium mixing bowls — one for the sugar mixture, one for the butter-maple mix.
- Spoon or spatula — to spread mixtures and pour glaze evenly.
- Knife or thin spatula — for running around the pan edge before inverting.
- Platter — for inverting the ring onto when it comes out of the pan.
Avoid These Traps
Two things derail sticky buns: sticking to the pan and underbaked centers. To prevent sticking, don’t skip coating the pan — a light coat of nonstick spray or a small amount of the melted butter will make flipping safe. If your pan has a lot of nooks, take extra care to grease thoroughly.
Underbaked rolls happen if the oven runs cool or if you crowd the pan. Give the rolls room to expand into a neat ring. Check your oven temperature with a thermometer if you suspect it runs hot or cold. The 20-minute bake time assumes a properly preheated oven at 375°F (190°C); the tops should be golden and the centers cooked through.
Finally, don’t invert immediately while the glaze is raging hot. Let the pan sit 3–5 minutes so the glaze sets slightly; that reduces messy drips and helps the ring hold together when released.
Variations by Season
Small changes keep this recipe fresh across the year:
- Fall: Stir a pinch of ground nutmeg or allspice into the brown sugar mix; fold in chopped toasted pecans on top of the first brown sugar layer for crunch.
- Winter: Use a robust, darker maple syrup for a deeper caramel flavor. Add a scattering of candied orange peel with the chocolate chips for brightness.
- Spring: Fold in a tablespoon of lemon zest to the maple-butter if you want a bright lift to the sweetness (works best with white chocolate instead of dark).
- Summer: Add toasted coconut flakes to the brown sugar layer for a tropical twist; consider swapping chocolate for macadamia pieces.
Testing Timeline
If you’re testing this recipe at home, here’s a short timeline to expect from start to finish:
- Prep time: 10–15 minutes to melt butter, mix bowls, coat rolls and arrange them in the pan.
- Bake time: 20 minutes at 375°F (190°C).
- Rest and release: 3–5 minutes before inverting onto a platter.
- Total time: Roughly 35–45 minutes from preheating to serving, depending on how long your oven takes to reach temperature and how quickly you assemble.
Freezer-Friendly Notes
You can freeze baked pieces or the whole ring, but do it thoughtfully so texture and glaze survive well. For best results, cool completely, then wrap tightly in plastic followed by foil. Freeze up to 1 month.
To reheat, thaw overnight in the refrigerator or on the counter for a few hours. Warm individual portions in a 325°F (165°C) oven for 8–10 minutes to refresh the glaze and soften the center. If frozen unbaked (assembled in pan), add 5–8 minutes to the bake time and ensure the interior reaches a fully baked texture.
Ask the Chef
Q: My glaze is too thin and runs off the platter. What happened?
A: If the glaze is very runny, it likely had excess liquid (for example, too much maple syrup relative to butter) or you inverted it while it was still scorching hot. Let the pan rest 3–5 minutes before inverting to allow the glaze to set. If it still seems thin, refrigerate the ring briefly to firm the glaze before serving.
Q: The rolls look browned on top but are doughy inside.
A: That’s an oven or placement issue. Lower the rack one position and tent loosely with foil if the tops brown too fast. Also verify your oven temperature with a thermometer. You want a golden top and fully baked centers; an oven that runs hot will overbrown before the middle cooks through.
Q: Can I make this for a crowd?
A: Yes. Make multiple rings and bake them on separate racks if your oven allows, rotating pans midway if necessary for even color. Alternatively, make two rings back-to-back and keep the second warm in a very low oven (200°F / 95°C) wrapped in foil.
Before You Go
This Chocolate Chip Sticky Bun Ring is built for simplicity with a rewarding finish. The canned dinner rolls are a shortcut I use when I want guaranteed, even results without the heft of yeast dough. The marriage of brown sugar, cinnamon, maple and chocolate is classic with a minimal time investment.
Follow the steps as written for best results, grease your pan well, and watch the bake time. Serve warm, tear-apart style, and plan for sticky fingers. If you enjoyed this, bookmark it — it’s a reliable, repeatable crowd-pleaser that’s easy to tweak by season or taste.
Chocolate Chip Sticky Bun Ring
Ingredients
Ingredients
- 1/2 cupbrown sugar
- 1 tspcinnamon
- 1/4 cupmini chocolate chips
- 3 tbsp.butter melted
- 1/2 cupmaple syrup
- 2 small tubes refrigerated dinner rolls
Instructions
Instructions
- Preheat oven to 375°F (190°C).
- Lightly coat a fluted (Bundt-style) pan to prevent sticking (you may use a small amount of the melted butter if you like).
- In a small bowl, combine the brown sugar, cinnamon, and mini chocolate chips.
- In a separate bowl, stir together the melted butter and maple syrup.
- Divide the brown sugar mixture into two equal portions. Spread one portion evenly over the bottom of the prepared pan.
- Divide the butter–maple syrup mixture into two equal portions. Pour one portion evenly over the brown sugar layer in the pan.
- Working one roll at a time, take each refrigerated dinner roll and lightly coat it in the remaining brown sugar mixture (toss or press gently so the coating sticks). Arrange the coated rolls in the pan in a circle to form a ring, using all rolls from the two tubes.
- Pour the remaining butter–maple syrup mixture evenly over the arranged rolls.
- Bake for 20 minutes, until the rolls are cooked through and golden on top.
- Remove the pan from the oven and let sit 3–5 minutes. Run a knife around the pan edge if needed, then invert the pan onto a platter to release the sticky bun ring.
Equipment
- fluted (Bundt-style) pan


