

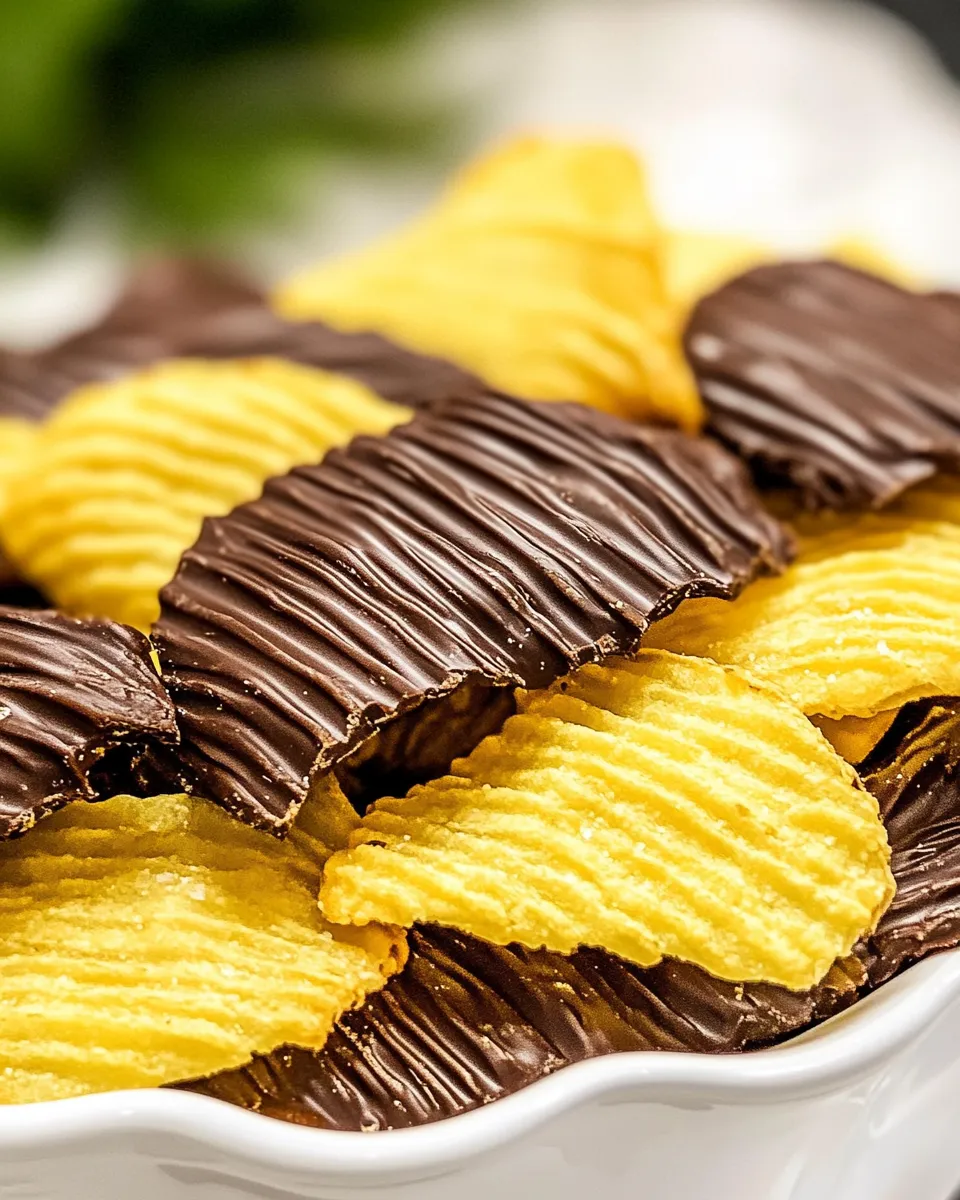
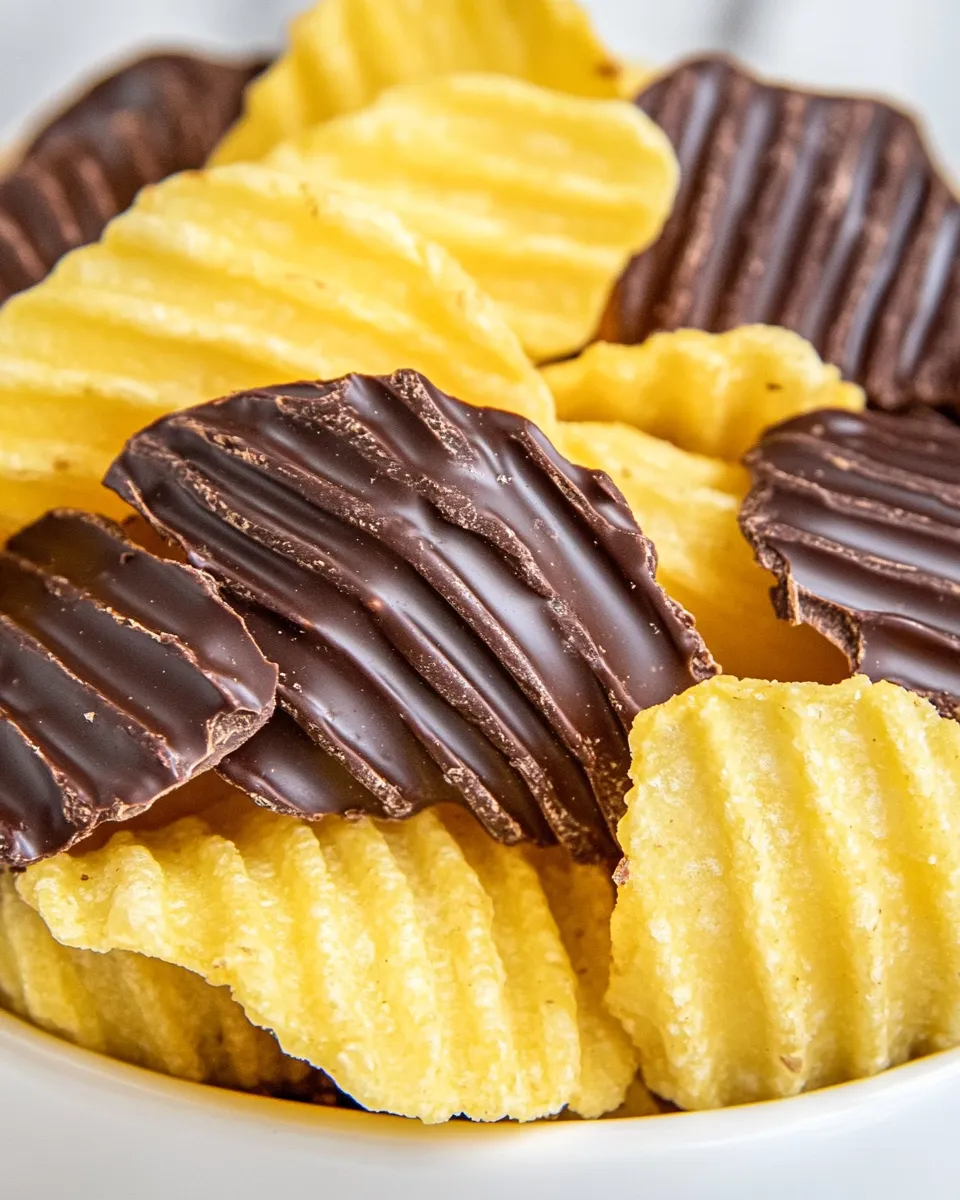
Crunch meets chocolate in the quickest party snack you’ll ever make. These chocolate covered potato chips are salty, crisp, and satisfyingly addictive. I love them because they’re fuss-free: two pantry items and a bit of patience yields something that feels both homemade and indulgent.
I’ll walk you through a clear, reliable method that keeps cleanup minimal and results consistent. There’s nothing fancy here — just sensible tips, smart substitutions, and storage notes so they stay crisp. If you’re making them for a gathering, you can have a tray ready in under 30 minutes.
Ingredients
- 24ozpackage Chocolate Almond Bark — melting chocolate for the coating; follow package melting instructions for best results.
- 10.5ozpackage Wavy Potato Chips — sturdy, ridged chips that hold chocolate well and provide crunch and salt.
What to Buy
Stick to the two essentials listed above: a 24-ounce package of Chocolate Almond Bark and a 10.5-ounce package of Wavy Potato Chips. The “wavy” or ridged chips are important because they resist breakage when you dip them and they hold more chocolate in the grooves for better flavor balance.
If you don’t already have wax paper at home, pick up a roll — it makes cooling and transferring the chips simple and keeps the baking sheet clean. A microwave-safe bowl or a pot for a double boiler is useful, but you likely already own one.
Chocolate Covered Potato Chips in Steps
- Line a baking sheet with wax paper and open the 24 oz package Chocolate Almond Bark and the 10.5 oz package Wavy Potato Chips.
- Melt the Chocolate Almond Bark according to the package directions until smooth (use a microwave-safe bowl or a double boiler per the package instructions).
- Working in small batches, hold one wavy potato chip by an edge and dip about half of the chip into the melted almond bark, letting excess drip back into the bowl.
- Place each dipped chip chocolate-side down on the prepared wax paper in a single layer. Repeat until chips or chocolate are used up; reheat the almond bark per package directions if it begins to thicken.
- Let the chocolate set: leave at room temperature until firm or refrigerate for faster setting (about 10–20 minutes).
- Once the chocolate is fully set, store the chips in an airtight container and keep in the refrigerator or another cool place.
Why Chocolate Covered Potato Chips is Worth Your Time

These chips deliver an immediate contrast: the crunch of potato chip plus the snap and creaminess of chocolate. The salt from the chips brightens the chocolate’s flavor, making each bite more complex than it seems. You get all this with very little hands-on time.
They’re also flexible. Make them for a movie night, wrap a few in cellophane as a neighborly treat, or set them out on a dessert table alongside cookies and brownies. The appearance is appealing — glossy chocolate clinging to neat ridged chips — and they always disappear fast.
Smart Substitutions
If you don’t have exactly what the recipe calls for, here are practical, low-risk swaps that preserve texture and flavor.
- Chocolate Almond Bark — If you don’t have the prepackaged almond bark, use any melting chocolate or compound coating of equivalent weight. The package directions for melting tend to match these products, so follow whichever instructions you have.
- Wavy Potato Chips — Any sturdy, ridged potato chip of a similar size will work. Thin, delicate chips will break during dipping; choose a brand or variety that holds up under a little handling.
Cook’s Kit
These are the tools that make the process quicker and cleaner.
- Wax paper — for cooling the dipped chips and easy cleanup.
- Microwave-safe bowl or double boiler — for melting the Chocolate Almond Bark per package directions.
- Tongs or a fork (optional) — useful if you prefer not to hold each chip by the edge.
- Baking sheet — a flat surface to place the wax paper and arrange chips in a single layer.
- A small plate or shallow bowl (optional) — if you like to rest dipped chips before transferring to the sheet.
Steer Clear of These
A few things will make the process harder or the final result disappointing; avoid them.
- Thin, fragile chips — they’re likely to snap while dipping. Use ridged or kettle-style chips for strength.
- Overheating the chocolate — follow package directions carefully. Chocolate that’s too hot can seize or become grainy.
- Stacking chips while the chocolate is still wet — this will smudge the coating and make them stick together. Give them time to set in a single layer.
- Leaving the finished chips in a warm room — heat softens the coating and can make the chips soggy; store them cool.
Fresh Takes Through the Year
You can adapt the same technique for seasonal variations without adding complicated steps.
- Serve plain for a classic sweet-salty snack that’s welcome at any gathering.
- For colder months, make trays to hand out during neighborhood visits; the firmness of the coating helps them travel well if kept cool.
- In warm weather, keep them refrigerated right up until serving to maintain crunch and prevent melting.
Behind-the-Scenes Notes
I test these by doing a couple of small batches first to gauge how the chocolate behaves. Almond bark and compound coatings melt predictably, but they do thicken as they cool. That’s why the directions call out reheating per package instructions — it keeps the dipping smooth and quick.
Holding the chip by the edge gives you control and keeps fingerprints off the chocolate. Dipping only about half the chip balances salt and sweetness; you can dip more or less depending on taste, but more chocolate takes longer to set and adds sweetness that can overpower the salt.
Prep Ahead & Store
Prep in advance if you need to. You can melt the chocolate and dip the chips a few hours before serving; then refrigerate them to firm up right away. Keep the finished chips in a single layer on wax paper until fully set, then transfer to an airtight container.
Storage tip: follow the recipe’s guidance — store the chips in an airtight container and keep them in the refrigerator or another cool place. Refrigeration speeds setting and helps them stay fresh, especially in warm environments. Let refrigerated chips sit a few minutes at room temperature before serving so the chocolate regains a bit of its creaminess.
Chocolate Covered Potato Chips FAQs
Q: Will the chips become soggy if I store them in the refrigerator?
A: When fully set and kept in an airtight container, they stay crisp. If humidity is high, a short rest at room temperature before serving helps maintain texture.
Q: Can I melt the chocolate in a microwave safely?
A: Yes — follow the package directions for short bursts and stirring in between. That prevents scorching and keeps the chocolate smooth.
Q: How long will they keep?
A: Stored in an airtight container in a cool place, they’ll be good for several days. Refrigeration extends freshness, but bring them toward room temperature briefly before serving for the best texture and flavor.
Q: Do I have to dip half the chip, or can I cover it fully?
A: The recipe suggests dipping about half to balance salt and sweet and to keep them easy to hold. You can dip more or less depending on preference, but note that thicker coatings take longer to set.
Final Thoughts
This is one of those simple recipes that delivers big on satisfaction with minimal effort. Two packaged items, a lined baking sheet, and a few minutes of careful dipping will produce a snack people remember. Keep the workflow steady: melt, dip in small batches, cool the tray, and store cool.
Make a practice batch first if you’re serving them for guests. Once you get a feel for how the Chocolate Almond Bark behaves, the rest is fast and repeatable. Enjoy the crunch—and the praise that comes when you set out a tray of these at your next get-together.

Chocolate Covered Potato Chips
Ingredients
Ingredients
- 24 ozpackage Chocolate Almond Bark
- 10.5 ozpackage Wavy Potato Chips
Instructions
Instructions
- Line a baking sheet with wax paper and open the 24 oz package Chocolate Almond Bark and the 10.5 oz package Wavy Potato Chips.
- Melt the Chocolate Almond Bark according to the package directions until smooth (use a microwave-safe bowl or a double boiler per the package instructions).
- Working in small batches, hold one wavy potato chip by an edge and dip about half of the chip into the melted almond bark, letting excess drip back into the bowl.
- Place each dipped chip chocolate-side down on the prepared wax paper in a single layer. Repeat until chips or chocolate are used up; reheat the almond bark per package directions if it begins to thicken.
- Let the chocolate set: leave at room temperature until firm or refrigerate for faster setting (about 10–20 minutes).
- Once the chocolate is fully set, store the chips in an airtight container and keep in the refrigerator or another cool place.
Equipment
- Baking Sheet
- Wax paper
- Microwave-safe Bowl
- Double Boiler
Notes
BEST CHOCOLATE AND CHIPS TO USE
Sturdy wavy potato chips work best for this recipe. The chips’ ridges give the chocolate something to cling to, and they’re sturdy enough for dipping.
For the chocolate, use chocolate almond bark. It melts like a dream and makes it really easy to dip the chips!
CAN YOU USE CHOCOLATE CHIPS INSTEAD?
I don’t recommend using chocolate chips because they are thicker when you melt them. They have stabilizers that help them keep their shape when baked, so they aren’t great for dipping things. Chocolate almond bark will have a nice dippable consistency.
STORAGE TIPS
Store them in an airtight container in a cool, dry place or the refrigerator. If it’s too warm, the chocolate will soften and melt.
They will keep in the refrigerator or other cool, dry place for up to five days! It’s best to store them in a container and separate the layers with wax paper. That way, the chips won’t stick to each other.


