
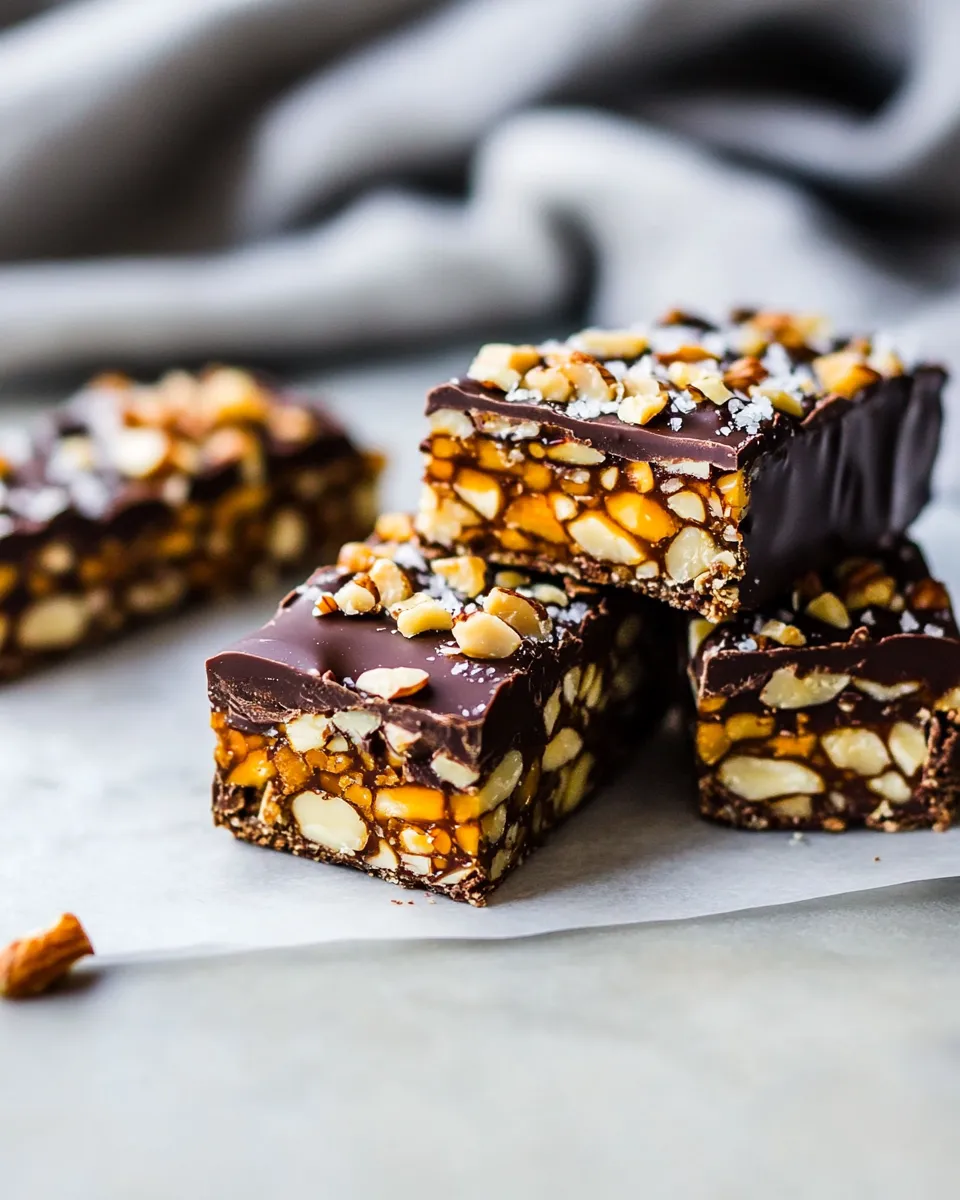
These bars are the kind of thing I bring to a potluck and then quietly watch them disappear. They’re sturdy, sweet, and seriously addictive: honey caramel coats a crunchy blend of nuts and seeds, then gets a dramatic dunk in dark chocolate and a final kiss of flaky sea salt. They’re not fussy, but they do reward a little patience while they cool and set.
I make a tray when I want something that travels well and stores nicely — a snack for the week, a hostess gift, or a weekend treat that feels just a bit luxurious without taking all day. The balance here is important: toasted nuts for depth, seeds for crunch and a bit of earthiness, honey to glue it all together, and dark chocolate to keep things rich and not overly sweet.
Below I’ll walk you through exactly what goes into the bowl, how to bake and finish the slab, and how to avoid common pitfalls so you get clean, chocolate-dipped bars every time. There are practical tips for tweaks, storage, and troubleshooting — no fluff, just what I actually do when I make these again and again.
What’s in the Bowl

- 3/4 cup honey — primary sweetener and binder; it caramelizes in the oven to glue the mix together.
- 2 tablespoons coconut sugar or brown sugar — adds a bit of caramel depth and helps the honey caramelize without burning as quickly.
- 2 tablespoons coconut oil — loosens the honey mixture so it coats the nuts evenly and helps set the bars.
- 1 teaspoon vanilla — rounds and lifts the honey flavor; stir in after the syrup has cooled slightly.
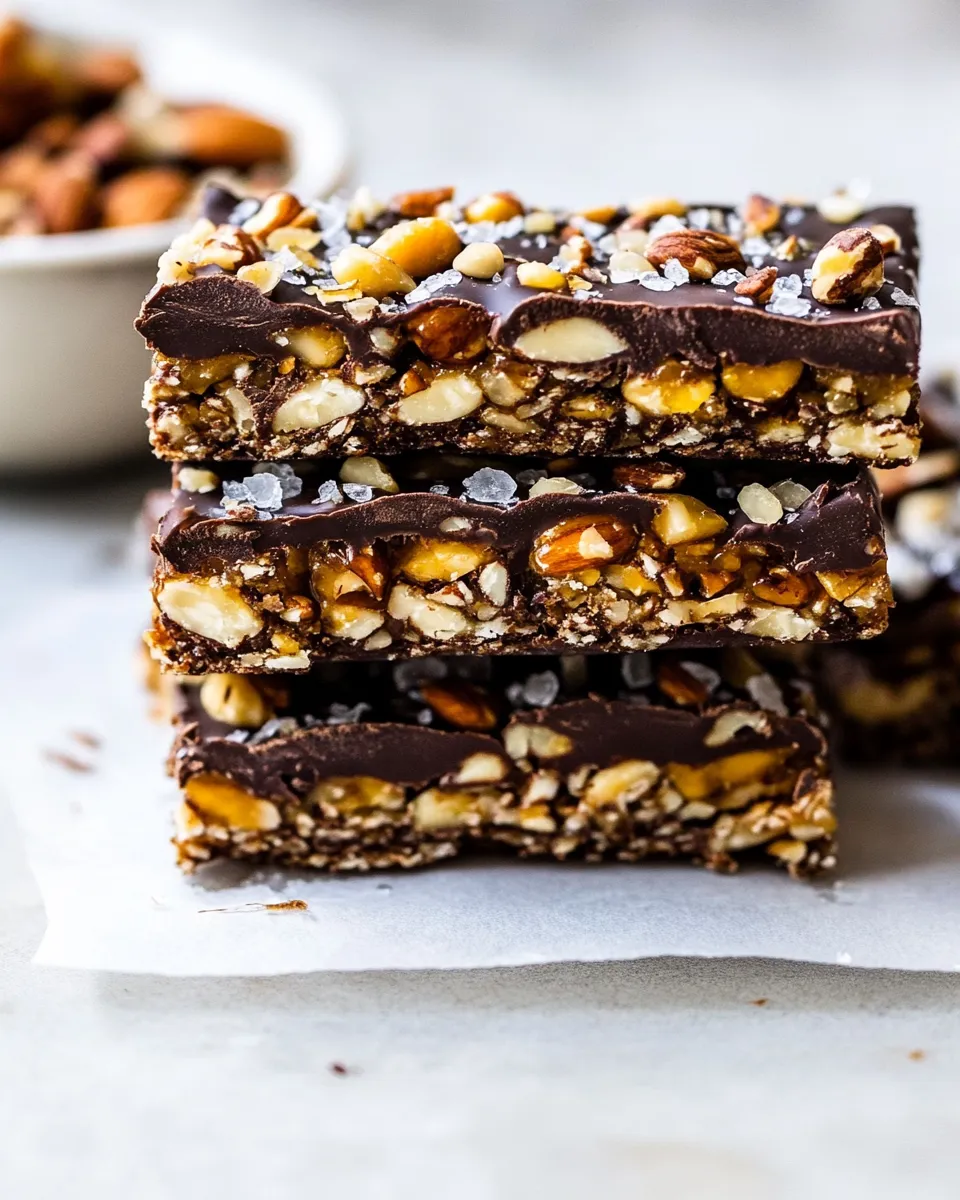
- 1 cup roasted peanuts — toasty backbone; use roasted for immediate flavor.
- 1 cup raw almonds — offers a clean crunch and structure.
- 1/2 cup roasted shelled pistachios — flavor and a pretty green note; roasted intensifies the nutty aroma.
- 1/2 cup roasted cashews — creamy crunch that contrasts the firmer almonds.
- 1/2 cup raw pepitas — pepitas add a tender, nutty pop and help when you want more seed-to-nut ratio.
- 2 tablespoons raw sesame seeds — tiny bursts of toasty flavor and extra texture on top.
- 2 tablespoons raw hemp seeds — soft, nutty bits that increase protein and add chew.
- 8–12 ounces dark chocolate, melted — for dunking; the range lets you cover fully or halfway depending on preference.
- flaky sea salt — sprinkled on the chocolate to finish; it brightens the overall flavor.
Cook Chocolate Dunked Salted Honey Nut Bars Like This
- Preheat the oven to 350°F (175°C). Line a 9×13-inch baking pan with parchment paper, leaving an overhang on two sides for easy removal, and grease the parchment lightly with coconut oil.
- In a medium saucepan, combine 3/4 cup honey, 2 tablespoons coconut sugar (or brown sugar), and 2 tablespoons coconut oil. Heat over medium, stirring, until the mixture comes to a boil. Once boiling, maintain a gentle boil for 3–4 minutes, stirring occasionally to prevent scorching or boiling over. Remove from the heat and allow to cool slightly, then stir in 1 teaspoon vanilla.
- Spread the nuts and seeds in an even layer in the prepared pan: 1 cup roasted peanuts, 1 cup raw almonds, 1/2 cup roasted shelled pistachios, 1/2 cup roasted cashews, and 1/2 cup raw pepitas. Toss to combine, then sprinkle 2 tablespoons raw sesame seeds and 2 tablespoons raw hemp seeds evenly over the top.
- Slowly pour the honey mixture over the nuts and seeds. Use a spatula or the back of a spoon to help distribute the liquid so the mixture is as evenly coated as possible.
- Bake on the middle oven rack for 25–30 minutes, until the top is a deep golden color. For gooey, sticky bars bake about 25 minutes; for firmer, crunchier bars bake closer to 30 minutes. Remove from the oven.
- Cool completely in the pan on a wire rack—several hours at room temperature or until firm. You may refrigerate to speed this (about 1–2 hours). If you use the freezer to firm them quickly, freeze only 20–30 minutes and allow a brief thaw before cutting (fully frozen bars are difficult to cut cleanly).
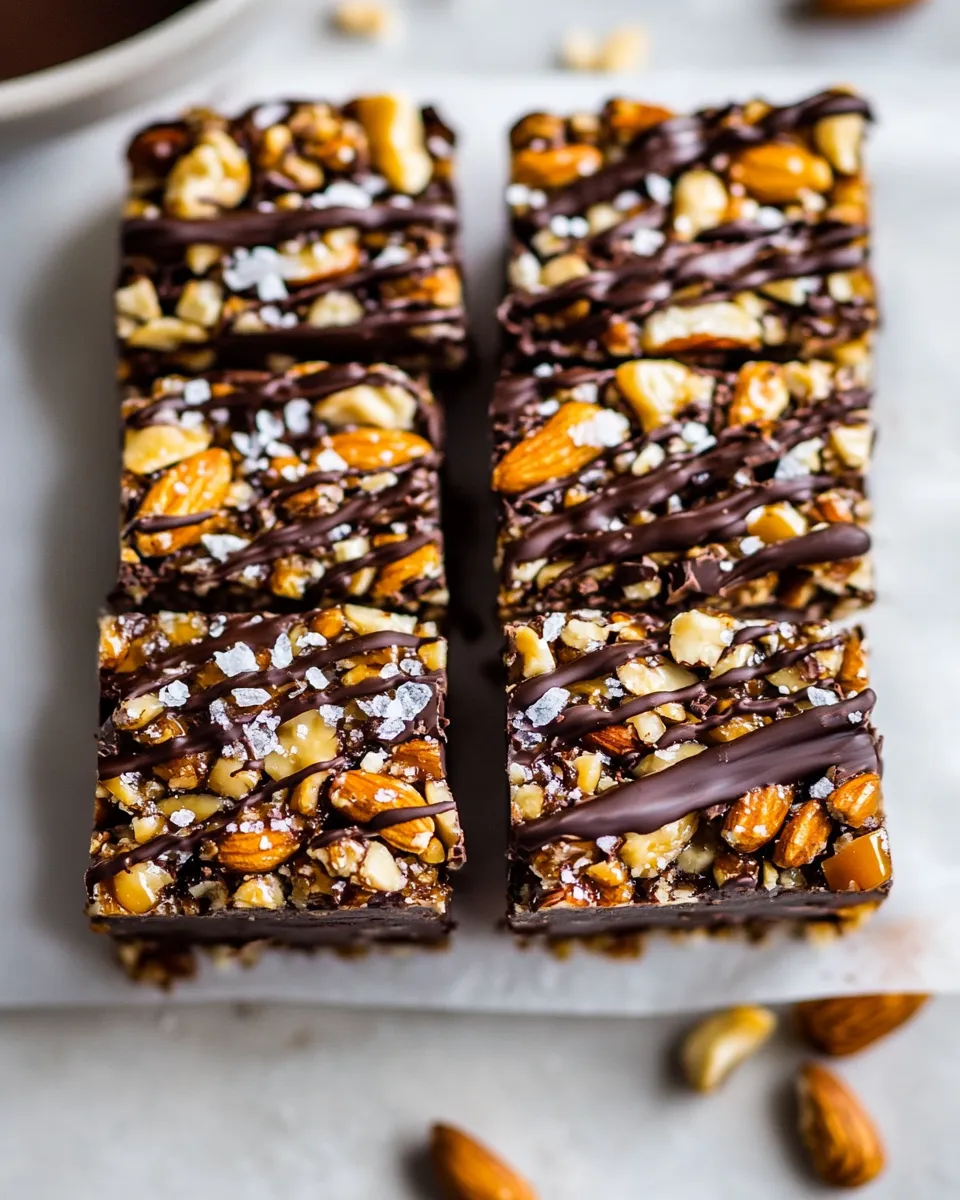
- Lift the slab from the pan using the parchment overhang and place on a cutting board. Using a sharp, long knife, cut into 12–14 bars.
- Line a baking sheet with parchment for the chocolate-dipping step. Place the bars on the sheet and chill or freeze until firm for easier dipping (freeze 20–30 minutes or refrigerate until firm). Meanwhile, melt 8–12 ounces dark chocolate in a heatproof bowl set over simmering water (double boiler) or in the microwave in short bursts, stirring until smooth.
- Dip each chilled bar into the melted chocolate, covering fully or halfway as you prefer. Allow excess chocolate to drip off, then place the dipped bars back on the parchment. Sprinkle each bar with flaky sea salt.
- Return the chocolate-dipped bars to the freezer for about 5 minutes (or to the fridge) to set the chocolate. Store finished bars in a sealed container in a cool, dark place or in the refrigerator.
Why You’ll Keep Making It
These bars hit several cravings at once: crunchy and chewy textures, toasty nut flavors, and a bittersweet chocolate finish. They’re reliably transportable. You can slice them cleanly, stack them in a tin, and they won’t collapse in a bag. That makes them useful for gifting or stashing in the fridge for the week.
They’re also endlessly tweakable while staying straightforward. Want them more chocolate-forward? Use the higher end of the chocolate range. Prefer chewier bars? Pull them at the 25-minute mark. The recipe is forgiving — the structure comes from the honey-caramel and the pan size, both simple to control.
Allergy-Friendly Substitutes
I know nut allergies are common; this recipe relies heavily on nuts. If you’re adapting for sensitivities, keep these practical points in mind.
- To shift the texture without adding new ingredients, increase the quantity of existing seeds (pepitas, sesame, hemp) if you need to reduce or omit certain nuts. Seeds still bind with the honey syrup and provide crunch.
- If a single nut is the problem, leave that specific nut out and make up the volume with the other nuts listed (for example, omit peanuts and increase almonds and pepitas to maintain bulk).
- For a lower-sodium finish, skip the flaky sea salt or use just a light dusting; the bars will still be flavorful because of the roasted nuts and dark chocolate.
Hardware & Gadgets
- 9×13-inch baking pan — gives the right thickness so bars hold together when cut.
- Parchment paper with overhang — makes lifting the slab out effortless.
- Medium saucepan — for the honey-sugar-oil syrup.
- Spatula or wooden spoon — for stirring and spreading the syrup.
- Wire rack — cools the slab evenly so it sets properly.
- Sharp, long knife — necessary for clean cuts through the set slab.
- Baking sheet lined with parchment — for the chocolate-dipping stage.
- Heatproof bowl and double boiler or microwave-safe bowl — to melt the chocolate smoothly.
- Refrigerator or freezer — speeds setting and makes dipping easier.
Watch Outs & How to Fix
Honey burns or boils over
Honey foams and can boil over quickly. Keep the heat moderate, use a saucepan with tall sides, and stir as it comes to a boil. If it starts to brown too fast, reduce the heat immediately and remove from the burner to cool slightly.
Bars crumble when cutting
Cutting too soon is the usual culprit. Make sure the slab is fully cooled and firm. If you’ve refrigerated or frozen to speed the process, allow a short thaw (5–10 minutes) so the knife passes cleanly. Use a long, sharp knife and wipe it clean between cuts.
Chocolate seizes while melting
Keep water away from the chocolate. If you’re using the microwave, heat in short bursts and stir well. For a double boiler, ensure the bowl doesn’t touch the simmering water and lift it off the heat to stir. If chocolate thickens from a splash of water, adding a small, warm spoonful of neutral oil can sometimes smooth it back out.
Better Choices & Swaps
- Roasted vs raw nuts: roasted nuts bring immediate depth; raw nuts keep the flavor fresher. Use roasted peanuts and pistachios as written for a more toasted profile.
- Chocolate range: 8 ounces will cover bars halfway or lightly; 12 ounces gives you full coverage and drips. Choose the amount based on how chocolate-forward you want the bars.
- Adjusting chew vs crunch: shorter bake time for chewier bars, longer for crispness. Watch the color — deep golden = done.
Behind the Recipe
I started making variations of this kind of bar because I needed a portable snack that would last. The technique is old-school candy-making in small doses: make a syrup that holds the mix, bake to intensify flavor and set the structure, then finish with chocolate for contrast. The honey brings a floral sweetness and a glossy finish; the coconut oil prevents the syrup from hardening too brittle, keeping the bars pleasantly chewable.
Little choices — roasting one nut type, scattering seeds on top, or using a higher-percentage chocolate — change the final personality. I like dark chocolate because it offsets the honey, but if you prefer sweeter bars, milk chocolate will do. The flaky salt at the end is non-negotiable for me; it highlights the dark chocolate and brightens the nuts.
Storing Tips & Timelines
Store the finished bars in a sealed container. At room temperature in a cool, dark spot they keep several days; refrigeration extends their life to about 2 weeks. If you stack bars, separate layers with parchment to prevent sticking. If the chocolate softens at room temperature, a quick chill in the fridge will firm it back up.
Handy Q&A
- Can I make these ahead? Yes. Make them, store in a sealed container, and they’ll be fine for gifting or snacking during the week.
- Can I cut different sizes? Absolutely. The recipe suggests 12–14 bars from a 9×13 slab; for bite-sized pieces, cut smaller and expect more pieces.
- Do I have to chill before dipping? It makes dipping neater. If the slab is warm, the bars fall apart or the chocolate won’t set cleanly.
- Why include both coconut sugar and honey? The sugar rounds the caramel notes and helps control the honey’s tendency to scorch while baking.
The Takeaway
These Chocolate Dunked Salted Honey Nut Bars are simple to assemble but feel thoughtful when served. Follow the bake times based on your preferred texture, chill before cutting and dipping for clean edges, and don’t skip the flaky sea salt on top of the chocolate — it pulls everything together. Make a tray, mark the date on the container, and enjoy a snack that travels and stores beautifully.
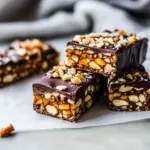
Chocolate Dunked Salted Honey Nut Bars.
Ingredients
Ingredients
- 3/4 cuphoney
- 2 tablespoonscoconut sugar or brown sugar
- 2 tablespoonscoconut oil
- 1 teaspoonvanilla
- 1 cuproasted peanuts
- 1 cupraw almonds
- 1/2 cuproastedshelled pistachios
- 1/2 cuproasted cashews
- 1/2 cupraw pepitas
- 2 tablespoonsraw sesame seeds
- 2 tablespoonsraw hemp seeds
- 8-12 ouncesdark chocolatemelted
- flaky sea saltfor sprinkling
Instructions
Instructions
- Preheat the oven to 350°F (175°C). Line a 9x13-inch baking pan with parchment paper, leaving an overhang on two sides for easy removal, and grease the parchment lightly with coconut oil.
- In a medium saucepan, combine 3/4 cup honey, 2 tablespoons coconut sugar (or brown sugar), and 2 tablespoons coconut oil. Heat over medium, stirring, until the mixture comes to a boil. Once boiling, maintain a gentle boil for 3–4 minutes, stirring occasionally to prevent scorching or boiling over. Remove from the heat and allow to cool slightly, then stir in 1 teaspoon vanilla.
- Spread the nuts and seeds in an even layer in the prepared pan: 1 cup roasted peanuts, 1 cup raw almonds, 1/2 cup roasted shelled pistachios, 1/2 cup roasted cashews, and 1/2 cup raw pepitas. Toss to combine, then sprinkle 2 tablespoons raw sesame seeds and 2 tablespoons raw hemp seeds evenly over the top.
- Slowly pour the honey mixture over the nuts and seeds. Use a spatula or the back of a spoon to help distribute the liquid so the mixture is as evenly coated as possible.
- Bake on the middle oven rack for 25–30 minutes, until the top is a deep golden color. For gooey, sticky bars bake about 25 minutes; for firmer, crunchier bars bake closer to 30 minutes. Remove from the oven.
- Cool completely in the pan on a wire rack—several hours at room temperature or until firm. You may refrigerate to speed this (about 1–2 hours). If you use the freezer to firm them quickly, freeze only 20–30 minutes and allow a brief thaw before cutting (fully frozen bars are difficult to cut cleanly).
- Lift the slab from the pan using the parchment overhang and place on a cutting board. Using a sharp, long knife, cut into 12–14 bars.
- Line a baking sheet with parchment for the chocolate-dipping step. Place the bars on the sheet and chill or freeze until firm for easier dipping (freeze 20–30 minutes or refrigerate until firm). Meanwhile, melt 8–12 ounces dark chocolate in a heatproof bowl set over simmering water (double boiler) or in the microwave in short bursts, stirring until smooth.
- Dip each chilled bar into the melted chocolate, covering fully or halfway as you prefer. Allow excess chocolate to drip off, then place the dipped bars back on the parchment. Sprinkle each bar with flaky sea salt.
- Return the chocolate-dipped bars to the freezer for about 5 minutes (or to the fridge) to set the chocolate. Store finished bars in a sealed container in a cool, dark place or in the refrigerator.
Equipment
- 9x13 inch Baking Pan
- Parchment Paper
- Medium Saucepan
- Spatula
- Oven
- Wire Rack
- Cutting Board
- Sharp Knife
- Baking Sheet
- Heatproof bowl
- Double boiler or microwave
Notes
8. Line a baking sheet with parchment for the chocolate-dipping step. Place the bars on the sheet and chill or freeze until firm for easier dipping (freeze 20–30 minutes or refrigerate until firm). Meanwhile, melt 8–12 ounces dark chocolate in a heatproof bowl set over simmering water (double boiler) or in the microwave in short bursts, stirring until smooth.


