
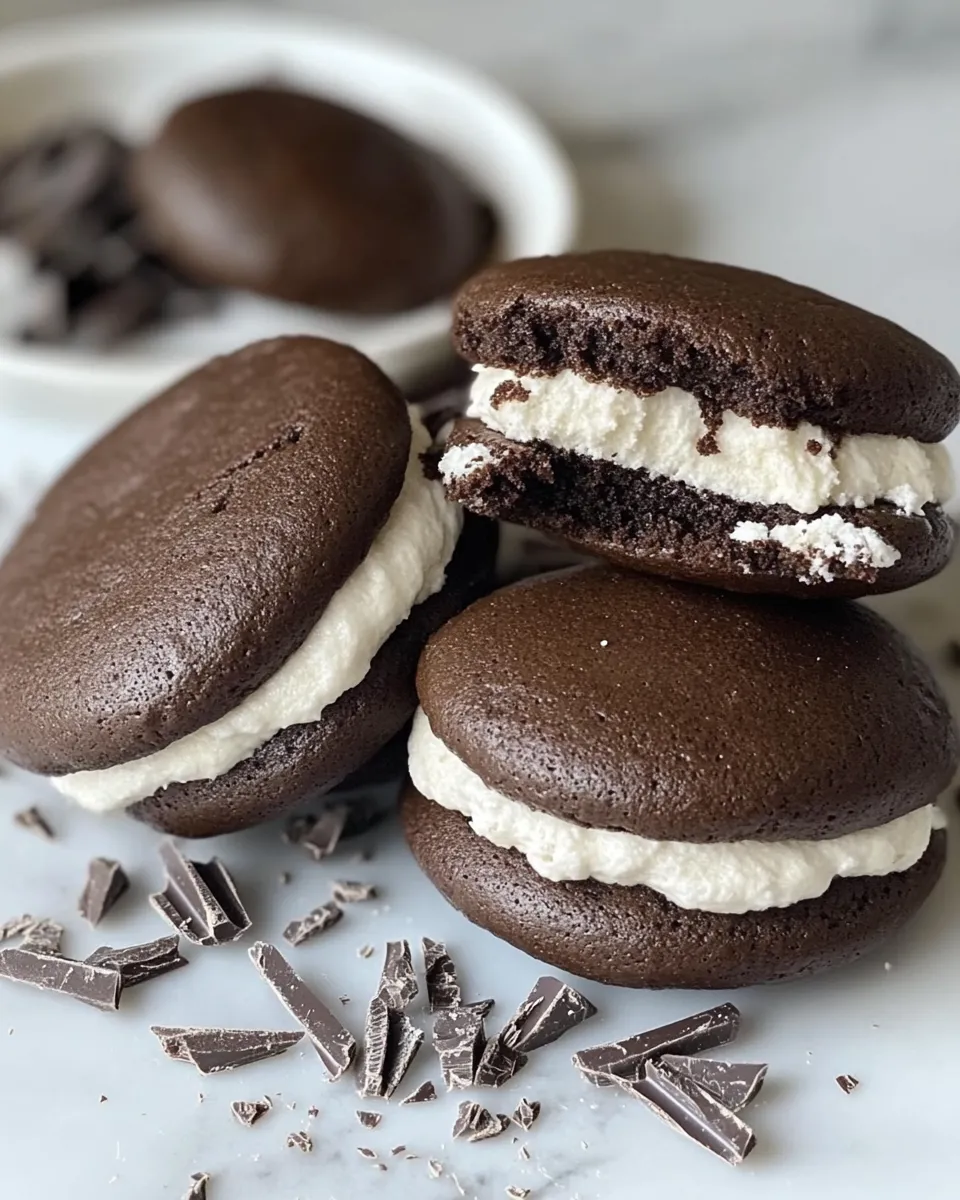
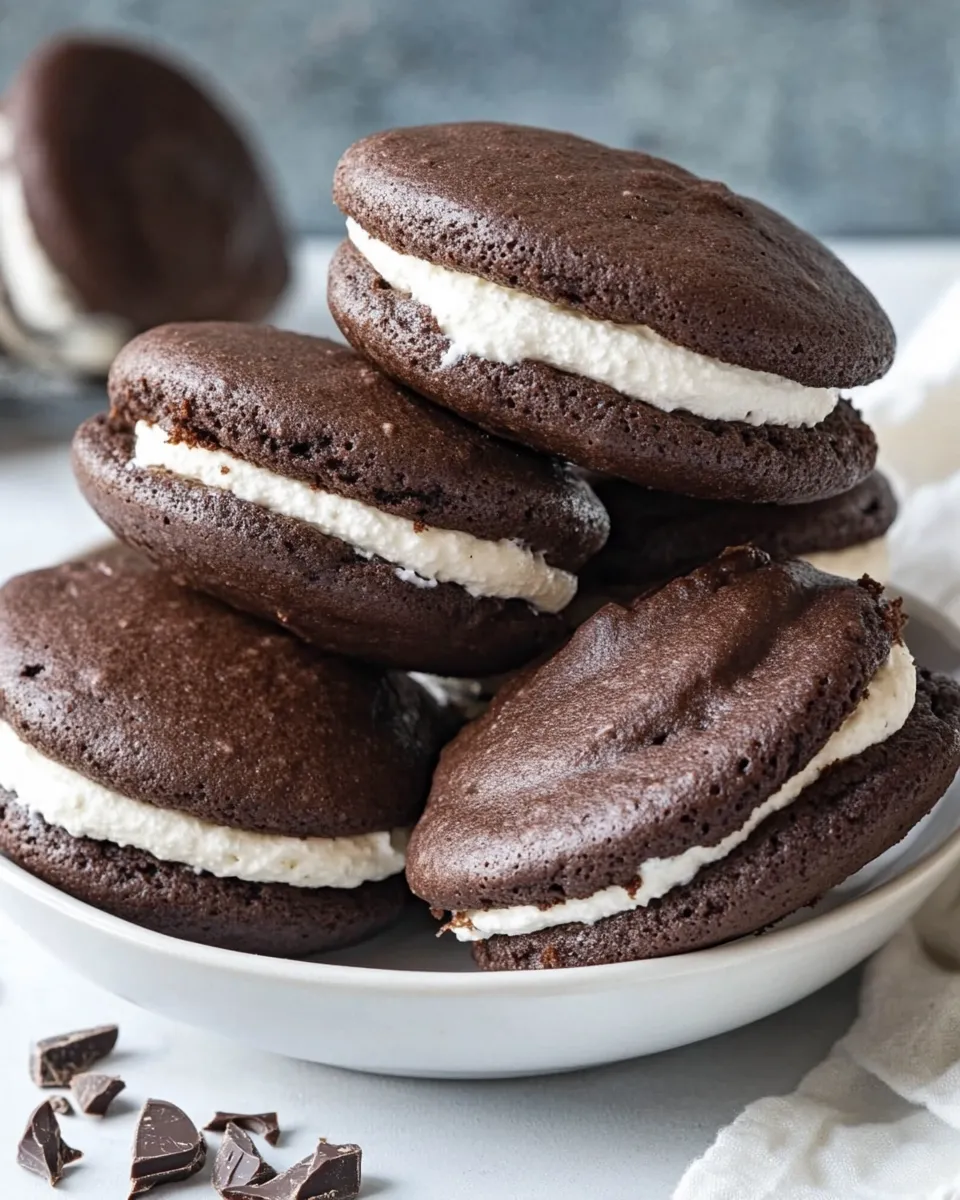
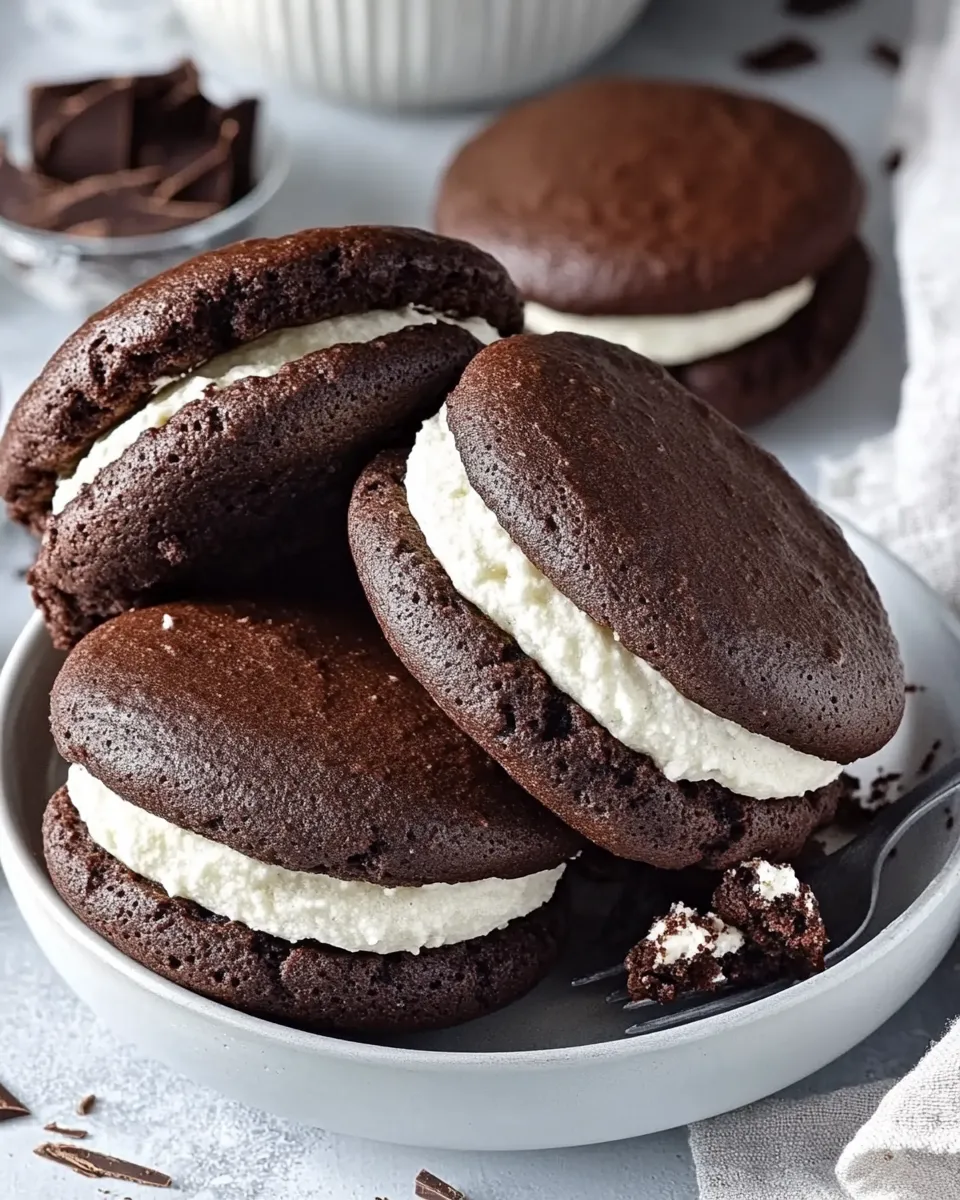
These Chocolate Gobs are the kind of thing I keep in the back of my mind when I want a crowd-pleasing, hands-on dessert that doesn’t overcomplicate the kitchen. They’re pillowy chocolate cookies sandwiched with a marshmallowy filling — familiar, nostalgic, and stubbornly delicious. No fussing with tempering or delicate piping beyond the filling, and they come together fast.
I like making a batch when friends drop by or when I need a dessert to tuck into lunchboxes. The recipe is straightforward: a quick batter, a short blast in a hot oven so the cookies puff and set, and a simple marshmallow filling that gets billowy in the mixer. There’s room to tweak texture and finish, but the base here is reliably good.
If you want dessert that feels homemade but looks put-together, this is it. Below you’ll find the exact ingredients and the step-by-step method I use every time — practical notes, troubleshooting tips, and a few ideas to tailor them for holidays or dietary needs.
What’s in the Bowl
Before you start: these gobs are mostly pantry staples with one or two specialty items (marshmallow fluff and vegetable shortening). The dough is forgiving, and the filling is speedy once the cookies cool. Read through the steps so you know the flow: dry mix, cream shortening and sugar, alternate dry with liquids, bake briefly, then make the filling and assemble.
Ingredients
- 2 cups (260 g) all-purpose flour — forms the structure of the cookies; measure by weight when possible for consistency.
- ½ cup (42 g) unsweetened cocoa powder — gives the chocolate flavor; use a good-quality cocoa for better depth.
- 1 teaspoon baking soda — provides lift so the cookies puff in the oven.
- ¼ teaspoon salt — balances sweetness and enhances chocolate notes.
- ½ cup (92 g) vegetable shortening — creamed with sugar to create a tender crumb and characteristic texture.
- 1 cup (198 g) granulated sugar — primary sweetener; creamed into shortening for aeration.
- 1 whole egg — adds structure and moisture.
- 1 egg yolk — adds richness and tenderness to the cookie.
- 1 teaspoon vanilla extract — flavoring for the batter; enhances overall taste.
- ½ cup (120 ml) buttermilk — adds acidity and a tender crumb; helps react with the baking soda.
- ½ cup (120 ml) hot water — loosens the batter and blooms the cocoa for deeper flavor.
- 1½ cups (192 g) marshmallow fluff — base of the filling; gives the classic marshmallow center.
- 1¼ cups (283 g) vegetable shortening — whipped with fluff to create a stable, spreadable filling.
- 1 cup (113 g) powdered sugar — sweetens and stabilizes the filling; sift if lumpy.
- Pinch of salt — tames sweetness in the filling and rounds the flavor.
- 1 tablespoon vanilla extract — adds a warm, aromatic note to the filling.
Chocolate Gobs — Do This Next
- Preheat oven to 450°F (232°C). Line two baking sheets with parchment paper; set aside.
- In a medium bowl, whisk together the 2 cups (260 g) all-purpose flour, ½ cup (42 g) unsweetened cocoa powder, 1 teaspoon baking soda, and ¼ teaspoon salt. Set the dry mixture aside.
- In the bowl of an electric mixer, cream ½ cup (92 g) vegetable shortening and 1 cup (198 g) granulated sugar on medium speed until light and fluffy, about 3 minutes. Scrape down the bowl as needed.
- Add 1 whole egg, 1 egg yolk, and 1 teaspoon vanilla extract to the creamed shortening and sugar. Beat on medium speed for 1 to 2 minutes, until smooth and fully combined.
- Reduce the mixer speed to low. Add one-third of the dry flour mixture and mix just until combined. Add ½ cup (120 ml) buttermilk and mix again on low until combined. Add the second third of the dry mixture and mix until just combined. Add ½ cup (120 ml) hot water and mix briefly. Add the remaining third of the dry mixture and mix until just combined. Finish by folding the batter a few times with a rubber spatula to ensure everything is incorporated; avoid overmixing.
- Use a medium cookie scoop (about 1½ tablespoons) to drop rounded portions of batter onto the prepared baking sheets, spacing them about 2 inches apart.
- Bake in the preheated oven for 5 to 6 minutes, until the cookies are puffed and set. Let the cookies cool on the baking sheets for about 5 minutes, then transfer them to a wire rack to cool completely.
- Make the filling: In the mixer bowl, beat 1½ cups (192 g) marshmallow fluff and 1¼ cups (283 g) vegetable shortening on medium speed until light and fluffy, about 3 minutes. Reduce speed to low and add 1 cup (113 g) powdered sugar, a pinch of salt, and 1 tablespoon vanilla extract; mix until the sugar is incorporated. Increase speed to medium and beat an additional 3 to 5 minutes, until the filling is light and fluffy.
- Assemble the gobs: Pair cooled cookies by size. Using a pastry bag with a round decorating tip or a spoon, spread the filling onto the bottom side of half the cookies. Top each filled cookie with a remaining cookie to form sandwiches, pressing gently to spread the filling to the edges.
- Store assembled gobs at room temperature in an airtight container for up to 4 days.
Top Reasons to Make Chocolate Gobs

- Quick bake time — the cookies take only 5–6 minutes, so you can have fresh gobs in under an hour.
- Simple pantry ingredients — most items are common; marshmallow fluff is the only specialty product.
- Kid-friendly and nostalgic — they have a classic, comfort-dessert vibe that appeals to all ages.
- Scalable — easily double or halve the batch without changing technique.
- Make-ahead friendly — you can bake cookies in advance and fill them the next day.
Allergy-Friendly Substitutes
Be cautious: the recipe includes eggs, dairy (buttermilk), and vegetable shortening (which is usually soy-based). If you need alternatives, here are practical options to consider — test a small batch first.
- Egg replacement: use a commercial egg replacer or a flax “egg” (1 tablespoon ground flaxseed + 3 tablespoons water per egg), but note texture may change.
- Buttermilk substitute: mix ½ cup milk with ½ tablespoon white vinegar or lemon juice and let sit 5 minutes; this replicates acidity and tenderizing effect.
- Shortening alternatives: some bakers use unsalted butter in place of shortening for both the cookie and filling. Butter will flavor the results differently and can make the filling softer; chill briefly if needed.
- Marshmallow fluff: for a vegan or egg-free marshmallow, look for specialty vegan fluffs; they vary in stability so adjust whipping time.
Appliances & Accessories
- Electric mixer (stand or hand) — required for creaming and for the fluffy filling.
- Medium mixing bowls — one for dry ingredients, one for batter work.
- Rubber spatula — for folding without overworking the batter.
- Medium cookie scoop (about 1½ tablespoons) — gives even cookies that match for sandwiches.
- Baking sheets and parchment paper — parchment prevents sticking and makes cleanup easy.
- Wire rack — cools cookies evenly so the filling doesn’t melt on contact.
- Pastry bag and round tip (optional) — for neat, consistent filling application; a spoon works fine too.
Troubles You Can Avoid
These are common issues and how to prevent them. The fixes are simple and usually don’t require redoing a batch.
- Cookies too flat: don’t overmix the batter. Fold the final dry ingredients in by hand and stop when combined.
- Cookies dry or crumbly: avoid overbaking. The short bake time is deliberate; the cookies should be puffed and set, not browned.
- Filling too soft: if your filling is droopy, chill it briefly to firm up before piping, or reduce mixer speed near the end to avoid warming it with the motor.
- Uneven sandwich sizes: use a medium scoop for uniform cookies and pair by size before filling.
- Filling spills out: don’t overfill; a heaping teaspoon to a tablespoon depending on cookie size is usually enough. Press gently to spread.
Holiday & Seasonal Touches
Chocolate Gobs are an easy canvas for seasonal tweaks. Small additions can make them festive without changing technique.
- Winter/Holiday: press a few crushed peppermint candies into the filling edge after assembly, or add ½ teaspoon peppermint extract to the filling (use sparingly).
- Autumn: fold a pinch of ground cinnamon or pumpkin pie spice into the cookie batter for a warm note.
- Spring/Summer: top with a dab of fruit jam between filling and cookie for a bright counterpoint to the marshmallow.
- Decorative: dip half of each sandwich in melted dark or white chocolate and let it set for gifting or a more polished presentation.
Method to the Madness
Make the Cookies
Whisk the dry ingredients and set them aside. Cream shortening and sugar until light; this step traps air and gives the cookies lift. Add the eggs and vanilla, then alternate dry ingredients with buttermilk and hot water as directed. The hot water blooms the cocoa and thins the batter enough to spread into those puffy rounds. Scoop, bake at a very high temperature briefly, then cool completely so the filling doesn’t melt.
Make and Pipe the Filling
The filling is essentially whipped marshmallow fluff with additional fat and powdered sugar for body. Beat fluff with shortening until light, then incorporate powdered sugar and vanilla; beat longer to aerate. Pipe or spoon onto cookie bottoms, pair, and press to the edges. Let them rest briefly to set for easier handling.
Refrigerate, Freeze, Reheat
The recipe’s source instruction: store assembled gobs at room temperature in an airtight container for up to 4 days. That’s your baseline. If you want to change that timeline slightly:
- Short term: keep at room temperature in a single layer or separated by parchment in an airtight container for up to four days.
- Longer storage: you can freeze either the baked cookies (unfilled) or assembled sandwiches. Freeze on a tray until firm, then transfer to a sealed container or bag. Thaw in the refrigerator or at room temperature before serving.
- Reheating: these are best served at room temperature. If chilled, bring them out 30–60 minutes before serving so the filling softens.
Ask the Chef
Q: Can I use butter instead of shortening?
A: Yes, you can substitute butter in both cookie and filling, but the texture will change. Butter gives more flavor but can make the filling softer and less stable at room temperature. If you use butter, chill briefly before assembling.
Q: My cookies spread too much; what went wrong?
A: Likely overmixed batter or the scoop was too large. Also ensure your oven is at the correct high temperature; the quick puff depends on that initial oven burst.
Q: Can I tint the filling?
A: Yes — use gel food coloring so you don’t change consistency. Add a drop or two when you add the powdered sugar, then beat to distribute color evenly.
Make It Tonight
Plan for about 45–60 minutes start to finish. Preheat the oven, whisk the dry ingredients, cream shortening and sugar, and prepare batter. Bake the cookies in two batches, cool them while you whip the filling, then assemble. If you want to be extra organized: bake the cookies in advance and keep them in a sealed container; make the filling when you’re ready to assemble so it’s at its fluffiest.
These Chocolate Gobs are a dependable go-to: fast, nostalgic, and endlessly tweakable. Make a batch tonight and keep a stack in an airtight tin for afternoon pick-me-ups or an easy treat to bring along to a gathering.

Chocolate Gobs (aka Whoopie Pies)
Ingredients
Ingredients
- 2 cups 260 gall-purpose flour
- 1/2 cup 42 gunsweetened cocoa powder
- 1 teaspoonbaking soda
- 1/4 teaspoonsalt
- 1/2 cup 92 gvegetable shortening
- 1 cup 198 ggranulated sugar
- 1 whole egg
- 1 egg yolk
- 1 teaspoonvanilla extract
- 1/2 cup 120 mlbuttermilk
- 1/2 cup 120 mlhot water
- 1 1/2 cups 192 gmarshmallow fluff
- 1 1/4 cups 283 gvegetable shortening
- 1 cup 113 gpowdered sugar
- Pinchof salt
- 1 tablespoonvanilla extract
Instructions
Instructions
- Preheat oven to 450°F (232°C). Line two baking sheets with parchment paper; set aside.
- In a medium bowl, whisk together the 2 cups (260 g) all-purpose flour, ½ cup (42 g) unsweetened cocoa powder, 1 teaspoon baking soda, and ¼ teaspoon salt. Set the dry mixture aside.
- In the bowl of an electric mixer, cream ½ cup (92 g) vegetable shortening and 1 cup (198 g) granulated sugar on medium speed until light and fluffy, about 3 minutes. Scrape down the bowl as needed.
- Add 1 whole egg, 1 egg yolk, and 1 teaspoon vanilla extract to the creamed shortening and sugar. Beat on medium speed for 1 to 2 minutes, until smooth and fully combined.
- Reduce the mixer speed to low. Add one-third of the dry flour mixture and mix just until combined. Add ½ cup (120 ml) buttermilk and mix again on low until combined. Add the second third of the dry mixture and mix until just combined. Add ½ cup (120 ml) hot water and mix briefly. Add the remaining third of the dry mixture and mix until just combined. Finish by folding the batter a few times with a rubber spatula to ensure everything is incorporated; avoid overmixing.
- Use a medium cookie scoop (about 1½ tablespoons) to drop rounded portions of batter onto the prepared baking sheets, spacing them about 2 inches apart.
- Bake in the preheated oven for 5 to 6 minutes, until the cookies are puffed and set. Let the cookies cool on the baking sheets for about 5 minutes, then transfer them to a wire rack to cool completely.
- Make the filling: In the mixer bowl, beat 1½ cups (192 g) marshmallow fluff and 1¼ cups (283 g) vegetable shortening on medium speed until light and fluffy, about 3 minutes. Reduce speed to low and add 1 cup (113 g) powdered sugar, a pinch of salt, and 1 tablespoon vanilla extract; mix until the sugar is incorporated. Increase speed to medium and beat an additional 3 to 5 minutes, until the filling is light and fluffy.
- Assemble the gobs: Pair cooled cookies by size. Using a pastry bag with a round decorating tip or a spoon, spread the filling onto the bottom side of half the cookies. Top each filled cookie with a remaining cookie to form sandwiches, pressing gently to spread the filling to the edges.
- Store assembled gobs at room temperature in an airtight container for up to 4 days.
Equipment
- Oven
- Mixing bowls
- Electric Mixer
- Rubber spatula
- Baking Sheets
- Parchment Paper
- medium cookie scoop (about 1½ tablespoons)
- Wire Rack
- pastry bag or spoon
Notes
Buttermilk:If you do not have buttermilk and need a substitute, follow the instructionshere.
Shortening:I do not recommend making a substitution in the cookie, as the shortening helps the cookie hold its shape. However, if you want to replace half or all of the shortening with butter in the filling recipe, I think that would totally work!
Filling Substitute:For an even more traditional filling, replace this filling with the cooked white icing recipe from myHo Ho Cake.
Doubling: This recipe can easily be doubled.
Mini:Use a small cookie scoop (or about 2 teaspoons of dough). Reduce the baking time by 1 to 2 minutes.
Storage:The whoopie pies will keep in an airtight container at room temperature for up to 4 days, or in the refrigerator for up to 1 week.
Freezing Instructions:Wrapped individually in plastic wrap, the assembled whoopie pies can be stored in an airtight container or ziploc bag for up to 3 months. Thaw overnight in the refrigerator or for a brief time at room temperature.


