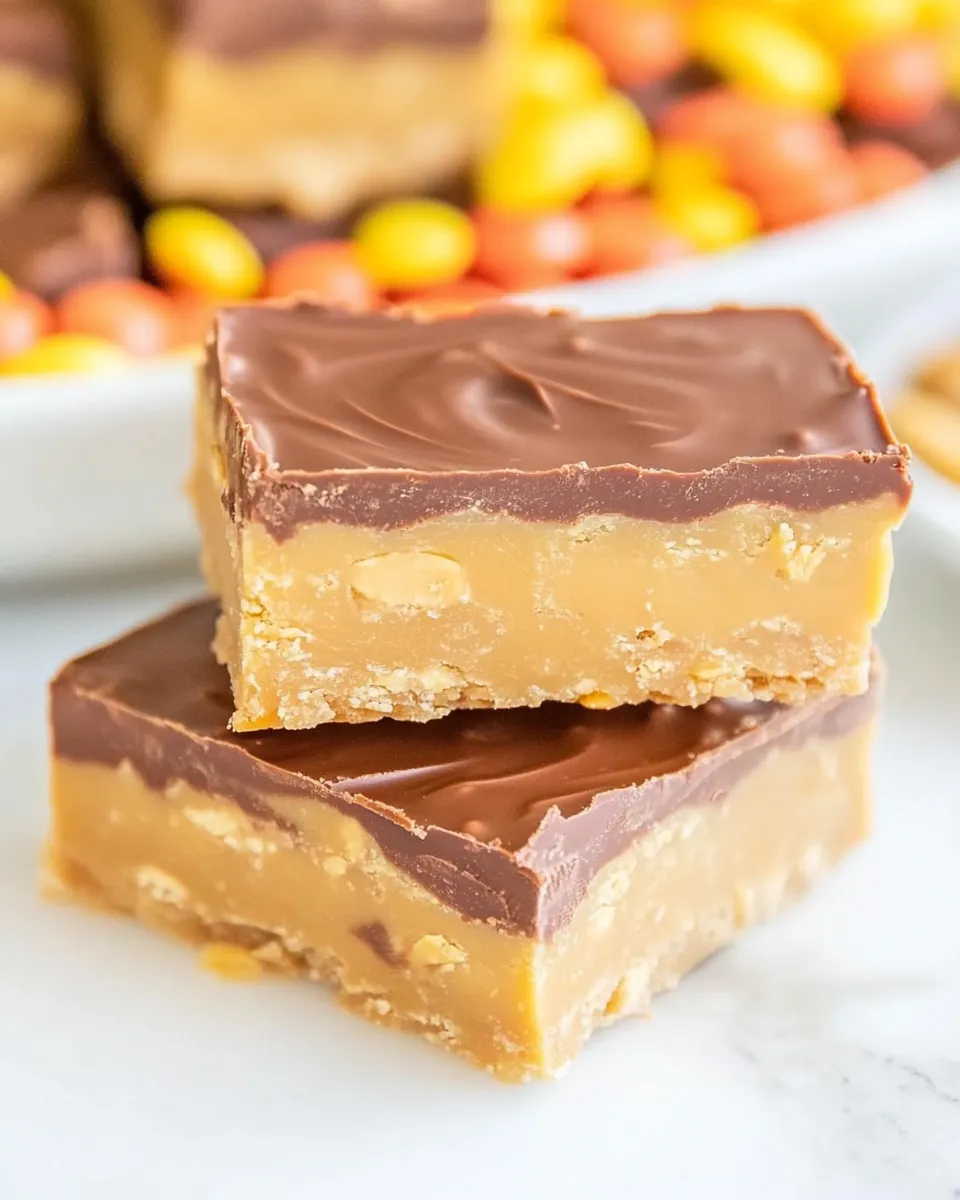
These bars are the kind of treat I make when I want something seriously nostalgic but also fast enough for a weekday afternoon. They don’t require baking, they hold together well, and the flavor is the sort that makes friends ask for the recipe on the spot. Practical, forgiving, and endlessly customizable—perfect for a busy kitchen.
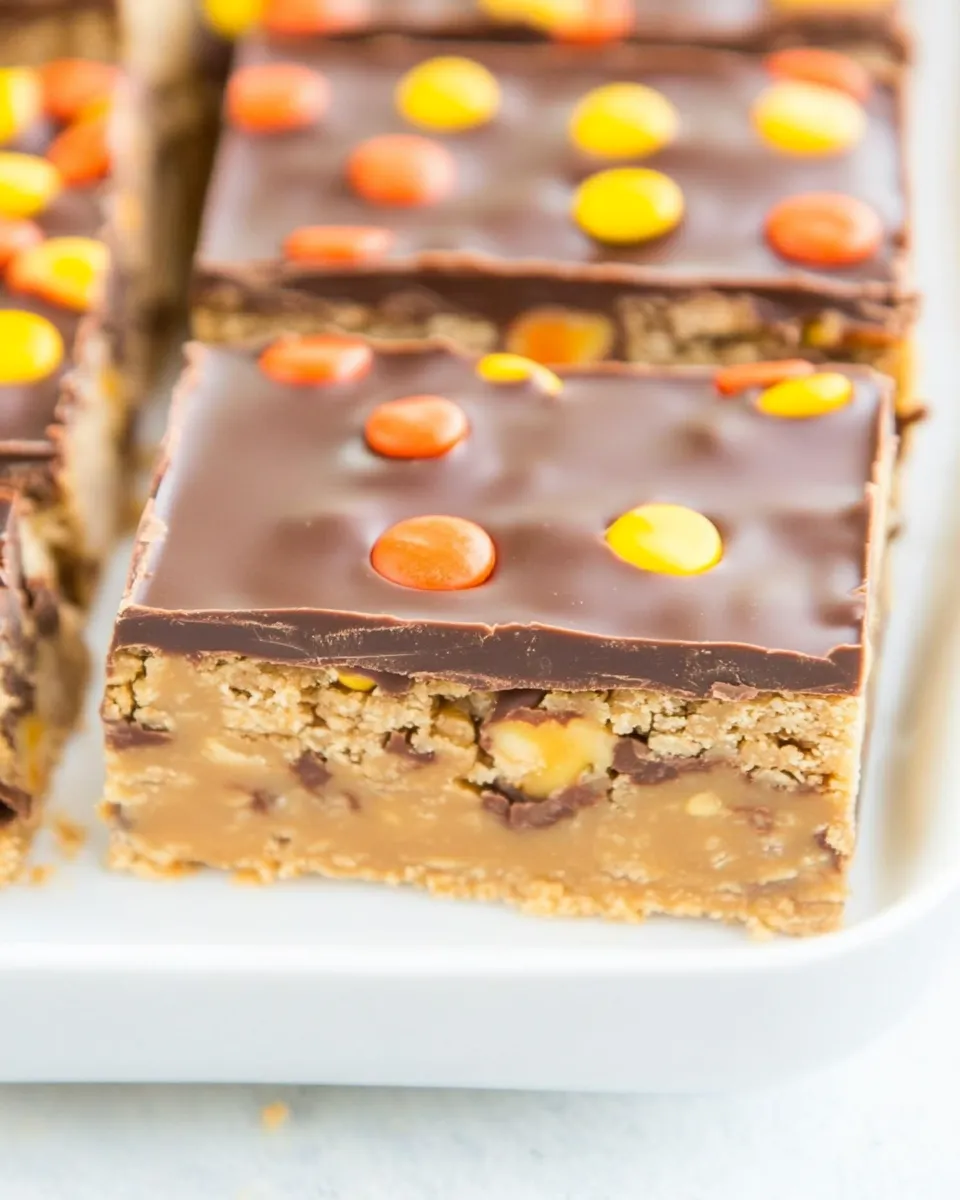
Functionally, this recipe is about binding crunchy cereal with a warm peanut-butter-sugar syrup, topping it with melted chocolate, and finishing with a scatter of bite-sized candy bars. The technique is straightforward and the payoff is reliably addictive. I’ll walk you through each step, list the exact ingredients, and highlight the small tips that make the bars turn out well.
If you’re short on time, a microwave and a few basic tools are all you need. Read through the steps once, prep your pan and ingredients, and you’ll have candy bars that slice clean and travel well. Let’s get into it.
Ingredient List
- 1 heaping cup creamy peanut butter — use Jif, Skippy, or similar; do not use natural or homemade peanut butter; this gives body and helps bind the cereal.
- ½ cup light-colored corn syrup — provides sweetness and the sticky texture that holds the bars together.
- ½ cup granulated sugar — adds sweetness and helps set the filling.
- ¼ cup light brown sugar, packed — contributes a touch of molasses flavor and chew.
- 1 tablespoon vanilla extract — brightens and rounds the sweetness.
- 3 ½ cups Special K Cereal — the crunchy base; it soaks up the peanut mixture while staying crisp enough for texture.
- 1 ¾ cups semi-sweet chocolate chips — the chocolate topping; melts smoothly and provides a stable chocolate layer.
- ¼ cup creamy peanut butter — folded into the melted chocolate for shine and peanut flavor.
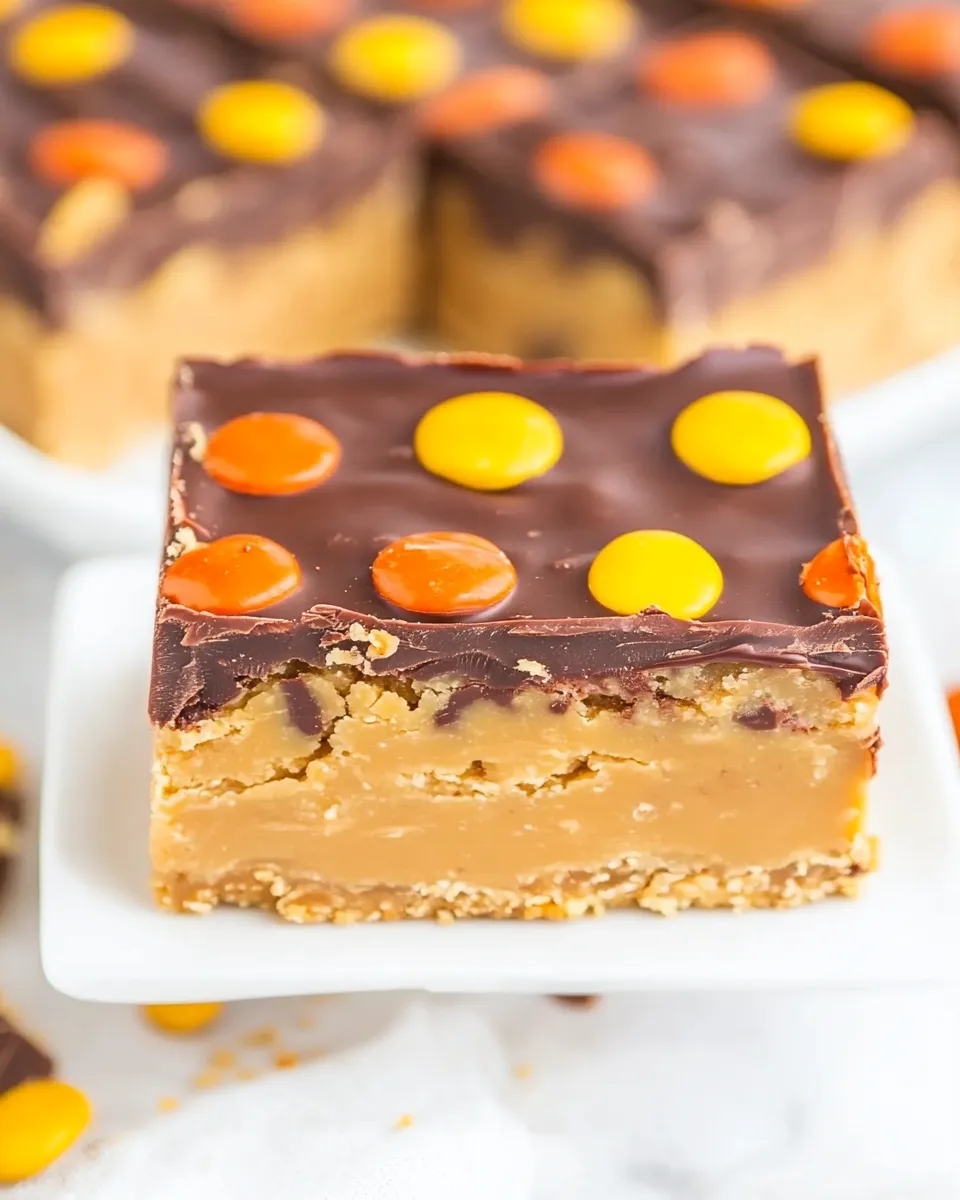
- about 1 cup bite-sized candy bar pieces — for scattering on top; examples used: Rolo, Reese’s Pieces, mini Reese’s Peanut Butter Cups, and Butterfinger Cups; substitute with your favorite candy as desired.
Chocolate Peanut Butter Candy Bars Made Stepwise
- Line an 8×8-inch square pan with aluminum foil and spray the foil with cooking spray; set the pan aside.
- In a large microwave-safe bowl, add 1 heaping cup creamy peanut butter, ½ cup light-colored corn syrup, ½ cup granulated sugar, and ¼ cup light brown sugar (packed).
- Microwave the mixture on high for 1 minute. Remove and stir; the mixture may still be granular.
- Return the bowl to the microwave and heat on high for 1 more minute. Remove and stir.
- Return the bowl to the microwave and heat on high for 30 seconds. Remove and stir. (Total microwave time ~2½ minutes. If the mixture is not combined, heat in additional 10–15 second increments, stirring after each, until smooth enough to stir.)
- Stir in 1 tablespoon vanilla extract.
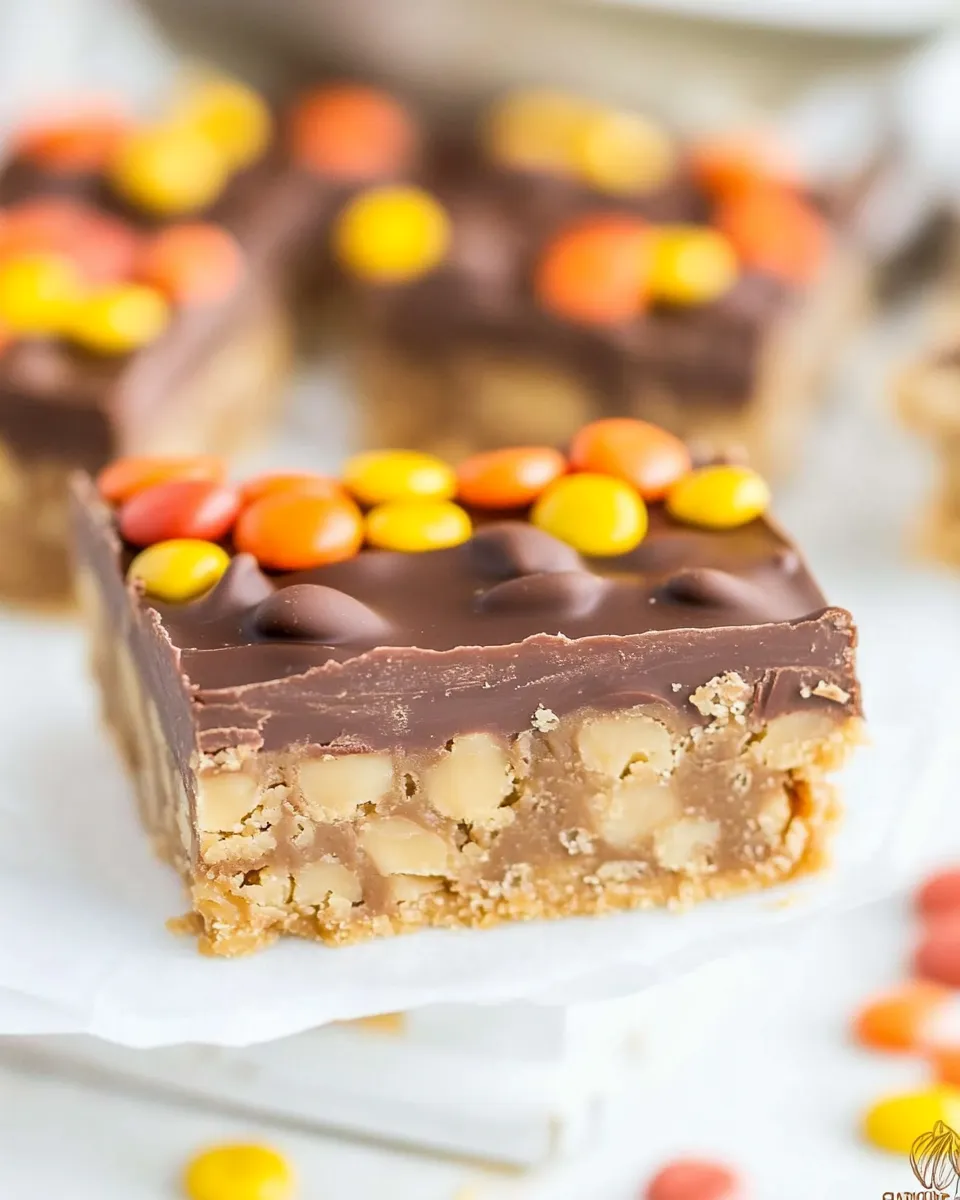
- Add 3½ cups Special K cereal to the peanut butter mixture and stir until the cereal is evenly coated.
- Turn the coated cereal mixture into the prepared pan. Use a spatula to press and pack the mixture somewhat firmly and to smooth the top.
- In a medium microwave-safe bowl, combine 1¾ cups semi-sweet chocolate chips and ¼ cup creamy peanut butter.
- Microwave the chocolate mixture on high for 30 seconds, then stir. Continue heating in 20–30 second increments, stirring after each increment, until the chocolate is fully melted and smooth (about 1½–2 minutes total).
- Pour the melted chocolate mixture evenly over the packed cereal layer and smooth lightly with a spatula.
- Evenly scatter about 1 cup bite-sized candy bar pieces over the chocolate, pressing them down very lightly so they adhere.
- Cover the pan with foil and let the bars cool at room temperature until the chocolate has set, about 4 hours or longer. (If you need them sooner, you can refrigerate to speed setting, but refrigeration may cause cosmetic chocolate bloom or condensation when returned to room temperature.)
The Upside of Chocolate Peanut Butter Candy Bars
There are a few big wins with this recipe. First, it’s no-bake, which means minimal cleanup and no oven time—great for hot days or quick last-minute desserts. Second, the flavor combination is timeless: peanut butter and chocolate is almost universally liked, and the added candy pieces introduce contrast in texture and sweetness.
These bars are also forgiving. The technique (melting, mixing, pressing, topping) is simple, and small deviations won’t ruin the final product. They make excellent party bites, school bake sale items, or afternoon treats to keep in a container for easy snacking. Because they set at room temperature, you can make them in the morning and they’ll be ready by the afternoon.
Budget & Availability Swaps
If you’re watching cost or can’t find a specific brand, you don’t need to overthink it. Use store-brand creamy peanut butter instead of name-brand; it will behave the same in the microwave and bind the cereal. Buy a store-brand version of Special K if the branded box is too pricey—this is the biggest ingredient by volume, so swapping it saves money.
For the candy pieces on top, raid your pantry or the dollar bin. The recipe calls for “about 1 cup” of bite-sized candies, so whatever mix you have—chocolate-covered caramels, miniature peanut butter cups, or small chocolate candies—will work. If you want to trim cost, use fewer candy pieces or swap for chocolate chips instead. The semi-sweet chocolate chips for the topping are easy to find at any grocery store; price shop for the best deal.
Appliances & Accessories
Essential tools:
- Microwave-safe bowls (one large for the peanut mixture, one medium for melting chocolate)
- 8×8-inch square pan lined with aluminum foil
- Spatula for mixing and pressing the cereal layer
- Cooking spray to prevent sticking
- Measuring cups and spoons
Nice-to-have but optional
- A bench scraper or offset spatula for smoothing the chocolate layer
- Small candy scoop or spoon to evenly distribute the candy pieces
What Not to Do
There are a few common mistakes that make these bars less than ideal. Don’t use natural or homemade peanut butter—its oil separation and thinner consistency won’t set properly and the recipe explicitly calls for a standard creamy jar peanut butter like Jif or Skippy. Don’t skip packing the cereal layer firmly; loose packing leads to crumbly bars that fall apart when cut.
When melting the chocolate, don’t overheat. Heat in short increments and stir between each; overheated chocolate can seize and become grainy. Also, press candy pieces down only very lightly so they adhere—pressing too hard can embed them into the chocolate and ruin the clean look and texture.
Health-Conscious Tweaks
If you want to make these a bit lighter without changing the structure of the recipe, consider these practical adjustments: reduce the surface candy layer to cut down on extra sugar, or swap the final candy scatter for a sprinkle of chopped unsalted nuts if you prefer less processed sweets (this is just a topping change—keep the rest the same).
Another easy tweak is to portion smaller bars. Cutting the pan into more pieces reduces per-serving calories and makes the bars go further. Finally, using dark or lower-sugar chocolate chips for the top can modestly cut added sugar—just be mindful that flavor will shift slightly.
If You’re Curious
How will these hold up for gifting or potlucks? They travel well if wrapped tightly in foil or stored in an airtight container. If you’ll be stacking bars, use parchment between layers to prevent sticking. If you want a glossy, showroom-quality chocolate top, allow the chocolate to cool and set at room temperature rather than forcing it in the fridge—rapid cooling increases the chance of bloom or dullness.
Want variety? Change up the candy pieces on top or omit them entirely for a simpler look. The cereal base is versatile: it provides crunch while keeping the bars lighter than a pure peanut-butter-toffee square.
Save for Later: Storage Tips
Keep the bars covered at room temperature and they’ll be fine for several days. If your kitchen is very warm, store them in the refrigerator to prevent softening, but be aware refrigeration can sometimes cause condensation when the bars return to room temperature, which affects appearance. Wrapped tightly in foil or in an airtight container, they also freeze well for longer storage—thaw at room temperature before serving.
Chocolate Peanut Butter Candy Bars FAQs
Can I use crunchy peanut butter?
Crunchy will change the texture of the bars and make the filling slightly less cohesive, but if you enjoy the extra crunch it’s workable. The recipe specifically advises creamy peanut butter for the initial binding step.
My peanut mixture is still gritty after the microwave times—what now?
The recipe notes total microwave time is about 2½ minutes. If your mixture isn’t smooth, continue heating in 10–15 second increments, stirring thoroughly after each. The sugar needs to dissolve into the corn syrup and peanut butter to bind properly.
Can I skip the candy pieces on top?
Yes. They’re purely decorative and add extra sweetness and texture. The bars will still be delicious without them; you can sprinkle chopped nuts or leave the top plain chocolate.
How do I get clean slices?
Use a sharp knife and warm the blade under hot water, dry it, and then slice—wiping the blade between cuts helps keep the edges tidy. Pressing the cereal layer firmly in the pan before topping helps too.
Will the bars be too hard to bite?
When packed somewhat firmly, the bars should hold together but still be easy to bite. If you press too hard during packing, they can become denser. Aim for firm, not rock-solid.
Save & Share
If you make these, save the recipe and share with a friend who loves peanut butter and chocolate. They’re a simple, satisfying project that rewards small effort with big flavor. Tag a friend, wrap a few up, and enjoy how quickly they disappear.
Chocolate Peanut Butter Candy Bars
Ingredients
Ingredients
- 1 heaping cup creamy peanut butter use Jif, Skippy, or similar; do not use natural or homemade peanut butter
- 1/2 cuplight-colored corn syrup
- 1/2 cupgranulated sugar
- 1/4 cuplight brown sugar packed
- 1 tablespoonvanilla extract
- 3 1/2 cupsSpecial K Cereal
- 1 3/4 cupssemi-sweet chocolate chips
- 1/4 cupcreamy peanut butter
- about 1 cup bite-sized candy bar pieces I used Rolo, Reese’s Pieces, mini Reese’s Peanut Butter Cups, and Butterfinger Cups; substitute with your favorite candy as desired
Instructions
Instructions
- Line an 8×8-inch square pan with aluminum foil and spray the foil with cooking spray; set the pan aside.
- In a large microwave-safe bowl, add 1 heaping cup creamy peanut butter, ½ cup light-colored corn syrup, ½ cup granulated sugar, and ¼ cup light brown sugar (packed).
- Microwave the mixture on high for 1 minute. Remove and stir; the mixture may still be granular.
- Return the bowl to the microwave and heat on high for 1 more minute. Remove and stir.
- Return the bowl to the microwave and heat on high for 30 seconds. Remove and stir. (Total microwave time ~2½ minutes. If the mixture is not combined, heat in additional 10–15 second increments, stirring after each, until smooth enough to stir.)
- Stir in 1 tablespoon vanilla extract.
- Add 3½ cups Special K cereal to the peanut butter mixture and stir until the cereal is evenly coated.
- Turn the coated cereal mixture into the prepared pan. Use a spatula to press and pack the mixture somewhat firmly and to smooth the top.
- In a medium microwave-safe bowl, combine 1¾ cups semi-sweet chocolate chips and ¼ cup creamy peanut butter.
- Microwave the chocolate mixture on high for 30 seconds, then stir. Continue heating in 20–30 second increments, stirring after each increment, until the chocolate is fully melted and smooth (about 1½–2 minutes total).
- Pour the melted chocolate mixture evenly over the packed cereal layer and smooth lightly with a spatula.
- Evenly scatter about 1 cup bite-sized candy bar pieces over the chocolate, pressing them down very lightly so they adhere.
- Cover the pan with foil and let the bars cool at room temperature until the chocolate has set, about 4 hours or longer. (If you need them sooner, you can refrigerate to speed setting, but refrigeration may cause cosmetic chocolate bloom or condensation when returned to room temperature.)
Equipment
- 1(8×8 inch) Baking Pan
- 2 Microwave-Safe Bowls
Notes
Adapted from myChewy Peanut Butter and Chocolate Cereal Bars.