
I love desserts that look fancy but are actually quick to assemble. These Chocolate Strawberry Cups fit that bill perfectly: they combine simple pantry ingredients and fresh strawberries into a treat that travels well, impresses guests, and doesn’t demand a pastry degree. They feel celebratory, yet they come together in stages any home cook can manage.
The texture is what sells it — a thin, crisp chocolate shell that gives way to a cold, tangy strawberry cream. The strawberry puree brightens the mix, while the coconut milk and cream cheese create a smooth filling that holds shape without being heavy. You can make them for a dinner party, pack them for a picnic, or keep them on hand for a weekday sweet tooth.
I’ll walk you through the exact ingredients, the step-by-step method, and practical tips I use to avoid common mistakes. There are swaps for special diets, storage advice, and quick troubleshooting notes so your cups come out tidy and delicious every time.
Ingredient Rundown
- 1/2 cup strawberries, hulled — pureed base; use ripe berries for the best flavor.
- 1 tablespoon honey — sweetener that balances the tartness of strawberries.
- 1 teaspoon lemon juice — brightens the fruit and sharpens the flavor.
- 1/2 cup canned coconut milk — provides richness and creaminess; canned is thicker than carton milk.
- 1/3 cup cream cheese, fat-free, softened — creates structure in the filling and keeps it light.
- 5 ounces milk chocolate, coarsely chopped — melts into the cup shells; chopping helps it melt evenly.
- 7 strawberries, quartered — for garnish and a fresh pop on top of each cup.
- mint leaves, fresh — optional garnish that adds color and a fresh aroma.
Method: Chocolate Strawberry Cups
- Put the 1/2 cup hulled strawberries, 1 tablespoon honey, and 1 teaspoon lemon juice into a blender or food processor and blend until smooth.
- In a medium bowl, whisk together the 1/2 cup canned coconut milk and the 1/3 cup softened fat-free cream cheese until the mixture is smooth and no lumps remain.
- Stir the coconut-milk mixture into the strawberry puree until evenly combined. Cover the bowl and refrigerate the strawberry cream for 2 hours.
- Put the 5 ounces coarsely chopped milk chocolate in a small microwave-safe bowl. Microwave on medium power in 10-second bursts, stirring well after each burst, until the chocolate is fully melted and smooth. Be careful not to overcook.
- Line a mini muffin tin with paper liners. Spoon a tablespoon (or enough) of the melted chocolate into each liner, then tilt and rotate each liner so the chocolate coats the bottom and sides to form a cup. Return any excess chocolate to the bowl.
- Place the muffin tin in the refrigerator and chill until the chocolate shells are firm, about 15–20 minutes.
- Remove the tin from the refrigerator and gently peel the paper liners away from each chocolate shell. If a shell softens while peeling, return the tin to the refrigerator briefly to firm up.
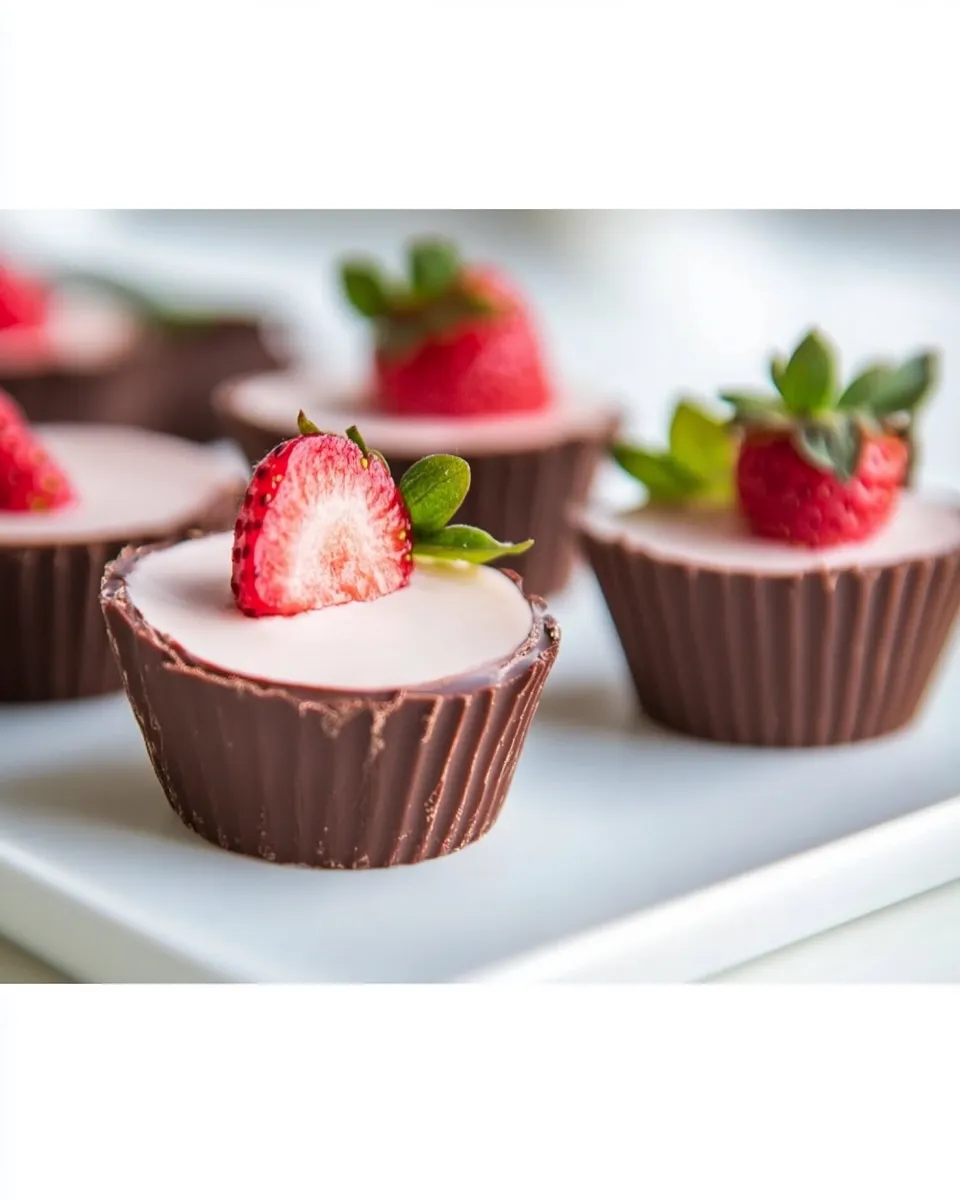
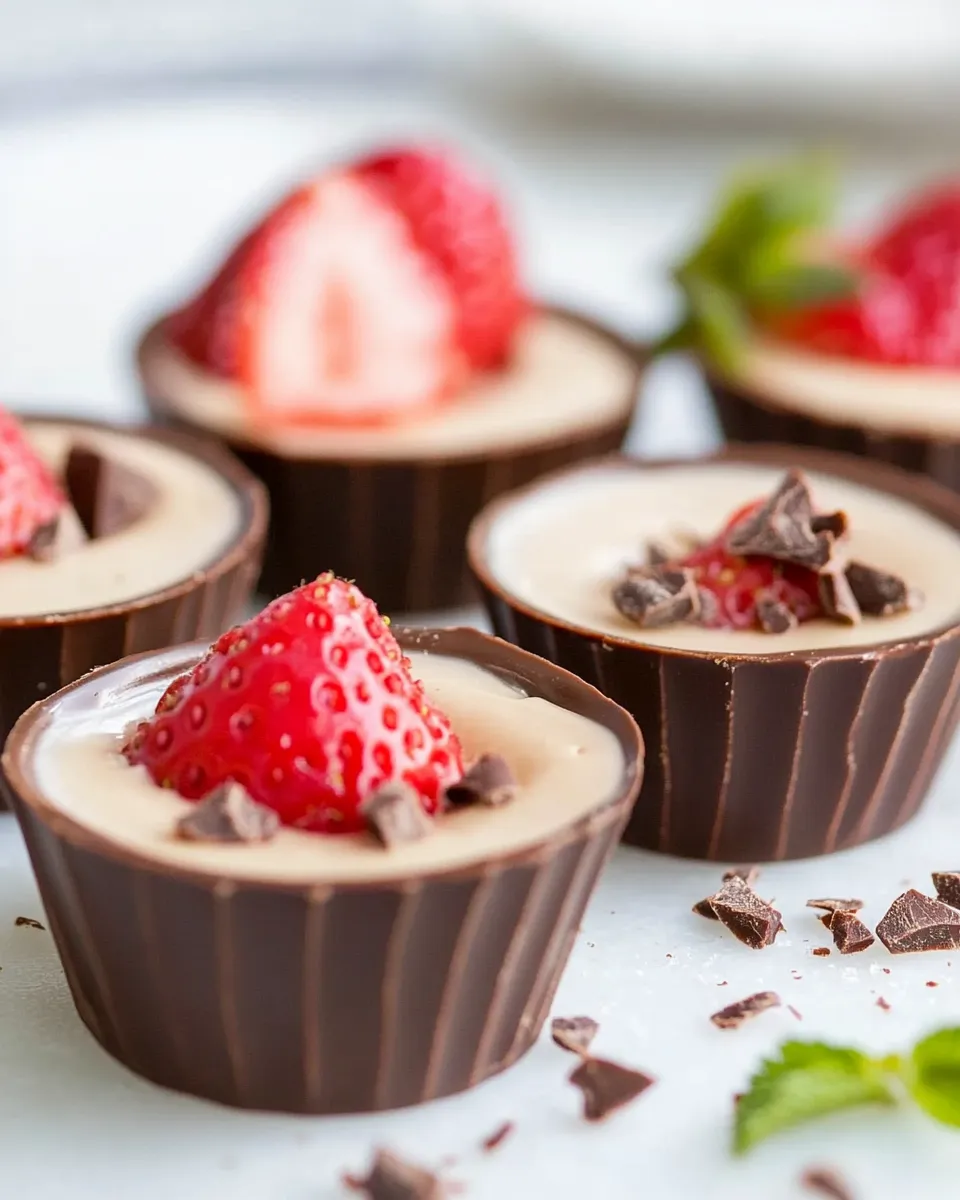
- Spoon or pipe the chilled strawberry cream into each chocolate cup, filling nearly to the top.
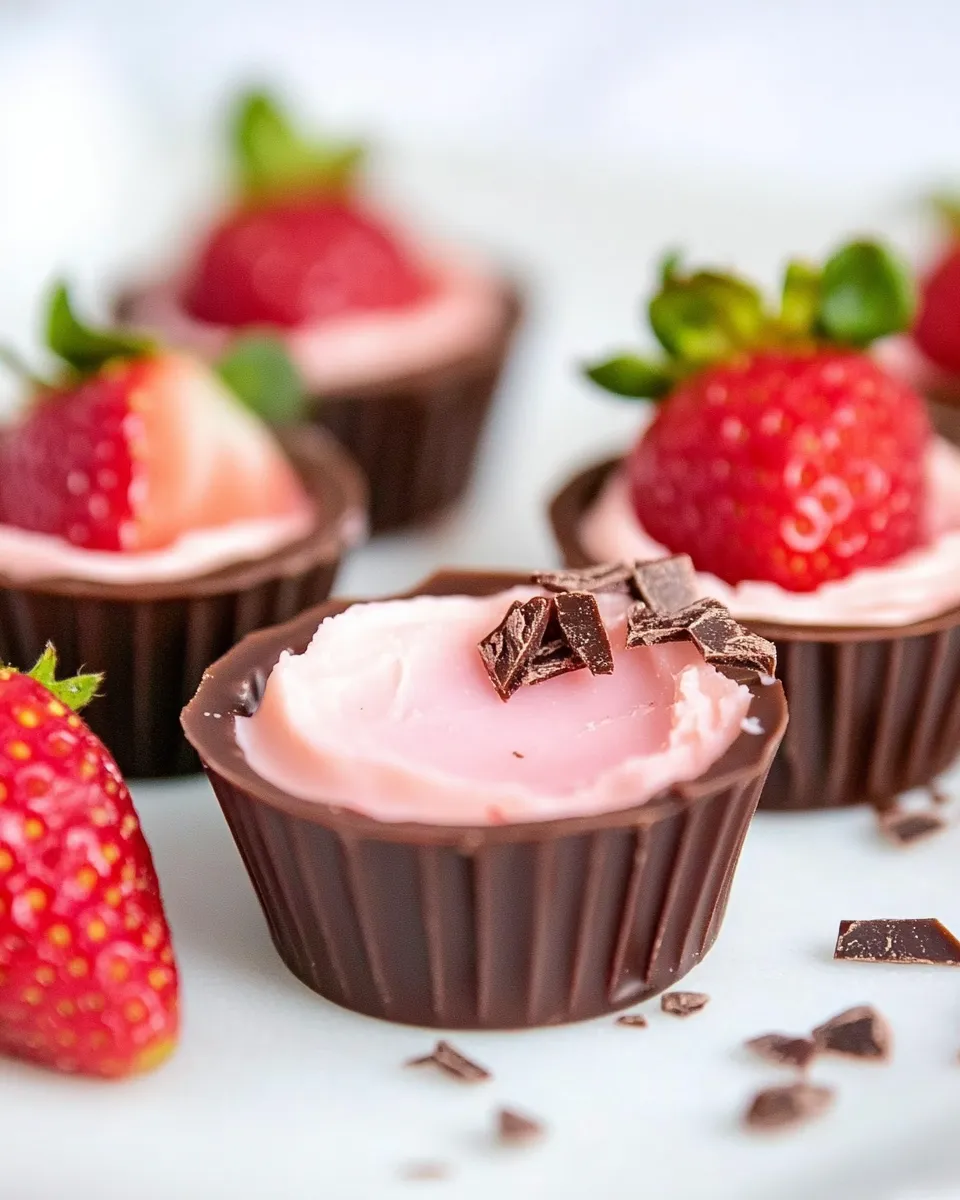
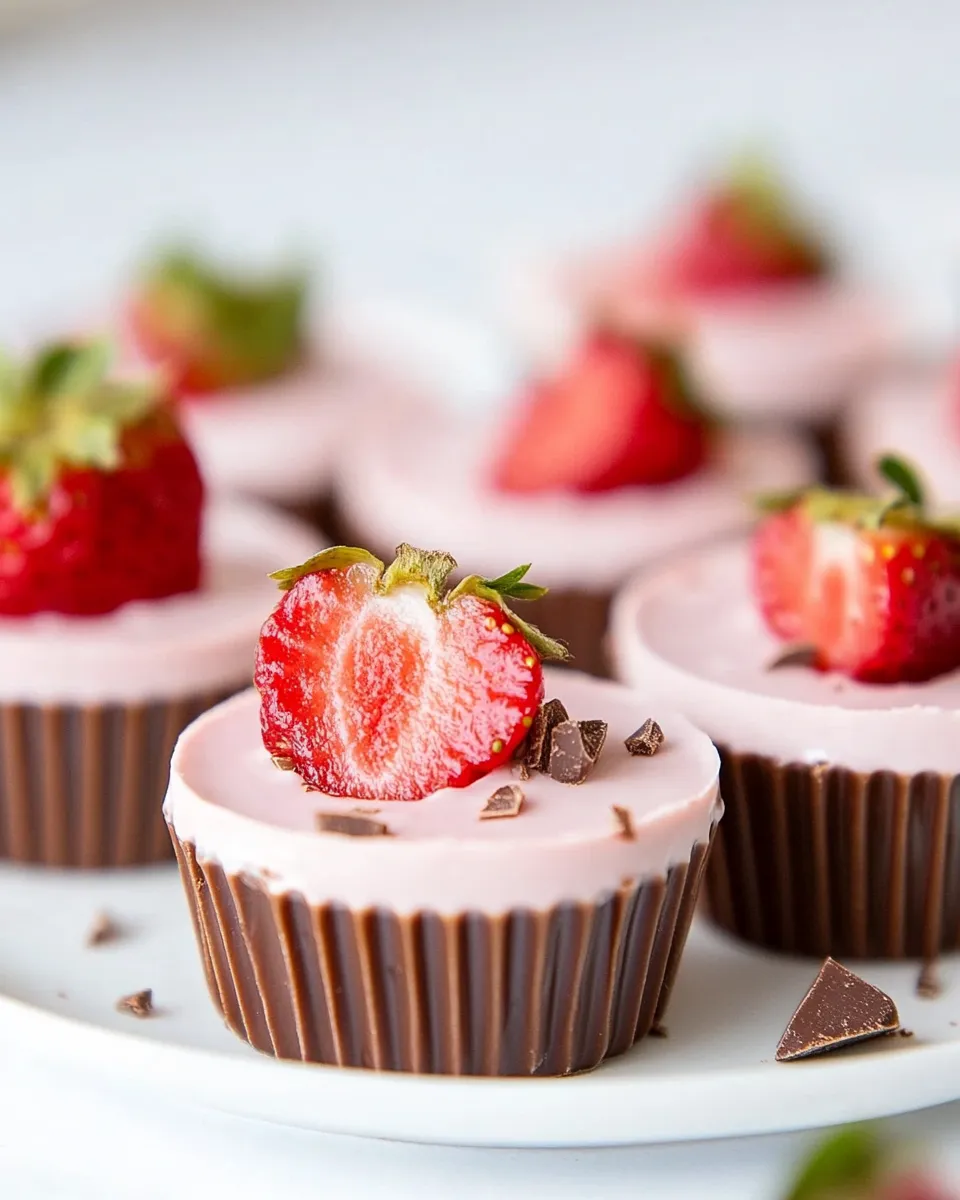
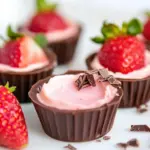
- Top each filled cup with the quartered strawberries (from the 7 strawberries) and a fresh mint leaf as desired. Serve immediately or keep refrigerated until serving.
Why It’s My Go-To
These cups are reliable and versatile. They require no baking, rely on minimal equipment, and spotlight fresh fruit without hiding it under heavy frosting. I reach for this recipe when I want something that looks done-up but is actually approachable. The components are forgiving: if the chocolate needs another chill, it’s an easy fix; if the filling feels loose, an extra 30 minutes in the fridge tightens it up.
The balance of sweet and tart is straightforward to control. Add a touch more honey for a gentler strawberry flavor. Use riper berries if you want them sweeter without changing the recipe. Because the method separates the filling and shell steps, you can pace yourself or assemble in stages on a busy day.
Vegan & Vegetarian Swaps
Vegetarian? This recipe already fits (no meat or gelatin). For vegan adaptations, focus on two swaps: dairy and chocolate. Choose a plant-based cream cheese alternative in place of the fat-free cream cheese, and use a dairy-free chocolate that melts smoothly. Keep the canned coconut milk; it’s already plant-based.
When swapping, pick versions with similar textures. A very watery coconut cream or a thin non-dairy cheese will change the filling’s stability. Test one cup first to confirm set and flavor before doing the whole batch.
Setup & Equipment
You don’t need fancy tools for this project. Set up these basics so the process flows:
- Blender or food processor — for the strawberry puree.
- Medium mixing bowl and whisk — to combine coconut milk and cream cheese until smooth.
- Small microwave-safe bowl — to melt the chocolate safely in short bursts.
- Mini muffin tin and paper liners — to form and chill the chocolate cups.
- Spoon or piping bag — to fill the chilled shells neatly.
- Refrigerator — essential for firming the shells and chilling the filling.
Have a clean towel and a bowl for excess chocolate nearby. It makes tilting the liners and returning extra chocolate easier and less messy.
Errors to Dodge
Watch these common missteps so the final cups look professional and taste great.
- Overheating the chocolate: Melt in short bursts and stir between each one. Chocolate can seize or burn quickly if left unattended.
- Skipping the chill: If the shells aren’t cold enough before removing liners, they’ll tear. Give them the full 15–20 minutes or longer if your fridge is crowded.
- Using watery coconut milk: Canned coconut milk is thicker and gives a creamier filling. Thin milk will make the filling loose.
- Filling hot shells: Make sure shells are chilled before filling; warm chocolate will melt or warp the cup shape.
- Not softening the cream cheese: Work out any lumps by fully softening and whisking the cream cheese before combining with coconut milk.
Seasonal Twists
Strawberries are the star, so lean into their season. In spring and early summer use the ripest local berries you can find. In late summer and fall, you can combine strawberries with a few raspberries for a deeper berry flavor. For a winter version, consider using a bright citrus curd as a topping rather than fresh berries, or swap the strawberry puree for a frozen-thaw berry blend if fresh berries aren’t available.
Another seasonal detail: finish with a tiny sprinkle of flaky sea salt on the chocolate rim for contrast during winter months when richer desserts are welcome.
Chef’s Rationale
Every step has a purpose. Pureeing the strawberries with honey and lemon concentrates flavor and creates a smooth texture that mixes cleanly with the coconut-cream base. The coconut milk adds body and helps the filling set without relying solely on cream cheese — this keeps the mouthfeel lighter while still structured. The two-hour rest chills and firms the filling so it holds shape when piped into chilled shells.
Forming thin chocolate shells ensures the chocolate sets quickly and has the right snap without being too thick to bite through. Cooling the shells before peeling the liners prevents breaks, and piping the filling results in cleaner presentation than spooning, though spooning works fine for casual serving.
Best Ways to Store
Short-term storage: Keep the filled cups in an airtight container in the refrigerator for up to 48 hours. Arrange them in a single layer if possible to avoid squishing the tops and the garnishes.
Longer storage: You can refrigerate the chocolate shells (unfilled) for up to a week before filling. If you need to freeze, put unfilled shells in a single layer on a baking sheet until solid, then transfer to a sealed container for up to one month. Thaw gently in the refrigerator before filling; avoid room-temperature thawing, which can cause condensation and bloom on the chocolate.
Helpful Q&A
- Can I make these ahead? Yes. Prepare the chocolate shells and store them chilled (unfilled) up to a week. Make the filling and keep it refrigerated for up to 48 hours. Fill just before serving for the best texture.
- Can I use dark chocolate instead of milk? Yes. Dark chocolate will make the cups less sweet and more intense. The method is the same; melting time may vary slightly, so watch it closely.
- What if my filling is too loose after chilling? Return it to the refrigerator until it firms up. If it’s still loose, a short whisk with a little more softened cream cheese can help tighten it — add very small amounts and test.
- How can I make the presentation neater? Use a piping bag with a medium round tip to fill the cups, and trim the garnish so each quartered strawberry sits flat on the filling. Wipe any chocolate smudges away before serving.
- Why use canned coconut milk? Canned coconut milk is richer and creamier than carton varieties, which helps the filling set and provides a pleasant mouthfeel.
- Can I skip the paper liners? You can, but liners make it easier to remove the shells gently and serve without breaking. If you omit liners, lightly oil the tin and handle the shells carefully when peeling out.
Final Thoughts
Chocolate Strawberry Cups are a practical, pretty dessert you can feel good about making. They strike a balance between show-stopping and straightforward. Follow the method, watch the chocolate, and give the filling its chill time. A few smart prep choices — good strawberries, thick coconut milk, and patient cooling — take these from simple to memorable.
Make a test tray first if you’re serving guests. It takes one small trial to dial in your chocolate-melting rhythm and filling technique. After that, you’ll have a repeatable, crowd-pleasing dessert that’s quick enough for weeknights and elegant enough for company.
Chocolate Strawberry Cups
Ingredients
Ingredients
- 1/2 cupstrawberrieshulled
- 1 tablespoonhoney
- 1 teaspoonlemon juice
- 1/2 cupcoconut milkcanned
- 1/3 cupcream cheesefat-free softened
- 5 ouncesmilk chocolatecoarsely chopped
- 7 strawberriesquartered
- mint leavesfresh
Instructions
Instructions
- Put the 1/2 cup hulled strawberries, 1 tablespoon honey, and 1 teaspoon lemon juice into a blender or food processor and blend until smooth.
- In a medium bowl, whisk together the 1/2 cup canned coconut milk and the 1/3 cup softened fat-free cream cheese until the mixture is smooth and no lumps remain.
- Stir the coconut-milk mixture into the strawberry puree until evenly combined. Cover the bowl and refrigerate the strawberry cream for 2 hours.
- Put the 5 ounces coarsely chopped milk chocolate in a small microwave-safe bowl. Microwave on medium power in 10-second bursts, stirring well after each burst, until the chocolate is fully melted and smooth. Be careful not to overcook.
- Line a mini muffin tin with paper liners. Spoon a tablespoon (or enough) of the melted chocolate into each liner, then tilt and rotate each liner so the chocolate coats the bottom and sides to form a cup. Return any excess chocolate to the bowl.
- Place the muffin tin in the refrigerator and chill until the chocolate shells are firm, about 15–20 minutes.
- Remove the tin from the refrigerator and gently peel the paper liners away from each chocolate shell. If a shell softens while peeling, return the tin to the refrigerator briefly to firm up.
- Spoon or pipe the chilled strawberry cream into each chocolate cup, filling nearly to the top.
- Top each filled cup with the quartered strawberries (from the 7 strawberries) and a fresh mint leaf as desired. Serve immediately or keep refrigerated until serving.
Equipment
- Blender or Food Processor
- Medium Bowl
- small microwave-safe bowl
- Microwave
- Mini muffin tin
- Paper liners
- Refrigerator


