
These cookie bars are the kind of baking I turn to when I want something that feels indulgent without a long list of steps. They come together in one bowl, rely on a simple pantry lineup, and bake into a chewy, slightly crisp-edged sheet that you can slice and share. I love making a pan on a Sunday afternoon — the house smells like brown sugar and vanilla for hours.
I tested this version several times to nail the texture: not too cakey, not too greasy, with chocolate pockets throughout. The trick is melted butter and packed brown sugar — they give the bars chew and depth. Sprinkle the chocolate on top so every bite has a generous hit of chocolate without sinking.
Below you’ll find everything from the exact ingredient list and step-by-step directions to troubleshooting notes, equipment suggestions, and ways to keep these bars in rotation through the seasons. If you’re short on time but want great results, this is a go-to.
What You’ll Gather
Before you start, line up your ingredients and tools. The recipe is straightforward, but having measurements ready and a prepared pan makes the whole process calm and predictable. A single bowl for mixing, a sieve for the dry ingredients, and a 9×13-inch glass baking dish are the essentials.
Ingredients
- 2 cups packed light brown sugar — provides moisture and that deep, toffee-like flavor.
- ¾ cup unsalted butter, melted — melts into the batter for a dense, chewy crumb; use unsalted so you control the salt level.
- 2 eggs — bind the dough and add richness.
- 2 teaspoons vanilla extract — lifts and rounds the sweetness.
- 2 cups all-purpose flour, sifted — the structure; sifting helps avoid lumps and keeps the texture light.
- 1 teaspoon salt — balances sweetness and enhances flavor.
- 1 teaspoon baking powder — gives the bars a touch of lift so they’re not flat.
- ¼ teaspoon baking soda — works with the brown sugar to improve chew and browning.
- 1½ cups chocolate chips, semisweet or milk — the sweet pockets that make these irresistible; scatter on top for even distribution.
Make Cookie Bars: A Simple Method
- Preheat the oven to 350°F. Grease a 9×13-inch glass baking dish and set aside.
- In a medium bowl combine 2 cups packed light brown sugar and ¾ cup unsalted butter, melted and slightly cooled. Add 2 eggs and 2 teaspoons vanilla extract and stir with a wooden spoon until smooth.
- In a separate bowl sift together 2 cups all-purpose flour, 1 teaspoon salt, 1 teaspoon baking powder, and ¼ teaspoon baking soda.
- Gradually add the sifted dry ingredients to the wet ingredients, stirring after each addition until just combined and no large streaks of flour remain. Do not overmix.
- Pour the batter into the prepared baking dish and spread it into an even layer.
- Sprinkle 1½ cups chocolate chips evenly over the top and gently press a few chips into the batter so they adhere.
- Bake in the preheated oven for 24–28 minutes, until the edges are set and a toothpick inserted near the center comes out with a few moist crumbs (not wet batter).
- Remove from the oven and let the pan cool completely on a wire rack before cutting into bars.
What Sets This Recipe Apart
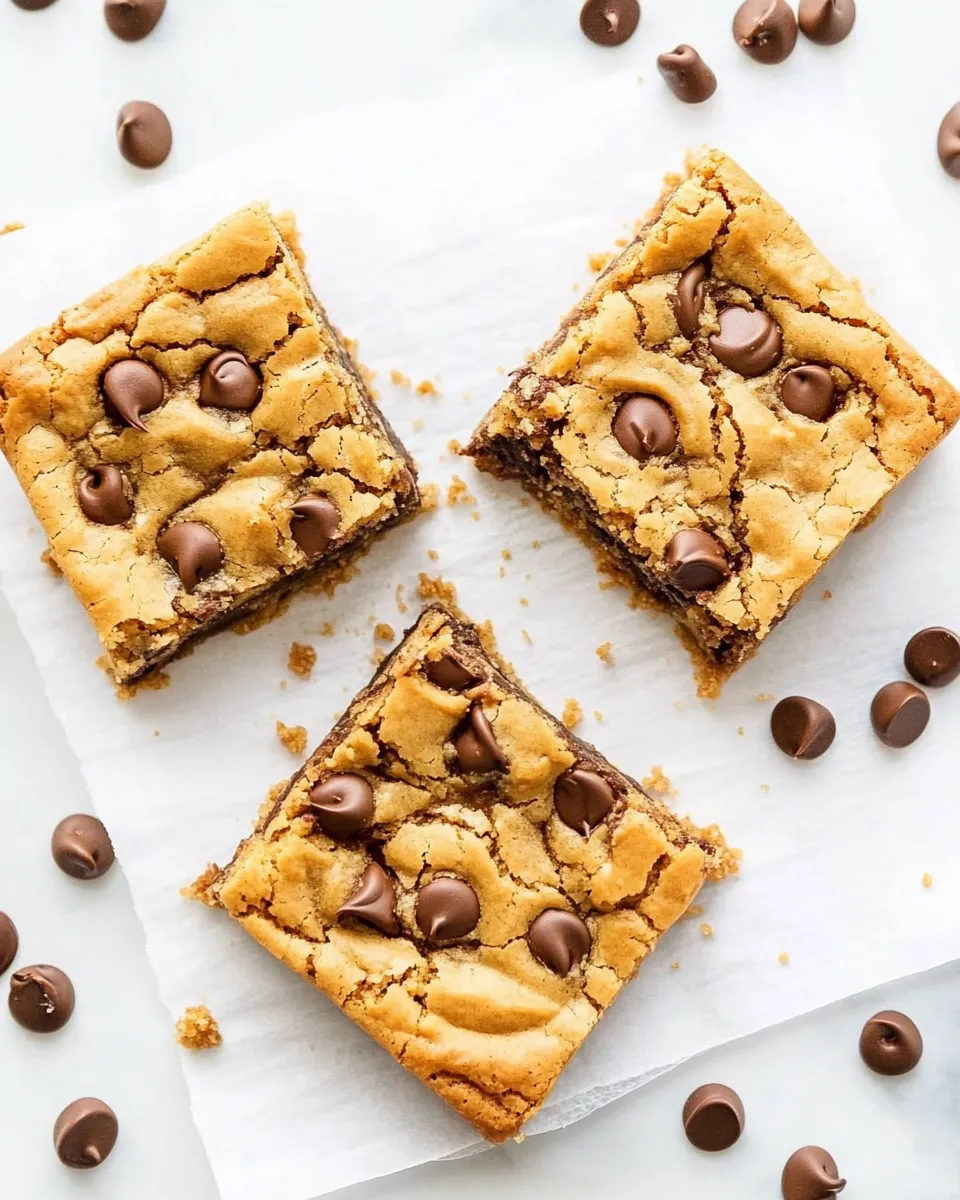
This is not a cookie dropped by spoonfuls; it’s a bar that mimics everything you love about a classic chocolate-chip cookie but in sliceable form. Using melted butter instead of creaming butter and sugar gives the bars a fudgier interior and crisper edge. Packed brown sugar contributes both moisture and that caramel-y depth you notice in good bakery bars.
Another difference: the chocolate chips get scattered on top rather than stirred in, so you get a glossy chocolate surface that browns slightly and gives a dramatic bite. The balance of baking powder and a touch of baking soda keeps the texture just right — light enough to cut easily, dense enough to be satisfyingly chewy.
Low-Carb/Keto Alternatives
If you need to reduce carbs, you can adapt the concept while keeping the method. Note that texture and flavor will change when you swap flours or sugars, so expect the bars to be denser or more friable.
- Flour swap: Try almond flour or a 50/50 blend of almond and coconut flour. Almond flour will give a moist, nutty result, but you’ll need more binders (extra egg) since those flours don’t behave like wheat.
- Sugar swap: Use a granular erythritol blend measured cup-for-cup for brown sugar, and add a teaspoon of molasses or a few drops of maple-flavored extract for that brown sugar note. Do a small test batch first.
- Chocolate: Use sugar-free baking chips made for keto baking. Keep an eye on sweetness to avoid an overly sweet finish from sweeteners that taste different than sugar.
Equipment & Tools
- 9×13-inch glass baking dish — the recipe is tuned for this size; metal pans may brown faster.
- Medium mixing bowl and a separate small bowl for the dry ingredients.
- Sieve or sifter — for aerating the flour and removing lumps.
- Wooden spoon or sturdy spatula — the batter is thick; these handle it well.
- Measuring cups and spoons — accurate measurements matter here.
- Wire rack — let the pan cool completely for clean slices.
- Toothpick — used to check doneness in the center.
Troubleshooting Tips
- Batter seems too wet: If you missed sifting and the batter looks gummy, gently fold in a tablespoon of flour at a time until it holds shape without large wet streaks. Avoid adding too much flour.
- Browning too quickly on edges: Your oven might run hot. Tent the pan loosely with foil for the last 5–10 minutes or lower the oven temperature by 10–15°F next time.
- Center underbaked but edges set: Your pan may be too small or oven temperature uneven. Confirm you’re using a 9×13-inch glass dish and rotate the pan at the 12-minute mark. Also allow full cooling time before slicing.
- Bars too dry: That usually means overbaking. Check at the earliest time in the range (24 minutes) and pull when the toothpick shows a few moist crumbs. Brown sugar keeps moisture, so don’t substitute with white sugar unless you add a tablespoon of extra butter or an extra egg yolk.
- Chocolate chips sinking: Sprinkle them on top as the recipe directs. If chips still sink after pressing, chill the batter briefly (10–15 minutes) before adding chips and baking.
Fresh Seasonal Changes
Cookie bars are forgiving when it comes to seasonal tweaks. In winter, fold in chopped toasted pecans and a pinch of cinnamon for warmth. In spring and summer, swap half the chocolate chips for white chocolate and folded-in freeze-dried strawberry bits for bright flavor and color. Fall invites pumpkin spice and toasted pepitas for texture.
When adding nuts, toast them first in a dry skillet until fragrant — that extra step deepens their flavor. When using fruit or citrus zest, add them to the wet ingredients so they disperse evenly and don’t dry out during baking.
Author’s Commentary
I’ve baked these bars dozens of times for bake sales, potlucks, and cozy coffee mornings. The version here came after I learned the hard way that creaming isn’t always necessary. Melting the butter simplifies the process and makes the bars reliably chewy, even when I’m short on time.
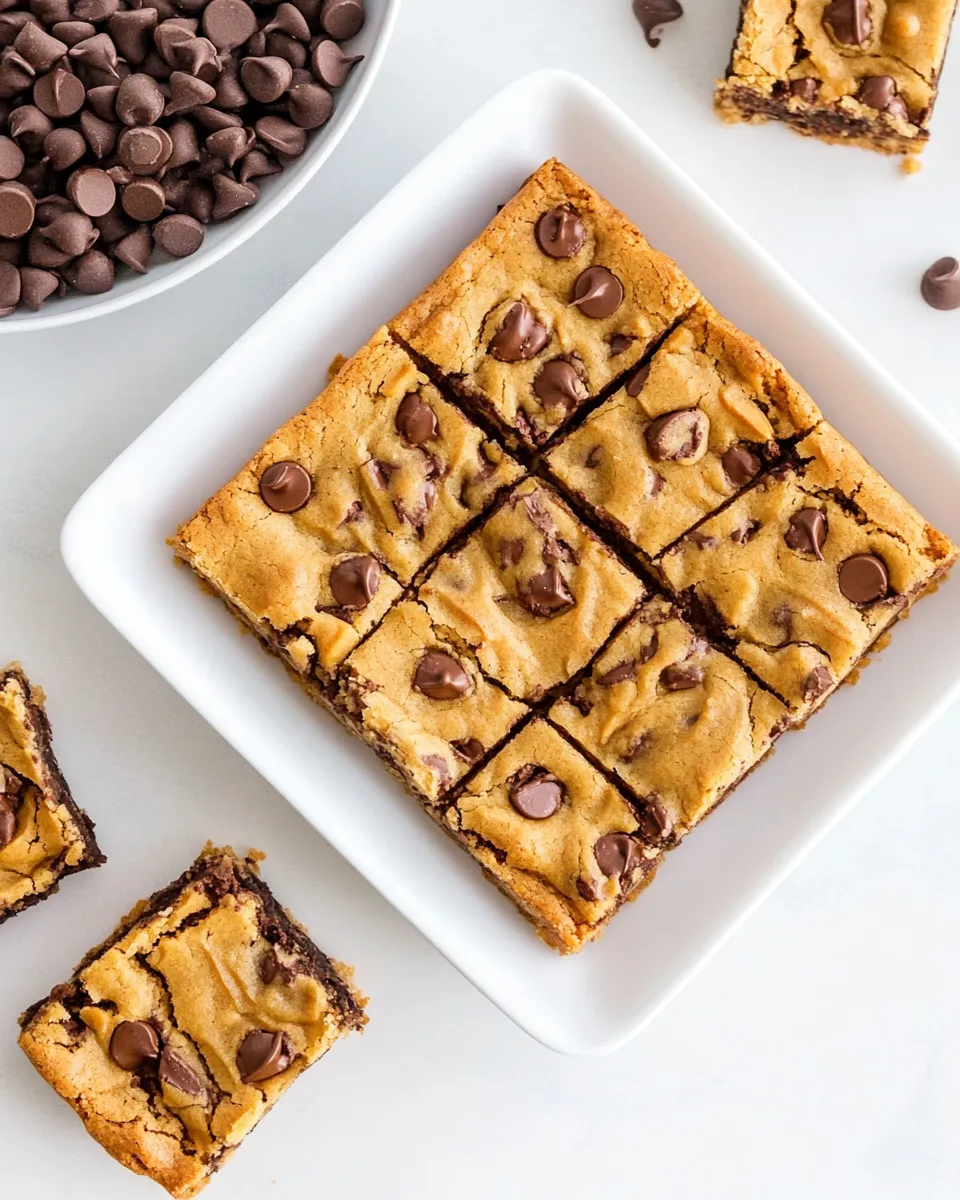
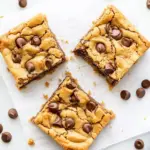
My favorite moment is after cooling and slicing: when the chocolate has cooled to a matte gleam but still melts against your fingertip. I usually cut the pan into 24 small squares for sharing. They travel well in a tin and keep for several days at room temperature if wrapped tightly.
Save It for Later
Room Temperature
Store cooled bars in an airtight container at room temperature for up to 3 days. Layer with parchment paper to prevent sticking. Keep them away from direct heat or sunlight.
Refrigerator & Freezer
- Refrigerator: If you want a firmer texture, refrigerate the bars in an airtight container for up to 7 days. Bring them to room temperature before serving for best flavor.
- Freezer: Wrap individual bars tightly in plastic wrap and place them in a freezer-safe bag for up to 3 months. Thaw at room temperature or warm briefly in a 300°F oven to refresh the top sheen.
Frequently Asked Questions
- Can I use salted butter? Yes, but reduce the added salt slightly or omit it depending on your taste. The recipe calls for unsalted so you can control sodium precisely.
- What if I don’t have a glass baking dish? A metal 9×13-inch pan works, but metal browns faster. Check the bars a few minutes earlier and tent with foil if edges are getting too dark.
- Can I make this gluten-free? Use a 1:1 gluten-free all-purpose flour blend that contains xanthan gum. Texture will be slightly different, but the method stays the same.
- Why top with chocolate chips instead of mixing them in? Topping ensures an even chocolate distribution and a pretty surface. If you prefer chips throughout, fold half into the batter and reserve half for the top.
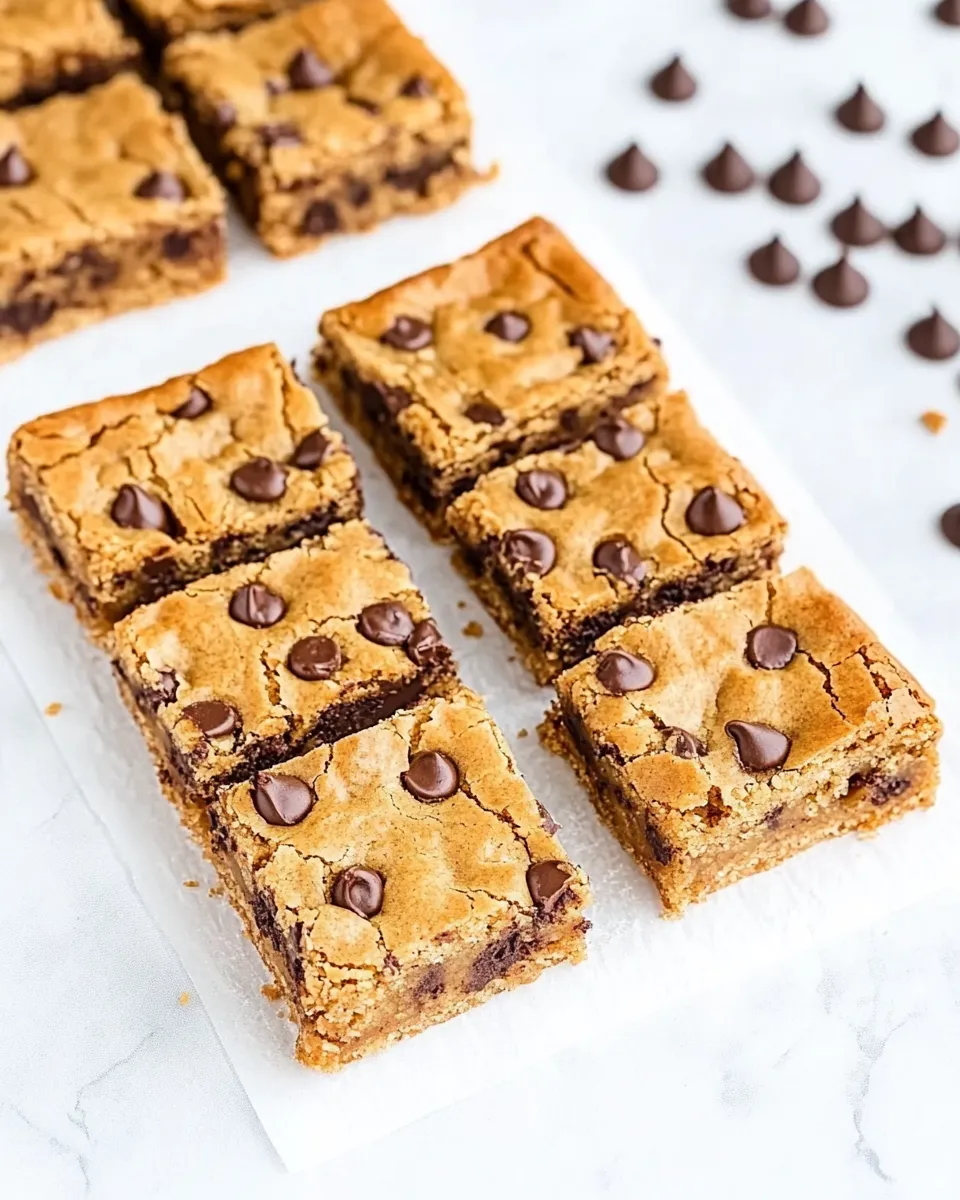
- How do I get clean slices? Let the pan cool completely to room temperature, then chill 20–30 minutes and use a sharp knife. Wipe the knife between cuts for the cleanest edges.
Serve & Enjoy
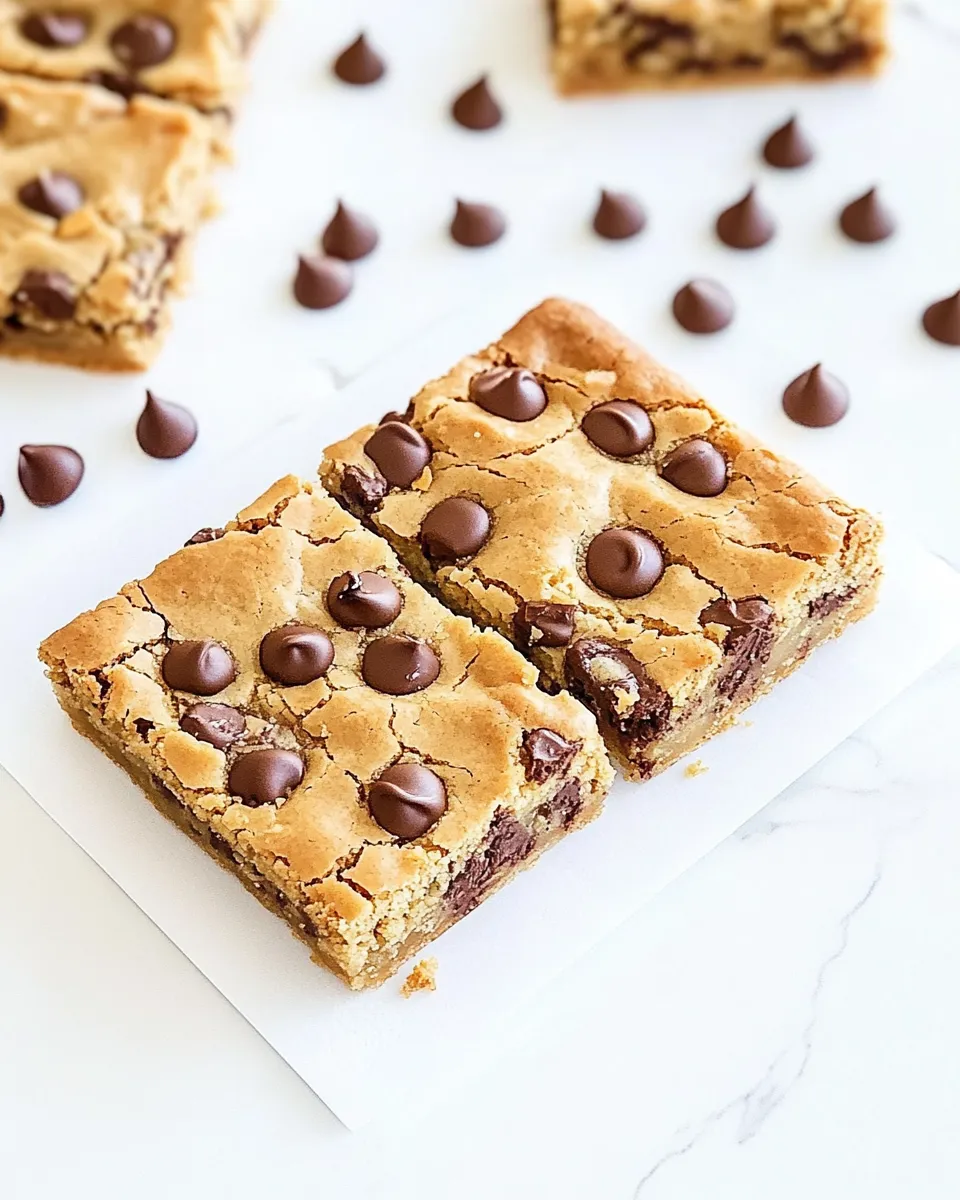
Serve these bars slightly warm or at room temperature. They’re lovely with a cup of strong coffee, a tall glass of milk, or a scoop of vanilla ice cream for a dessert plate. For a casual treat, stack them on a wooden board with a few extra chocolate chips scattered around.
Cut into generous squares for dessert or smaller bites for a bake sale—either way, these cookie bars disappear fast. If you want to make presentation special, dust with a light touch of cocoa powder or drizzle melted chocolate across the top before the chips set. Enjoy — and don’t forget to keep one for yourself.
Cookie Bars Recipe
Ingredients
Ingredients
- 2 cupspacked light brown sugar
- 3/4 cupunsalted butter melted
- 2 eggs
- 2 teaspoonsvanilla extract
- 2 cupsall-purpose flour sifted
- 1 teaspoonsalt
- 1 teaspoonbaking powder
- 1/4 teaspoonbaking soda
- 1 1/2 cupschocolate chips semisweet or milk
Instructions
Instructions
- Preheat the oven to 350°F. Grease a 9×13-inch glass baking dish and set aside.
- In a medium bowl combine 2 cups packed light brown sugar and ¾ cup unsalted butter, melted and slightly cooled. Add 2 eggs and 2 teaspoons vanilla extract and stir with a wooden spoon until smooth.
- In a separate bowl sift together 2 cups all-purpose flour, 1 teaspoon salt, 1 teaspoon baking powder, and ¼ teaspoon baking soda.
- Gradually add the sifted dry ingredients to the wet ingredients, stirring after each addition until just combined and no large streaks of flour remain. Do not overmix.
- Pour the batter into the prepared baking dish and spread it into an even layer.
- Sprinkle 1½ cups chocolate chips evenly over the top and gently press a few chips into the batter so they adhere.
- Bake in the preheated oven for 24–28 minutes, until the edges are set and a toothpick inserted near the center comes out with a few moist crumbs (not wet batter).
- Remove from the oven and let the pan cool completely on a wire rack before cutting into bars.
Equipment
- Oven
- 9x13 inch Baking Dish
- Mixing bowls
- Wooden Spoon
- Sifter
- Wire Rack
Notes
The bars are done
when they have a slightly dull surface and the edges of the crust should also begin to harden and slightly pull away from the surface of the baking dish. If the center is undercooked, return them to bake in the oven immediately and check them for doneness at 5-minute intervals.
Store the dough
wrapped in plastic and refrigerate for 1-2 days or freeze for up to 3 months. Thaw, if needed, press into the pan and bake.
Store c
ookie bars
in an airtight container for 3-4 days or in a freezer Ziploc for 2-3 months.


