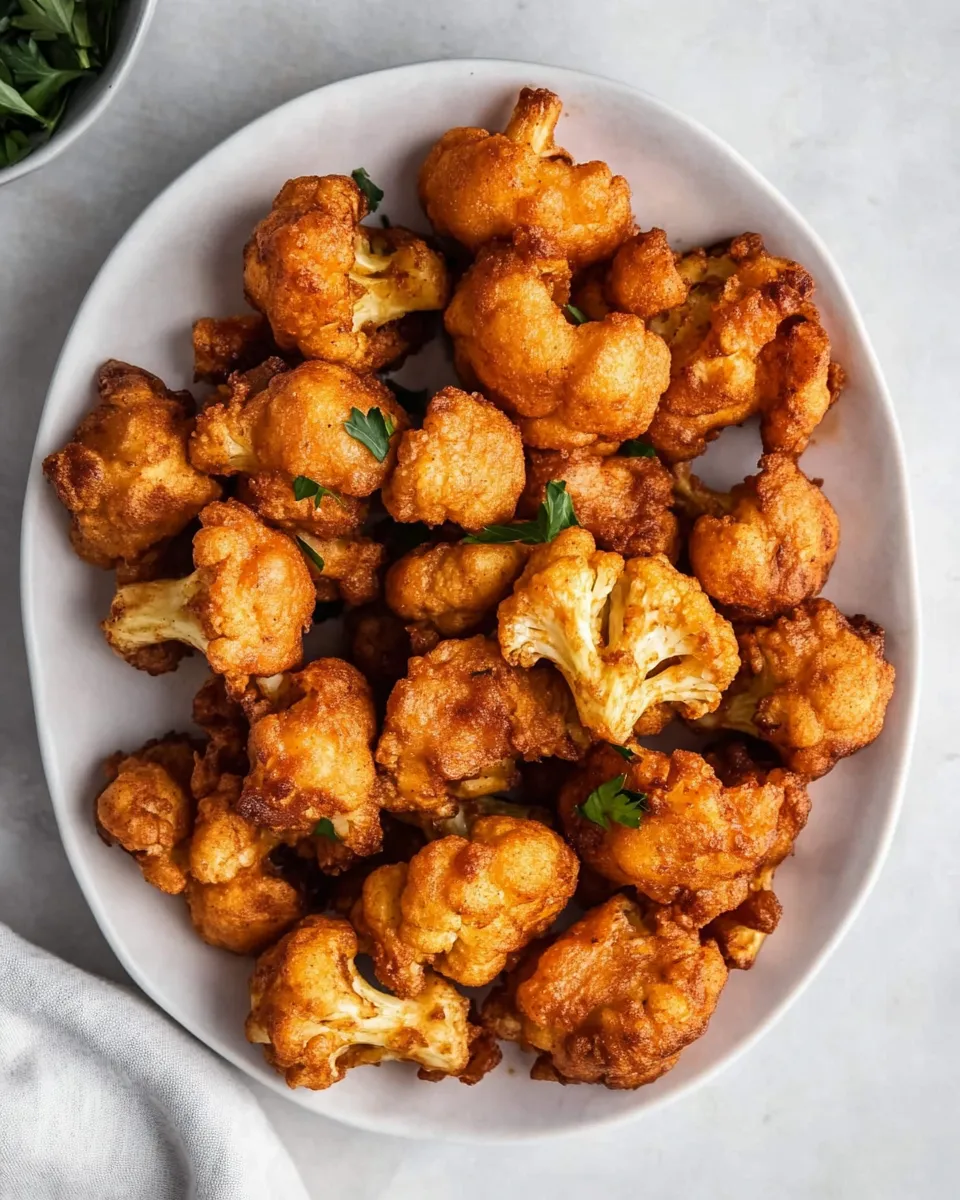
I love dishes that feel indulgent but are built from simple pantry items. Crispy Fried Cauliflower is one of those recipes: a small list of staples, a straightforward batter, and hot oil. What you get is crunchy, golden florets that hold up to dipping sauces and vanish from a serving plate faster than you can say “one more.”
This recipe is practical. It doesn’t rely on fancy ingredients or complicated technique. It leans on a few reliable tricks — keeping the florets dry, a batter with a little cornstarch for extra crunch, and maintaining oil temperature — to produce consistent results. I’ll walk you through each step, common pitfalls, and sensible swaps so you can make this at home with confidence.
Whether you’re feeding a crowd, prepping a casual snack, or making something crispy to top a grain bowl or salad, these fried florets perform. Read on for exact ingredients, step-by-step directions, equipment notes, and troubleshooting items so your batch comes out crisp and not soggy.
What Goes In

This is a short, practical overview of what you’ll need and why. The core is one head of cauliflower and a simple batter made from flour, cornstarch, salt, pepper, and milk. Oil for frying is essential — choose a neutral oil with a high smoke point. Each ingredient plays a clear role: cauliflower provides the base, flour and cornstarch create the crispy shell, milk hydrates the dry mix into batter, and salt and pepper season.
Ingredients
- 1 head cauliflower, cut into florets — the vegetable base; trim into bite-size pieces so they cook evenly.
- 1 cup all-purpose flour — provides structure for the batter and browning surface.
- 1 tablespoon cornstarch — adds extra crispness by reducing gluten formation and encouraging a crisper crust.
- ½ teaspoon salt — seasons the batter; adjust to taste but don’t skip it.
- ¼ teaspoon pepper — a mild kick; freshly ground is best if you have it.
- 1½ cups milk — hydrates the dry ingredients into a pourable batter; full-fat milk will give a slightly richer crust.
- oil for frying — choose a neutral, high smoke-point oil (like vegetable, canola, or peanut) and heat to 350°F.
Crispy Fried Cauliflower, Made Easy
- If not already prepared, cut 1 head cauliflower into florets and rinse; pat the florets dry with paper towels.
- Pour oil for frying into a large, heavy pot to a depth of about 3 inches. Heat the oil to 350°F (use a deep fryer if you prefer).
- In a medium bowl, add 1 cup all-purpose flour, 1 tablespoon cornstarch, ½ teaspoon salt, and ¼ teaspoon pepper. Whisk to combine.
- Whisk 1½ cups milk into the dry ingredients until a smooth batter forms.
- Working in batches, dip each cauliflower floret into the batter, letting excess batter drip off and shaking gently with a fork if needed.
- Carefully add a few battered florets to the hot oil with tongs (do not overcrowd). Fry about 4 minutes on each side or until golden brown and crisp, turning once with tongs. Allow the oil to return to 350°F between batches.
- Remove fried florets with a slotted spoon and place on a paper towel–lined plate to drain. Serve warm.
Why It Deserves a Spot
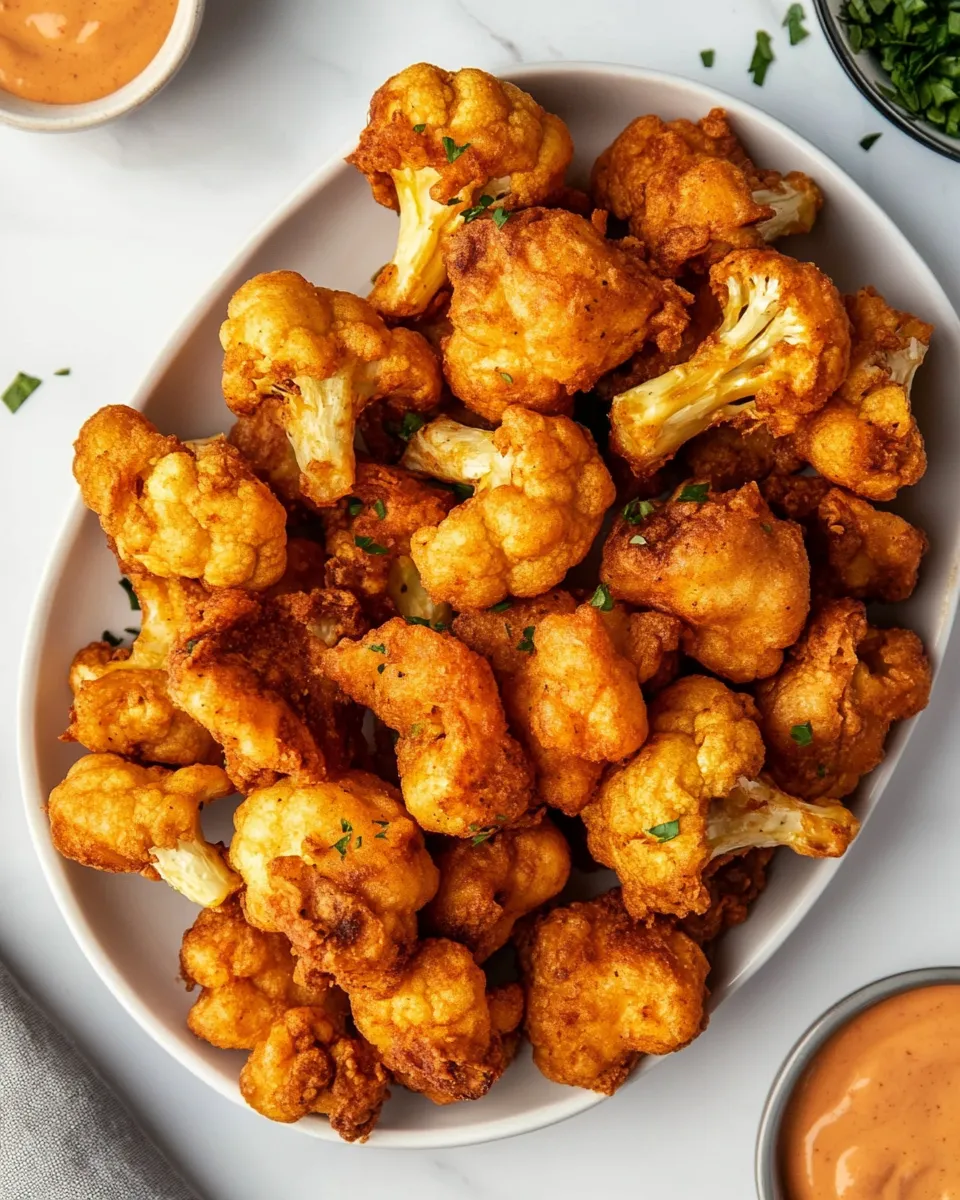
Texture. That first bite is all about contrast: tender cauliflower inside, a crisp, golden shell outside. The cornstarch in the batter is the unsung hero here — it cuts down on chew and amplifies crunch. This dish works as a snack, a side, or the star of a casual meal.
Versatility. You can leave the florets plain to show off a simple crunch, or serve them with sauces ranging from a classic ketchup-based dip to a garlicky yogurt or spicy mayo. They’re neutral enough to pair with many flavors, yet distinctive because of the crisp coating and quick fry time.
Speed and simplicity. Active hands-on time is short: a little prep, a quick batter, and a few minutes in the oil. It’s an approachable recipe for anyone comfortable frying at home and worth the effort for the result.
Budget & Availability Swaps
This recipe keeps costs low because cauliflower, flour, and milk are affordable staples. If you can’t find a fresh head of cauliflower, check for reasonably priced frozen florets, but be aware frozen cauliflower releases water — thaw and pat very dry before battering to avoid splatter and sogginess.
Milk can be substituted with what’s on hand. Use any plain milk you have available. If you need a dairy-free version, use an unsweetened plant-based milk; the batter will still bind but the flavor and browning may differ slightly.
Oil choice matters for safety and flavor, but not for the core recipe. Use a neutral oil with a high smoke point. If your usual market lacks one type, choose another neutral oil rather than a strongly flavored alternative, which can overwhelm the cauliflower.
Hardware & Gadgets
You don’t need fancy gear, but the right tools make frying safer and cleaner.
Essentials
- Large, heavy pot — helps keep oil temperature steady.
- Deep-fry thermometer — accurate temperature control is key; aim for 350°F.
- Slotted spoon or spider skimmer — for lifting fried florets and draining oil.
- Tongs — helpful for placing battered pieces in oil and turning them.
- Paper towels and a plate — for draining finished pieces.
Nice-to-haves
- Deep fryer with basket — makes batch frying easier and safer.
- Wire cooling rack set over a baking sheet — better than paper towels for long runs because it keeps the crust from steaming.
Mistakes That Ruin Crispy Fried Cauliflower
- Overcrowding the pot — when too many florets go in at once the oil temperature drops and the coating becomes soggy. Fry in small batches and wait for the oil to return to 350°F.
- Using wet florets — excess moisture makes the batter slide off and creates dangerous oil splatter. Pat each piece thoroughly dry before battering.
- Skipping the cornstarch — it’s a simple addition but it materially improves crispness. Omitting it will give a heavier, less crunchy coating.
- Not monitoring oil temperature — if the oil is too hot the outside will burn before the inside cooks; too cool and the crust will absorb oil and go greasy. Keep a thermometer handy.
- Letting fried florets sit on an absorbent surface — a paper towel will soak up oil but can also make the bottom soggy if you pile pieces. Use a rack when frying multiple batches.
Health-Conscious Tweaks
If you want a lighter version, there are a few sensible adjustments that keep the spirit of the recipe but cut calories or fat.
- Air-fryer or oven finish: you can air-fry or bake battered florets on a well-oiled sheet to reduce the amount of oil absorbed. Coat lightly with oil and bake at a high heat or air-fry until golden. Results won’t be identical to deep frying, but they’re crisp and lighter.
- Lower-fat milk: swap full-fat for reduced-fat or skim milk if you prefer. The batter will bind; the crust will be a touch less rich.
- Drain thoroughly: use a wire rack rather than piling pieces on paper towels to keep crusts crisp and avoid excess oil lingering on the surface.
Behind the Recipe
This technique is intentionally minimal. The batter is a simple flour-and-milk mixture augmented with cornstarch to boost crunch. Cornstarch reduces the amount of gluten formed in the batter, and it crisps up quickly in hot oil. The milk hydrates the dry mix and helps the batter adhere to the cauliflower.
Frying at 350°F is a sweet spot: hot enough to set the coating and brown it without burning, yet gentle enough to allow the cauliflower to become tender. The instruction to let the oil return to temperature between batches prevents the coating from turning greasy and encourages uniform browning.
These are techniques used in many kitchens because they work consistently. Stick to them, and you’ll find the process dependable even on a busy weeknight.
Keep-It-Fresh Plan
Leftovers: store cooled florets in an airtight container in the refrigerator for up to 2 days. They will soften in the fridge; reheating in a hot oven or air fryer helps to re-crisp the exterior.
Reheating: preheat your oven to about 375–400°F and arrange the florets on a wire rack over a baking sheet. Heat for 8–10 minutes or until crisp and warmed through. An air fryer set to 375°F works well for 4–6 minutes. Avoid microwaving unless you accept a loss of crispness.
Freezing: fried cauliflower is best eaten fresh. You can freeze raw, battered florets (flash-freeze on a baking sheet, then transfer to a bag) and fry from frozen, but expect some variation in texture and possibly longer fry times. Thawing before frying will add moisture and risk a soggy crust unless dried thoroughly.
Ask the Chef
- Can I prep ahead? You can trim and cut the cauliflower hours ahead and refrigerate in a bowl of cold water to keep it crisp, then drain and pat dry before battering. Avoid battering far in advance — the coating is best right before frying.
- Is the batter safe to make ahead? Batter can be made and kept in the refrigerator for an hour or two, but it may thicken; whisk again before using. For best results dip and fry immediately.
- How do I test oil temperature without a thermometer? If you don’t have a thermometer, flick a small bit of batter into the oil — it should sizzle immediately and rise slowly. If it browns too fast, the oil is too hot; if it sinks and comes up soggy, it’s too cool.
- What about safety? Always dry items going into hot oil. Maintain a steady temperature, don’t fill the pot more than halfway with oil, and never leave hot oil unattended. Keep a lid nearby to smother flames if needed, and don’t use water on grease fires.
Ready to Cook?
Here’s a short checklist to get you frying: pick up 1 head of cauliflower, 1 cup all-purpose flour, 1 tablespoon cornstarch, ½ teaspoon salt, ¼ teaspoon pepper, 1½ cups milk, and a neutral frying oil. Trim cauliflower into bite-size florets and pat them dry. Heat oil to 350°F and set up a station with tongs, a slotted spoon, paper towels or a wired rack, and a bowl for batter.
Follow the steps in the “Crispy Fried Cauliflower, Made Easy” section exactly, working in small batches, and you’ll end up with golden, crisp florets that are delicious on their own or with your favorite dipping sauce. Go on — start the oil warming and make a batch tonight. You’ll thank yourself for the crunch.

Crispy Fried Cauliflower
Ingredients
Ingredients
- 1 head cauliflowercut into florets
- 1 cupall-purpose flour
- 1 tablespooncornstarch
- 1/2 teaspoonsalt
- 1/4 teaspoonpepper
- 1 1/2 cupsmilk
- oil for frying
Instructions
Instructions
- If not already prepared, cut 1 head cauliflower into florets and rinse; pat the florets dry with paper towels.
- Pour oil for frying into a large, heavy pot to a depth of about 3 inches. Heat the oil to 350°F (use a deep fryer if you prefer).
- In a medium bowl, add 1 cup all-purpose flour, 1 tablespoon cornstarch, ½ teaspoon salt, and ¼ teaspoon pepper. Whisk to combine.
- Whisk 1½ cups milk into the dry ingredients until a smooth batter forms.
- Working in batches, dip each cauliflower floret into the batter, letting excess batter drip off and shaking gently with a fork if needed.
- Carefully add a few battered florets to the hot oil with tongs (do not overcrowd). Fry about 4 minutes on each side or until golden brown and crisp, turning once with tongs. Allow the oil to return to 350°F between batches.
- Remove fried florets with a slotted spoon and place on a paper towel–lined plate to drain. Serve warm.
Equipment
- large heavy pot
- deep fryer
- Medium Bowl
- Whisk
- Tongs
- Slotted spoon
- Paper Towels
Notes
Storage & Reheating:
Store leftovers in an airtight container for up to 3 days. They may lose some crispness. Reheat in the oven or air fryer at 375ºF to bring back that crunch.