
These potato cakes are the kind of recipe I reach for when I want something simple, satisfying, and fast. They rely on four pantry-friendly items and turn leftover mashed potatoes into golden, crisp-edged cakes in under 30 minutes. No frying oil, no fuss—just a hot griddle and a little patience.
I like to make a batch the morning after a roast or when I have a tub of leftover mash in the fridge. The dough comes together quickly and is forgiving: a touch more flour if it’s too sticky, a little less if it’s dry. The result is a soft interior with browned spots that give you pleasant chew and color.
Below you’ll find the ingredient details, the exact step-by-step process, troubleshooting tips, and practical ways to adapt texture and timing without changing the core four ingredients. If you want a straightforward, comforting side or a light meal, these are honest, dependable cakes.
Ingredient Rundown
Ingredients
- 2 cups mashed potato — the base and binder for the dough; starchy, well-seasoned mash gives best results.
- 1 ½ cups all-purpose flour — provides structure; plus extra for dusting when rolling and cutting.
- 1 teaspoon baking powder — a little lift so cakes are not dense.
- 1 teaspoon salt — seasons the dough throughout; adjust to taste in the mash beforehand if needed.
Cooking (Irish Potato Cakes): The Process
- In a large bowl, combine 2 cups mashed potato, 1 ½ cups all-purpose flour, 1 teaspoon baking powder, and 1 teaspoon salt. Mix until the ingredients come together into a soft dough. If the dough is too wet, sprinkle a little extra flour (for dusting) and knead gently until it holds its shape.
- Divide the dough into two equal portions and shape each portion into a ball.
- Lightly flour your work surface. Flatten one dough ball with your hands or a floured rolling pin into a disk about 1 cm thick.
- Cut the disk into 4 equal quarters. Lightly dust each quarter with flour and set them aside. Repeat steps 3–4 with the second dough ball so you have 8 potato cakes total.
- Heat a large frying pan or griddle over medium heat until hot. Do not add oil.
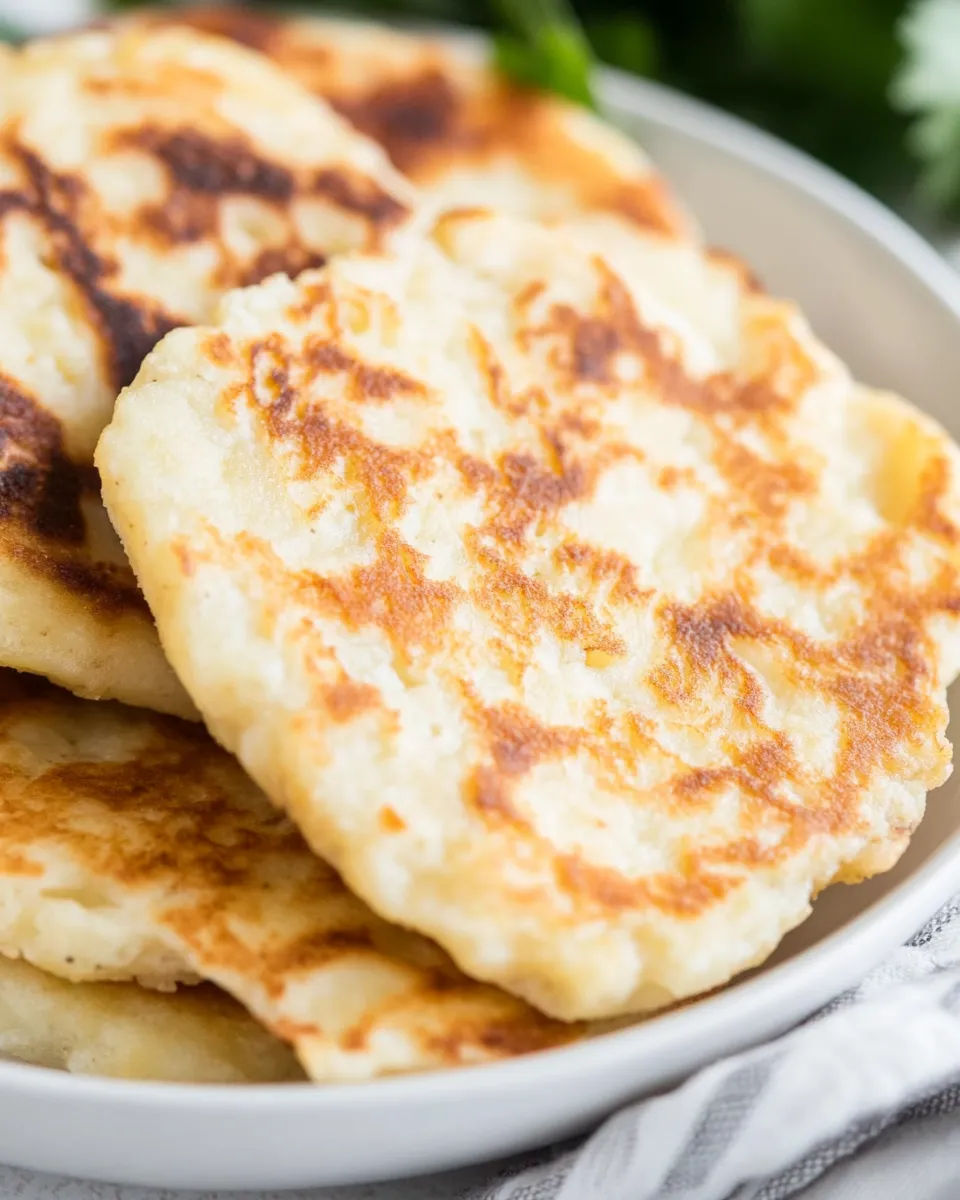
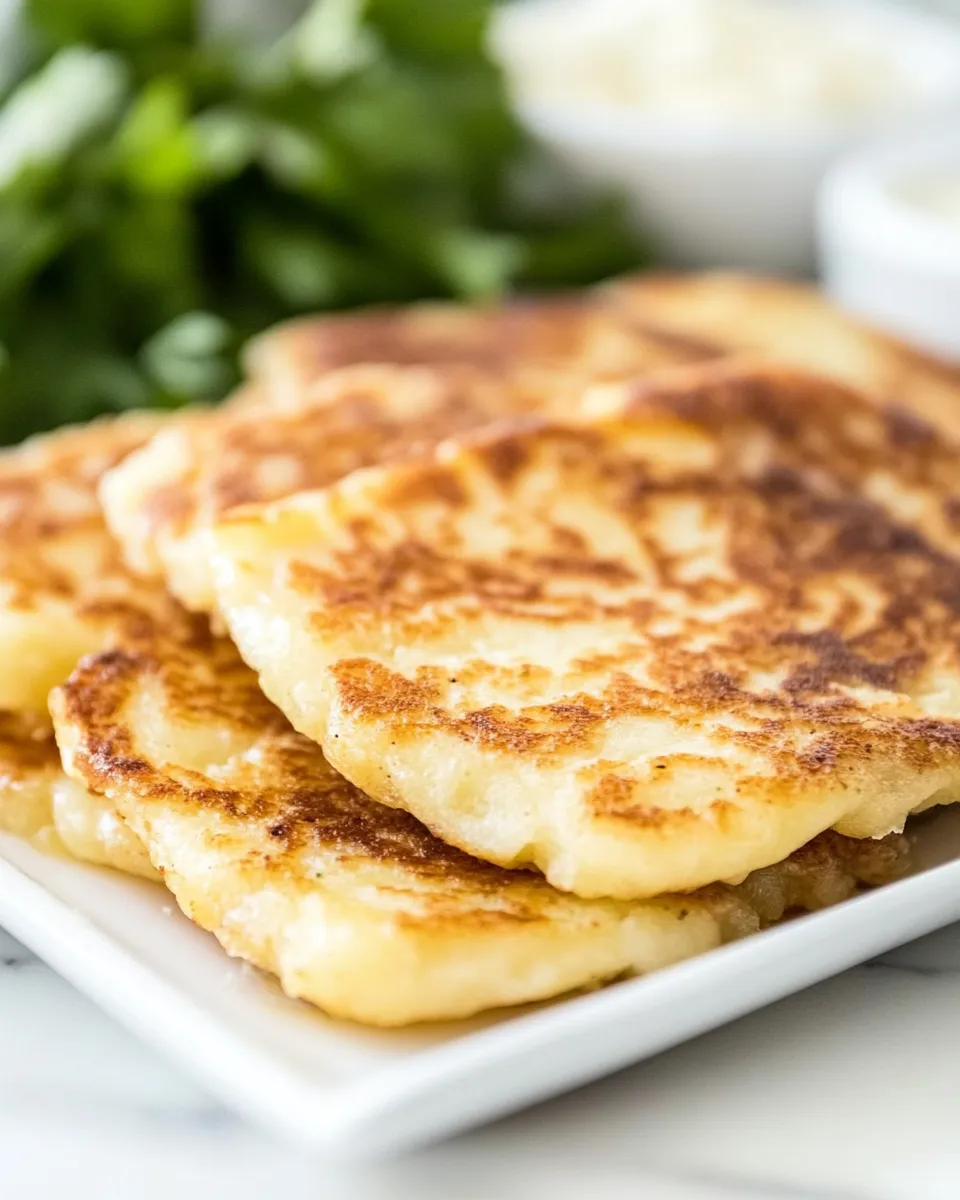
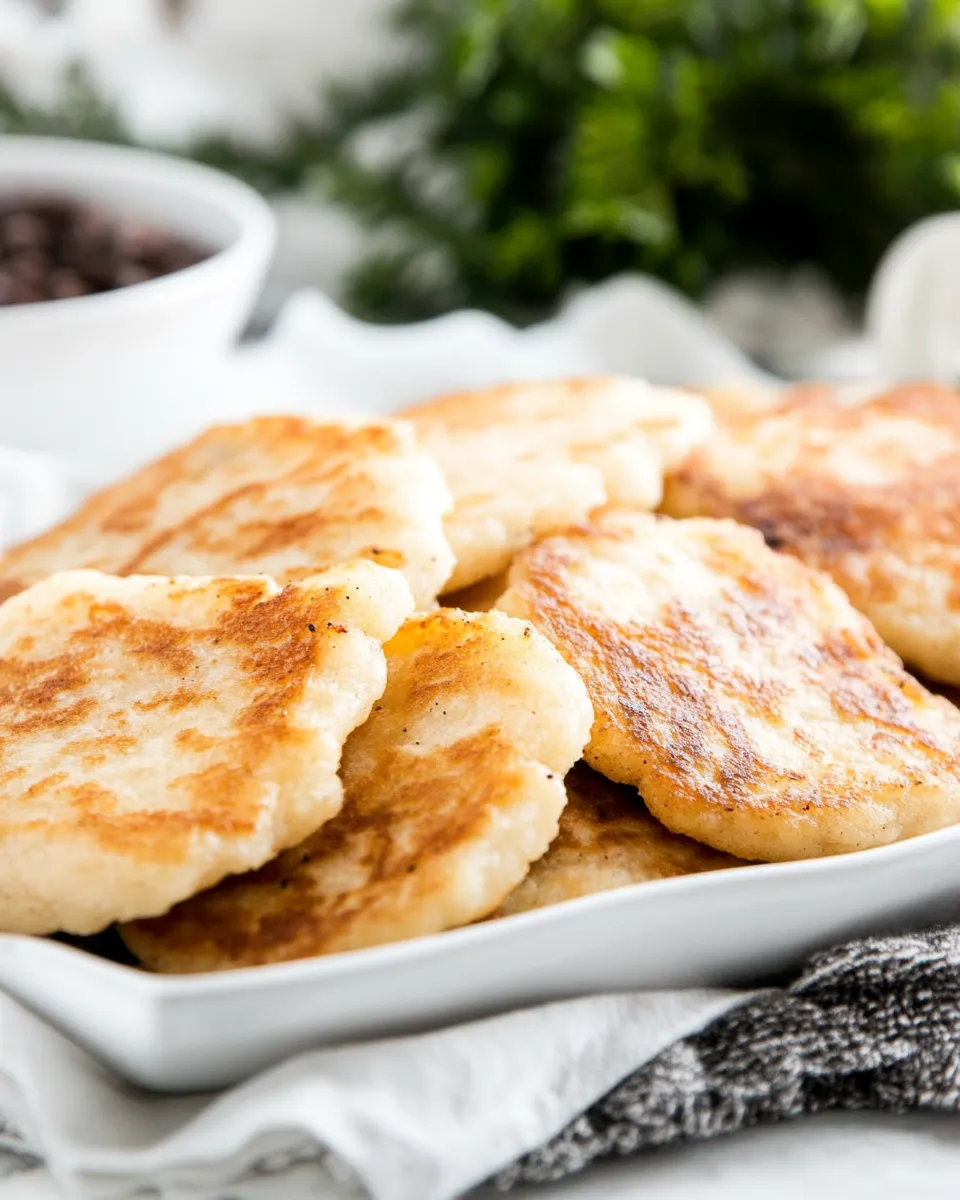
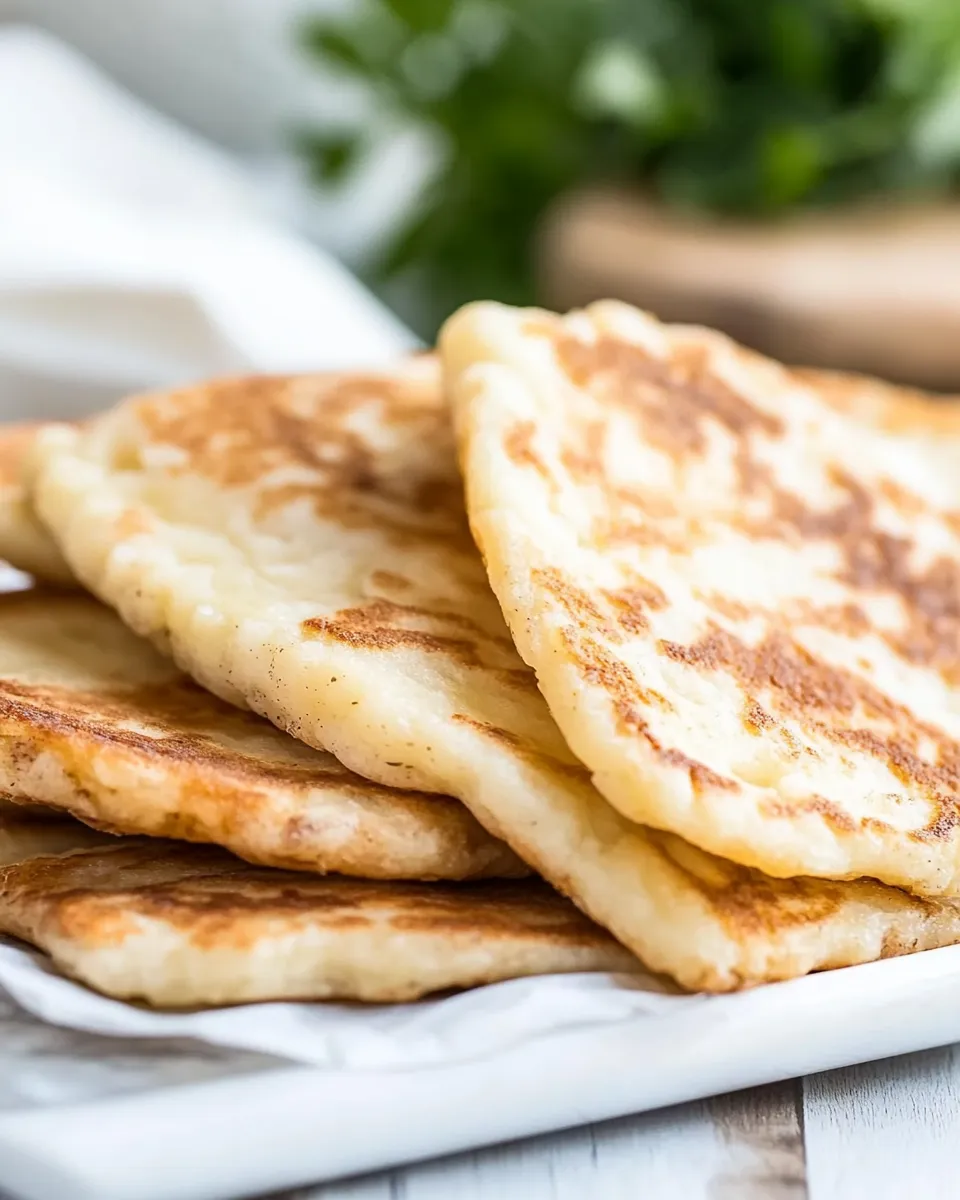
- Place a few potato cakes in the dry pan without overcrowding. Cook for about 4 minutes on the first side, until colored and golden.
- Carefully flip each cake and cook for a further 4 minutes on the second side, until heated through and dark brown in places.
- Transfer cooked potato cakes to a plate and keep warm while you cook remaining batches. Serve immediately.
The Upside of Irish Potato Cakes
These cakes are quick, efficient, and forgiving. You can transform leftovers into a fresh component for breakfast, lunch, or dinner without adding anything new. The method requires no oil, which simplifies cooking and cleanup. Because the cakes are pan-seared dry, they develop pockets of caramelized color while staying tender inside.
They scale easily. If you need more, double the dough and work in batches. If you want fewer, halve the quantities. The dough is adaptable: a slightly wetter dough makes a softer cake; a firmer dough yields crisper edges. Above all, they’re reliable—simple inputs, predictable output.
Flavor-Forward Alternatives
Without introducing extra ingredients into the dough itself, you can shift flavor and texture through technique and serving choices. Make the cakes thinner for more surface browning and crunch, or roll them slightly thicker for a pillowy interior. Press them a touch at the center before cooking to promote even browning.
Think about how you finish and pair the cakes rather than changing the recipe. Serve them with something acidic, something creamy, or something bright to balance the starchy richness. A warm topping will melt into the surface; a cool spoonful beside them will provide contrast. Small changes in temperature and texture make a big flavor difference.
Must-Have Equipment
- Large mixing bowl — for combining the mashed potato and dry ingredients.
- Rolling pin (or your hands) — to flatten the dough to an even 1 cm thickness.
- Large frying pan or griddle — a smooth, flat surface ensures even contact and browning.
- Spatula — for careful flipping so the cakes keep their shape.
- Measuring cups and spoons — to keep proportions exact as written.
Errors to Dodge
Skip these common missteps for the best results:
- Overworking the dough. Knead just enough to bring it together. Too much handling can make the texture gummy.
- Cooking on too high a heat. The outside will burn before the center heats through. Medium heat gives even color and a cooked interior.
- Overcrowding the pan. Give each cake space so heat circulates; crowded cakes steam instead of browning.
- Using wet mashed potatoes without adjusting flour. If your mash is very moist, sprinkle a little extra flour for dusting and knead very gently until it holds.
Make It Diet-Friendly
If you’re watching portions or calories, the simplest levers are size and serving. Make smaller cakes to reduce per-serving volume. Flatten them a bit thinner to increase browning without increasing mass—crisp edges read as more satisfying for fewer calories.
Also control the plate. Pair one or two cakes with a heap of fresh salad or raw vegetables to balance a meal without changing the recipe’s ingredients. Reduce salt in the mash if you’re limiting sodium. These small adjustments keep the integrity of the four-ingredient formula while tailoring the result to dietary goals.
Testing Timeline
Here’s a realistic timeline you can follow when making these from chilled mashed potatoes:
- Prep (mixing dough and shaping): 8–10 minutes.
- Rolling and cutting into 8 cakes: 5–7 minutes.
- Cooking each batch (4–5 cakes per pan load): about 8 minutes per batch (4 minutes per side).
- Total active time for one pan: 20–25 minutes from start to finish. Allow a few extra minutes if you’re monitoring color closely or working with colder dough.
Best Ways to Store
For short-term holding, keep cooked cakes on a warm plate covered loosely with foil so they don’t steam damp. They’re best eaten hot and fresh, within an hour or two.
To refrigerate, cool completely on a wire rack, then store in an airtight container for up to 2 days. Reheat in a dry skillet over medium-low heat to crisp the exterior again. Microwaving will make them soft; the skillet restores texture.
For longer storage, freeze cooled cakes in a single layer on a tray until firm, then transfer to a freezer container or bag. Reheat from frozen in a skillet over low heat, covering briefly to allow the center to heat through without excessive browning.
Handy Q&A
Can I use raw grated potatoes?
This recipe calls for mashed potato. Using raw potatoes requires a different technique and will not produce the same result without adjusting proportions and cooking method.
What if my dough is crumbly?
Crumbly dough usually means the mash was too dry. Press the dough gently—if it won’t come together, a tiny sprinkle of water or very small additional bits of mashed potato would help, but try to keep additions minimal to maintain the ratio.
Do I need to add oil to the pan?
No. The method works by using a dry pan over medium heat. Adding oil will change the browning and the outer texture; the recipe is designed to crisp without it.
Can I make these ahead?
You can shape the cakes and refrigerate them briefly before cooking, but they’re best when cooked and served fresh. Cooked cakes can be stored and reheated as described above.
Final Thoughts
These Irish Potato Cakes are a small, reliable trick to have in your repertoire. Four ingredients keep the process uncluttered. The technique—gentle mixing, even shaping, and moderate heat—delivers consistent results. They’re perfect for using up leftovers or for a quick, humble plate that feels like comfort food without much work.
Make a batch, pay attention to heat and dough feel, and adjust thickness for the crispness you prefer. With minimal fuss you’ll have golden, satisfying cakes that work all day long.

Easy Irish Potato Cakes (4 Ingredients)
Ingredients
Ingredients
- 2 cupsmashed potato- See note 1
- 1 1/2 cupsAP flour- plus extra for dusting
- 1 teaspoonbaking powder
- 1 teaspoonsalt
Instructions
Instructions
- In a large bowl, combine 2 cups mashed potato, 1 ½ cups all-purpose flour, 1 teaspoon baking powder, and 1 teaspoon salt. Mix until the ingredients come together into a soft dough. If the dough is too wet, sprinkle a little extra flour (for dusting) and knead gently until it holds its shape.
- Divide the dough into two equal portions and shape each portion into a ball.
- Lightly flour your work surface. Flatten one dough ball with your hands or a floured rolling pin into a disk about 1 cm thick.
- Cut the disk into 4 equal quarters. Lightly dust each quarter with flour and set them aside. Repeat steps 3–4 with the second dough ball so you have 8 potato cakes total.
- Heat a large frying pan or griddle over medium heat until hot. Do not add oil.
- Place a few potato cakes in the dry pan without overcrowding. Cook for about 4 minutes on the first side, until colored and golden.
- Carefully flip each cake and cook for a further 4 minutes on the second side, until heated through and dark brown in places.
- Transfer cooked potato cakes to a plate and keep warm while you cook remaining batches. Serve immediately.
Equipment
- Large Bowl
- Frying pan
- Griddle
- rolling pin (optional)
- work surface
Notes
Ideally you want to use mashed potatoes that haven't had butter and/or cream added to them. If you are using very wet/buttery mashed potatoes then you may need add extra flour to form a manageable dough.
Because there is no oil in the frying pan, the potato cakes don't get a golden color to them, instead they get a darker dirtier look. This is exactly what you are looking for and is completely traditional and authentic.


