
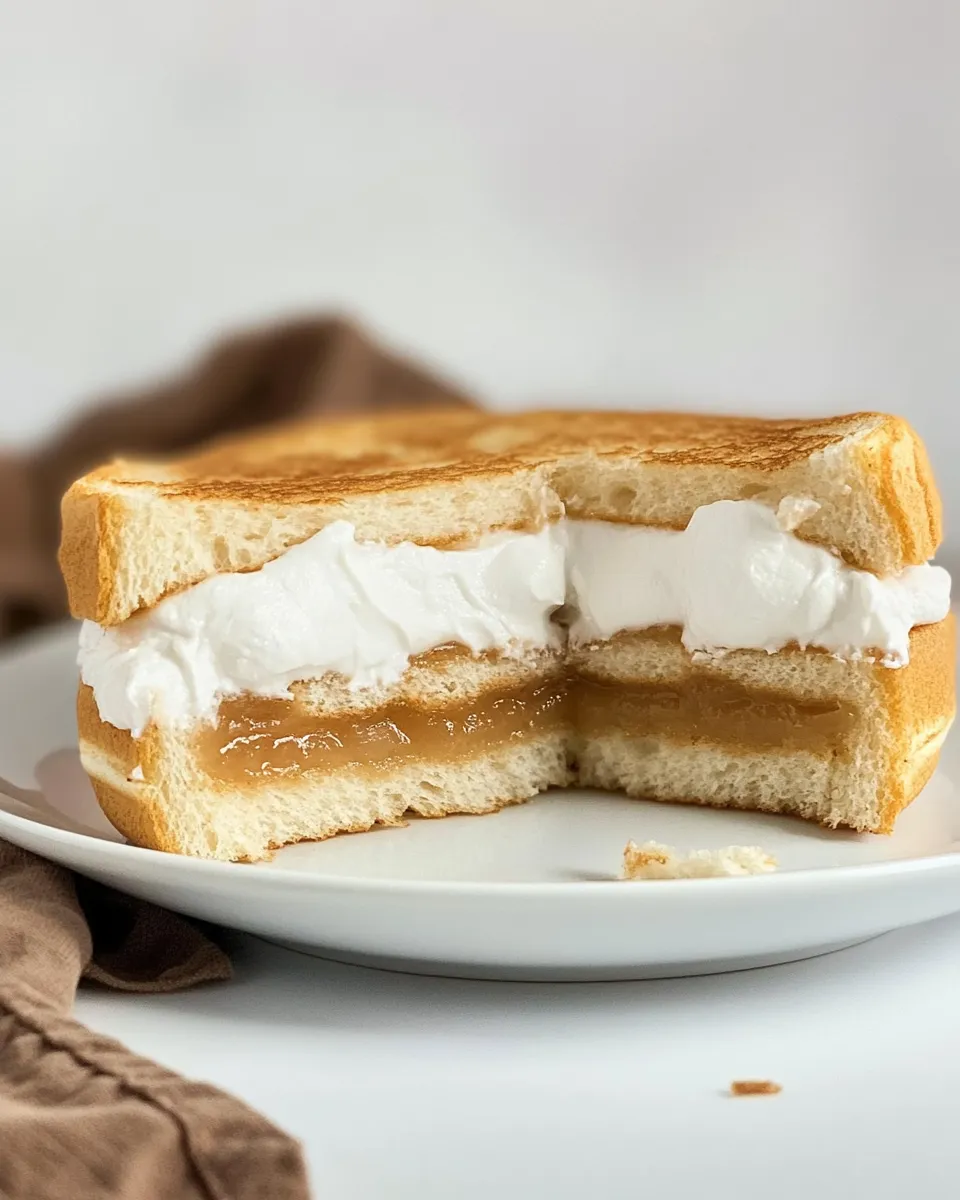
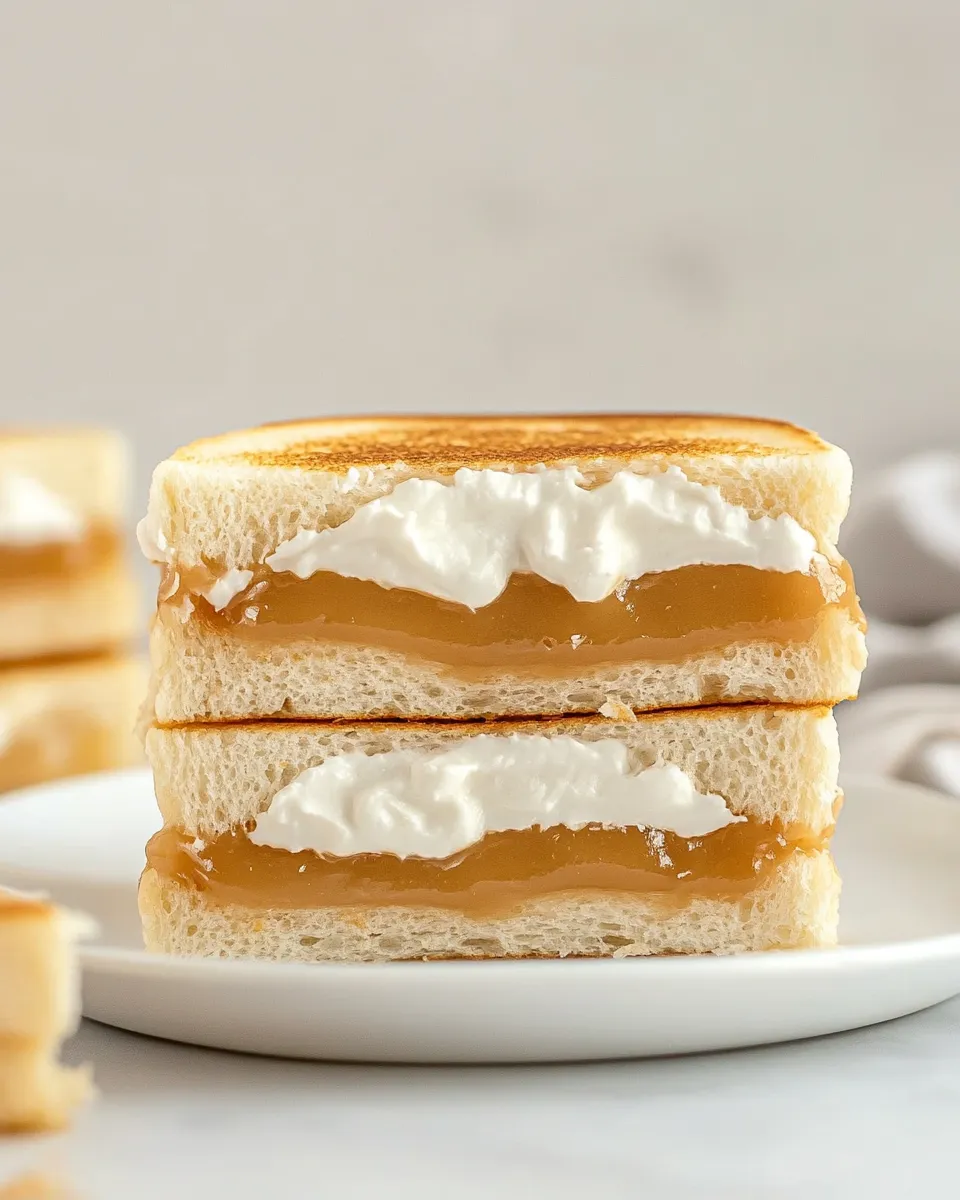
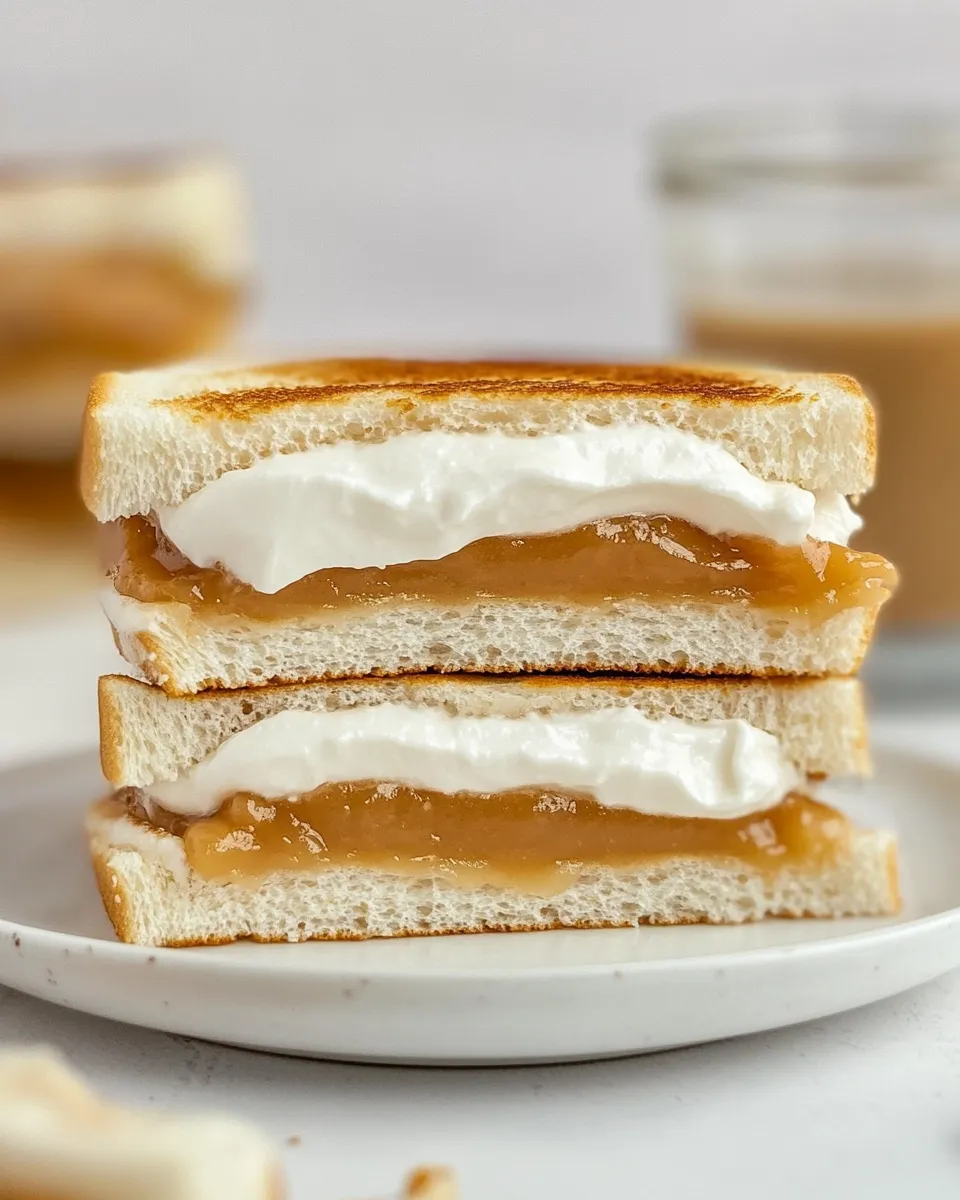
This sandwich is one of those simple pleasures that feels indulgent without any fuss. Two slices of bread, a smear of peanut butter, and a cloud of marshmallow fluff come together in under five minutes to deliver something comforting, sweet, and nostalgic. I make these when I want a quick treat, a lunchbox win, or an easy dessert for a kid’s party.
I like that the Fluffernutter Sandwich is forgiving: no precise technique, no special equipment, and it travels well when packed properly. It’s also a great canvas—tiny tweaks change its character entirely, from creamy and classic to modern and textured. Below you’ll find the exact ingredients and step-by-step directions, plus practical tips for packing, swapping, and avoiding common problems.
If you’ve never tried one, think peanut butter’s savory nuttiness balanced by the airy sweetness of marshmallow fluff. If you have tried one, this is your reminder to make another—fast, satisfying, and reliably good.
What We’re Using
This recipe leans on pantry staples and a couple of simple spreads. The goal is a neat, evenly spread sandwich with a pleasant contrast between the dense peanut butter and the light, sticky fluff. Keep your tools minimal and use the pairings that match your preferences.
Ingredients
- 2 slices sandwich bread, your favorite — basic structure; choose a slice that can hold spreads without falling apart.
- 2 tablespoons peanut butter, your favorite — provides richness and salt; creamy spreads are easiest to spread evenly.
- 2 tablespoons marshmallow fluff — adds sweetness and a fluffy texture; use straight from the jar for best spreadability.
How to Prepare Fluffernutter Sandwich
- Gather 2 slices of sandwich bread, 2 tablespoons peanut butter, and 2 tablespoons marshmallow fluff.
- Place the two slices of bread flat on a clean surface, side by side.
- Using a knife or spoon, spread 2 tablespoons peanut butter evenly over the surface of one slice of bread.
- Using a clean knife or spoon, spread 2 tablespoons marshmallow fluff evenly over the surface of the other slice of bread.
- Place the two slices together with the peanut butter and marshmallow fluff sides facing each other and press gently to seal.
- If you like, cut the sandwich in half (diagonally or straight down the middle) and serve.
- To pack for later, put the sandwich in its own compartment of a lunchbox with fruit, veggies, and your favorite sides; add an ice pack to the lunch bag if necessary.
Reasons to Love Fluffernutter Sandwich
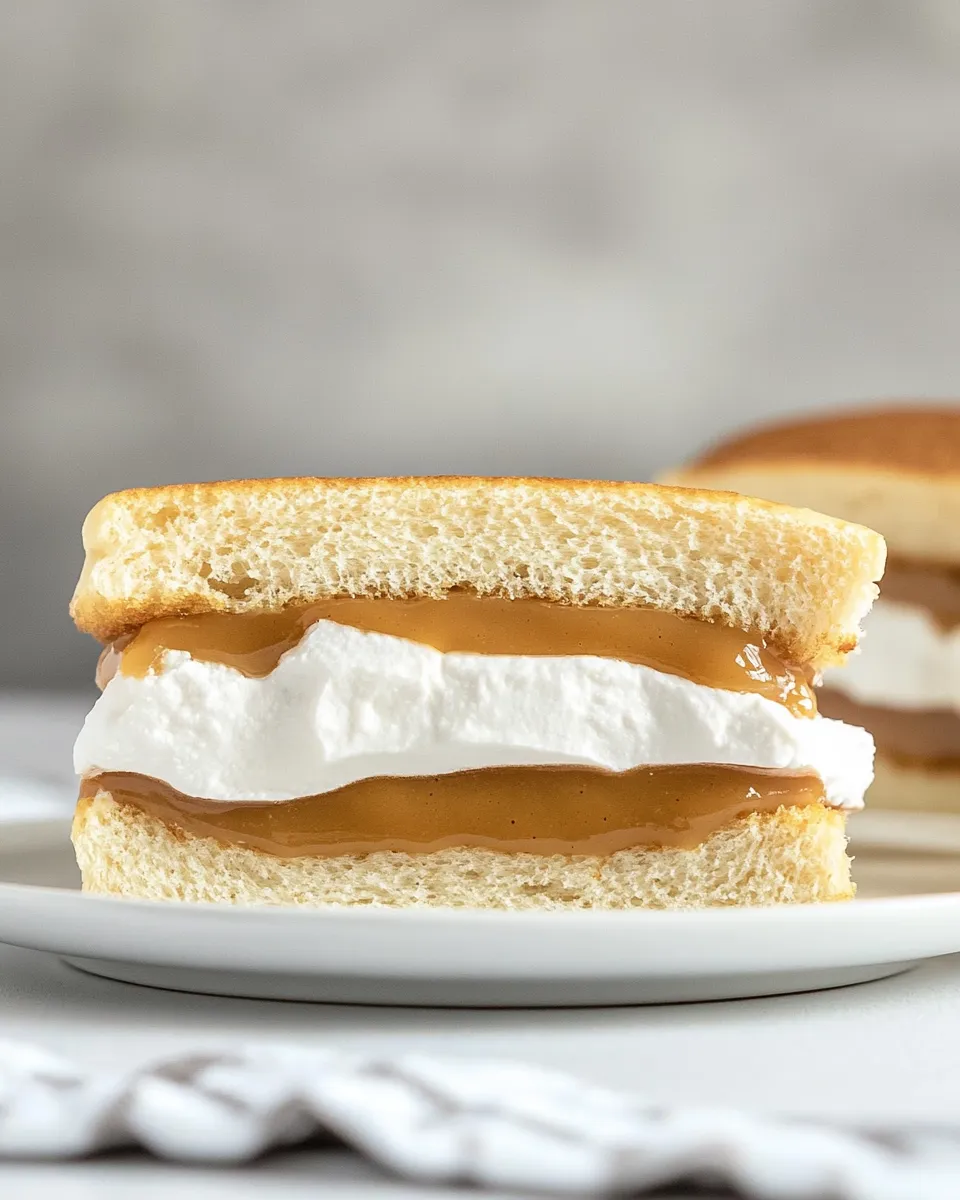
There are straightforward reasons this sandwich endures. It’s quick: under five minutes from start to finish. It’s nostalgic: many of us remember versions made for school lunches and snacks. The texture contrast is the magic—the dense, savory peanut butter against a pillowy, sweet marshmallow spread creates a small, perfect tension in every bite.
It’s also flexible: make it for breakfast, an after-school snack, or a portable dessert. You don’t need elaborate ingredients or technique to get a satisfying result. For households with kids, it’s a reliable favorite; for adults, it’s an unapologetic sweet-salty pick-me-up.
Swap Guide
Want to change the profile without losing the sandwich’s spirit? Here are practical swap ideas that keep the method identical:
- Swap the peanut butter for another nut or seed butter to change flavor and allergy profile.
- Use a thicker-sliced or sturdier bread for more heft, or a thin sandwich loaf for a lighter bite.
- Skip the fluff and use a thin layer of honey for a simpler sweet-and-salty version (keeps the method the same).
- For a toasted take, toast the bread lightly before spreading to add crunch and reduce sogginess.
Equipment & Tools
- Knife or spreader — for evenly applying peanut butter and fluff; use a clean knife for each to avoid cross-contamination.
- Spoon — handy if the peanut butter is very thick or the fluff is sticky.
- Plate or clean work surface — keeps things tidy while you assemble.
- Lunchbox or storage wrap — if you’re packing for later, a dedicated compartment or wrap keeps the sandwich from getting squashed.
- Optional: ice pack — recommended if you’re packing the sandwich with perishable sides and will be away from refrigeration.
Pitfalls & How to Prevent Them
Even a simple sandwich has common pitfalls. Here’s how to avoid them so the Fluffernutter stays tidy, tasty, and transportable.
- Soggy bread: If you pack or wait too long, moisture from spreads can soften the bread. Prevent this by using slightly thicker bread, toasting if you prefer, or wrapping the sandwich in parchment or wax paper rather than plastic wrap to reduce trapped moisture.
- Uneven spreading: Thick globs of peanut butter or fluff will squish out at the seams. Use an even, thin layer across the slice—2 tablespoons spread carefully is plenty.
- Cross-contamination: If someone has a peanut allergy in the household, designate separate knives and surfaces for peanut butter and other spreads. Always clean tools between uses.
- Sticky mess: Marshmallow fluff is sticky. Wipe tools and hands quickly with warm water and soap; use a clean knife to spread the fluff so the peanut butter jar stays tidy.
In-Season Flavor Ideas
Pairing the Fluffernutter with seasonal produce makes it feel fresh and intentional. Here are small, no-fuss ideas that add a bright note without changing the assembly method:
- Spring: Thinly sliced strawberries or a few whole raspberries tucked alongside give a tart counterpoint to the sweetness.
- Summer: Fresh peach or apricot slices are lovely with the sandwich’s sweet edge; keep slices thin to avoid excess juice.
- Fall: Crisp apple slices or pear slivers complement the nuttiness and add crunch; choose firmer varieties so they don’t make the bread soggy.
- Winter: Add a few dried fruit pieces—very small and sparse—to introduce chew without moisture.
What Could Go Wrong
Common mishaps and quick fixes:
- Squeeze-out at the edges: Too much filling or thick clumps cause mess. Spread thinner and press gently when joining slices.
- Sandwich falls apart: Use bread with enough structural integrity and press the slices together firmly but gently.
- Fluff hardens if chilled: If refrigerated, fluff can stiffen. Let sit at room temperature a few minutes before eating for the best texture.
- Allergy risks: Peanut butter is a common allergen. Substitute an alternative spread for allergy-sensitive eaters, and be careful when packing for group settings.
Storage Pro Tips
Because this sandwich contains spreads rather than perishable wet fillings, short-term storage is simple. For best results:
- Wrap the sandwich in parchment, wax paper, or reusable sandwich wraps to protect it from being crushed. Avoid plastic wrap if you want to reduce trapped moisture.
- If packing with perishable sides (yogurt, cut fruit), use an ice pack and an insulated lunch bag to keep everything cool and safe.
- Eat within a few hours for the best texture. If you must store longer, keep refrigerated and accept that the fluff may firm up—allow it to warm slightly before serving.
- To freeze: I don’t recommend freezing a Fluffernutter for texture reasons. Freezing changes the fluff and bread structure.
Fluffernutter Sandwich FAQs
- Q: Can I use crunchy peanut butter? — A: Yes. Crunchy will add texture; spread evenly and use a little more care so the fluff doesn’t catch on the larger peanut pieces.
- Q: Is this safe for school lunches? — A: Generally yes, but check your school’s allergy policy. Pack it separately if students with peanut allergies are present, or use an alternative butter.
- Q: How do I keep it from getting too sweet? — A: Choose a peanut butter with a touch of salt or opt for less fluff. The ratio here is 2 tablespoons of each; you can reduce the fluff slightly if you prefer less sweetness.
- Q: Can I toast the sandwich after assembling? — A: You can, but be careful: the fluff will heat and become very sticky. Toast bread first if you want a crunchy exterior.
- Q: How long will it last once packed? — A: At room temperature, plan to eat it within a few hours. If packed with perishable sides, use an ice pack and consume within the same day.
Hungry for More?
If you loved this quick sandwich, try taking the same assembly ideas and swapping spreads or adding a single fresh element—thinly sliced banana, a few berries, or a light sprinkle of cinnamon. The method stays the same: two slices, even spreads, press, and go. It’s a small bit of joy that’s easy to repeat and adapt.
Make a Fluffernutter when you want something fast, nostalgic, and satisfying. It’s the sort of recipe that reminds you comfort food doesn’t have to be complicated—just well executed.

Fluffernutter Sandwich
Ingredients
Ingredients
- 2 slicessandwich bread your favorite
- 2 tablespoonspeanut butter your favorite
- 2 tablespoonsmarshmallow fluff
Instructions
Instructions
- Gather 2 slices of sandwich bread, 2 tablespoons peanut butter, and 2 tablespoons marshmallow fluff.
- Place the two slices of bread flat on a clean surface, side by side.
- Using a knife or spoon, spread 2 tablespoons peanut butter evenly over the surface of one slice of bread.
- Using a clean knife or spoon, spread 2 tablespoons marshmallow fluff evenly over the surface of the other slice of bread.
- Place the two slices together with the peanut butter and marshmallow fluff sides facing each other and press gently to seal.
- If you like, cut the sandwich in half (diagonally or straight down the middle) and serve.
- To pack for later, put the sandwich in its own compartment of a lunchbox with fruit, veggies, and your favorite sides; add an ice pack to the lunch bag if necessary.
Equipment
- Equipment
- 101 Packed Lunches
- Glass Lunch Containers
- ice pack


