
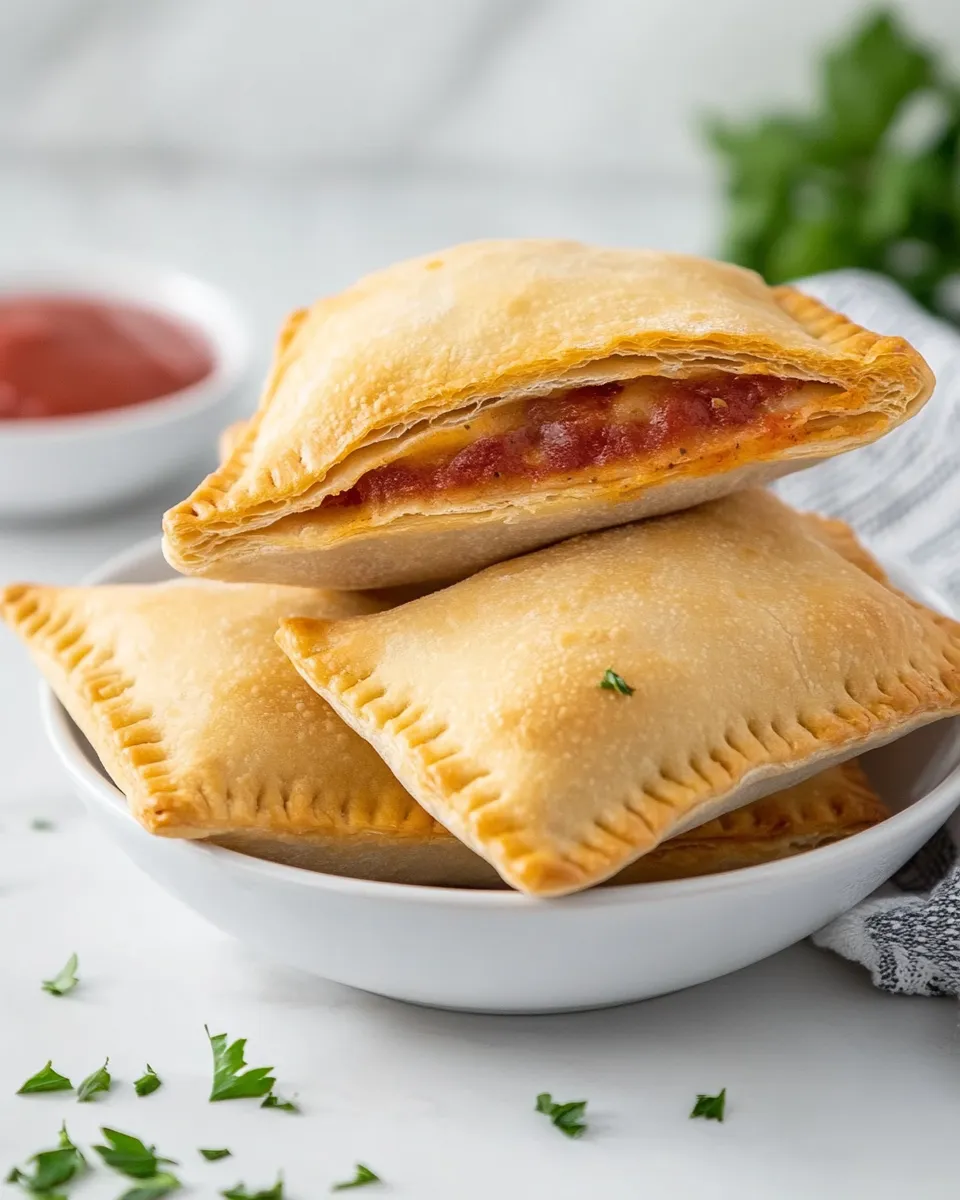
These Homemade Hot Pockets are my go-to when I want something nostalgic, fast, and infinitely customizable. They hit the same comfort notes as the freezer aisle originals but with fresher ingredients and a flaky, golden crust that you control. No mystery fillers, no preservatives — just simple assembly and a reliably satisfying result.
I test recipes like this constantly to make sure they work for busy weeknights and relaxed weekends alike. The method below is straightforward: portion dough, fill, seal, egg wash, and bake. The whole process takes less than an hour from start to finish, with most of that time being hands-off while they puff up in the oven.
I’ll walk you through the exact ingredients, the step-by-step directions, sensible substitutions, storage notes, and quick fixes for common problems. It’s practical, honest cooking — the kind you’ll want to save and make again.
Ingredient Rundown
Ingredients
- 1 pound refrigerated pizza dough — the pocket shell; refrigerated dough is stretchy and browns well without extra kneading.
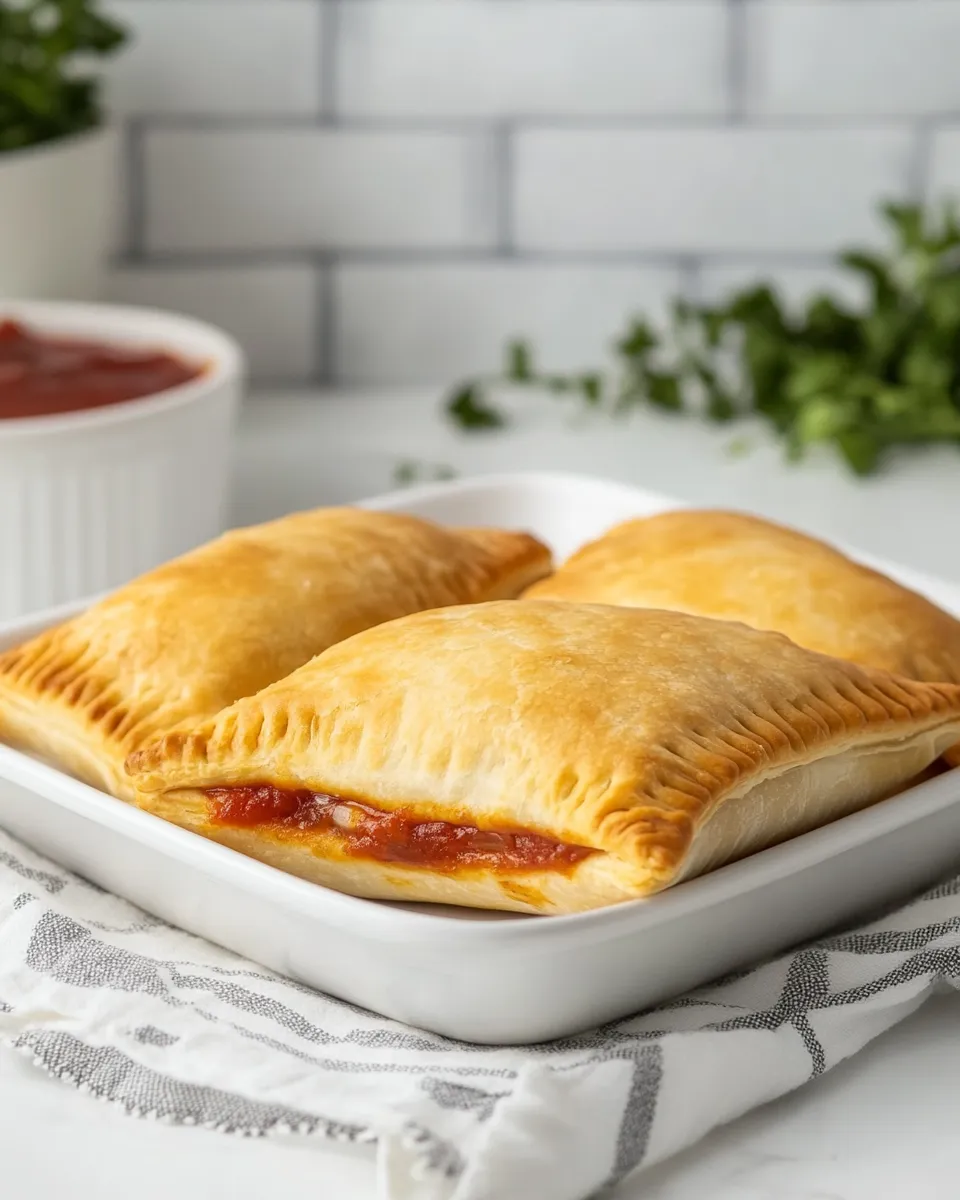
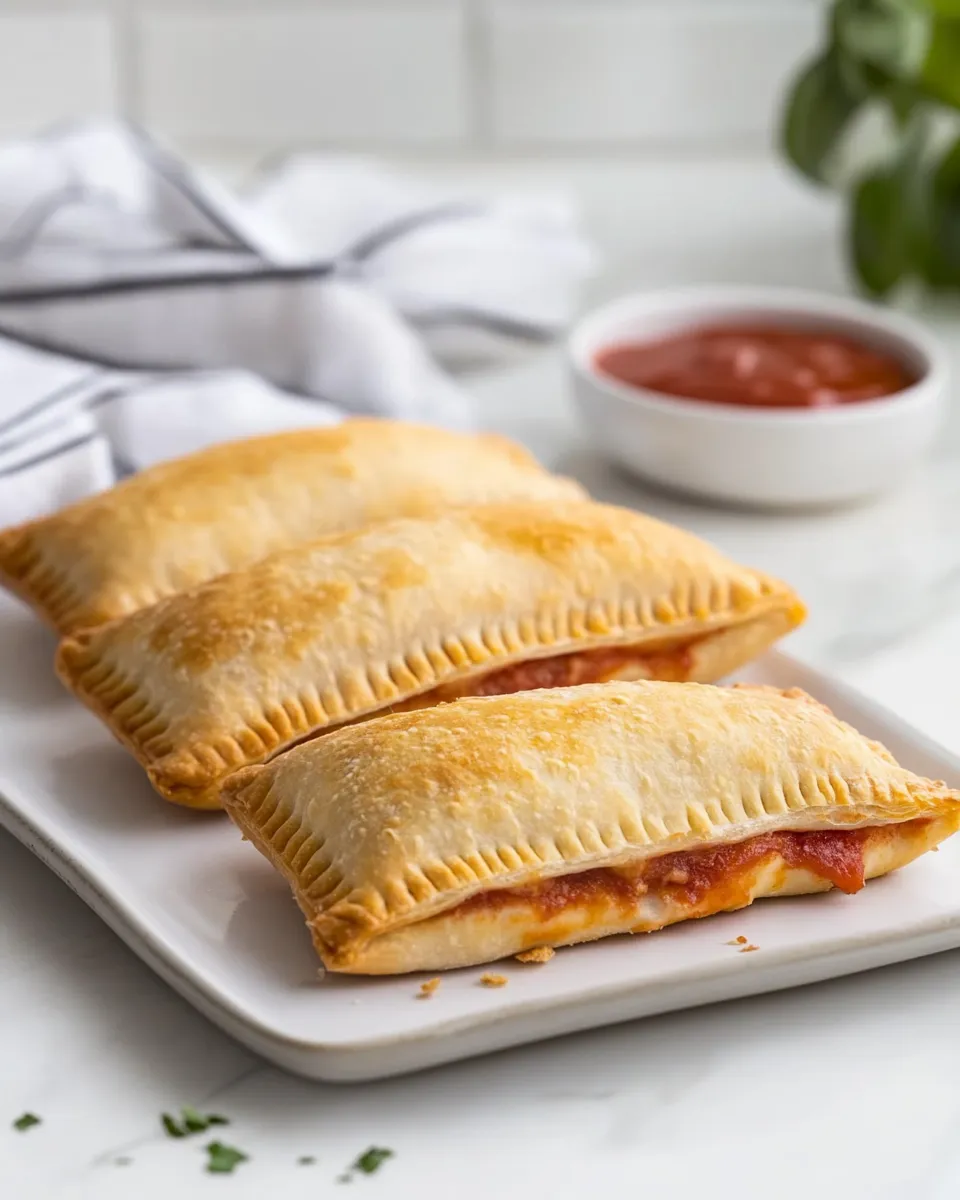
- ½ cup pizza sauce — provides moisture and flavor; leaving a border prevents soggy seams.
- 1 cup shredded mozzarella cheese — melts into a gooey filling; shred fresh for best melt and texture.
- ½ cup sliced pepperoni — the primary savory element; use thicker or thinner slices based on how meaty you like the bite.
- 1 large egg, beaten — for brushing the tops so pockets brown evenly and seal well.
Homemade Hot Pockets, Made Easy
- Preheat oven to 400°F (200°C). Line a baking sheet with parchment paper.
- Divide the 1 pound refrigerated pizza dough into 8 equal portions.
- On a clean work surface or on the prepared parchment, roll each portion into a 5-inch square. Place the squares on the prepared baking sheet, leaving space between them.
- Spoon 1 tablespoon of pizza sauce onto the center of each square, leaving a 1/2-inch border around the edges.
- Evenly divide the 1 cup shredded mozzarella cheese among the squares, sprinkling the cheese over the sauce on each one.
- Evenly divide the 1/2 cup sliced pepperoni among the squares and place the slices on top of the cheese.
- Fold each square in half over the filling to form a pocket. Press the edges together to seal, then crimp the sealed edges with a fork to ensure they are closed.
- Brush the tops and edges of each sealed pocket with the beaten large egg.
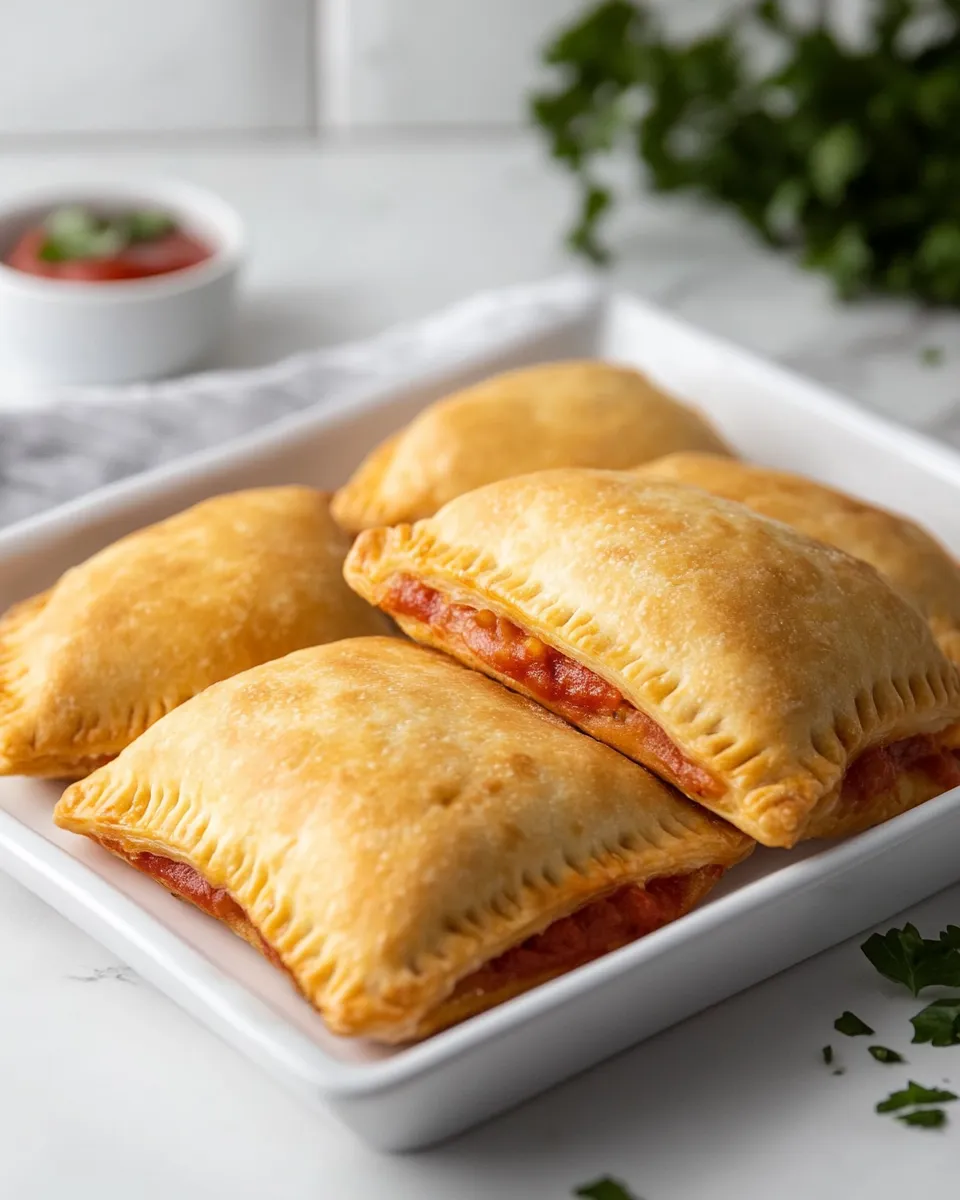
- Bake on the prepared baking sheet for 15 minutes, or until the pockets are puffed and golden brown.
- Remove from the oven and let the hot pockets cool on the baking sheet for about 5 minutes before serving.
Why Homemade Hot Pockets is Worth Your Time
Making these at home gives you control over ingredients and portion size. You avoid the overly processed fillings and get a fresher chew and flavor from real cheese and dough. They’re fast enough for a weeknight and simple enough to make in batches for quick lunches.
Beyond taste, there’s satisfaction in folding and sealing your own pockets — it’s quick hands-on work that produces a tangible payoff. The dough crisps and browns more pleasantly than microwave reheats, and baking concentrates flavors so each bite has a clear filling-to-crust balance.
Healthier Substitutions
Want to shave calories or add more nutrients without changing the method? Small swaps make a difference:
- Pizza dough: Choose whole-wheat or part-whole-wheat dough to add fiber. Texture will be slightly denser, but it still seals well.
- Cheese: Use part-skim mozzarella or reduce the amount to cut fat. Mixing in some shredded low-moisture provolone can keep flavor with less volume.
- Pepperoni: Swap for thinly sliced turkey pepperoni or cooked, crumbled lean turkey or chicken sausage to lower saturated fat.
- Pizza sauce: Pick a low-sugar marinara or make your own with crushed tomatoes, garlic, and oregano to control salt and sugar.
Equipment Breakdown
Minimal gear is needed. If you own these few tools, the job becomes easier and cleaner:
Must-haves
- Baking sheet: A rimmed sheet keeps the pockets in place while baking and catches any spillover.
- Parchment paper: Prevents sticking and makes transfer and cleanup effortless.
- Rolling pin (or hands): To shape the dough into even 5-inch squares. Hands work if you press gently and evenly.
- Pastry brush: For the egg wash; a silicone brush works fine.
Nice-to-haves
- Bench scraper: Handy for dividing dough into equal portions cleanly.
- Ruler or small measuring guide: Useful if you want perfectly uniform pockets for freezing and stacking.
Problems & Prevention
Here are the most common issues and how to avoid them.
- Soggy centers: Don’t over-sauce the pockets. The recipe specifies 1 tablespoon of sauce and a 1/2-inch border — that border is key for a crisp seam.
- Seams opening during baking: Press edges firmly and crimp with a fork. The egg wash helps seal; make sure it’s applied to the edges as well as the top.
- Pockets burning on the bottom: Use parchment and a middle-rack position. If your oven runs hot, reduce temp by 10–15°F and add a couple extra minutes to bake time.
- Uneven browning: Rotate the baking sheet halfway through cooking if your oven has hot spots.
Spring to Winter: Ideas
These pockets are a framework for seasonal fillings. Change the interior to match produce and cravings.
- Spring: Add thinly sliced asparagus, fresh basil, and a whisper of lemon zest with mozzarella for brightness.
- Summer: Use grilled vegetables, fresh tomatoes (lightly drained), and a little goat cheese for tang.
- Fall: Mix roasted butternut squash with sage and fontina for a cozy twist.
- Winter: Try caramelized onions, mushrooms, and shredded roast chicken with a touch of thyme for a hearty option.
Insider Tips
Little details make a big difference in texture and ease:
- Room temperature dough: If your dough is too cold to roll, let it sit for 10–15 minutes. It should be pliable but not sticky.
- Even portions: Divide the dough into eight portions by weight if you want uniform pockets. Otherwise, eyeballing works fine for casual meals.
- Drain wet fillings: If you use veggies with high moisture (like fresh tomatoes), pat them dry so the pocket doesn’t get soggy.
- Crimp well: A fork press not only seals but also creates a decorative edge that helps steam escape evenly through the crust rather than bursting open.
Freezer-Friendly Notes
These pockets freeze beautifully, making them perfect for meal prep.
- Flash-freeze: After assembling but before baking, place the sheet of pockets in the freezer until firm (about 1–2 hours). Then transfer to a labeled freezer bag. This prevents sticking and keeps shapes intact.
- Bake from frozen: You can bake frozen pockets straight from the freezer. Add 5–8 minutes to the baking time and watch for golden color. Consider covering with foil for the first part of baking if tops brown too quickly.
- Storage life: Properly wrapped, these last 2–3 months in the freezer. Thawed pockets keep in the refrigerator for up to 48 hours before baking.
Troubleshooting Q&A
Short answers to likely questions.
Q: Can I make these ahead and refrigerate before baking?
A: Yes. Assemble and keep them covered in the fridge for up to 24 hours before baking. Egg wash just before baking for best color.
Q: My pockets are browning but the inside is still cold. What now?
A: Reduce oven temperature by 10–15°F and bake a few minutes longer. Alternatively, tent with foil to prevent further browning while the center finishes cooking.
Q: Can I use homemade dough?
A: Absolutely. Use a basic pizza dough that’s been chilled. The same portioning and rolling apply. If your dough is higher in hydration, flour the surface lightly to manage stickiness.
Q: Any tips for reheating baked pockets?
A: Reheat in a 350°F (175°C) oven for 8–10 minutes from refrigerated, or 12–15 minutes from frozen. The oven restores the crust better than a microwave, which can make them soggy.
In Closing
Homemade Hot Pockets are simple, customizable, and fast enough to become a regular in your rotation. The basic assembly and baking method here is forgiving: keep the fillings moderate, seal well, and you’ll get consistent, satisfying results. Make a batch, freeze some for later, and use the filling ideas to keep things interesting.
Try them once and you’ll see how easy it is to outshine the store-bought version with fresher flavors and better texture. If you experiment with a seasonal filling, come back and note what worked — that’s how new favorites are born.

Homemade Hot Pockets
Ingredients
Ingredients
- 1 poundrefrigerated pizza dough
- 1/2 cuppizza sauce
- 1 cupshredded mozzarella cheese
- 1/2 cupsliced pepperoni
- 1 large eggbeaten
Instructions
Instructions
- Preheat oven to 400°F (200°C). Line a baking sheet with parchment paper.
- Divide the 1 pound refrigerated pizza dough into 8 equal portions.
- On a clean work surface or on the prepared parchment, roll each portion into a 5-inch square. Place the squares on the prepared baking sheet, leaving space between them.
- Spoon 1 tablespoon of pizza sauce onto the center of each square, leaving a 1/2-inch border around the edges.
- Evenly divide the 1 cup shredded mozzarella cheese among the squares, sprinkling the cheese over the sauce on each one.
- Evenly divide the 1/2 cup sliced pepperoni among the squares and place the slices on top of the cheese.
- Fold each square in half over the filling to form a pocket. Press the edges together to seal, then crimp the sealed edges with a fork to ensure they are closed.
- Brush the tops and edges of each sealed pocket with the beaten large egg.
- Bake on the prepared baking sheet for 15 minutes, or until the pockets are puffed and golden brown.
- Remove from the oven and let the hot pockets cool on the baking sheet for about 5 minutes before serving.
Equipment
- Baking Sheet
- Parchment Paper
- Rolling Pin
- Fork
- Pastry Brush


