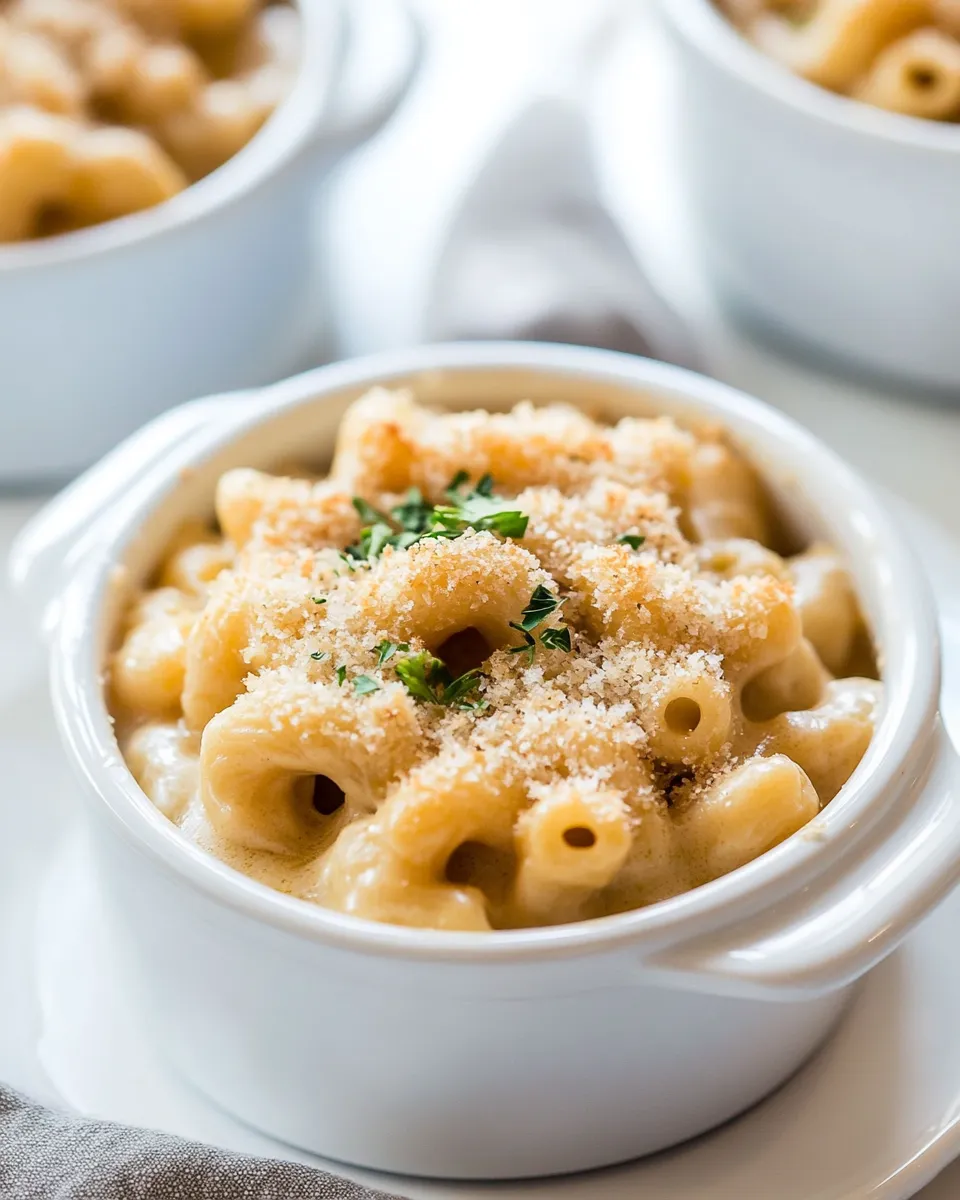
This Instant Pot Cauliflower Mac and Cheese is my weekday lifesaver — creamy, cheesy, and faster than a stove-top version. It uses riced cauliflower folded into whole wheat pasta so you get extra vegetables without sacrificing the classic mac-and-cheese comfort. The Instant Pot does the heavy lifting: pasta and cauliflower cook together, and the sauce comes together right in the pot.
I keep the flavors straightforward: a mix of melty cheeses, a touch of reduced‑fat cream cheese for silkiness, and evaporated milk to make the sauce rich without adding a pile of heavy cream. The recipe is forgiving on texture, so you can loosen it with more evaporated milk or thicken it by letting it sit for a minute.
Below you’ll find a clear ingredients list and the exact Instant Pot steps I use every time. I’ve also added tips for equipment, swaps, and what to avoid so this becomes a regular on your meal rotation. No frills—just practical, reliable cooking.
What’s in the Bowl
At a glance: riced cauliflower for body, whole wheat pasta for chew and fiber, and a blend of melty cheeses for richness. A small amount of butter and reduced‑fat cream cheese help the sauce cling to the pasta, while evaporated milk gives a smooth finish without overpowering the other flavors. Garlic powder and black pepper keep seasoning simple and pantry-friendly.
Ingredients
- 1 medium/large head cauliflower — riced to add volume and a mild cauliflower flavor; blends into the sauce.
- 16 ounces whole wheat pasta elbows, shells, rotini, or similar — the pasta provides structure; choose shapes that trap the sauce.
- 1 tablespoon unsalted butter — adds a touch of richness and helps the sauce emulsify.
- 1 teaspoon kosher salt — seasons the cooking liquid and the pasta; you can adjust at the end.
- 2 ounces reduced-fat cream cheese — broken into pieces and melted in for creaminess without too much fat.
- 2 cups freshly grated melty flavorful cheese such as cheddar, gruyere, provolone, fontina, gouda, or a mix, divided (about 8 ounces; I used half extra-sharp white cheddar and half provolone) — divided so some melts into the sauce and some gets sprinkled on top for texture and extra melt.
- 8 to 12 ounces 2% evaporated milk — the main liquid that creates a silky sauce; start with 8 ounces and add up to 12 if you want it looser.
- ½ teaspoon garlic powder — simple aromatic that gives savory depth without overpowering.
- ¼ teaspoon ground black pepper — brightens and balances the richness; adjust to taste.
Step-by-Step: Instant Pot Cauliflower Mac and Cheese
- Cut the cauliflower into large florets. Using the large side of a box grater, shred the florets; or for faster results pulse the florets in a food processor fitted with a steel blade until the cauliflower resembles small grains (about 4 cups riced cauliflower).
- Divide the 2 cups freshly grated cheese into two roughly equal portions and set one portion aside for topping.
- In a 6‑quart (or larger) Instant Pot, add the 16 ounces whole wheat pasta, the riced cauliflower, 3 1/2 cups water, 1 tablespoon unsalted butter, and 1 teaspoon kosher salt. Stir to combine and make sure the pasta is mostly submerged.
- Secure the lid and set the valve to Sealing. Cook on High Pressure (Manual) for 4 minutes.
- When the cook time ends, perform a quick release: carefully move the valve to Venting until the steam finishes and the float valve drops. Open the lid.
- Break the 2 ounces reduced‑fat cream cheese into small pieces and dot them over the pasta mixture.
- Add the first portion of grated cheese (the half you did not set aside), 8 ounces evaporated milk, 1/2 teaspoon garlic powder, and 1/4 teaspoon ground black pepper. Stir gently until the cream cheese and shredded cheese melt and the sauce is smooth.
- If the mac and cheese is thicker than you like, stir in more evaporated milk, up to the remaining amount allowed (use additional evaporated milk up to a total of 12 ounces) until you reach your desired consistency.
- Taste and adjust seasoning with additional kosher salt and/or black pepper if needed. Sprinkle the reserved grated cheese over the top if desired, then serve hot.
Why It Deserves a Spot

This recipe earns a spot on any busy-weeknight roster because it combines speed, comfort, and a sneaky vegetable boost. It’s satisfying in the way classic mac and cheese is, but the riced cauliflower stretches the dish so you get more volume and fiber without changing the mood at the table.
Using whole wheat pasta makes the dish heartier and more filling, and the instant protein-and-dairy combo means it’s a crowd-pleaser for both kids and adults. The Instant Pot cuts down active time and delivers consistent results—no stirring a pot for 20 minutes.
Healthier Substitutions

- Swap the cheeses — use lower-fat cheddar or a single strong-flavored cheese (like sharp cheddar) to use less while keeping taste.
- Milk choices — if you don’t have evaporated milk, you can use whole milk or a mix of milk and a splash of half-and-half, but the texture will be slightly thinner.
- Pasta — if you prefer a gluten-free option, use a gluten-free pasta that tolerates pressure cooking well; check manufacturer guidance for cook times.
- Extra veg — stir in steamed peas or chopped spinach after cooking for more color and nutrients.
Gear Up: What to Grab
A 6‑quart Instant Pot (or larger) is the central tool. You’ll also want a box grater or food processor to rice the cauliflower, a good microplane or box grater for the cheese if you’re shredding it fresh, and a heatproof spoon for stirring. A liquid measuring cup helps you track the evaporated milk additions.
What Not to Do
- Don’t skip ricing the cauliflower — large florets won’t meld into the sauce the same way and will give an uneven texture.
- Don’t overcrowd a small Instant Pot — the directions assume a 6‑quart or larger pot. A smaller pot can lead to uneven cooking or foam issues.
- Don’t overdo pressure time — the pasta is meant to cook quickly; extra minutes could make it mushy, especially in whole wheat varieties.
- Don’t add all evaporated milk at once — start with 8 ounces, then add more only if needed. Too much can make the sauce runny.
Seasonal Spins
In spring and summer, fold in blanched asparagus tips or fresh peas at the end for brightness. In fall, swap half the cheese for a milder fontina and top with toasted breadcrumbs and a sprinkle of smoked paprika for warmth. In winter, stir in roasted butternut squash cubes for a sweet contrast and a festive color.
Flavor Logic
The recipe balances creamy mouthfeel and cheesy flavor without relying on heavy cream. Reduced‑fat cream cheese adds structure and helps the sauce cling. Evaporated milk concentrates dairy flavor more than plain milk, so you get richness with less volume. Garlic powder gives a steady savory backbone that doesn’t compete with the cheeses. The reserved grated cheese on top melts into a glossy finish and offers an extra hit of flavor and texture.
Make-Ahead & Storage
Make-Ahead: You can cook the pasta and cauliflower through Step 5, cool, then refrigerate for up to 24 hours. Before serving, rewarm gently in the Instant Pot on Sauté (low) or in a saucepan, then proceed with Steps 6–9 so the cheeses melt fresh.
Storage: Leftovers keep well in an airtight container in the fridge for 3–4 days. Reheat gently on the stovetop with a splash of milk or water to loosen the sauce, or microwave in short bursts, stirring between intervals. The texture will firm up in the fridge — adding a little extra evaporated milk when reheating brings it back.
Helpful Q&A
Q: Can I use fresh milk instead of evaporated milk?
Yes, but evaporated milk gives a creamier, slightly thicker result. If you use fresh milk, consider adding a small extra dose of cream cheese or using whole milk to maintain richness.
Q: My pasta came out a little soft. What happened?
Whole wheat pasta can get softer than white pasta if overcooked. For firmer texture, reduce the pressure time by 1 minute next time or try a different brand with shorter recommended cook times.
Q: Can I double this recipe?
You can, but only if you have a larger Instant Pot (8-quart). Keep the liquid ratio and cook time the same; crowding too much into a smaller pot affects pressure performance.
Q: Is the dish freezer-friendly?
Freezing changes texture: the pasta will be softer after thawing and reheating. If you plan to freeze, consider undercooking the pasta slightly before freezing to reduce mushiness on reheat.
In Closing
This Instant Pot Cauliflower Mac and Cheese gives you the comfort of classic mac and cheese with a little extra nutrition and less hands-on time. It’s straightforward, adaptable, and built for busy nights when you want something cozy without fuss. Make it as written the first time, then feel free to tweak cheeses, add a veg, or top it with breadcrumbs for crunch. You’ll be surprised how often it becomes the easy, reliable dinner you reach for.

Instant Pot Cauliflower Mac and Cheese
Ingredients
Ingredients
- 1 medium/large head cauliflower
- 16 ounceswhole wheat pastaelbows shells, rotini, or similar
- 1 tablespoonunsalted butter
- 1 teaspoonkosher salt
- 2 ouncesreduced-fat cream cheese
- 2 cupsfreshly grated melty flavorful cheesesuch as cheddar gruyere, provolone, fontina, gouda, or a mix, divided (about 8 ounces; I used half extra-sharp white cheddar and half provolone)
- 8 to 12 ounces2% evaporated milk
- 1/2 teaspoongarlic powder
- 1/4 teaspoonground black pepper
Instructions
Instructions
- Cut the cauliflower into large florets. Using the large side of a box grater, shred the florets; or for faster results pulse the florets in a food processor fitted with a steel blade until the cauliflower resembles small grains (about 4 cups riced cauliflower).
- Divide the 2 cups freshly grated cheese into two roughly equal portions and set one portion aside for topping.
- In a 6‑quart (or larger) Instant Pot, add the 16 ounces whole wheat pasta, the riced cauliflower, 3 1/2 cups water, 1 tablespoon unsalted butter, and 1 teaspoon kosher salt. Stir to combine and make sure the pasta is mostly submerged.
- Secure the lid and set the valve to Sealing. Cook on High Pressure (Manual) for 4 minutes.
- When the cook time ends, perform a quick release: carefully move the valve to Venting until the steam finishes and the float valve drops. Open the lid.
- Break the 2 ounces reduced‑fat cream cheese into small pieces and dot them over the pasta mixture.
- Add the first portion of grated cheese (the half you did not set aside), 8 ounces evaporated milk, 1/2 teaspoon garlic powder, and 1/4 teaspoon ground black pepper. Stir gently until the cream cheese and shredded cheese melt and the sauce is smooth.
- If the mac and cheese is thicker than you like, stir in more evaporated milk, up to the remaining amount allowed (use additional evaporated milk up to a total of 12 ounces) until you reach your desired consistency.
- Taste and adjust seasoning with additional kosher salt and/or black pepper if needed. Sprinkle the reserved grated cheese over the top if desired, then serve hot.
Equipment
- Instant Pot
- Box Grater
- Food Processor
Notes
I don’t recommend gluten-free pasta, as it breaks down and becomes very gummy.