
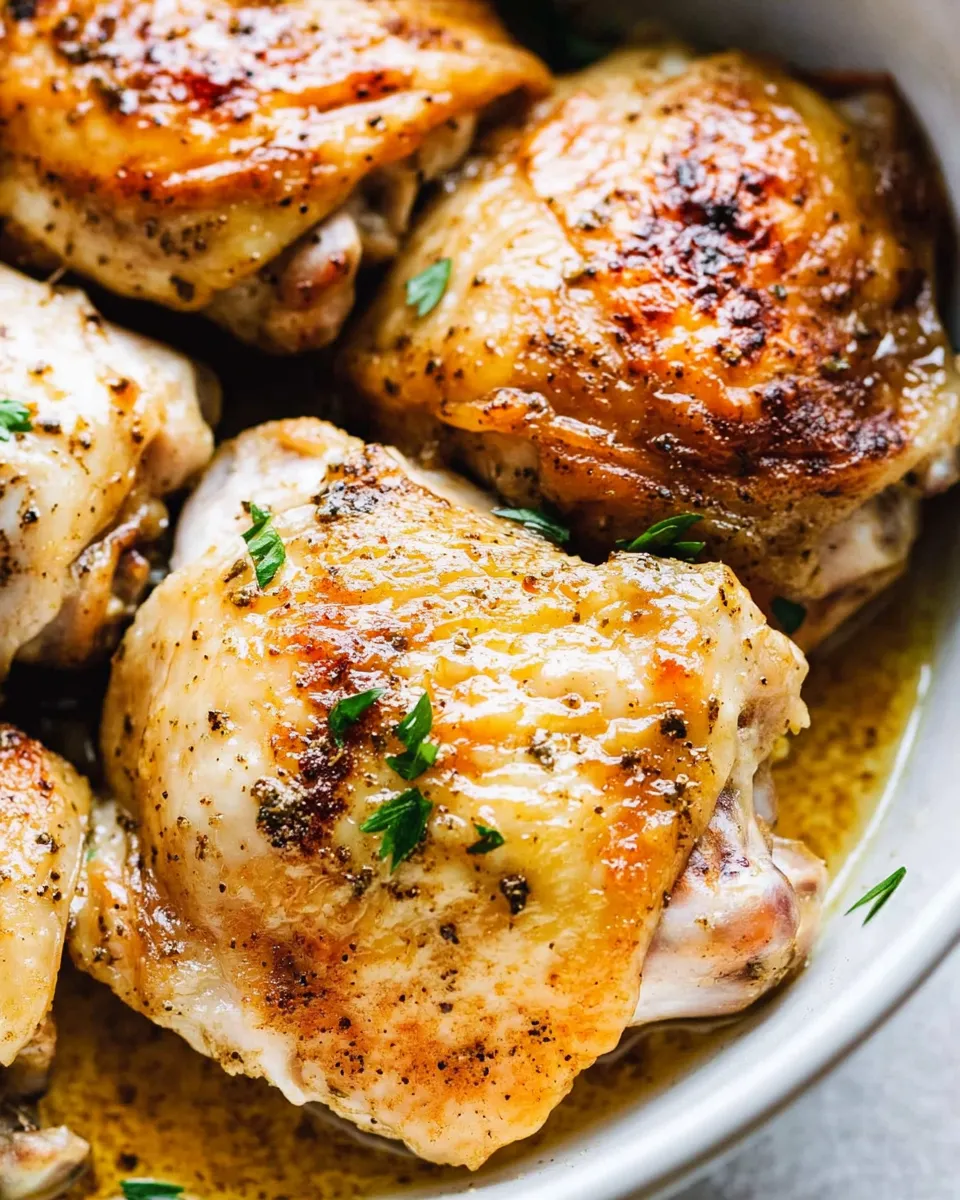
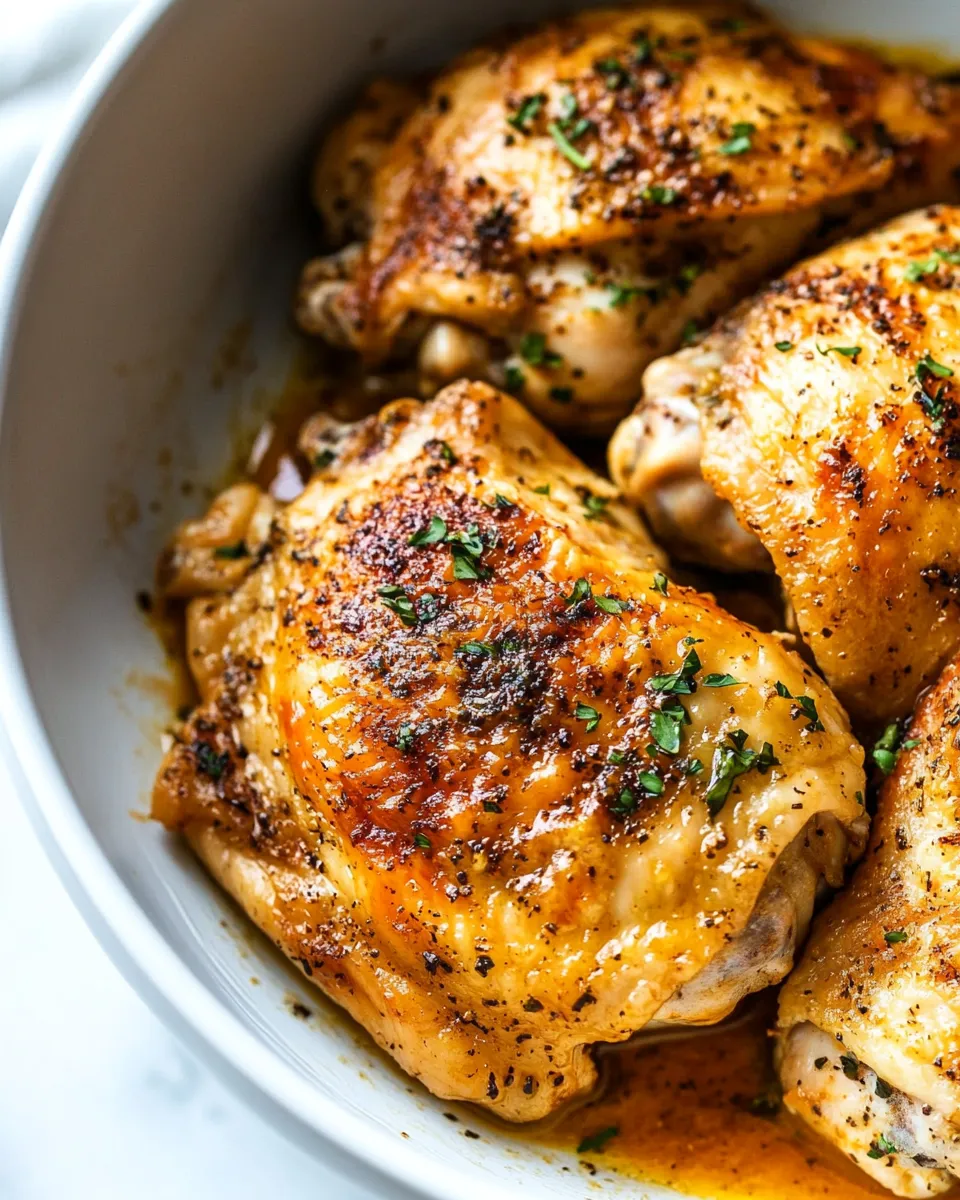
These Instant Pot chicken thighs are my weekday workhorse: quick to prep, reliably tender, and honestly forgiving if life gets in the way of dinner. You get a nicely browned exterior from a short sear, then the pressure does the heavy lifting so the meat becomes fall-off-the-bone without sitting in the oven for hours.
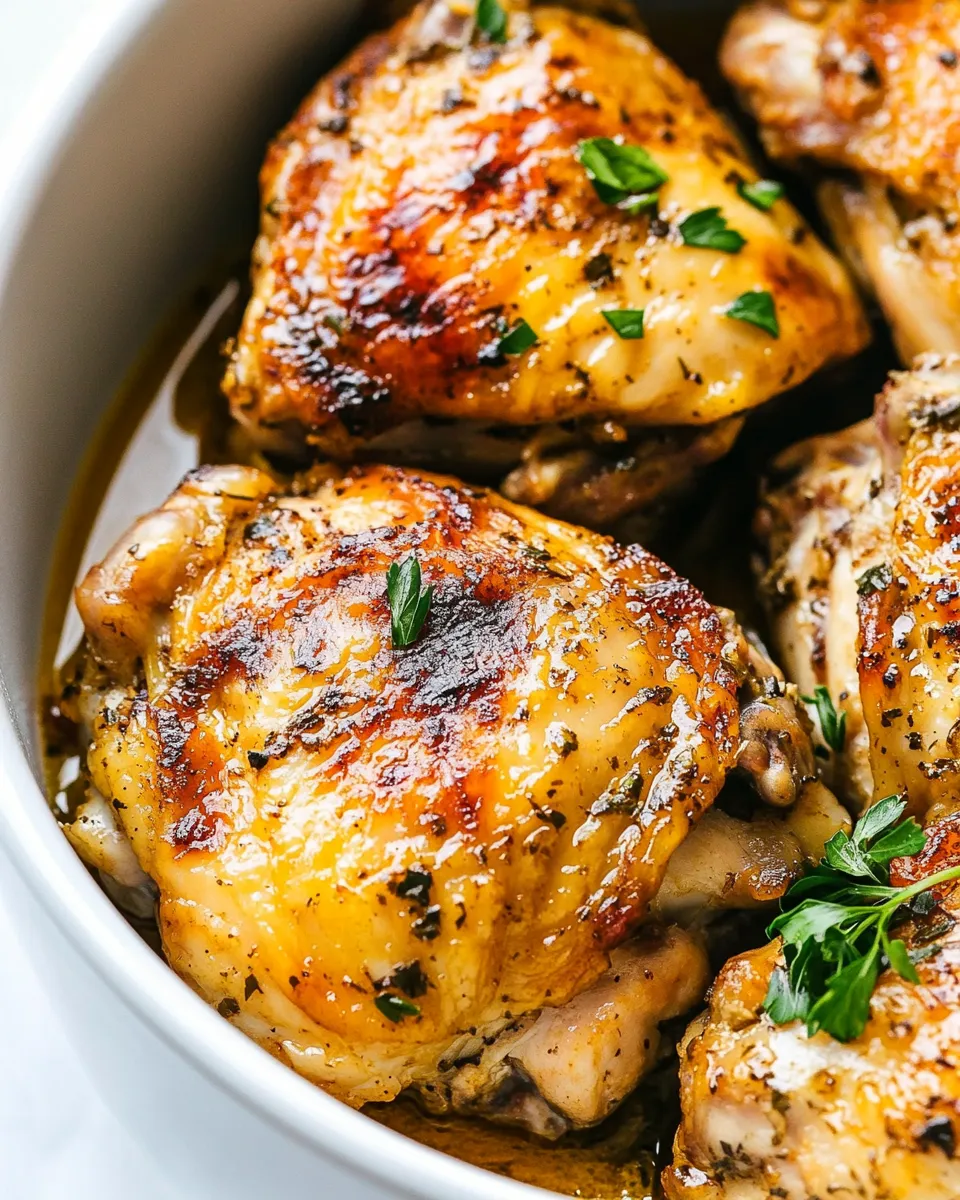
I keep this recipe in rotation because it behaves — the timing is predictable, the flavors are straightforward, and the pot juices make an easy pan sauce that elevates plain rice or roasted vegetables. No complicated steps, no specialized pantry items. Just a little sear, a pressure cycle, and dinner is served.
If you want reliable family food that still feels like a home-cooked meal, this is it. Below you’ll find the ingredients, the exact Instant Pot steps, practical tips, troubleshooting, and ideas to tweak it for your needs.
Ingredients
- 2 pounds chicken thighs, bone-in skin-on, 6-8 pieces — the bone and skin add flavor and keep the thighs moist under pressure.
- ½ teaspoon paprika — brings color and a mild smoky-sweet note to the skin.
- ½ teaspoon dried oregano — a savory herb touch that pairs well with chicken.
- ½ teaspoon garlic powder — concentrated garlic flavor without fresh garlic prep.
- 1 teaspoon salt — seasons the meat; adjust if you use low-sodium stock.
- ¼ teaspoon ground black pepper — adds a gentle heat and balances the flavors.
- 1 tablespoon butter — helps brown the skin and contributes richness to the pan juices.
- 1 tablespoon olive oil — raises the smoke point of the butter and aids in searing.
- 1 cup chicken stock or broth — the liquid that creates steam and becomes the cooking juices/sauce.
Shopping List
All of these are basic and usually easy to find. If you already have a well-stocked pantry you may only need the chicken and stock.
- Chicken thighs, bone-in and skin-on (2 pounds, 6–8 pieces) — buy slightly more if pieces are small.
- Salt, black pepper, paprika, dried oregano, garlic powder — check freshness on spices; old spices lose punch.
- Butter and olive oil — you need small amounts, so single sticks/bottles are fine.
- Chicken stock or broth — use a carton or can, 1 cup required; low-sodium if you prefer to control salt.
How to Prepare Instant Pot Chicken Thighs
- Pat the chicken thighs dry with paper towels. Evenly season all sides with the paprika, dried oregano, garlic powder, salt, and black pepper.
- Press SAUTE on the Instant Pot. Add 1 tablespoon olive oil and 1 tablespoon butter. When the butter has melted and the oil is hot, proceed to brown the chicken.
- Add the chicken thighs skin-side down in a single layer (work in batches if they won’t fit without crowding). Brown skin-side down 2–3 minutes until golden, then flip and brown the other side about 2 minutes. Remove browned thighs to a plate and repeat with any remaining pieces.
- Pour 1 cup chicken stock into the pot. Use a wooden spoon or spatula to scrape the bottom of the pot and deglaze, loosening any browned bits.
- Insert the trivet into the pot. Arrange the browned chicken thighs on the trivet (slight overlap is okay).
- Secure the lid and set the steam release valve to SEALING. Select PRESSURE COOK / MANUAL on High pressure and set the time to 10 minutes. The Instant Pot will take about 6–7 minutes to come to pressure before the cooking time begins.
- When the cooking program ends, either allow a natural pressure release (recommended for more tender, fall-off-the-bone chicken) or perform a quick release if you need the chicken right away. When the pressure is fully released, open the lid away from your face.
- Transfer the chicken to a serving plate and spoon the pot juices over the thighs. If you prefer a thicker sauce, select SAUTE and simmer the juices until reduced to your desired consistency, stirring occasionally.
Why It’s My Go-To

This recipe hits three things I look for: speed, reliability, and texture. The sear gives the thighs a real, attractive color and a flavor layer you don’t get from steaming alone. Pressure cooking then finishes the job quickly and keeps the meat moist around the bone. Even when life is chaotic, this method gives consistent results.
It’s also flexible — the pan juices are a built-in, no-fuss sauce, and the overall prep is straightforward: dry, season, sear, and pressure-cook. You don’t have to babysit an oven or time multiple pots. That combination keeps it on my weekly rotation.
Smart Substitutions
Keep substitutions simple so the method still works as written:
- Chicken stock or broth — the recipe already lists both; use whichever you have. If you need lower sodium, choose low-sodium broth and taste before serving.
- Butter and olive oil — you can use just olive oil if you prefer no dairy, or just butter if that’s what you have; the mix helps with searing and flavor.
- Herbs and spices — the base spices listed are minimal. If you have a mixed Italian blend, you can use a portion of it in place of the oregano, but try to keep the total amount similar so the seasoning balance remains.
Gear Up: What to Grab
Minimal gear makes this easy:
- Electric pressure cooker (Instant Pot) with a sauté function — the recipe relies on both sauté and pressure modes.
- Trivet — the recipe calls for a trivet so the thighs sit above the liquid; most Instant Pots come with one.
- Tongs — for flipping and removing hot thighs safely.
- Wooden spoon or spatula — to deglaze the bottom and loosen browned bits.
- Paper towels — to pat the thighs dry; dryness equals better sear.
Troubles You Can Avoid
These are the common hiccups and how to prevent them:
- Crowding the pot while searing — if you put too many thighs in at once you won’t brown them properly. Work in batches so each piece gets direct contact with the hot surface.
- Skipping the deglaze — if you don’t pour the stock and scrape the bottom after searing, browned bits can trigger a burn warning on the Instant Pot during pressure build-up.
- Opening the lid too soon after pressure release — after a quick release, open the lid away from your face to avoid steam; after natural release, wait until the float valve drops fully.
- Using skinless thighs without adjustments — skin adds flavor and protects meat; if you use skinless thighs, reduce sauté time slightly and handle them gently to avoid drying.
Customize for Your Needs
Want to adapt this for different meals or preferences? Here are honest, practical ways to shift it:
- Lower sodium — use low-sodium chicken stock and reduce added salt; you can always finish with a pinch at the table.
- Thicker pan sauce — after removing the thighs, use SAUTE to reduce the cooking liquid until it coats a spoon, or swirl in a small pat of butter for shine and body.
- Meal pairings — serve with rice, mashed potatoes, or a quick sautéed green. The thighs and juices are versatile and pair well with simple sides.
- Make it a one-pot meal — add quick-cooking vegetables on top of the trivet (e.g., sliced potatoes or carrots) if you want everything cooked together; adjust timing for the veggies’ doneness.
What Could Go Wrong
Real talk: even simple recipes have pitfalls. Here’s what to watch for and how to fix it.
- Burn or BURN warning — that usually happens when residue from searing isn’t fully deglazed. Make sure to scrape the pot bottom thoroughly after adding the stock.
- Tough meat — overcooking can make thighs stringy. Stick to the 10-minute pressure time; if your thighs are larger-than-average, check for doneness and use natural release for more tenderness.
- Pale skin — if the thighs aren’t browned enough after sautéing, try a slightly longer sear (but watch for burning). Browning is quick; 2–3 minutes per side is usually enough.
- Watery sauce — if the juices seem thin, simmer them on SAUTE for a few minutes to reduce and concentrate the flavor.
Make-Ahead & Storage
Make-ahead and leftovers are where this recipe shines. Cooked thighs store well and reheat evenly.
- Refrigerate: Cool to room temperature and store in an airtight container for up to 3–4 days. Keep the pot juices with the chicken so meat stays moist when reheated.
- Freeze: Place cooled thighs and their juices in a freezer-safe container or heavy-duty bag for up to 3 months. Thaw overnight in the refrigerator before reheating.
- Reheating: Warm gently in a 300°F oven covered, or reheat in a skillet over medium-low heat with a splash of stock to revive the sauce. Microwaving works in a pinch—cover and add a teaspoon of liquid to avoid drying out.
Questions People Ask
Can I use boneless, skinless thighs?
Yes. Boneless, skinless thighs will cook faster and won’t need as long to brown. Shorten the sauté time slightly and keep an eye on texture; you may prefer a shorter pressure time depending on size.
Do I have to brown the chicken first?
Browning adds flavor and color, but you can skip it if you’re short on time. Skip searing and set the Instant Pot for the same pressure time — you’ll lose some depth in the sauce and color on the skin, but the meat will still be tender.
Which release is better: natural or quick?
Natural release lets the pressure come down slowly and is recommended for more tender, fall-off-the-bone meat. Quick release is fine if you’re pressed for time and don’t mind a slightly firmer texture.
How thick will the sauce be after pressure cooking?
Straight from pressure cooking the juices will be thin. Use SAUTE to reduce them until they reach your preferred consistency, stirring occasionally. A minute or two can make a big difference.
That’s a Wrap
This Instant Pot Chicken Thighs recipe is simple, dependable, and adaptable. It gives you golden-browned thighs and a flavorful sauce with minimal hands-on time. Follow the sear, deglaze, and pressure steps faithfully and you’ll have dinner that feels like you spent more time on it than you did.
Make it once, and you’ll see why it’s so easy to rely on. If you try it, tell me how you served it—rice, mashed potatoes, or a tray of roasted veggies? I love hearing real-world swaps and timing adjustments that worked in other kitchens.

Instant Pot Chicken Thighs
Ingredients
Ingredients
- ?2 poundschicken thighsbone-in skin-on 6-8 pieces
- ?1/2 teaspoonpaprika
- ?1/2 teaspoondried oregano
- ?1/2 teaspoongarlic powder
- ?1 teaspoonsalt
- ?1/4 teaspoonground black pepper
- ?1 tablespoonbutter
- ?1 tablespoonolive oil
- ?1 cupchicken stock or broth
Instructions
Instructions
- Pat the chicken thighs dry with paper towels. Evenly season all sides with the paprika, dried oregano, garlic powder, salt, and black pepper.
- Press SAUTE on the Instant Pot. Add 1 tablespoon olive oil and 1 tablespoon butter. When the butter has melted and the oil is hot, proceed to brown the chicken.
- Add the chicken thighs skin-side down in a single layer (work in batches if they won’t fit without crowding). Brown skin-side down 2–3 minutes until golden, then flip and brown the other side about 2 minutes. Remove browned thighs to a plate and repeat with any remaining pieces.
- Pour 1 cup chicken stock into the pot. Use a wooden spoon or spatula to scrape the bottom of the pot and deglaze, loosening any browned bits.
- Insert the trivet into the pot. Arrange the browned chicken thighs on the trivet (slight overlap is okay).
- Secure the lid and set the steam release valve to SEALING. Select PRESSURE COOK / MANUAL on High pressure and set the time to 10 minutes. The Instant Pot will take about 6–7 minutes to come to pressure before the cooking time begins.
- When the cooking program ends, either allow a natural pressure release (recommended for more tender, fall-off-the-bone chicken) or perform a quick release if you need the chicken right away. When the pressure is fully released, open the lid away from your face.
- Transfer the chicken to a serving plate and spoon the pot juices over the thighs. If you prefer a thicker sauce, select SAUTE and simmer the juices until reduced to your desired consistency, stirring occasionally.
Equipment
- Instant Pot
Notes
Bone-in skinless:10 minutes high pressure, then 5 minutes natural release.
Boneless skinless:8 minutes high pressure, then 5 minutes natural release.
Frozen chicken thighs, frozen individually:14 minutes high pressure, then 5 minutes natural release.


