
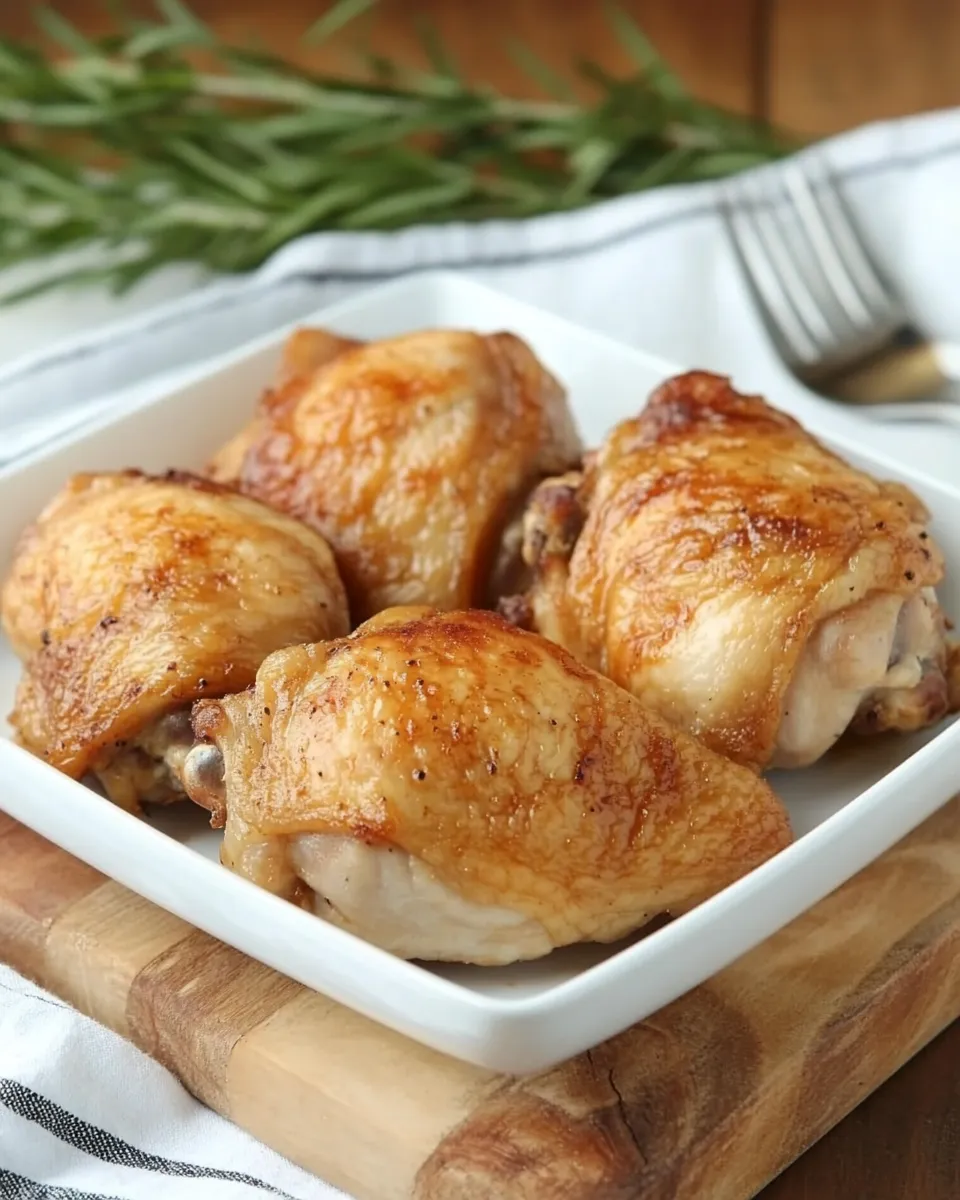
These Keto Chicken Thighs are my go-to weeknight rescue: crispy, seasoned skin with juicy meat beneath, and a straightforward technique that doesn’t demand babysitting. There’s no complicated sauce, no long marinating, just good seasoning and a hot pan that gives you that restaurant-level sear at home. I like meals that do one thing very well—this is one of them.
I tested this method until the skin reliably crisped and the meat stayed tender. It’s forgiving, and you’ll find small adjustments that match your oven and skillet. If you’re watching carbs, this fits naturally into a keto menu without feeling austere. Serve it with a quick salad or roasted low-carb veg and you’re done.
I’ll walk you through the ingredients, each step of the process, what not to do, and a few practical notes so you can make this reliably every time. No fancy equipment required; just a hot skillet, a little patience, and the oven doing the rest.
Gather These Ingredients
- 6 chicken thighs (skin on) — the skin gives crispness and fat for flavor; leave it on for the best texture.
- ¼ teaspoon salt — seasons the meat; don’t skip or drastically reduce unless monitoring sodium.
- ¼ teaspoon pepper — balances the salt and highlights the spices.
- ½ teaspoon garlic powder — adds savory depth without moisture.
- ½ teaspoon onion powder — rounds the savory profile; works well mixed with garlic powder.
- ½ teaspoon smoked paprika — brings warmth and a subtle smoky note that lifts the skin.
- 1 teaspoon olive oil — helps the spices stick and encourages even browning during the sear.
The Method for Keto Chicken Thighs
- Preheat the oven to 450°F (232°C).
- Place a cast-iron pan or an oven-safe skillet on the stovetop over medium heat to warm while you prepare the chicken.
- Pat the 6 chicken thighs (skin on) dry with paper towels.
- Put the chicken thighs in a large bowl and add 1 teaspoon of olive oil. Toss or rub so each thigh is lightly and evenly coated.
- In a small bowl, whisk together ¼ teaspoon salt, ¼ teaspoon pepper, ½ teaspoon garlic powder, ½ teaspoon onion powder, and ½ teaspoon smoked paprika.
- Add the seasoning mixture to the large bowl and toss the chicken until each thigh is evenly coated with the spices.
- When the pan is hot, carefully place the chicken thighs skin side down in the pan (use tongs and watch for splatter). Sear for 4–5 minutes without moving them so the skin browns.
- Flip the thighs and sear the other side for 4–5 minutes.
- Transfer the pan (or move the chicken to an oven-safe dish if your skillet is not oven-safe) to the preheated oven and roast for 15–20 minutes, until the chicken is cooked through (juices run clear and no pink remains near the bone, or an internal temperature of 165°F/74°C).
- Remove the chicken from the oven and let it rest for a few minutes before serving.
Why You’ll Keep Making It
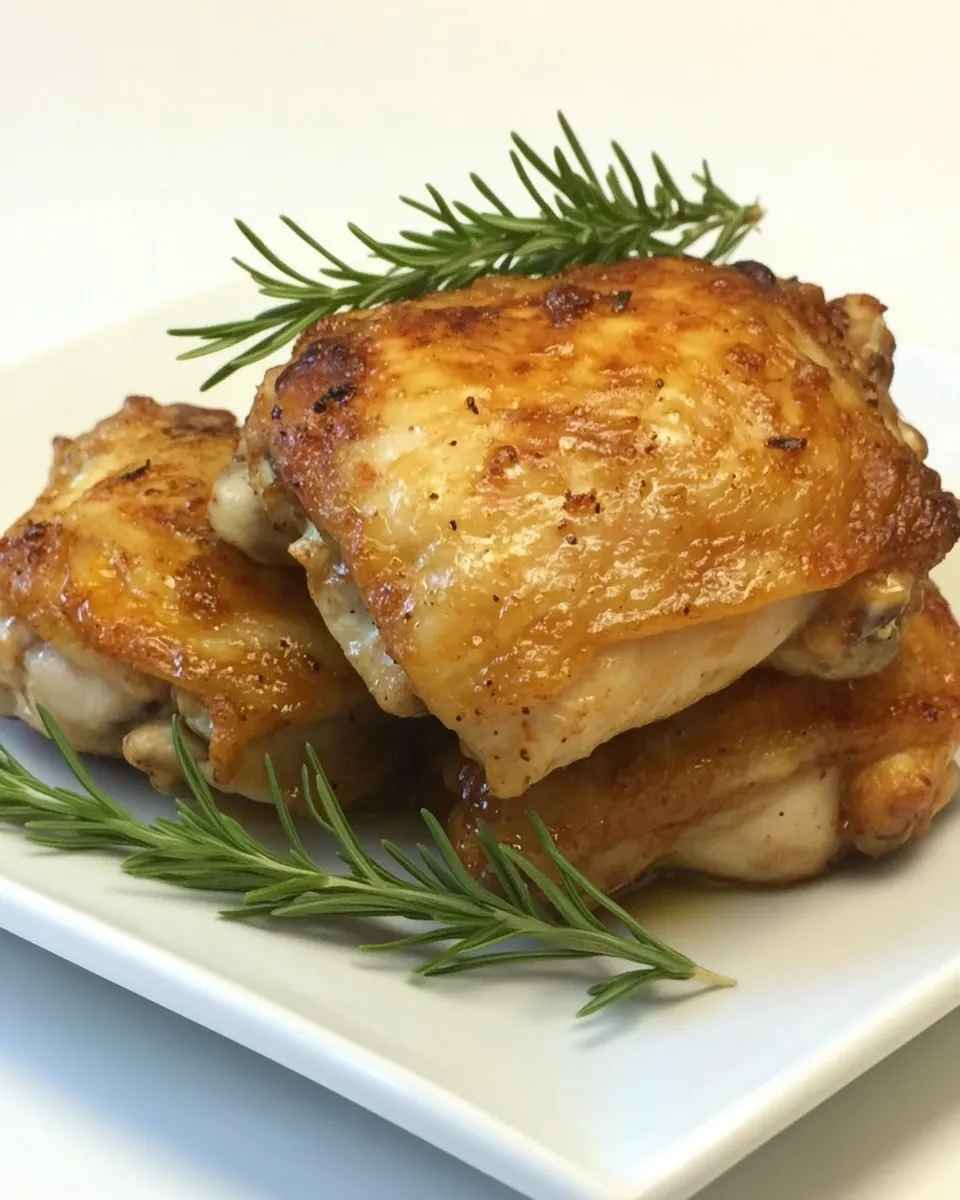
This recipe delivers three things you want from a weeknight protein: fast hands-on time, consistent results, and a texture contrast between crisp skin and tender meat. It’s a minimal-ingredient approach that still feels indulgent because of the sear and the short blast in a hot oven.
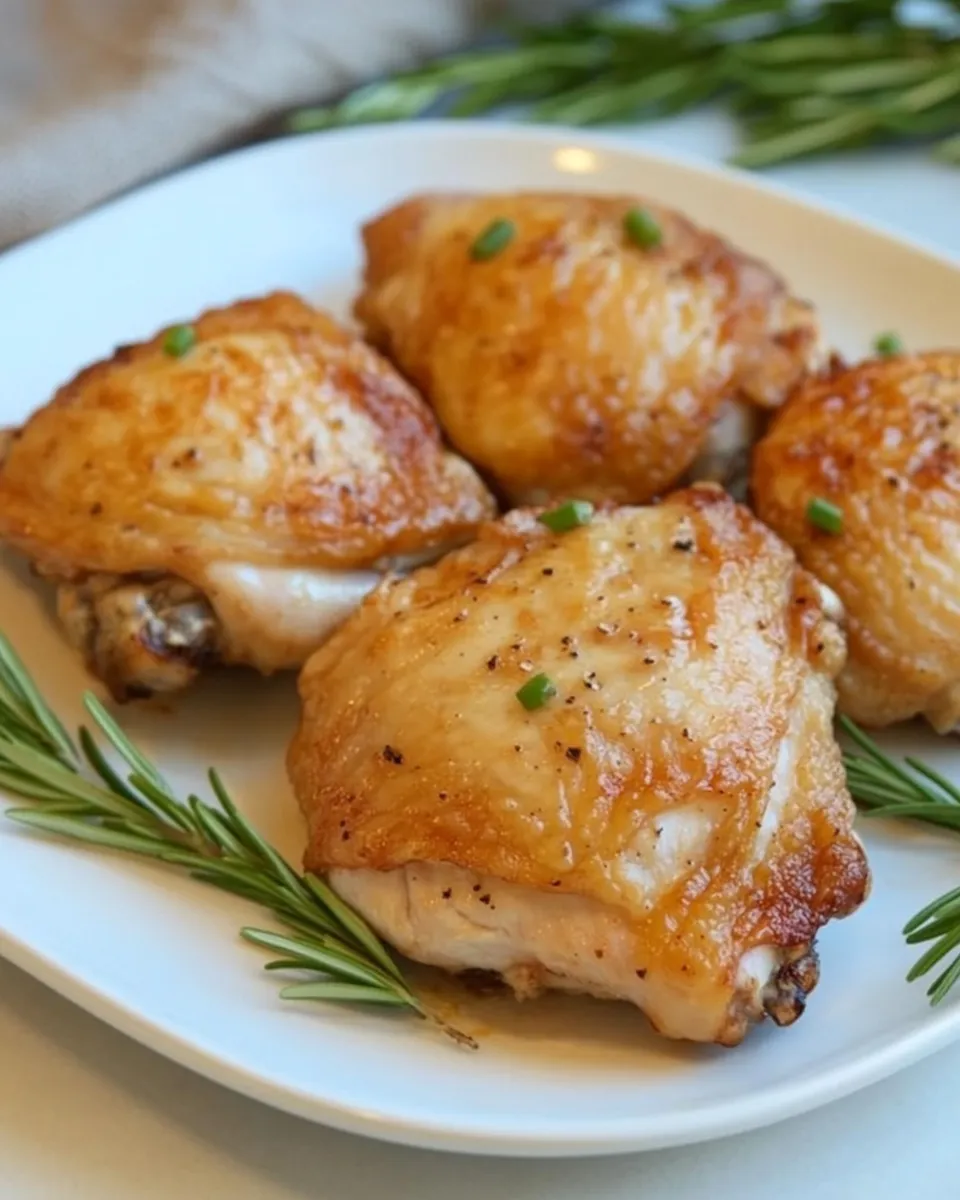
It’s also very keto-friendly by design: high-fat skin and olive oil, lean-ish protein, and no hidden sugars. You’ll find it pairs well with anything low-carb and quick: sautéed greens, cauliflower rice, or a simple herb salad.
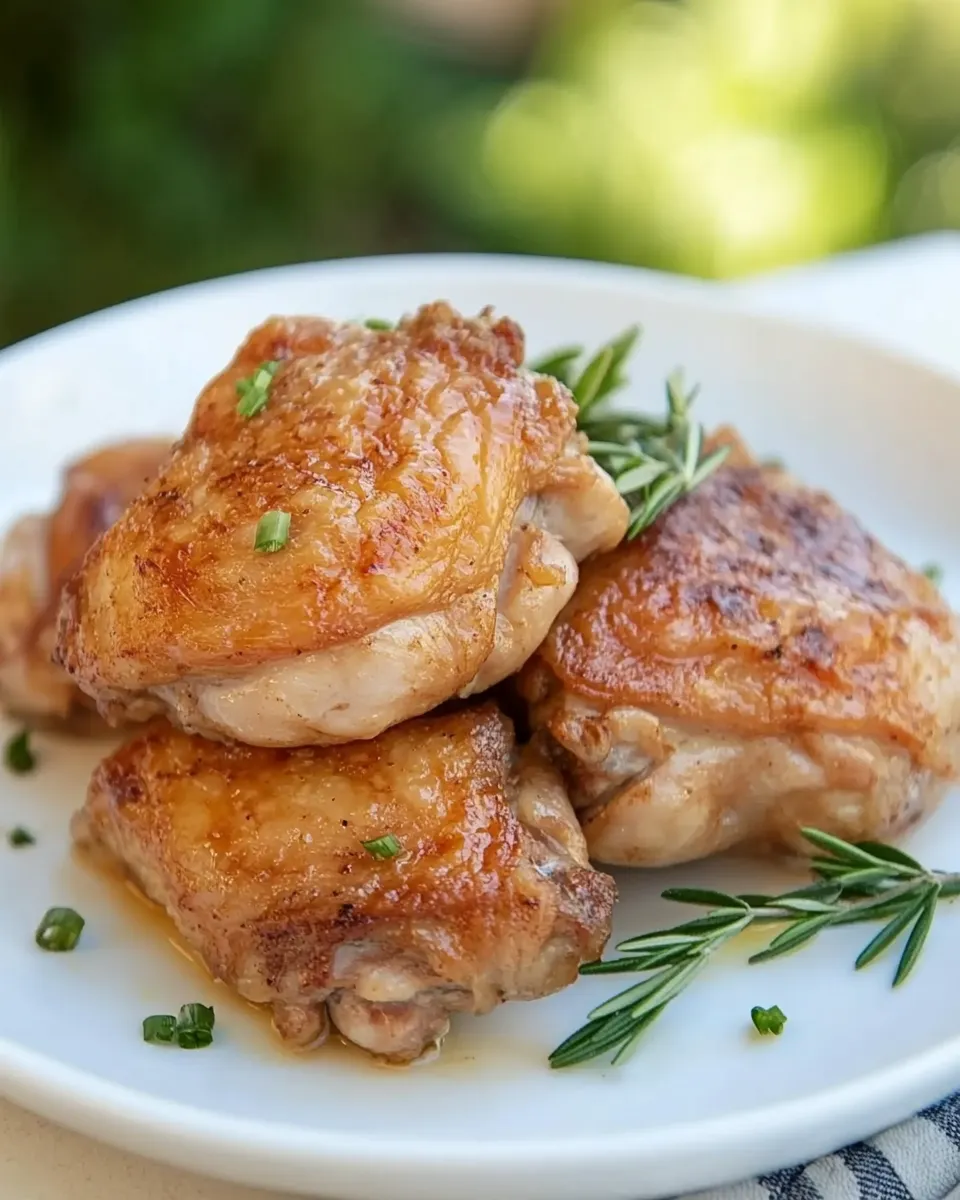
Beyond taste, the method trains good technique: drying the skin, searing hot, and finishing in the oven. Once you’ve done it a couple times, the timing becomes muscle memory—and you’ll know exactly how long to roast depending on how big your thighs are.
Texture-Safe Substitutions
Keep the end texture in mind when changing anything. Here are safe swaps that won’t ruin what makes this dish work.
- Skin removed — if you prefer less fat or crispness, pull the skin off before seasoning; expect less crisp texture and slightly drier meat.
- Smaller or larger thighs — adjust oven time toward the shorter or longer end of the 15–20 minute window; thicker pieces need the full time.
- Different cooking fat — use a neutral oil you already have if olive oil is not available; the role here is lubrication and even browning rather than flavoring.
- Use an oven-safe dish — if your skillet isn’t oven-safe, sear in a skillet and transfer to a baking dish; texture remains the same as long as you sear well.
Essential Tools for Success
- Cast-iron pan or heavy skillet — retains heat for a proper sear; it’s the most reliable option.
- Tongs — for safe flipping and placement without piercing skin and losing juices.
- Paper towels — drying the skin is non-negotiable for crispness.
- Instant-read thermometer — the fastest way to confirm doneness (165°F/74°C) and avoid overcooking.
- Oven mitts — to move a hot skillet safely into the oven.
Don’t Do This
There are a few common mistakes that undo all the good work of drying and seasoning.
- Don’t overcrowd the pan. If thighs are too close, steam builds, and skin won’t crisp. Work in batches if necessary.
- Don’t skip drying the skin. Moist skin equals rubbery skin. Pat until the paper towels pull away a little moisture.
- Don’t move the thighs during the initial sear. Let the Maillard reaction happen. If they stick a bit, they’ll release when the crust forms.
- Don’t assume timing is exact for every oven. Use appearance and an internal thermometer rather than relying only on minutes.
Fresh Takes Through the Year
Spring: Pair the thighs with quick-sauteed asparagus tossed with lemon zest and chopped parsley. The bright herbs cut the richness and make the meal feel lighter.
Summer: Serve alongside a cucumber-tomato-olive salad or a chilled Greek-style slaw (omit croutons) for a no-fuss plate you can eat outside.
Fall: Add roasted mushrooms and garlic-scented spinach on the side. Earthy mushrooms hold up to the strong seasoning here.
Winter: Make a warm cauliflower mash and spoon pan juices (skim off any excess fat if you prefer) over the mash for a cozy, low-carb comfort plate.
Recipe Notes & Chef’s Commentary
Seasoning and salt
The seasoning mix is small but balanced. Salt and pepper are the backbone. Garlic and onion powders add depth without turning this into a heavy spice profile. Smoked paprika gives a subtle smoky layer that complements the skin during searing.
Searing tips
Get the pan hot, but not smoking. A medium heat gives you control; a screaming hot pan risks burning the spice before the fat renders. You want a steady, audible sizzle when the skin hits the cast iron.
Doneness and resting
Carryover heat will raise the internal temperature slightly during the rest. Letting the chicken rest for a few minutes locks in juices and keeps the meat tender. If you cut immediately, juices run out and meat dries faster.
Storing, Freezing & Reheating
Leftovers cool to room temperature then refrigerate in an airtight container for up to 3–4 days. To freeze, wrap individual thighs tightly in plastic wrap and place in a freezer-safe bag for up to 3 months.
Reheat in a 350°F (175°C) oven on a wire rack over a baking sheet for 10–12 minutes from chilled; this preserves some crispness. If reheating from frozen, thaw in the fridge overnight first. Avoid microwaving directly; it will soften the skin and change texture.
Reader Q&A
Q: Can I use boneless thighs?
A: Yes. Boneless thighs cook faster—reduce the oven time and watch internal temperature closely. Searing times may shorten, so keep the 4–5 minute guideline as a maximum and check earlier if pieces are small.
Q: My skin didn’t crisp—what went wrong?
A: Three usual culprits: skin wasn’t dry, pan was crowded, or pan wasn’t hot enough. Dry thoroughly, use a hot skillet, and leave space between thighs so air can circulate and moisture can escape.
Q: Can I scale this up?
A: Yes, but cook in batches if necessary. Overcrowding reduces sear quality. Preheat additional pans or work in two rounds to keep cook time consistent.
Ready to Cook?
Preheat that oven and warm your skillet. Dry the thighs, mix the spices, and get ready for a short, satisfying cook that yields crisp skin and juicy meat. This is a method you’ll return to whenever you want a low-carb, no-fuss main that’s flavorful and repeatable. Let the pan do the heavy lifting, and enjoy the simple payoff.
If you try it, note your oven and thigh size—small adjustments make the recipe yours. Then tell me how it turned out: did the skin crisp, and what did you serve with it? Cooking is better when we refine the details together.

Keto Chicken Thighs
Ingredients
Ingredients
- 6 chicken thighs skin on
- 1/4 teaspoonsalt
- 1/4 teaspoonpepper
- 1/2 teaspoongarlic powder
- 1/2 teaspoononion powder
- 1/2 teaspoonsmoked paprika
- 1 teaspoonof olive oil
Instructions
Instructions
- Preheat the oven to 450°F (232°C).
- Place a cast-iron pan or an oven-safe skillet on the stovetop over medium heat to warm while you prepare the chicken.
- Pat the 6 chicken thighs (skin on) dry with paper towels.
- Put the chicken thighs in a large bowl and add 1 teaspoon of olive oil. Toss or rub so each thigh is lightly and evenly coated.
- In a small bowl, whisk together ¼ teaspoon salt, ¼ teaspoon pepper, ½ teaspoon garlic powder, ½ teaspoon onion powder, and ½ teaspoon smoked paprika.
- Add the seasoning mixture to the large bowl and toss the chicken until each thigh is evenly coated with the spices.
- When the pan is hot, carefully place the chicken thighs skin side down in the pan (use tongs and watch for splatter). Sear for 4–5 minutes without moving them so the skin browns.
- Flip the thighs and sear the other side for 4–5 minutes.
- Transfer the pan (or move the chicken to an oven-safe dish if your skillet is not oven-safe) to the preheated oven and roast for 15–20 minutes, until the chicken is cooked through (juices run clear and no pink remains near the bone, or an internal temperature of 165°F/74°C).
- Remove the chicken from the oven and let it rest for a few minutes before serving.
Equipment
- Cast-iron pan
- Oven-safe skillet
- Stovetop
- Oven
- Large Bowl
- Small Bowl
- Tongs
- Paper Towels
- Oven-safe dish


