
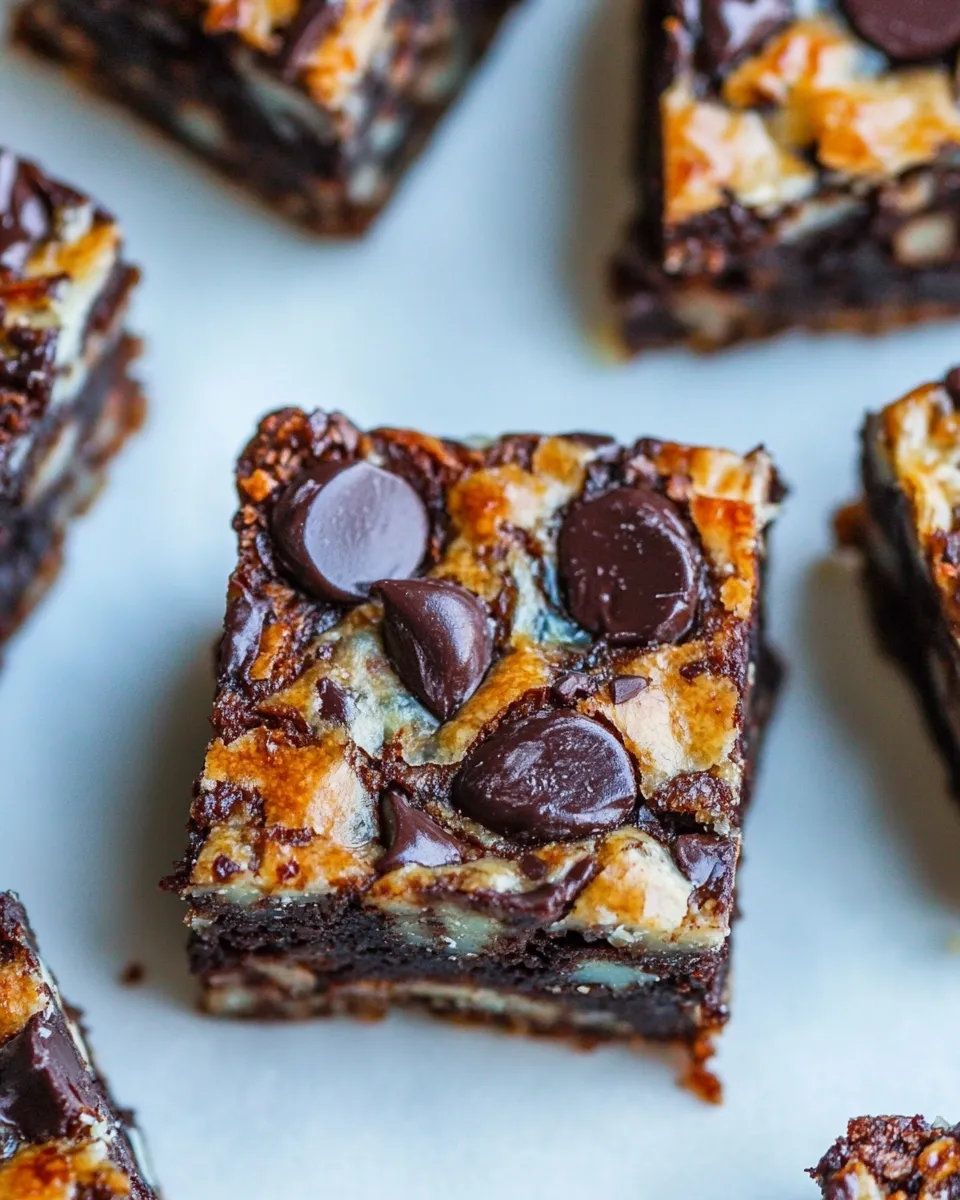
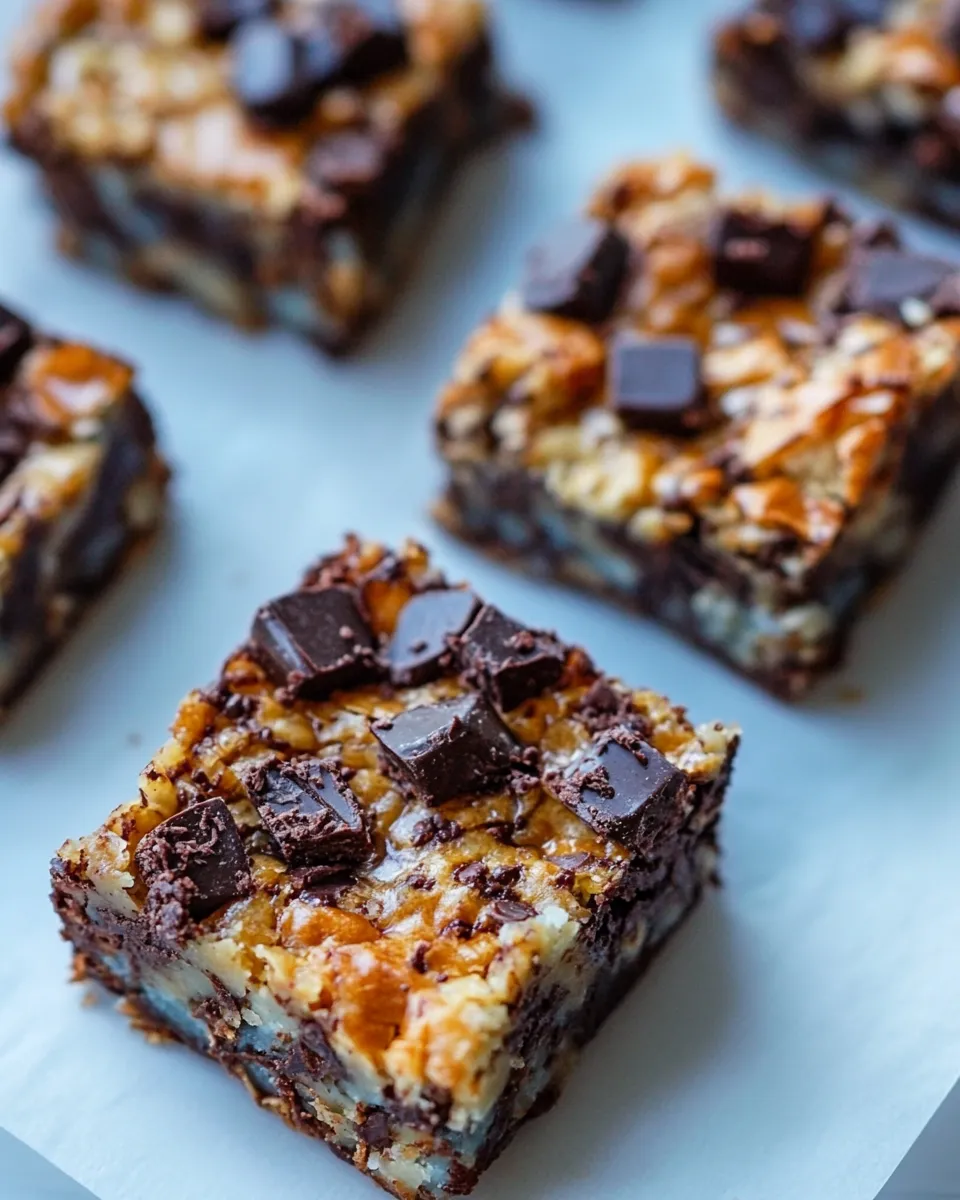
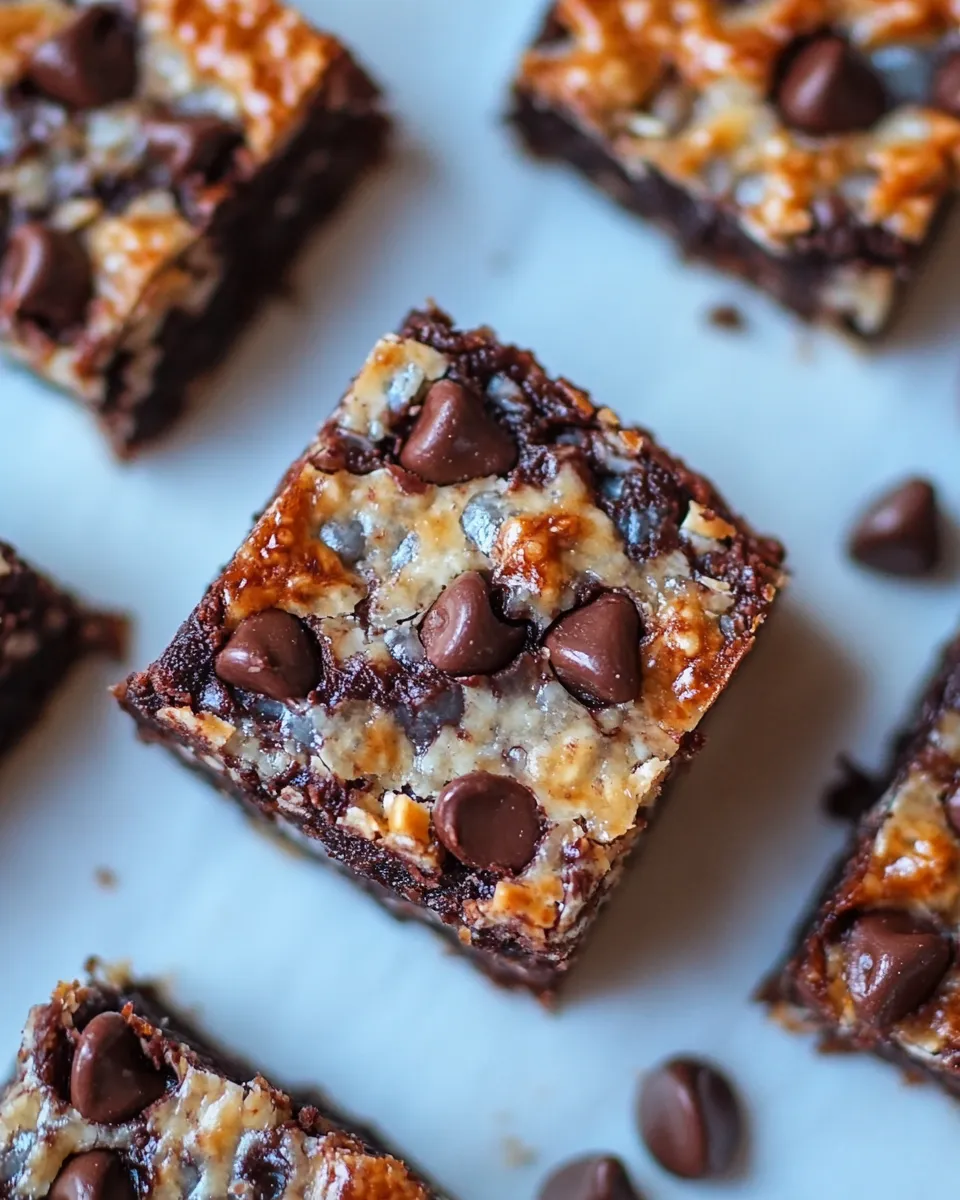
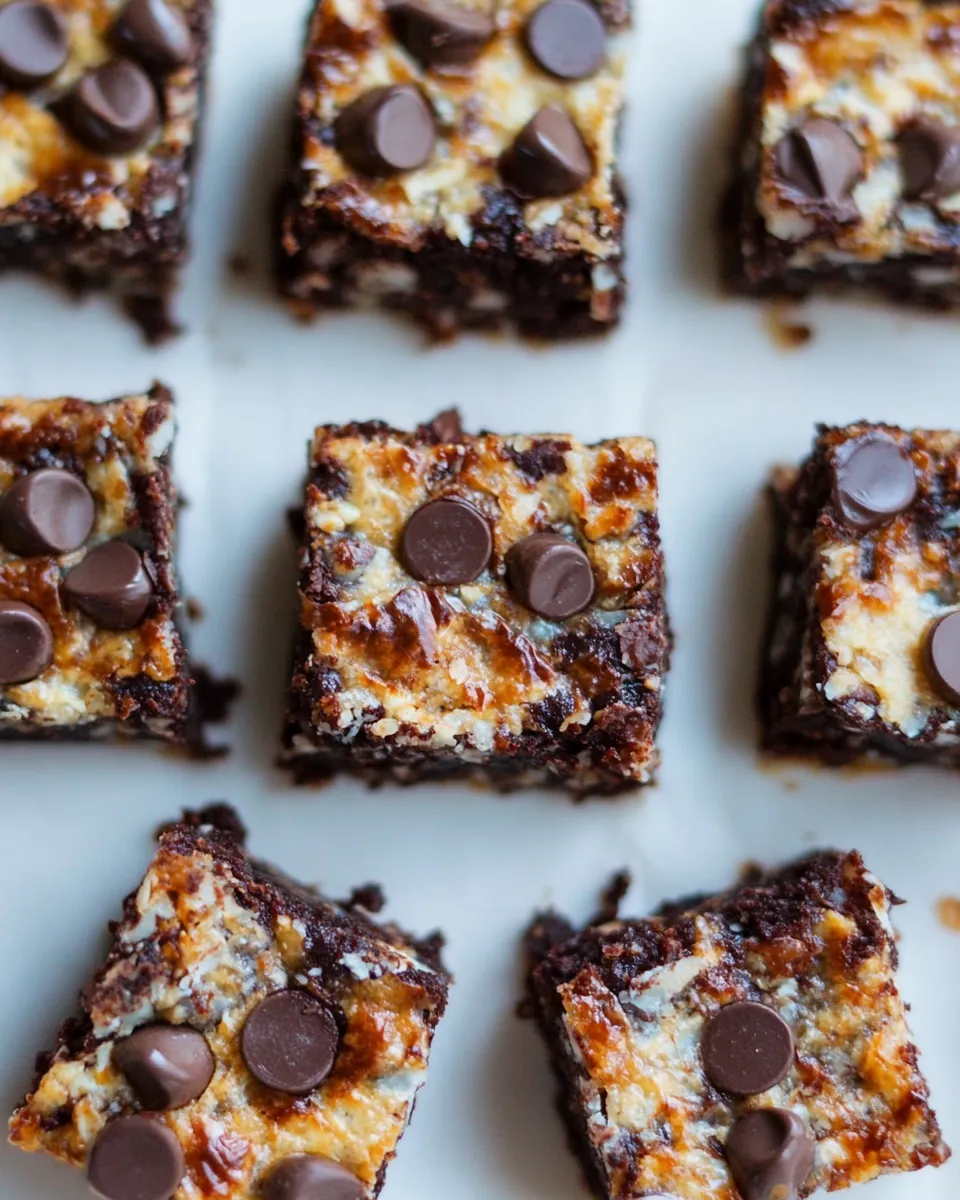
These Keto Magic Bars are proof that low-carb dessert doesn’t have to be boring. They have a buttery almond base, a scatter of chocolate and coconut, and a rich coconut milk layer that sets into chewy bars. I make them when I want something sweet that still fits into a low-carb or keto routine—no compromise on satisfaction.
The recipe is straightforward and forgiving. Press the crust, sprinkle the toppings, pour the coconut milk mixture, and bake. A short wait while they cool and a night in the fridge turns them into tidy, sliceable bars.
I’ll walk you through everything: what each ingredient does, the exact steps, sensible swaps, and troubleshooting if the texture isn’t what you expected. No fuss. Just clear guidance so you can get these on the table with confidence.
Ingredient Checklist
- 1 1/2 cups almond flour — the base; provides structure and a tender, nutty crust (for nut-free, see note below).
- 2 tbsp sweetener of choice, or stevia equivalent — adds sweetness without carbs; choose a granular sweetener if you want texture similar to sugar.
- 3 tbsp melted coconut oil — binds the crust and adds richness; melts easily and helps the crust set.
- 1/4 tsp salt — balances sweetness and enhances flavor throughout the bar.
- 3/4 cup mini chocolate chips or sugar free chocolate chips — the chocolate layer; mini chips distribute more evenly through the bars.
- 1/4 cup finely chopped walnuts, optional — for crunch and toasty flavor; leave out if you prefer nut-only base or need to avoid tree nuts.
- 2/3 cup full-fat shredded coconut — adds chew and coconut flavor; use unsweetened to keep carbs low.
- 1 1/4 cup full-fat canned coconut milk — creates the creamy top that firms into the “magic” layer when baked and chilled.
- 2 tbsp cocoa powder, optional — deepens chocolate flavor in the coconut milk layer; use unsweetened.
Make Keto Magic Bars: A Simple Method
- Preheat the oven to 350°F (175°C). Line an 8-inch square pan with parchment paper, leaving a little overhang on two sides to lift the bars out later.
- In a medium bowl, combine 1 1/2 cups almond flour, 2 tablespoons sweetener (or stevia equivalent), 3 tablespoons melted coconut oil, and 1/4 teaspoon salt. Mix until the mixture is evenly moistened and holds together when pressed.
- Press the almond flour mixture firmly and evenly into the bottom of the prepared pan to form the crust.
- Evenly sprinkle 3/4 cup mini chocolate chips, 2/3 cup full-fat shredded coconut, and 1/4 cup finely chopped walnuts (if using) over the crust.
- In a separate bowl, whisk together 1 1/4 cups full-fat canned coconut milk and 2 tablespoons cocoa powder (if using) until smooth and combined.
- Pour the coconut milk mixture evenly over the chocolate chips, coconut, and nuts. Pour slowly and gently so the toppings stay distributed.
- Bake in the preheated oven for 33 minutes, until the edges are set and the top is slightly firm.
- Remove the pan from the oven and let it cool on a wire rack for 15 minutes to allow the bars to firm up.
- For firmer bars, refrigerate the pan overnight before slicing.
- Use the parchment overhang to lift the slab from the pan, place on a cutting board, and slice into bars, wiping the knife clean between cuts.
Reasons to Love Keto Magic Bars
- High satisfaction, low carbs: they deliver a rich, layered bite—crust, chocolate, coconut, creamy top—without the sugar spike.
- Simple ingredients: no eggs, no baking powder, no complicated techniques. Most pantry staples for a low-carb household.
- Flexible and forgiving: the base binds easily and the coconut milk layer tolerates minor measurement differences.
- Make-ahead friendly: these actually improve after chilling overnight. That makes them perfect for prepping snacks or dessert in advance.
- Customizable texture: leave out the walnuts for a softer bar, or add them for crunch. Cocoa powder can be omitted or included depending on how chocolate-forward you want the top layer.
What to Use Instead
If you need or want to swap ingredients, keep these practical options in mind. I’ll keep the guidance general—don’t change quantities unless you know how the substitution behaves.
- Almond flour: For nut-free diets, a finely ground seed flour (like sunflower seed flour) can be used, but it may brown differently and can darken the batter. Expect minor texture changes.
- Sweetener: Use any granular keto-friendly sweetener you prefer. If you use a liquid sweetener, reduce the liquid elsewhere; texture will change.
- Coconut oil: Melted butter works as a 1:1 swap if you tolerate dairy. It will give a slightly different flavor and a firmer crust when chilled.
- Chocolate chips: If you’re avoiding sugar-free chips, small chopped dark chocolate can work, though it adds a few more carbs. Mini chips help distribute chocolate evenly.
- Canned coconut milk: Full-fat dairy cream can be substituted for a different flavor and silkier texture; it will change the flavor profile away from coconut-forward.
Must-Have Equipment
- 8-inch square baking pan — the size matters for thickness and bake time.
- Parchment paper — prevents sticking and gives a convenient overhang to lift the slab out.
- Measuring cups and spoons — to keep the almond flour and coconut milk amounts accurate.
- Mixing bowls — one for the crust, one for the coconut milk mixture.
- Spatula or spoon for pressing the crust — a flat-bottomed measuring cup works well to press evenly.
- Sharp knife and wiping cloth — a hot, clean knife slice technique keeps edges neat between cuts.
Avoid These Mistakes
- Don’t skip the parchment overhang. It’s the simplest way to lift the bars cleanly out of the pan without breaking them.
- Avoid using low-fat canned coconut milk. The fat is what helps the top layer set and gives that rich texture. Full-fat is specified for a reason.
- Don’t pour the coconut milk mixture quickly. Pour slowly so the chips and coconut stay distributed rather than floating to one side.
- Don’t slice while the slab is warm unless you like a gooey, messy result. Fifteen minutes on the rack helps, and overnight chilling gives the cleanest slices.
- Measure almond flour properly. Spoon it into the measuring cup and level it off rather than packing, for correct crust texture.
Holiday-Friendly Variations
These bars adapt well to seasonal flavors and holiday baking trays. Here are some ideas that keep the core recipe but deliver festive flair.
- Spiced winter version: add a pinch of cinnamon and nutmeg to the almond crust and sprinkle a few cinnamon sugar-free chips on top before baking.
- Nutty festive: swap or add pecans for that classic holiday crunch—toast them lightly first for extra aroma.
- Mint-chocolate: stir a drop or two of peppermint extract into the coconut milk mixture for a refreshing twist. Start small; extracts are potent.
- Chocolate drizzle and sea salt: once chilled and sliced, drizzle melted sugar-free chocolate over bars and finish with flaky sea salt for contrast.
What Could Go Wrong
Even simple recipes can hit snags. Here’s how to diagnose and fix common issues so you don’t waste effort or ingredients.
- Bars too soft after chilling: make sure you used full-fat coconut milk and that the pan was the correct size. If they remain soft, chill longer or freeze briefly before slicing.
- Toppings sank or clumped: pour the coconut milk mixture very slowly and evenly. If you already poured and the distribution is uneven, use a small spatula to nudge the toppings before baking.
- Crust crumbly or falling apart: ensure the almond flour mixture was evenly moistened and pressed firmly into the pan. If it still falls apart after baking, add an extra tablespoon of melted coconut oil next time.
- Burning edges with a soft center: check oven calibration. Use an oven thermometer if you suspect your oven runs hot. Tent loosely with foil if edges darken too quickly.
Leftovers & Meal Prep
Storage
Keep the bars chilled for best texture. Store them in an airtight container in the refrigerator for up to 5–7 days. Place parchment between layers to prevent sticking.
Freezing
These bars freeze well. Slice them first, then freeze individual bars on a tray until solid. Transfer to a sealed container or zip-top bag and store for up to 3 months. Thaw in the refrigerator to maintain texture—avoid microwaving if you want them to stay firm.
Portioning for the week
I like to slice into 12 bars and pack them in single portions for grab-and-go snacks. They travel well in a small cooler or insulated lunch bag.
Ask the Chef
Q: Can I make these nut-free? A: Yes—use a seed-based flour as a substitute, keeping in mind the texture and color may change. You may need to monitor moisture and bake time.
Q: Can I make them sweeter without changing texture? A: Choose a granular keto sweetener that measures like sugar. Avoid adding liquids to increase sweetness—liquid sweeteners will affect setting.
Q: Will these work dairy-free? A: The recipe is already dairy-free if you use coconut oil and canned coconut milk. If you choose butter as a swap, they will contain dairy.
If you have a specific question about ingredient swaps, oven timing, or scaling the recipe, leave it below the post. I read comments and answer practical, tested solutions.
Save & Share
If you try these Keto Magic Bars, save the recipe and share a photo. Tag or link back so others can find the method easily. A quick note: if you substitute something successfully, mention it in your post—small tips help everyone.
Happy baking. Keep it simple, taste as you go, and chill overnight for the best slices.

Keto Magic Bars
Ingredients
Ingredients
- 1 1/2 cupsalmond flour for nut-free, see note below
- 2 tbspsweetener of choice or stevia equivalent
- 3 tbspmelted coconut oil
- 1/4 tspsalt
- 3/4 cupmini chocolate chips orsugar free chocolate chips
- 1/4 cupfinely chopped walnuts optional
- 2/3 cupfull-fat shredded coconut
- 1 1/4 cupfull-fat canned coconut milk
- 2 tbspcocoa powder optional
Instructions
Instructions
- Preheat the oven to 350°F (175°C). Line an 8-inch square pan with parchment paper, leaving a little overhang on two sides to lift the bars out later.
- In a medium bowl, combine 1 1/2 cups almond flour, 2 tablespoons sweetener (or stevia equivalent), 3 tablespoons melted coconut oil, and 1/4 teaspoon salt. Mix until the mixture is evenly moistened and holds together when pressed.
- Press the almond flour mixture firmly and evenly into the bottom of the prepared pan to form the crust.
- Evenly sprinkle 3/4 cup mini chocolate chips, 2/3 cup full-fat shredded coconut, and 1/4 cup finely chopped walnuts (if using) over the crust.
- In a separate bowl, whisk together 1 1/4 cups full-fat canned coconut milk and 2 tablespoons cocoa powder (if using) until smooth and combined.
- Pour the coconut milk mixture evenly over the chocolate chips, coconut, and nuts. Pour slowly and gently so the toppings stay distributed.
- Bake in the preheated oven for 33 minutes, until the edges are set and the top is slightly firm.
- Remove the pan from the oven and let it cool on a wire rack for 15 minutes to allow the bars to firm up.
- For firmer bars, refrigerate the pan overnight before slicing.
- Use the parchment overhang to lift the slab from the pan, place on a cutting board, and slice into bars, wiping the knife clean between cuts.
Equipment
- 8-inch square pan
- Parchment Paper
- Mixing bowls
- Spatula or spoon
- Wire Rack
- Cutting Board
- Knife
Notes
*For a nut-free and oil- free version, try these
Vegan Magic Bars
.


