
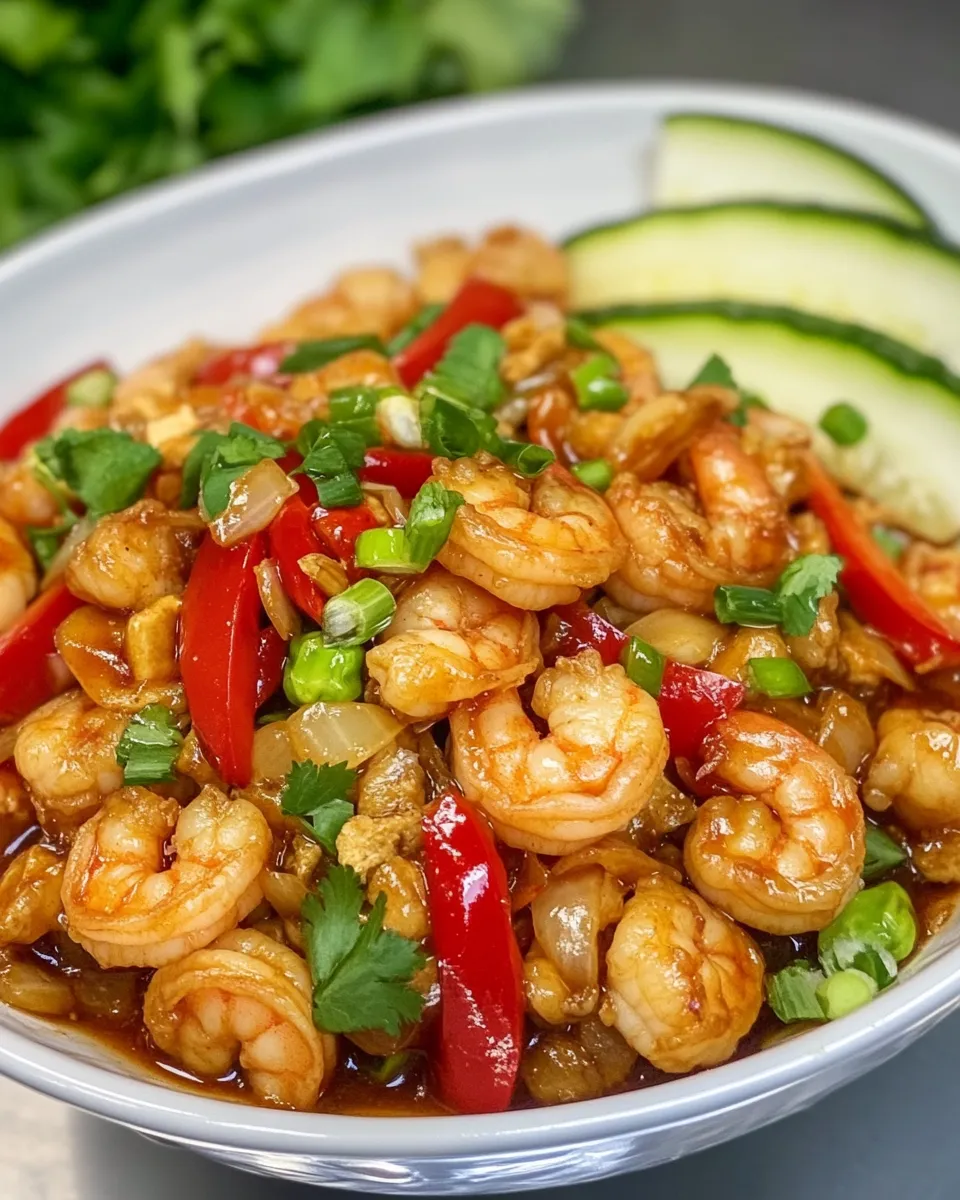
Quick, punchy, and reliably satisfying — this Kung Pao Shrimp recipe is the kind of dinner I reach for when I want bold flavors without fuss. It balances sweet, salty, spicy, and crunchy in a compact skillet-ready dish. The shrimp cook fast, the sauce comes together in a minute, and you end up with something that tastes like takeout but lands on the table in under 30 minutes.
I like this recipe because it’s forgiving. Small timing tweaks change texture, not success. Want it milder? Cut the pepper flakes. Prefer a brighter finish? Squeeze a little lime over the top. The structure here — a short marinate, a quick sear, a brief saute of aromatics, then a fast saucing and finish with peanuts and scallions — gives you maximum control.
Below you’ll find everything you need: the exact ingredient list I use, the step-by-step directions verbatim, tools that make the job easier, swap ideas for common allergies, and storage and reheating tips so leftovers stay tasty. No fluff. Just clear, practical guidance so you can make this reliably every time.
Ingredients
- 1 pound (450g) raw shrimp — I used 31–40 count per pound size, thawed if frozen, peeled and deveined; this is the protein base and cooks very quickly.
- 1 tablespoon soy sauce — I used gluten-free; part of the shrimp marinade to add salt and initial flavor.
- 2 teaspoons cornstarch — helps the marinade cling and gives the shrimp a slight glossy finish when seared.
- 1 tablespoon vegetable oil — for the initial sear of the shrimp; a neutral oil with a high smoke point.
- 3 tablespoons soy sauce — or coconut aminos; the savory backbone of the sauce.
- 1 teaspoon sesame oil — a little goes a long way; adds nutty aroma to the sauce.
- 2 teaspoons granulated sugar — or honey; balances the salt and heat with a touch of sweetness.
- ½ teaspoon crushed red pepper flakes — or 1 teaspoon sriracha; provides the dish’s heat.
- 1 teaspoon cornstarch — to thicken the pan sauce so it clings to the shrimp.
- 2 tablespoons vegetable oil — for stir-frying the vegetables and aromatics; added after cooking the shrimp.
- 1 red bell pepper — diced into ½” pieces; keeps some crunch and bright color.
- 4 medium cloves garlic — minced; aromatic and essential for depth.
- 1 tablespoon grated ginger — fresh is best; brings brightness and warmth.
- ½ cup unsalted roasted peanuts — adds crunch and a toasty counterpoint to the sauce.
- 3 large green onions — cut into ½ inch pieces; tossed in at the end for freshness and color.
The Essentials
Cook with confidence: shrimp cook in minutes and the sauce thickens almost instantly. That means prep is where you win or lose. Have your aromatics chopped, your pepper diced, and the sauce whisked before you heat the pan. When wok or skillet time starts, everything moves fast.
Pay attention to heat. Use medium-high so shrimp sear quickly without overcooking. If your pan is too cool, shrimp steam and become rubbery. If it’s smoking, turn it down a touch. And keep peanuts unsalted because the soy brings enough salt on its own.
Texture is a key part of the appeal: tender shrimp, crisp pepper, and crunchy peanuts. The cornstarch in the marinade gives the shrimp a slightly glossy, silkier mouthfeel while the cornstarch in the sauce ensures a clingy glaze.
Kung Pao Shrimp Made Stepwise
- In a bowl, combine 1 pound shrimp, 1 tablespoon soy sauce, and 2 teaspoons cornstarch; toss to coat and let sit to marinate for 10 minutes while you prep the rest of the ingredients.
- In a small bowl, whisk together 3 tablespoons soy sauce (or coconut aminos), 1 teaspoon sesame oil, 2 teaspoons granulated sugar (or honey), ½ teaspoon crushed red pepper flakes (or 1 teaspoon sriracha), and 1 teaspoon cornstarch until smooth; set the sauce aside.
- Heat 1 tablespoon vegetable oil in a large skillet or wok over medium-high heat. Add the shrimp in a single layer and cook 1–2 minutes per side, until pink and opaque. Remove the shrimp to a plate and set aside.
- Add 2 tablespoons vegetable oil to the same pan. Add 1 diced red bell pepper and cook 2–3 minutes, until the pepper softens slightly but remains crisp. Add 4 minced garlic cloves and 1 tablespoon grated ginger and cook about 30–45 seconds more, until fragrant.
- Pour the prepared sauce into the pan, stir, and bring to a simmer. Cook until the sauce starts to thicken, about 30–60 seconds.
- Return the cooked shrimp to the pan, toss to coat in the sauce, and cook about 30 seconds more until heated through and the sauce clings to the shrimp.
- Remove the pan from heat, stir in ½ cup unsalted roasted peanuts and 3 large green onions (cut into ½-inch pieces). Serve immediately.
Why It Deserves a Spot
This dish is fast, bold, and adaptable. It gives you takeout flavor with home-cooked control. On nights when time is short, it’s a dish that feels special without requiring a lot of babysitting. The flavor profile—salty, sweet, tangy-tinged, and spicy—works for a wide range of eaters.
The balance of textures elevates it. Shrimp cooks in minutes and pairs beautifully with the crunchy peanuts and crisp bell pepper. It’s also a one-skillet candidate for minimal clean-up and a quick midweek win.
Finally, it’s versatile. Use it as a main over rice, toss with noodles, or serve over a bed of greens for a lighter option. Small adjustments let you dial the heat, salt, or sweetness exactly to taste.
Allergy-Friendly Substitutes
- Peanut allergy — swap peanuts for toasted cashews or omit nuts entirely and add extra water chestnuts for crunch.
- Soy allergy / gluten-free concern — use coconut aminos in place of soy sauce; keep the same amounts.
- Sesame allergy — omit the sesame oil; replace with an extra 1 teaspoon vegetable oil for balance.
- Shrimp allergy — use firm tofu (pressed and pan-fried) or thinly sliced chicken breast, adjusting cooking time for the protein.
- Sweetener preference — honey or another granulated sweetener can be used in place of sugar; use the same amount called for.
Setup & Equipment
Must-haves
- Large skillet or wok — a wide surface gives you room to sear the shrimp in a single layer and stir quickly.
- Mixing bowls — one for marinating the shrimp and one small bowl to whisk the sauce.
- Sharp knife and cutting board — for quick, clean prep of the pepper, garlic, ginger, and green onions.
Nice-to-haves
- Fish spatula or wide spatula — makes flipping shrimp easier without tearing them.
- Microplane — for quickly grating ginger if you want a fine texture.
- Measuring spoons — for accuracy with the cornstarch and oils.
Avoid These Traps
- Overcrowding the pan — shrimp need space. If you crowd them they will steam instead of sear. Cook in batches if necessary.
- Overcooking shrimp — they go from perfect to rubbery quickly. Take them off the heat once opaque and pink and finish in the sauce for 30 seconds.
- Burning aromatics — garlic and ginger cook in under a minute; once fragrant, act quickly and add the sauce to prevent bitterness.
- Too much salt — check your soy sauce brand; some are saltier than others. If worried, taste the sauce before finishing and adjust with a pinch of sugar or a squeeze of lime instead of more soy.
Season-by-Season Upgrades
Spring: Add blanched snap peas or thin asparagus for a green crunch. They keep the dish bright and add a fresh bite.
Summer: Use a mix of colorful peppers for sweetness and color. A squeeze of lime at the end plays well with sun-ripe produce.
Fall: Stir in roasted squash or thinly sliced Brussels sprouts for heartier texture. Reduce the sugar slightly to keep the balance.
Winter: Add a handful of baby spinach at the end to wilt into the sauce for a quick veggie boost. Keep the peppers to retain some crunch.
Testing Timeline
To test and perfect this recipe, follow this simple timeline:
- Trial 1 — Make the recipe exactly as written. Note doneness and overall heat level.
- Trial 2 — If shrimp were slightly overdone, shave down the sear time by 15–30 seconds per side. If sauce was too thin, whisk an extra ¼ teaspoon cornstarch into the reserved sauce next time.
- Trial 3 — Adjust heat to taste: halve the red pepper flakes or switch to sriracha for a different chili profile. If you want more brightness, add ½ teaspoon rice vinegar or a squeeze of lime at the end.
Best Ways to Store
Cool leftovers quickly and store in an airtight container in the refrigerator for up to 2 days. The sauce thickens as it cools; when reheating, add a splash of water or broth and warm gently over medium heat until just heated through to loosen the sauce and avoid overcooking the shrimp.
Freeze? I don’t recommend freezing once cooked — shrimp texture degrades. If you need to freeze, cook components separately (sauce and raw shrimp unmarinated) and thaw/reheat carefully, but expect a change in texture.
Ask & Learn
Common question: Can I use frozen shrimp straight from the freezer? No — thaw completely, pat dry, then marinate. Excess moisture interferes with the sear. Another frequent ask: How spicy is this? The recipe uses ½ teaspoon crushed red pepper flakes; it provides a noticeable kick but not overpowering. Adjust to taste.
If you want more sauce, double the sauce ingredients (3 tablespoons soy, 1 teaspoon sesame oil, 2 teaspoons sugar, ½ teaspoon flakes, 1 teaspoon cornstarch) and whisk with 1–2 tablespoons water to maintain balance. Be ready to cook the sauce a touch longer to fully thicken.
Let’s Eat
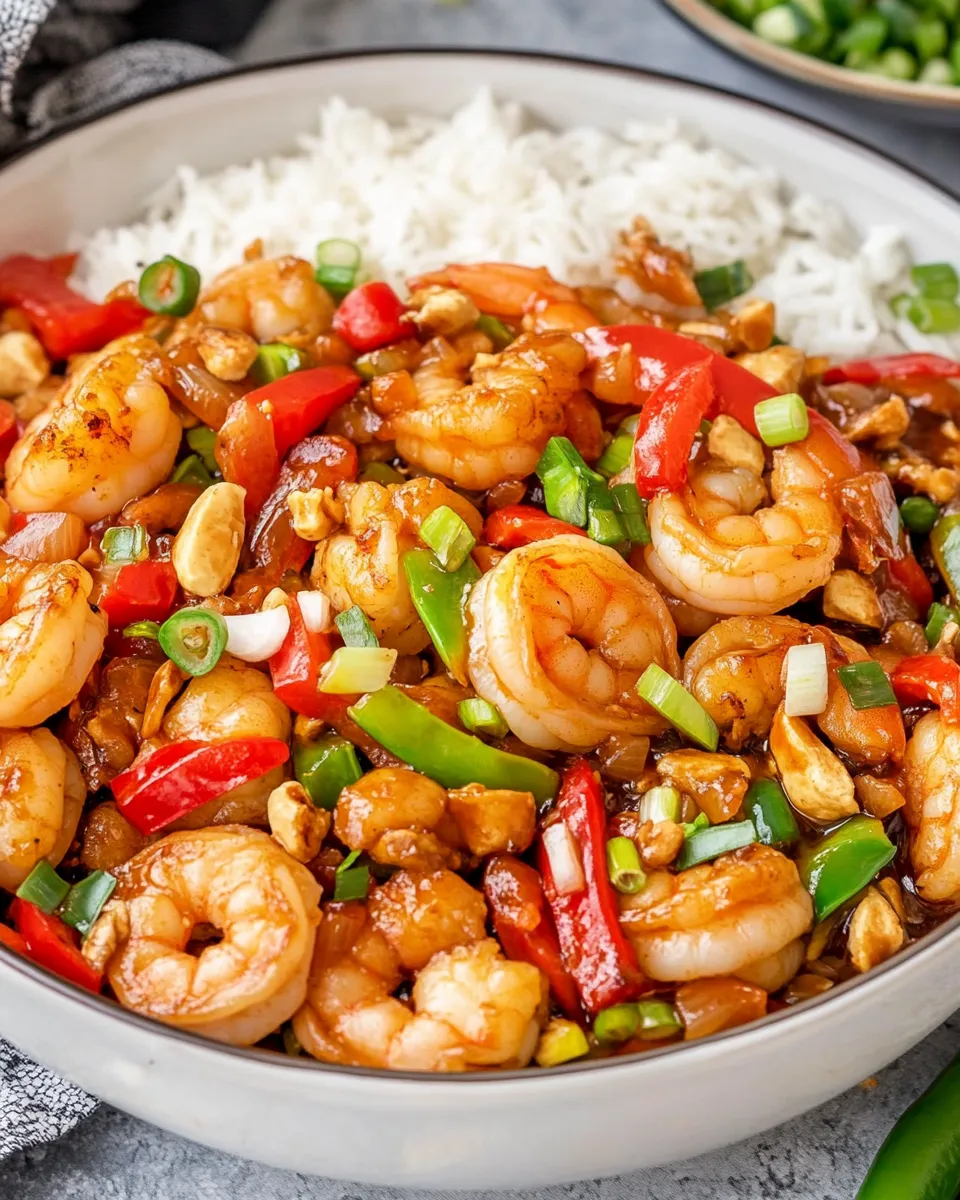
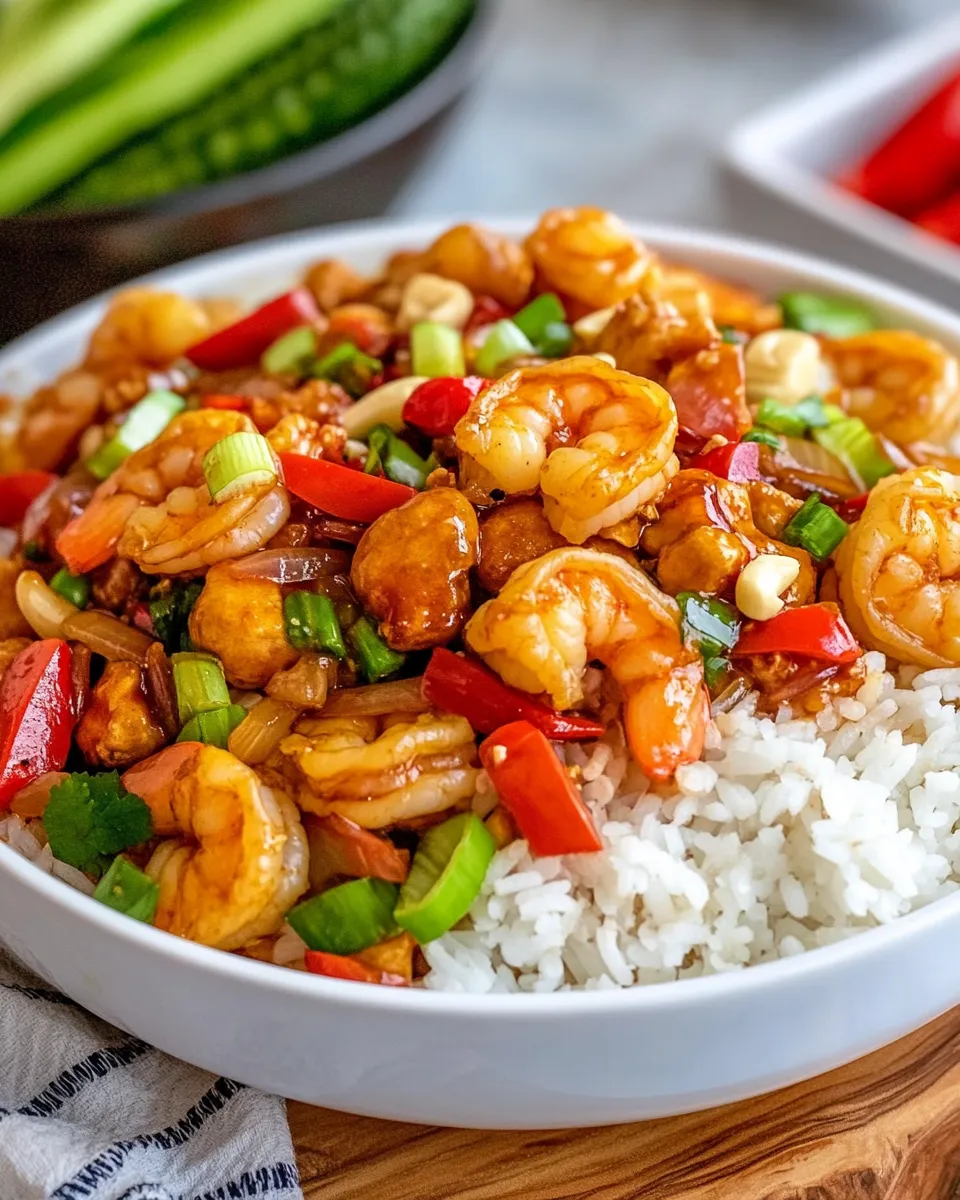
Serve the Kung Pao Shrimp over steamed jasmine rice, brown rice, or toss with cooked rice noodles for a saucier option. Garnish with extra sliced green onions and a wedge of lime if you like a fresh zing. A simple cucumber salad or quick sautéed bok choy complements the heat and crunch nicely.
Make it once, and you’ll find small ways to make it your own. I hope this guide gets you comfortable and confident with the recipe — fast weeknight flavor with control and a few pantry-friendly tricks on hand.
Kung Pao Shrimp
Ingredients
Ingredients
- ?1 pound 450 graw shrimpI used 31-40 count per pound size, thawed if frozen, peeled and deveined
- ?1 tablespoonsoy sauceI used gluten-free
- ?2 teaspoonscornstarch
- ?1 tablespoonvegetable oil
- ?3 tablespoonssoy sauceor coconut aminos
- ?1 teaspoonsesame oil
- ?2 teaspoonsgranulated sugaror honey
- ?1/2 teaspooncrushed red pepper flakesor 1 teaspoon sriracha
- ?1 teaspooncornstarch
- ?2 tablespoonsvegetable oil
- ?1 red bell pepperdiced into 1/2” pieces
- ?4 medium clovesgarlicminced
- ?1 tablespoongrated ginger
- ?1/2 cupunsalted roasted peanuts
- ?3 largegreen onionscut into 1/2 inch pieces
Instructions
Instructions
- In a bowl, combine 1 pound shrimp, 1 tablespoon soy sauce, and 2 teaspoons cornstarch; toss to coat and let sit to marinate for 10 minutes while you prep the rest of the ingredients.
- In a small bowl, whisk together 3 tablespoons soy sauce (or coconut aminos), 1 teaspoon sesame oil, 2 teaspoons granulated sugar (or honey), ½ teaspoon crushed red pepper flakes (or 1 teaspoon sriracha), and 1 teaspoon cornstarch until smooth; set the sauce aside.
- Heat 1 tablespoon vegetable oil in a large skillet or wok over medium-high heat. Add the shrimp in a single layer and cook 1–2 minutes per side, until pink and opaque. Remove the shrimp to a plate and set aside.
- Add 2 tablespoons vegetable oil to the same pan. Add 1 diced red bell pepper and cook 2–3 minutes, until the pepper softens slightly but remains crisp. Add 4 minced garlic cloves and 1 tablespoon grated ginger and cook about 30–45 seconds more, until fragrant.
- Pour the prepared sauce into the pan, stir, and bring to a simmer. Cook until the sauce starts to thicken, about 30–60 seconds.
- Return the cooked shrimp to the pan, toss to coat in the sauce, and cook about 30 seconds more until heated through and the sauce clings to the shrimp.
- Remove the pan from heat, stir in ½ cup unsalted roasted peanuts and 3 large green onions (cut into ½-inch pieces). Serve immediately.
Equipment
- Skillet12-inch size
Notes
A very cool tip is freezing the ginger root(I always do this!). It’s so easy to use a Microplane or the small holes on your box grater to grate the ginger as you need it. Frozen ginger doesn’t get stringy the way fresh ginger does, plus freezing it makes it last so much longer.
If you want to add dried chileswhich is more traditional, you can add ¾ cup small dried red chiles (20 grams in total). They are found in Chinese supermarkets, but I left them out as they’re not accessible to everyone. You can also sub with chiles de árbol.
Prep everything before you begin to cook.Stir-frying moves quickly, so having all your ingredients ready in advance is key!
Storeany leftovers in an airtight container for up to 3 days.To reheat on the stove:I usually reheat my stir fries in a pan on the stovetop over medium-high heat. Add a drizzle of oil to the pan and when it gets hot, add the leftovers and heat for 2–3 minutes. Make sure you continue to stir the leftovers as they’re warming up.To reheat in the microwave:You could also microwave in a microwave-safe bowl for 30-second intervals until warmed through.


