
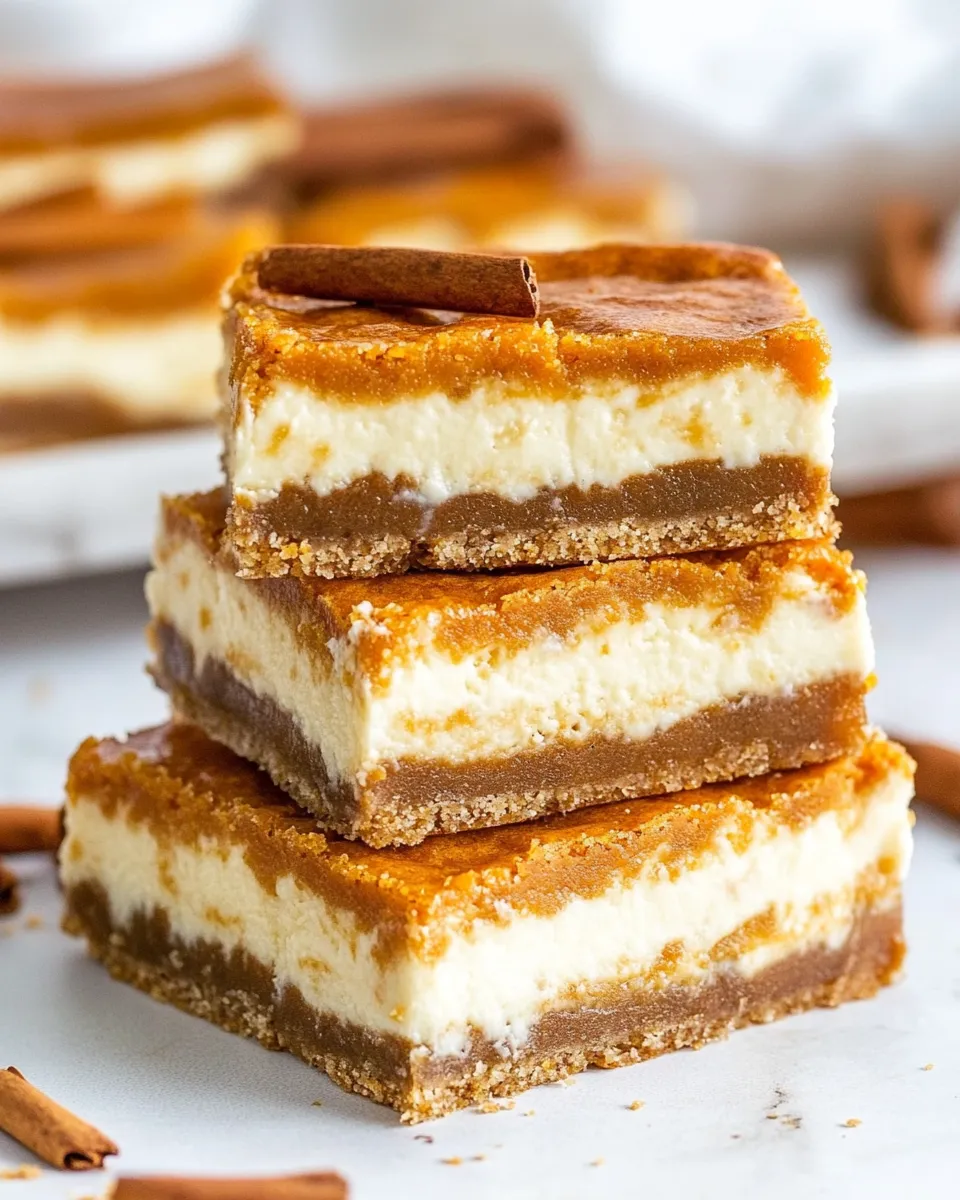
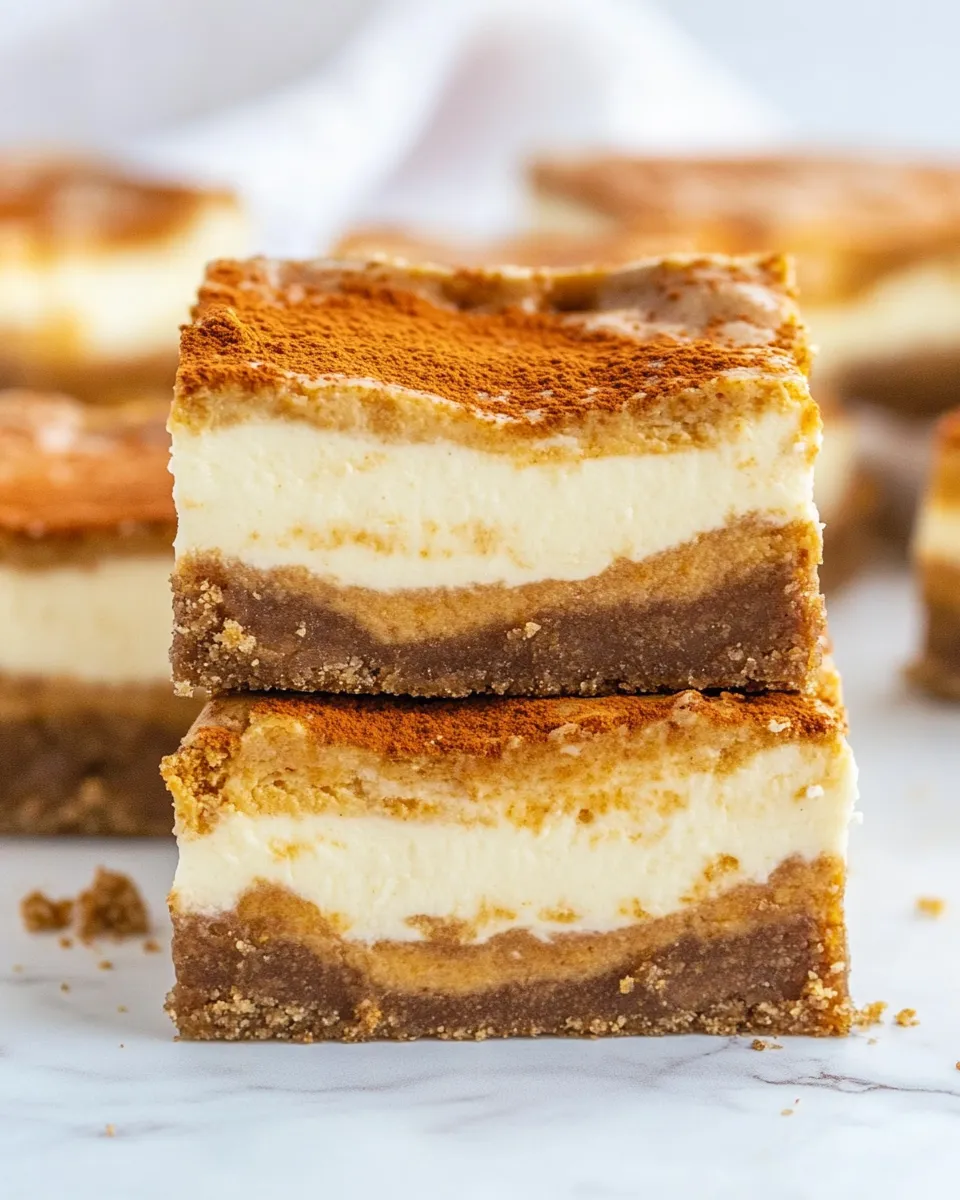
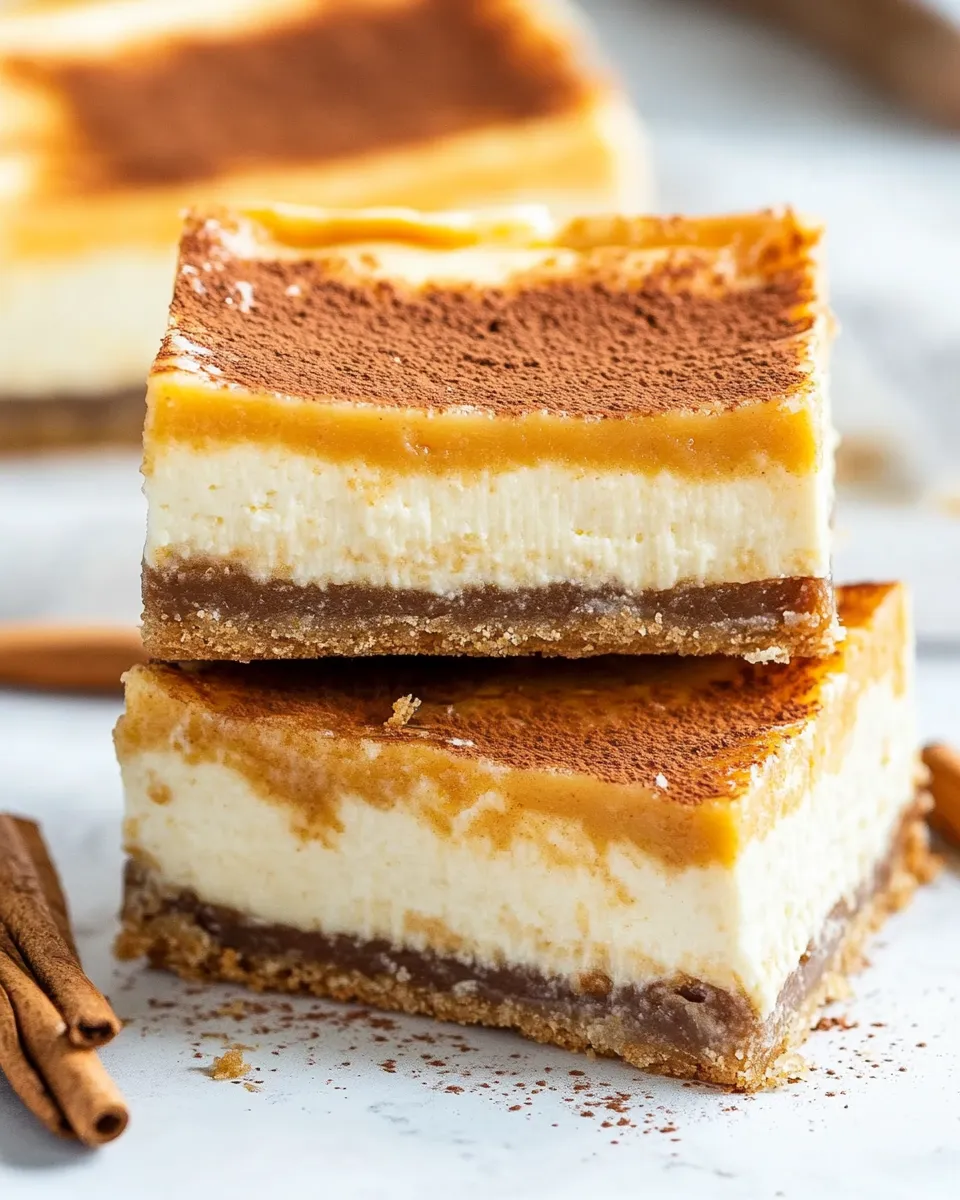
These Pumpkin Cheesecake Bars give you the cozy flavor of pumpkin pie with the creamy lift of cheesecake, and they cut into neat squares that make serving simple. The gingersnap crust adds the right amount of spice and crunch, the cheesecake layer keeps everything smooth, and the pumpkin swirl ties the whole thing to autumn without being overbearing.
I like recipes that balance flavor with straightforward technique, and this is one of those: a little patience while the bars chill, but no complicated equipment or fussy steps. Follow the order, mind the temperatures, and you’ll end up with clean swirls and perfect texture.
If you want a dessert that travels well to gatherings, stores beautifully, and can be dressed up or down, these bars are it. Read through the full rundown before starting so you aren’t surprised by a step or a rest time.
Ingredient Rundown
Ingredients
- 1 ½ cups gingersnap cookie crumbs (about 24 cookies) — Provides a spiced, sturdy crust that pairs perfectly with pumpkin and cream cheese.
- 5 tablespoons (65g) unsalted butter, melted — Binds the crumbs and browns the crust; use unsalted so you control the salt level.
- ¼ cup (50g) light brown sugar, packed — Sweetens and helps the crust caramelize; packed sugar prevents measuring errors.
- 16 ounces (450g) cream cheese, softened to room temperature — The base of the cheesecake layer; softening is essential for a lump-free batter.
- ½ cup (100g) granulated sugar — Adds sweetness to the cheesecake; helps the texture set correctly.
- 1 tablespoon (7g) all-purpose flour — Stabilizes the cheesecake layer and reduces cracking.
- ?? cup (85g) full-fat sour cream — Adds tang and creaminess; the weight is provided even if the cup fraction is unclear—use the 85g measurement if you prefer precision.
- 1 large egg, at room temperature — Adds structure; room temperature helps the batter emulsify.
- 1 egg yolk — Increases richness and silkiness without adding too much lift.
- 1 teaspoon (5ml) pure vanilla extract — Flavor booster for the cheesecake layer.
- ¾ cup (170g) pumpkin puree — The star of the pumpkin layer; use plain pumpkin, not pumpkin pie filling.
- ½ cup (100g) light brown sugar, packed — Sweetens the pumpkin layer and deepens its flavor.
- ½ cup (120ml) heavy whipping cream — Adds richness and lightness to the pumpkin layer.
- 1 large egg, at room temperature — For the pumpkin layer; note that this is a second egg in the recipe distinct from the cheesecake eggs.
- 1 teaspoon pure vanilla extract — Flavor support for the pumpkin.
- 2 tablespoons all-purpose flour — Helps the pumpkin layer set without becoming gummy.
- 2 teaspoons pumpkin pie spice — Provides the warm spice profile; adjust slightly if you like it milder or stronger.
Mastering Pumpkin Cheesecake Bars: How-To
- Adjust the oven rack to the lower-middle position. Preheat oven to 350°F (180°C) (160°C for a fan oven). Line an 8×8-inch (20×20 cm) baking dish with parchment paper, leaving the paper to hang over two opposite sides for easy removal.
- Place the gingersnap cookies in a food processor and pulse until they become fine crumbs. If you don’t have a food processor, place the cookies in a sturdy zip-top bag and crush them with a rolling pin until finely ground.
- Add the melted unsalted butter and 1/4 cup packed light brown sugar to the crumbs and pulse or stir until evenly combined.
- Pour the crumb mixture into the prepared pan and press it firmly and evenly into the bottom of the pan (use the bottom of a measuring cup or the back of a spoon). Bake the crust for 7 minutes. Remove from the oven and transfer to a wire rack to cool while you prepare the fillings.
- Reduce the oven temperature to 325°F (165°C).
- In the bowl of a stand mixer fitted with the paddle attachment (or using a hand mixer), beat the softened cream cheese on high speed until completely smooth and fluffy, about 4–5 minutes.
- Add the granulated sugar and 1 tablespoon all-purpose flour to the creamed cream cheese. Mix on medium speed until fully incorporated and smooth.
- Add the full-fat sour cream, 1 large egg, 1 egg yolk, and 1 teaspoon vanilla extract. Mix on medium-low speed just until combined; scrape down the sides and bottom of the bowl and mix briefly again so the mixture is homogeneous. Spoon out a small amount of this cheesecake mixture and set it aside for topping.
- In a separate bowl, whisk together the pumpkin puree, 1/2 cup packed light brown sugar, 1/2 cup heavy whipping cream, 1 large egg, and 1 teaspoon vanilla extract until smooth and uniform.
- Add the 2 tablespoons all-purpose flour and 2 teaspoons pumpkin pie spice to the pumpkin mixture and stir until there are no dry streaks.
- Pour the remaining cheesecake mixture evenly over the cooled gingersnap crust and smooth the top with a spatula or the back of a spoon.
- Gently pour the pumpkin mixture over the cheesecake layer and smooth it lightly so it’s even.
- Drop small spoonfuls of the reserved cheesecake mixture over the pumpkin layer. Using a toothpick or the tip of a sharp knife, drag through the layers to create swirls—do this gently and don’t over-swirl.
- Bake the bars at 325°F (165°C) for 50–55 minutes, until the edges are set and the center still has a slight jiggle.
- Turn off the oven, crack the oven door open, and let the pan sit in the oven for about 20 minutes to cool slowly.
- Remove the pan from the oven and let it cool to room temperature on a wire rack. Then refrigerate the bars until firm, at least 4 hours or preferably overnight.
- Use the parchment overhang to lift the cheesecake from the pan. Trim edges if desired and cut into 16 squares. Serve chilled.
The Upside of Pumpkin Cheesecake Bars
These bars give you concentrated cheesecake and pumpkin flavor without the fuss of a springform pan or cutting multiple slices from a large round cake. They chill firm, transport well, and portion easily—ideal for potlucks and holiday trays.
The gingersnap crust is a game changer: it’s spiced, crunchy, and contrasts the creamy filling. You get familiar autumn spices without relying solely on pumpkin pie filling, and the swirl looks impressive even when you’re short on time.
They’re versatile for serving: plain and chilled for a clean presentation, or topped with whipped cream, toasted pepitas, or a drizzle of caramel if you want to elevate them for guests.
Smart Substitutions
- Gingersnap crumbs — If you don’t have gingersnaps, graham crackers or speculoos cookies work; expect a slightly different spice profile.
- Unsalted butter — You can use salted butter; reduce or omit any extra salt elsewhere in the menu.
- Full-fat sour cream — If you prefer, replace with plain Greek yogurt of similar fat for a tangier note, but know the texture will be marginally different.
- Pumpkin puree — Canned pumpkin is consistent and recommended. If using fresh pumpkin puree, be sure it’s strained of excess water.
- Heavy whipping cream — For a lighter filling, half-and-half can be used, though the pumpkin layer will be less luxurious.
Must-Have Equipment
- 8×8-inch (20×20 cm) baking pan — The recipe is calibrated to this size for proper depth and bake time.
- Parchment paper — For the overhang that lets you lift the whole slab out cleanly.
- Stand mixer or hand mixer — Helps you get the cream cheese perfectly smooth; doable by hand but more effort.
- Food processor or rolling pin and bag — For crushing the gingersnaps to a fine crumb.
- Wire rack — For cooling the crust and finished pan before refrigerating.
Easy-to-Miss Gotchas
- Room-temperature cream cheese and eggs — Cold ingredients will give you lumps and a longer mixing time; soften the cream cheese fully.
- Over-swirl — Dragging too aggressively will blend the layers instead of creating pretty marbling. Go slow and gentle.
- Bake time and jiggle — The center should jiggle slightly; overbaking makes the texture more dense and dry.
- Cooling in the oven — Don’t skip the 20-minute cool-in-the-oven step; it helps prevent cracks and sudden temperature shocks.
- Parchment overhang — If you don’t leave two opposite sides overhanging, removing the slab from the pan will be fiddly and you may damage edges.
Warm & Cool Weather Spins
- Warm weather — Serve chilled straight from the fridge and keep them on a chilled platter. Skip heavy toppings that melt quickly; whipped cream can be stabilized with a little gelatin if needed.
- Cool weather — Warm them briefly (10–15 seconds in the microwave) and top with warm caramel sauce and toasted pecans for a cozier serving.
- Outdoor events — Keep them on ice in a cooler if they’ll sit out for long; gelatin-stabilized toppings will hold up better in heat.
Little Things that Matter
- Pressing the crust — Use a flat-bottomed measuring cup to get an even, tightly packed base so it doesn’t crumble while cutting.
- Scrape the bowl — After adding eggs and cream, scrape the mixer bowl so there are no pockets of unmixed cream cheese.
- Measure brown sugar packed — Pack it into the cup so sweetness levels match the recipe’s intent.
- Knife temperature when cutting — Run a sharp knife under hot water and dry it between cuts for cleaner edges, or chill the slab well and cut with a very sharp knife.
Prep Ahead & Store
These bars actually improve overnight as the flavors meld and the textures set. Refrigerate at least 4 hours, preferably overnight, before cutting.
- Make ahead — You can bake them up to 48 hours in advance and keep them refrigerated, covered tightly with plastic wrap.
- Freezing — Wrap individual bars in plastic and freeze for up to 2 months. Thaw in the fridge overnight.
- Serving from fridge — Serve chilled; remove them 10–15 minutes before serving if you prefer a softer mouthfeel.
Handy Q&A
- Q: Can I use low-fat cream cheese or sour cream? — A: You can, but texture and flavor will be less rich. For best results stick with full-fat.
- Q: My pumpkin layer separated slightly while whisking—what happened? — A: Whisk gently until uniform; if it still shows separation, a short rest and another gentle whisk should bring it back together.
- Q: How do I prevent cracks in the cheesecake layer? — A: Don’t overmix after adding eggs, avoid sudden temperature changes, and cool the pan gradually in the oven as instructed.
- Q: Can I make this in a 9×9 pan instead? — A: You can, but the bars will be slightly thinner and bake faster—start checking at 40 minutes.
Next Steps
Make a batch this weekend and bring them to your next gathering; they travel well and look special without being fussy. If you want to play with toppings, toasted walnuts, a brown-butter crumb, or a simple whipped cream are all natural fits.
If you liked this recipe, try adapting the same technique to other seasonal purées—pear or sweet potato both do nicely—or swap the gingersnap crust for a simple graham base for a different profile. And when you make them, take a photo of that swirl: it’s one of those bakes that makes people ask for the recipe before they taste it.
Pumpkin Cheesecake Bars
Ingredients
Ingredients
- ?1 1/2 cupsgingersnap cookie crumbsabout 24 cookies
- ?5 tablespoons 65 gunsalted buttermelted
- ?1/4 cup 50 glight brown sugarpacked
- ?16 ounces 450 gcream cheesesoftened to room temperature
- ?1/2 cup 100 ggranulated sugar
- ?1 tablespoon 7 gall-purpose flour
- ??cup 85 gfull fat sour cream
- ?1 largeeggat room temperature
- ?1 egg yolk
- ?1 teaspoon 5 mlpure vanilla extract
- ?3/4 cup 170 gpumpkin puree
- ?1/2 cup 100 glight brown sugarpacked
- ?1/2 cup 120 mlheavy whipping cream
- ?1 largeeggat room temperature
- ?1 teaspoonpure vanilla extract
- ?2 tablespoonsall-purpose flour
- ?2 teaspoonspumpkin pie spice
Instructions
Instructions
- Adjust the oven rack to the lower-middle position. Preheat oven to 350°F (180°C) (160°C for a fan oven). Line an 8×8-inch (20×20 cm) baking dish with parchment paper, leaving the paper to hang over two opposite sides for easy removal.
- Place the gingersnap cookies in a food processor and pulse until they become fine crumbs. If you don’t have a food processor, place the cookies in a sturdy zip-top bag and crush them with a rolling pin until finely ground.
- Add the melted unsalted butter and 1/4 cup packed light brown sugar to the crumbs and pulse or stir until evenly combined.
- Pour the crumb mixture into the prepared pan and press it firmly and evenly into the bottom of the pan (use the bottom of a measuring cup or the back of a spoon). Bake the crust for 7 minutes. Remove from the oven and transfer to a wire rack to cool while you prepare the fillings.
- Reduce the oven temperature to 325°F (165°C).
- In the bowl of a stand mixer fitted with the paddle attachment (or using a hand mixer), beat the softened cream cheese on high speed until completely smooth and fluffy, about 4–5 minutes.
- Add the granulated sugar and 1 tablespoon all-purpose flour to the creamed cream cheese. Mix on medium speed until fully incorporated and smooth.
- Add the full-fat sour cream, 1 large egg, 1 egg yolk, and 1 teaspoon vanilla extract. Mix on medium-low speed just until combined; scrape down the sides and bottom of the bowl and mix briefly again so the mixture is homogeneous. Spoon out a small amount of this cheesecake mixture and set it aside for topping.
- In a separate bowl, whisk together the pumpkin puree, 1/2 cup packed light brown sugar, 1/2 cup heavy whipping cream, 1 large egg, and 1 teaspoon vanilla extract until smooth and uniform.
- Add the 2 tablespoons all-purpose flour and 2 teaspoons pumpkin pie spice to the pumpkin mixture and stir until there are no dry streaks.
- Pour the remaining cheesecake mixture evenly over the cooled gingersnap crust and smooth the top with a spatula or the back of a spoon.
- Gently pour the pumpkin mixture over the cheesecake layer and smooth it lightly so it’s even.
- Drop small spoonfuls of the reserved cheesecake mixture over the pumpkin layer. Using a toothpick or the tip of a sharp knife, drag through the layers to create swirls—do this gently and don’t over-swirl.
- Bake the bars at 325°F (165°C) for 50–55 minutes, until the edges are set and the center still has a slight jiggle.
- Turn off the oven, crack the oven door open, and let the pan sit in the oven for about 20 minutes to cool slowly.
- Remove the pan from the oven and let it cool to room temperature on a wire rack. Then refrigerate the bars until firm, at least 4 hours or preferably overnight.
- Use the parchment overhang to lift the cheesecake from the pan. Trim edges if desired and cut into 16 squares. Serve chilled.
Equipment
- 8×8 inch pan20 cm quare pan
- Parchment Paper
- Food Processor
- Electric Hand mixer or Stand mixer
- Mixing Bowl
- Whisk
- Measuring cups and spoons
Notes
We used gingersnap cookies for the base, but graham crackers can be used.
Use a food processor:This small appliance is the best tool for creating fine cookie crumbs for pies and bars. If you don’t have a food processor, crush the cookies by hand, using a heavy ziplock bag and a rolling pin or meat mallet.
Pay attention to the recipe instructions:It’s particularly important to note that the oven temperature should be reduced after baking the crust and to follow the steps for cooling the cheesecake bars down slowly.
To cut clean squares:Use a large, sharp knife to slice your bars into squares after lifting them out of the pan. Before each cut, dip the knife into warm water, then clean it off with paper towels. It takes a bit of extra time, but it’s worth it!
To Store:Keep these bars in an airtight container in the fridge for up to 3 days, or freeze for up to 2 months.


