

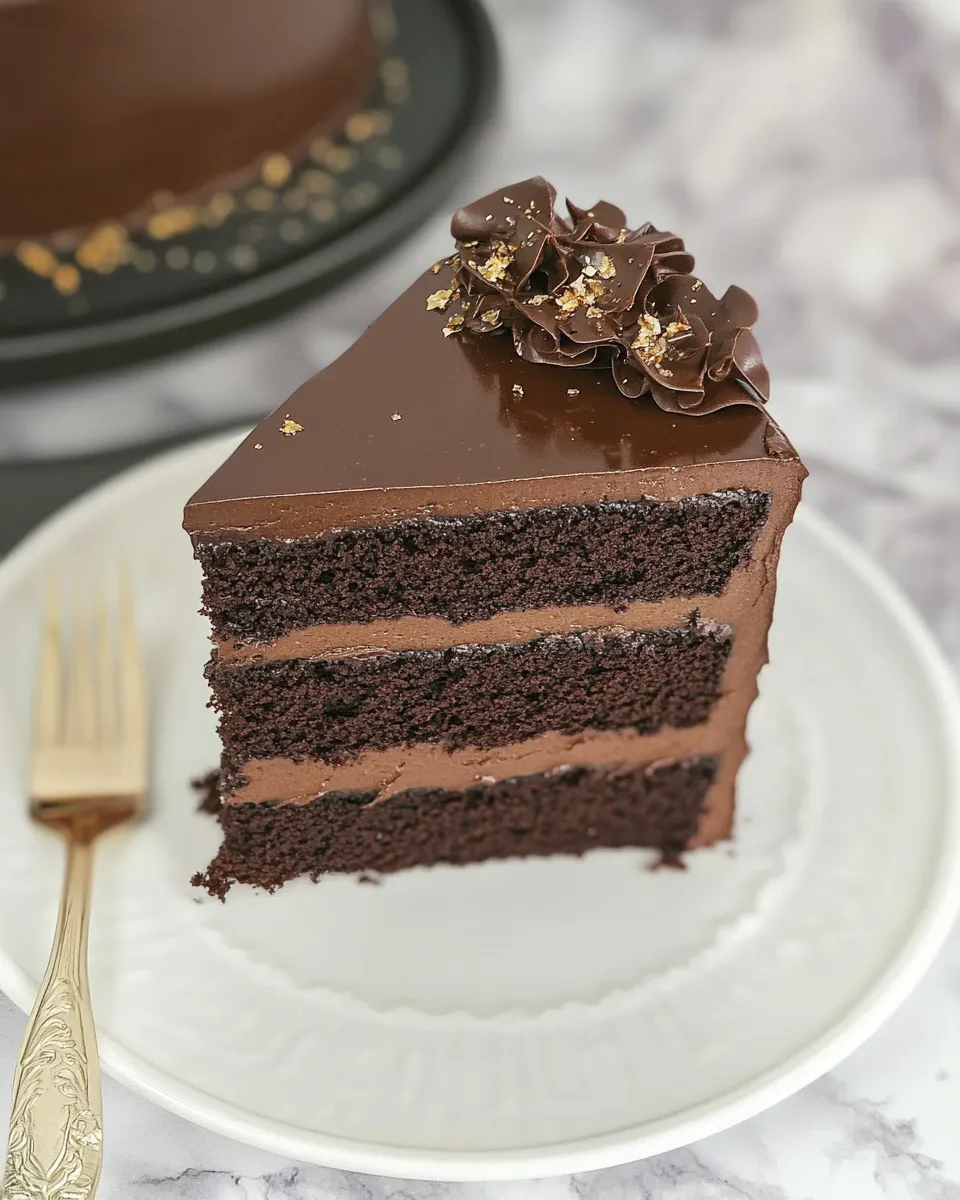
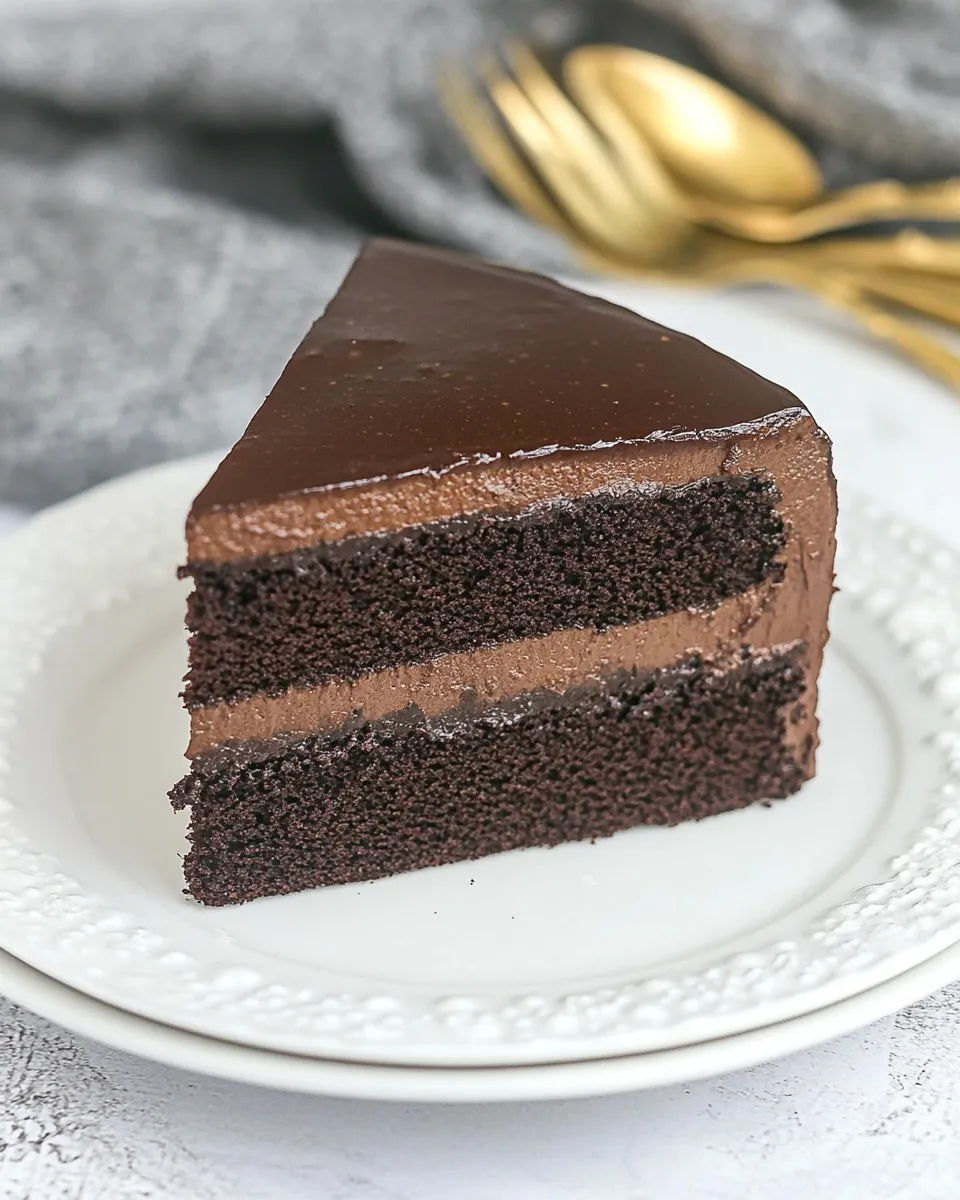
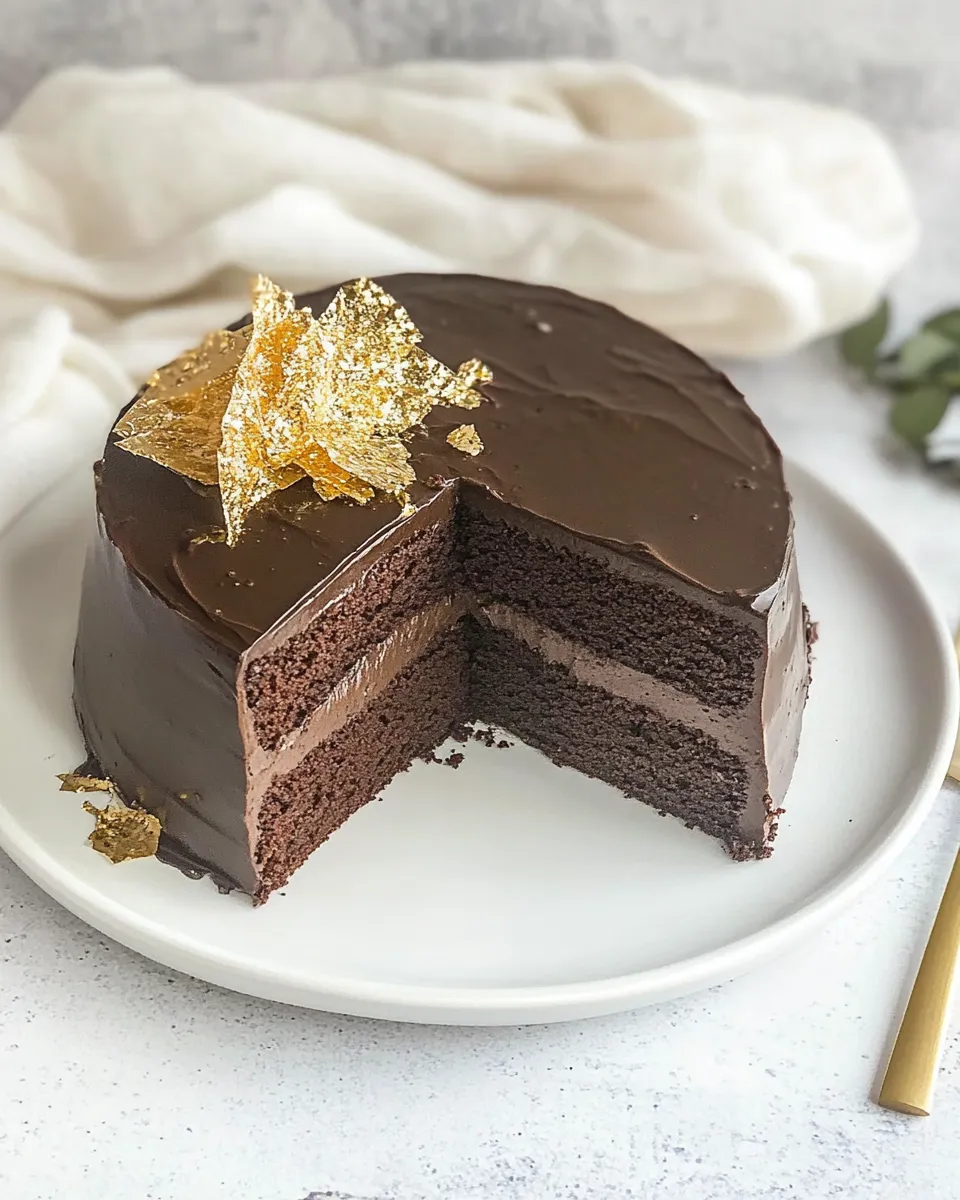
This is a straight‑forward, reliably moist chocolate layer cake designed to be dressed with a glossy mirror glaze or your favorite frosting. The crumb is chocolaty but not heavy; the recipe leans on boiling water to bloom the cocoa and give a tender, even texture. If you want a showstopper cake, the structure here is forgiving and sets up beautifully for a sleek finish.
I test recipes with a focus on what makes them repeatable at home: clear steps, predictable timing, and small tricks that save you headaches during assembly. You don’t need a professional kitchen to pull this off—just a couple of pans, a whisk, and a free hour or two (plus chilling time). Follow the method exactly for the best result, then customize your glaze or frosting to suit the occasion.
Below you’ll find the ingredient lineup (use these exact ingredients), a step‑by‑step Cooking Guide that follows the recipe directions, troubleshooting tips, storage notes, and practical options for swaps and upgrades. Read it through once, gather your gear, and you’ll be ready to bake.
The Ingredient Lineup
Ingredients
- 1¾ cups flour — provides the cake’s structure; measure accurately for consistent crumb.
- ¾ cup unsweetened cocoa powder — the primary source of chocolate flavor; sift to remove lumps.
- 1½ teaspoons baking powder — gives lift and resilience to the layers.
- 1½ teaspoons baking soda — works with the other leaveners for oven rise and tender crumb.
- 2 cups sugar — sweetens and helps with moisture and browning.
- 1 teaspoon salt — balances sweetness and enhances chocolate notes.
- 2 eggs — bind and add structure and richness.
- 1 cup milk — hydrates dry ingredients and contributes to a tender texture.
- ½ cup canola — provides fat for moistness; a neutral oil keeps the chocolate flavor forward.
- 2 teaspoons vanilla extract — rounds and brightens the chocolate taste.
- 1 cup boiling water — blooms the cocoa and thins the batter for a fine, even crumb.
Layered Chocolate Mirror Cake Cooking Guide
- Preheat the oven to 350°F (175°C). Grease two 9‑inch cake pans, line the bottoms with parchment paper, then grease the parchment.
- In a large bowl sift together 1¾ cups flour, ¾ cup unsweetened cocoa powder, 1½ teaspoons baking powder, and 1½ teaspoons baking soda.
- Add 2 cups sugar and 1 teaspoon salt to the dry ingredients and whisk to combine.
- In a separate bowl whisk together 2 eggs, 1 cup milk, ½ cup canola, and 2 teaspoons vanilla extract until smooth.
- Pour the wet mixture into the dry ingredients and whisk by hand until mostly combined.
- Stir in 1 cup boiling water until the batter is smooth. The batter will be thin—this is normal.
- Divide the batter evenly between the two prepared pans and smooth the tops. Bake for about 35–38 minutes, or until a cake tester or toothpick inserted into the center comes out clean.
- Let the cakes cool in the pans for about 10–15 minutes. Run a knife around the edges, invert each pan onto a wire rack, remove the parchment, and cool the layers completely on the rack.
- If you plan to frost the cake, place the cooled layers in the freezer for at least 30 minutes (or longer) to firm them; this makes layering and frosting easier.
- To assemble: place one chilled layer on a serving plate or cake board, spread your chosen frosting between the layers, place the second layer on top, and frost the outside of the cake as desired. Chill the finished, frosted cake for a few hours or overnight to set before serving. (Note: this recipe’s ingredient list does not include specific frosting or mirror‑glaze ingredients, so use a frosting/glaze recipe of your choice.)
Why Layered Chocolate Mirror Cake is Worth Your Time
This cake gives you a reliable base for an elegant finish. The thin batter and boiling water technique create a tender crumb that takes frosting and mirror glaze without tearing. Because the recipe uses oil instead of butter, the layers stay moist for longer—an advantage when you need to build and decorate over several hours or across two days.
It’s versatile. The layers play nicely with everything from a simple chocolate buttercream to a glossy mirror glaze. If you want a polished, professional look, chilling the layers before decorating makes smoothing and glazing much easier. For everyday dessert, a quick chocolate ganache or whipped frosting transforms it into something cozy and approachable.
Substitutions by Category
- Fats — canola is the recipe fat; you can swap for another neutral oil with similar results (milder flavor, same texture).
- Liquid — milk provides tenderness; use any neutral milk alternative if you need a dairy‑free option.
- Eggs — they add structure and moisture; for an egg‑free version, try a tested egg substitute (note: results will vary and may alter texture).
- Cocoa — unsweetened cocoa is essential for the chocolate flavor; Dutch‑processed cocoa will change acidity and may affect rise slightly.
- Sweetener — granulated sugar is specified; using other sugars will change texture and moisture and may require recipe testing.
- Rising agents — baking powder and soda together are chosen to balance rise and acidity; avoid omitting or replacing without adjusting the formula.
Gear Up: What to Grab
- Two 9‑inch round cake pans (same size for even layers).
- Parchment paper and a sharp knife or kitchen shears to line the pans.
- Wire cooling rack for even cooling.
- Mixing bowls, a whisk, and a rubber spatula.
- Measuring cups and spoons—accurate measuring is important here.
- Toothpick or cake tester to check doneness.
- Freezer space or refrigerator space for chilling layers and the finished cake.
- If glazing: an offset spatula, a turntable (helpful, not mandatory), and a bowl large enough to catch excess glaze.
Things That Go Wrong
Common issues and how to fix them
- Cake is dense or gummy — measuring errors (too much flour) or underbaking are usual suspects. Spoon and level flour rather than scooping. Allow the full bake time and check with a tester.
- Batter too thin or won’t rise — the recipe’s thin batter is expected because of the boiling water; if rise is poor, check your baking powder/soda freshness.
- Cracked or domed tops — over‑mixing or oven temperature too high can cause domes and cracks. Mix until just combined and use an oven thermometer to confirm accurate temperature.
- Layers tear while frosting — chilling the layers (as directed) helps. If you must work with warm cake, use a crumb coat first and handle gently.
- Mirror glaze not sticking or sliding — a very cold or under‑set crumb can cause problems. Chill the frosted cake until firm before pouring glaze, and strain the glaze for smooth application.
Season-by-Season Upgrades
- Spring — serve with a light citrus curd alongside to cut through the chocolate, or decorate with fresh berries for a bright contrast.
- Summer — top with macerated raspberries or a handful of mixed berries; a thin ribbon of mint adds freshness.
- Autumn — add warm spices to your frosting or garnish with toasted nuts; a salted caramel drizzle pairs well with the chocolate base.
- Winter — opt for a dark, glossy glaze and decorate with chocolate shards, candied orange peel, or a dusting of cocoa for a festive finish.
What I Learned Testing
The thin batter surprised me the first few times—don’t panic, that’s normal and results in a fine crumb once baked. Freezing the cooled layers for at least 30 minutes is a small extra step that makes a huge difference when frosting or glazing; the cake handles like a pro would. Also, strain any mirror glaze before pouring to avoid tiny lumps or air bubbles marring the finish.
I found that chilling the finished, frosted cake overnight improves the flavor melding and makes slicing cleaner. If you plan a multi‑layered, heavily glazed cake for a celebration, bake the layers a day ahead and fully chill them; assembly and decoration go faster and with less stress.
Shelf Life & Storage
- Unfrosted layers — wrap well and store at room temperature for 1 day; refrigerate up to 3 days or freeze up to 1 month. Thaw in the refrigerator before frosting.
- Frosted or glazed cake — refrigerate to keep fillings and frosting stable. Properly covered, it will stay fresh for 3–4 days.
- Freezing a finished cake — you can freeze a well‑wrapped frosted cake for up to 1 month; thaw slowly in the refrigerator to avoid condensation on glossy glazes.
FAQ
- Can I bake this in one pan and slice it? — Yes, but baking time will increase and cooling must be adjusted; two pans give you two even layers with consistent bake time.
- Do I have to use a mirror glaze? — No. The cake is delicious with a simple buttercream, ganache, or even whipped cream. The recipe provides a stable foundation for any topping.
- What if my cocoa has lumps? — Sift the cocoa with the flour and leaveners to remove lumps; that keeps the batter smooth.
- How do I get a perfectly smooth finish? — Chill the layers, apply a thin crumb coat, chill again, then apply a final smooth coat of frosting or strain and pour a well‑tempered glaze over a very cold cake.
Hungry for More?
If you enjoyed this cake base, try adapting the method to other flavors—replace some cocoa with espresso powder for an intensified mocha version, or add citrus zest to the frosting for a bright counterpoint. For more practical, tested cake recipes and glazing tutorials, check the blog’s cake section where I post step‑by‑step photos and troubleshooting notes from every test bake.
Make notes as you bake—temperature and oven quirks matter. Small adjustments make a big difference, and once you’ve nailed this recipe, you’ll have a dependable, elegant platform for any finishing style you choose.

Layered Chocolate Mirror Cake
Ingredients
Ingredients
- 1 3/4 cups flour
- 3/4 cup unsweetened cocoa powder
- 1 1/2 teaspoons baking powder
- 1 1/2 teaspoons baking soda
- 2 cups sugar
- 1 teaspoon salt
- 2 eggs
- 1 cup milk
- 1/2 cup canola
- 2 teaspoons vanilla extract
- 1 cup boiling water
Instructions
Instructions
- Preheat the oven to 350°F (175°C). Grease two 9‑inch cake pans, line the bottoms with parchment paper, then grease the parchment.
- In a large bowl sift together 1¾ cups flour, ¾ cup unsweetened cocoa powder, 1½ teaspoons baking powder, and 1½ teaspoons baking soda.
- Add 2 cups sugar and 1 teaspoon salt to the dry ingredients and whisk to combine.
- In a separate bowl whisk together 2 eggs, 1 cup milk, ½ cup canola oil, and 2 teaspoons vanilla extract until smooth.
- Pour the wet mixture into the dry ingredients and whisk by hand until mostly combined.
- Stir in 1 cup boiling water until the batter is smooth. The batter will be thin—this is normal.
- Divide the batter evenly between the two prepared pans and smooth the tops. Bake for about 35–38 minutes, or until a cake tester or toothpick inserted into the center comes out clean.
- Let the cakes cool in the pans for about 10–15 minutes. Run a knife around the edges, invert each pan onto a wire rack, remove the parchment, and cool the layers completely on the rack.
- If you plan to frost the cake, place the cooled layers in the freezer for at least 30 minutes (or longer) to firm them; this makes layering and frosting easier.
- To assemble: place one chilled layer on a serving plate or cake board, spread your chosen frosting between the layers, place the second layer on top, and frost the outside of the cake as desired. Chill the finished, frosted cake for a few hours or overnight to set before serving. (Note: this recipe’s ingredient list does not include specific frosting or mirror‑glaze ingredients, so use a frosting/glaze recipe of your choice.)
Equipment
- Oven
- 9-inch Cake Pans
- Parchment Paper
- Mixing bowls
- Whisk
- Wire Rack
- Knife
Notes
Freezing the cooled layers for at least 30 minutes makes layering and frosting easier.


