
This is a practical, no-fuss red velvet poke cake that delivers the soft crumb and tangy cream cheese frosting everyone expects, but with minimal effort. It leans on a boxed cake mix and a can of sweetened condensed milk to create a dessert that’s reliably moist and fast to assemble. I test recipes for a living, and this one earns its place on the regular rotation for potlucks and weeknight dessert emergencies.
The technique is straightforward: bake, poke, pour, chill, frost. Each step matters, but none are hard. I’ll walk you through why the ingredients are there, what to watch for, and how to adapt the cake if you need to scale, swap, or transport it.
Read on for the exact ingredient notes, the step-by-step instructions, and smart tips that keep the frosting stable and the cake sliceable. If you want a reliable showstopper with minimal fuss, this is it.
Ingredient Rundown
- one 16.25-ounce box red velvet cake mix — the cake base and red velvet flavor; follow the box instructions for liquid and fat amounts.
- one 14-ounce can sweetened condensed milk — soaks into the cake to add sweetness and moisture; pour slowly so it absorbs rather than pools.
- 8 ounces brick-style cream cheese, softened (lite okay) — gives the frosting its tang and stability; brick style is firmer than tub cream cheese.
- ¼ cup unsalted butter, softened (half of 1 stick) — softens the cream cheese and helps the frosting spread smoothly.
- 2 ½ cups confectioners’ sugar — sweetens and thickens the frosting; add in portions for even mixing.
- ½ teaspoon vanilla extract — rounds the frosting flavor.
- ½ teaspoon salt, or to taste — balances the sweetness and brightens the cream cheese.
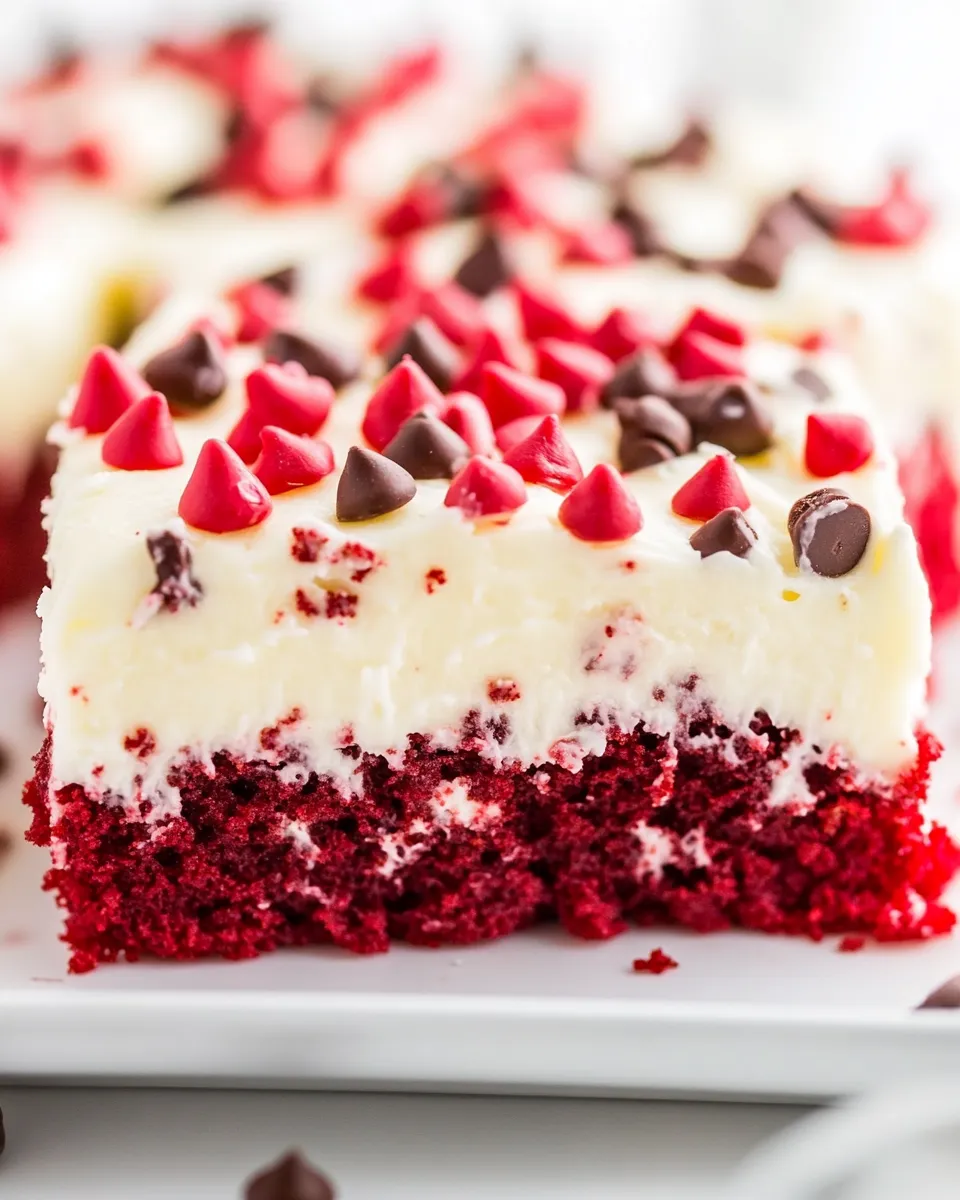
- ¾ cup mini semi-sweet chocolate chips — finish for texture and contrast; mini chips distribute evenly, but regular chips can be used.
Cook Red Velvet Poke Cake with Cream Cheese Frosting Like This
- Preheat oven to 350°F. Line a 9×13-inch pan with aluminum foil and spray the foil with cooking spray; set pan aside.
- Prepare the red velvet cake mix according to the package directions (use the eggs, water, and oil amounts called for on the box). Pour the batter into the prepared pan and bake according to the package instructions, until a toothpick inserted in the center comes out clean.
- Remove the cake from the oven and let it rest in the pan on a wire rack for 5 minutes.
- Using the blunt end of a wooden spoon or a skewer, poke holes evenly across the surface of the cake (about 1 inch apart).
- Slowly pour the 14-ounce can of sweetened condensed milk evenly over the cake, allowing the milk to seep into the holes. Pour gradually and pause as needed so the milk is absorbed.
- Place the cake in the refrigerator and chill at least 10 minutes, or until the cake is cool to the touch, while you make the frosting.
- For the frosting: in the bowl of a stand mixer fitted with the paddle attachment (or in a large bowl with a handheld mixer), beat the softened 8 ounces cream cheese and 1/4 cup softened unsalted butter together on low to medium speed until smooth and combined.
- Add the 2 1/2 cups confectioners’ sugar in portions, the 1/2 teaspoon vanilla extract, and the 1/2 teaspoon salt. Beat on low until the sugar is incorporated, then increase to medium-high and beat until the frosting is smooth and fluffy. Scrape down the bowl as needed.
- If the frosting feels very soft, chill it 10–15 minutes to firm up before spreading.
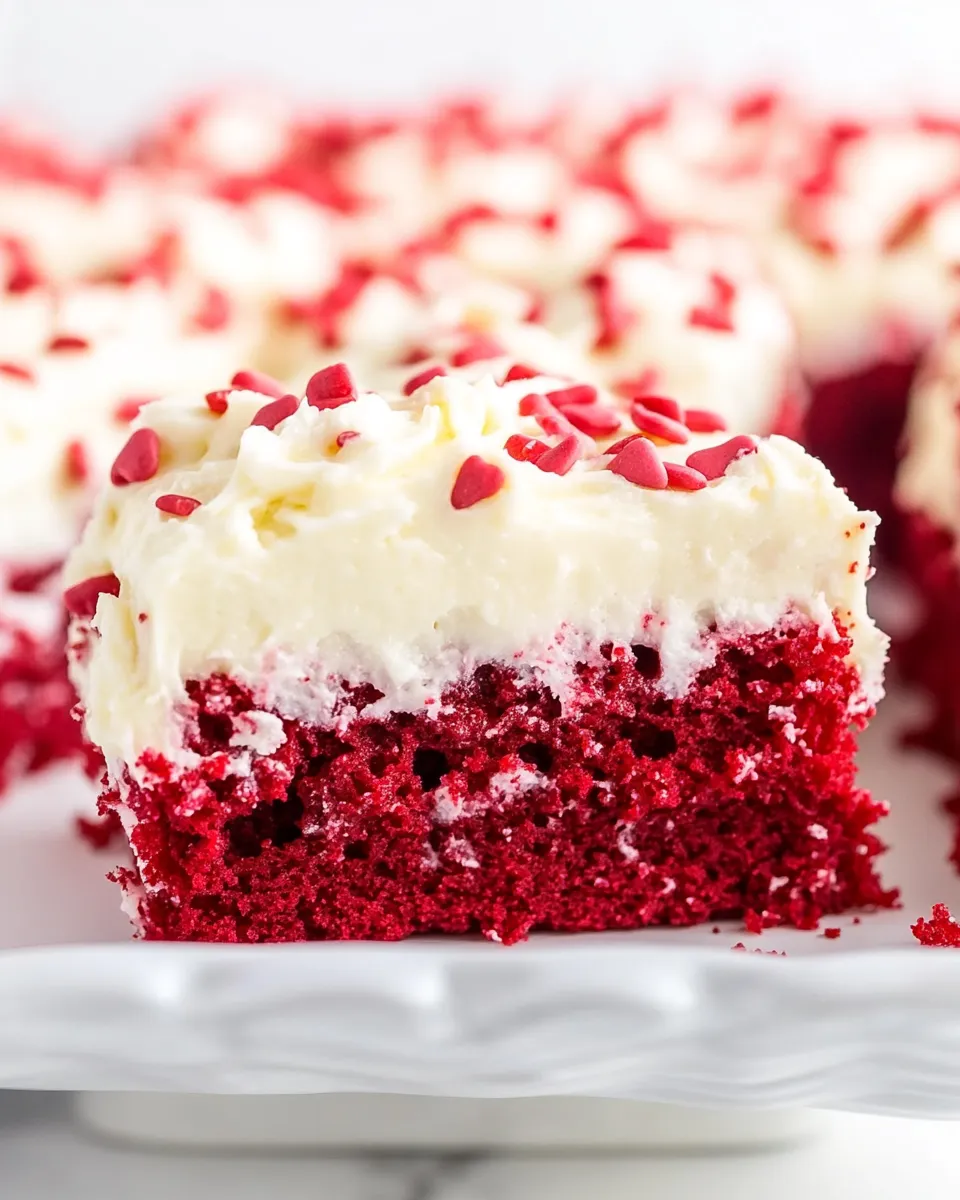
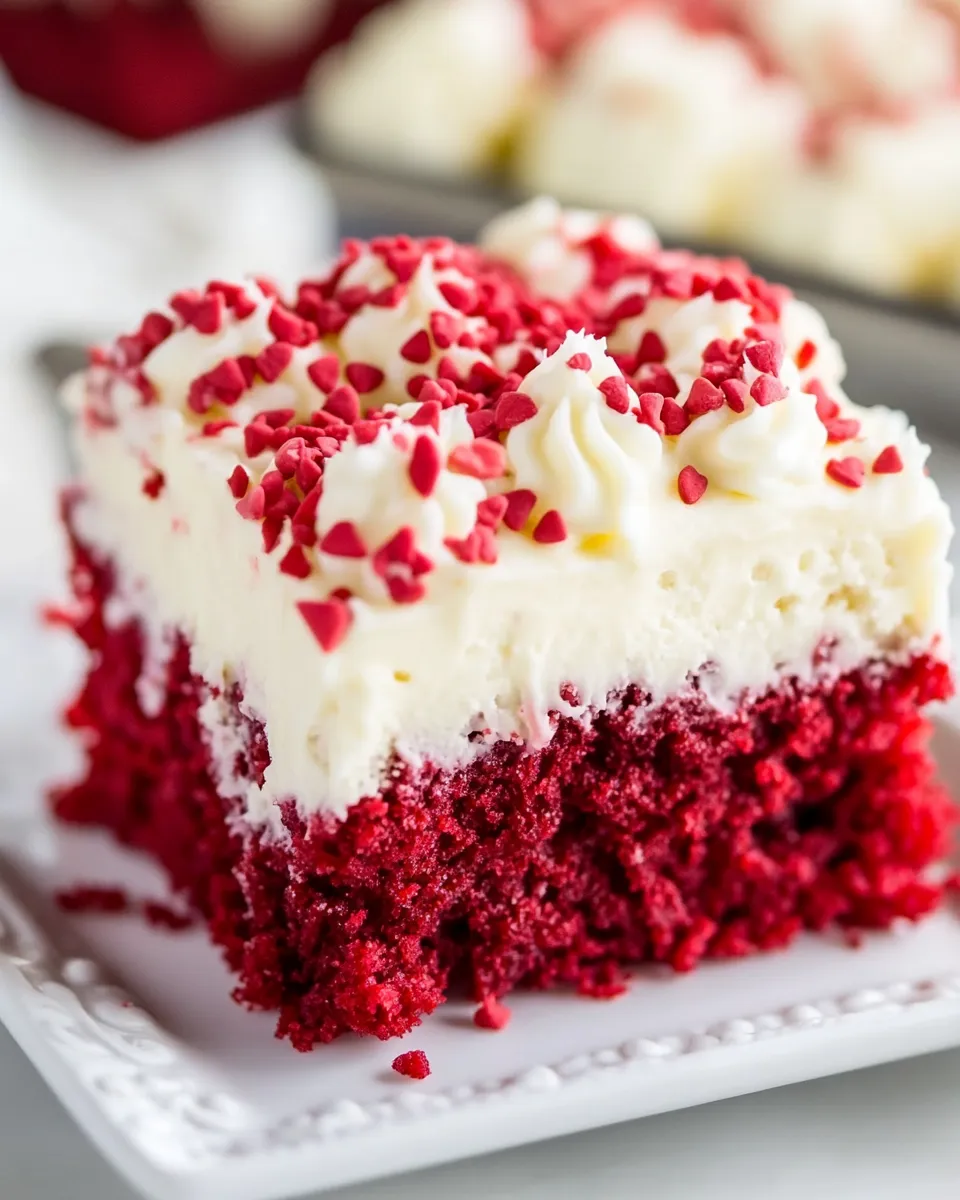
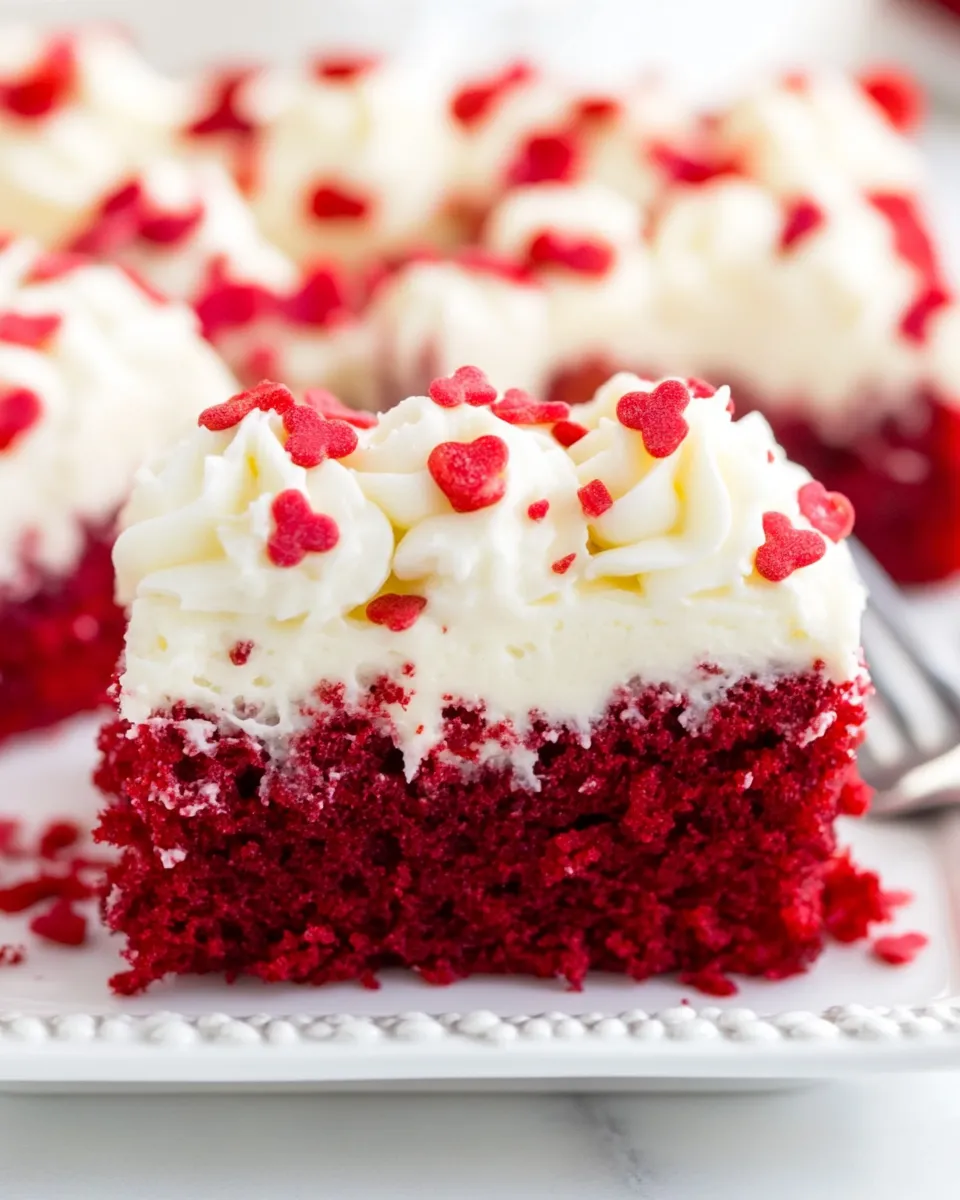
- Remove the chilled cake from the refrigerator and spread the cream cheese frosting evenly over the top with a spatula.
- Evenly sprinkle the 3/4 cup mini semi-sweet chocolate chips over the frosted cake.
- Cover the pan loosely and refrigerate the cake for at least 4 hours, or overnight, before slicing and serving.
Why Red Velvet Poke Cake with Cream Cheese Frosting is Worth Your Time
This cake rewards small effort with big results. The poke step is the secret: those holes create channels for the sweetened condensed milk to sink in, producing a uniformly moist texture that boxed mixes alone rarely deliver. The cream cheese frosting brings a tang that cuts through the sweet, making each bite balanced.
It’s forgiving. The boxed mix reduces variables, and the condensed milk absorbs slowly, so there’s time to stop pouring if areas start to pool. It travels well when chilled. And because it’s assembled in a 9×13 pan, you get neat slices without a lot of knife work.
Finally, it’s quick to pull together. If you need dessert with limited prep time—yet want something that looks and tastes like you spent hours—this is a practical go-to.
What to Use Instead
- Cake mix: If you prefer scratch, use an equivalent red velvet cake recipe and bake in a 9×13-inch pan. Be aware baking times may change, and a lighter crumb will absorb liquid differently.
- Sweetened condensed milk: Evaporated milk plus sugar won’t behave the same; the condensed milk’s viscosity is what soaks and sweetens effectively. If you must substitute, use a thicker sweet syrup sparingly.
- Cream cheese: Full-fat brick-style cream cheese gives best texture; low-fat or whipped tub versions may make a looser frosting that needs extra chilling.
- Chocolate chips: Chopped chocolate or chocolate sprinkles work for texture and finish. Use mini chips for even coverage; larger chips will clump.
Gear Checklist
- 9×13-inch baking pan — for the correct shape and baking time.
- Aluminum foil and cooking spray — easier release and cleaner pan.
- Stand mixer or handheld mixer — to get a smooth, lump-free frosting.
- Spatula and offset spatula — for spreading the frosting evenly.
- Wire rack — to cool the cake before poking and pouring.
- Wooden spoon handle or skewer — to poke uniform holes.
Quick tip
An offset spatula makes a dramatic difference when smoothing frosting on a large surface. If you only have a rubber spatula, warm the blade slightly under hot water and dry it before smoothing to reduce drag.
Frequent Missteps to Avoid
Don’t pour the condensed milk too fast. If you rush, the liquid will pool on top instead of soaking in. Pour slowly, pausing to let the milk absorb.
Don’t use room-temperature frosting if it’s too soft. Spreadable but slightly firm is best. If your frosting collapses or slides off the cake, chill it 10–15 minutes to firm up, then try again.
Don’t skip the refrigeration step. This cake benefits from time in the fridge to let the condensed milk finish distributing and to set the frosting. Slicing too soon gives messy pieces.
Watch your oven time. Box mixes vary; use a toothpick to confirm doneness. Overbaked cake will be drier and won’t absorb the condensed milk as evenly.
Seasonal Adaptations
Winter: Add a warmed berry compote at serving for brightness. The tang of the berries pairs beautifully with the cream cheese.
Spring/Summer: Top with fresh strawberries or raspberries instead of or alongside the chocolate chips. Chill thoroughly so berries don’t slide off.
Fall: Sprinkle a pinch of ground cinnamon into the frosting for a subtle spice. You can also fold a tablespoon of finely chopped toasted pecans into the topping for crunch.
Chef’s Notes
Frosting consistency
Frosting should be smooth and spreadable but not runny. If your cream cheese and butter were too warm, the frosting will be soft. Pop it in the fridge for 10–15 minutes and then spread. If it’s too stiff, let it sit at room temperature for 5 minutes and re-whip briefly.
Chocolate chips
Mini chips stick better to the frosting and distribute more evenly. If you use regular-size chips, press them in gently so they adhere and don’t fall off when cutting.
Serving
Run a sharp knife under hot water, dry it, and then slice for clean edges. Wipe the blade between cuts.
Meal Prep & Storage Notes
Refrigerate the cake covered for up to 4 days. The cream cheese frosting is perishable, so keep it cold. For best texture, consume within 48 hours.
To freeze: wrap the pan tightly in plastic wrap and then foil, or transfer slices to an airtight container. Freeze up to 2 months. Thaw in the refrigerator overnight. Note: freezing may slightly change the frosting texture; re-whip briefly if needed before serving.
If you need to travel with the cake, place it in a shallow cooler with ice packs and keep it chilled until serving to protect the cream cheese frosting.
Questions People Ask
Can I make this with a scratch red velvet cake? Yes. Use any reliable 9×13 red velvet recipe. Just be mindful that homemade cakes may absorb liquids differently, so pour the condensed milk slowly.
Why use sweetened condensed milk instead of glaze? Condensed milk provides a thick, even soak that keeps the cake uniformly moist. Thin glazes can run and pool.
Can I use whipped cream instead of cream cheese frosting? You can, but whipped cream won’t hold up as long and will require gelatin or stabilizer if you need to keep it for several hours.
Is there a dairy-free option? You can attempt dairy-free cream cheese alternatives and a dairy-free condensed milk, but results vary. Brick-style dairy-free cream cheeses are your best bet for stability.
Hungry for More?
If you liked this easy, make-ahead dessert, try swapping the cake mix for chocolate and using dulce de leche instead of condensed milk for a chocolate poke cake variation. The basic method—bake, poke, soak, chill, frost—works for many flavor combinations. Bookmark this technique; it’s one of my simplest hacks for reliably moist sheet cakes that serve a crowd.
Want a printable version or nutrition breakdown? Let me know which you prefer and I’ll prepare it. If you try the cake, tell me how you topped it—berries, nuts, or extra chocolate? I love hearing small tweaks that make a recipe your own.

Red Velvet Poke Cake with Cream Cheese Frosting
Ingredients
Ingredients
- one 16.25-ounce box red velvet cake mix I used Duncan Hines
- one 14-ounce can sweetend condensed milk
- 8 ouncesbrick-style cream cheese softened (lite okay)
- 1/4 cupunsalted butter softened (half of 1 stick)
- 2 1/2 cupsconfectioners’ sugar
- 1/2 teaspoonvanilla extract
- 1/2 teaspoonsalt or to taste
- 3/4 cupmini semi-sweet chocolate chips I prefer mini but regular size may be substituted
Instructions
Instructions
- Preheat oven to 350°F. Line a 9×13-inch pan with aluminum foil and spray the foil with cooking spray; set pan aside.
- Prepare the red velvet cake mix according to the package directions (use the eggs, water, and oil amounts called for on the box). Pour the batter into the prepared pan and bake according to the package instructions, until a toothpick inserted in the center comes out clean.
- Remove the cake from the oven and let it rest in the pan on a wire rack for 5 minutes.
- Using the blunt end of a wooden spoon or a skewer, poke holes evenly across the surface of the cake (about 1 inch apart).
- Slowly pour the 14-ounce can of sweetened condensed milk evenly over the cake, allowing the milk to seep into the holes. Pour gradually and pause as needed so the milk is absorbed.
- Place the cake in the refrigerator and chill at least 10 minutes, or until the cake is cool to the touch, while you make the frosting.
- For the frosting: in the bowl of a stand mixer fitted with the paddle attachment (or in a large bowl with a handheld mixer), beat the softened 8 ounces cream cheese and 1/4 cup softened unsalted butter together on low to medium speed until smooth and combined.
- Add the 2 1/2 cups confectioners’ sugar in portions, the 1/2 teaspoon vanilla extract, and the 1/2 teaspoon salt. Beat on low until the sugar is incorporated, then increase to medium-high and beat until the frosting is smooth and fluffy. Scrape down the bowl as needed.
- If the frosting feels very soft, chill it 10–15 minutes to firm up before spreading.
- Remove the chilled cake from the refrigerator and spread the cream cheese frosting evenly over the top with a spatula.
- Evenly sprinkle the 3/4 cup mini semi-sweet chocolate chips over the frosted cake.
- Cover the pan loosely and refrigerate the cake for at least 4 hours, or overnight, before slicing and serving.
Equipment
- 9x13-inch pan
- Aluminum Foil
- Cooking spray
- Wire Rack
- wooden spoon or skewer
- Refrigerator
- stand mixer or handheld mixer
- Spatula
Notes
Cake:
If you’d rather make homemade red velvet cake, you can probably double
this red velvet cupcake recipe
, although I haven’t tested it.
Frosting:
You can use
store-bought cream cheese frosting
, if desired. You’d likely need to use one-and-a-half to two 14-ounce tubs whipped cream cheese frosting.
Storage:
Cake will keep airtight in the fridge for up to 1 week.


