
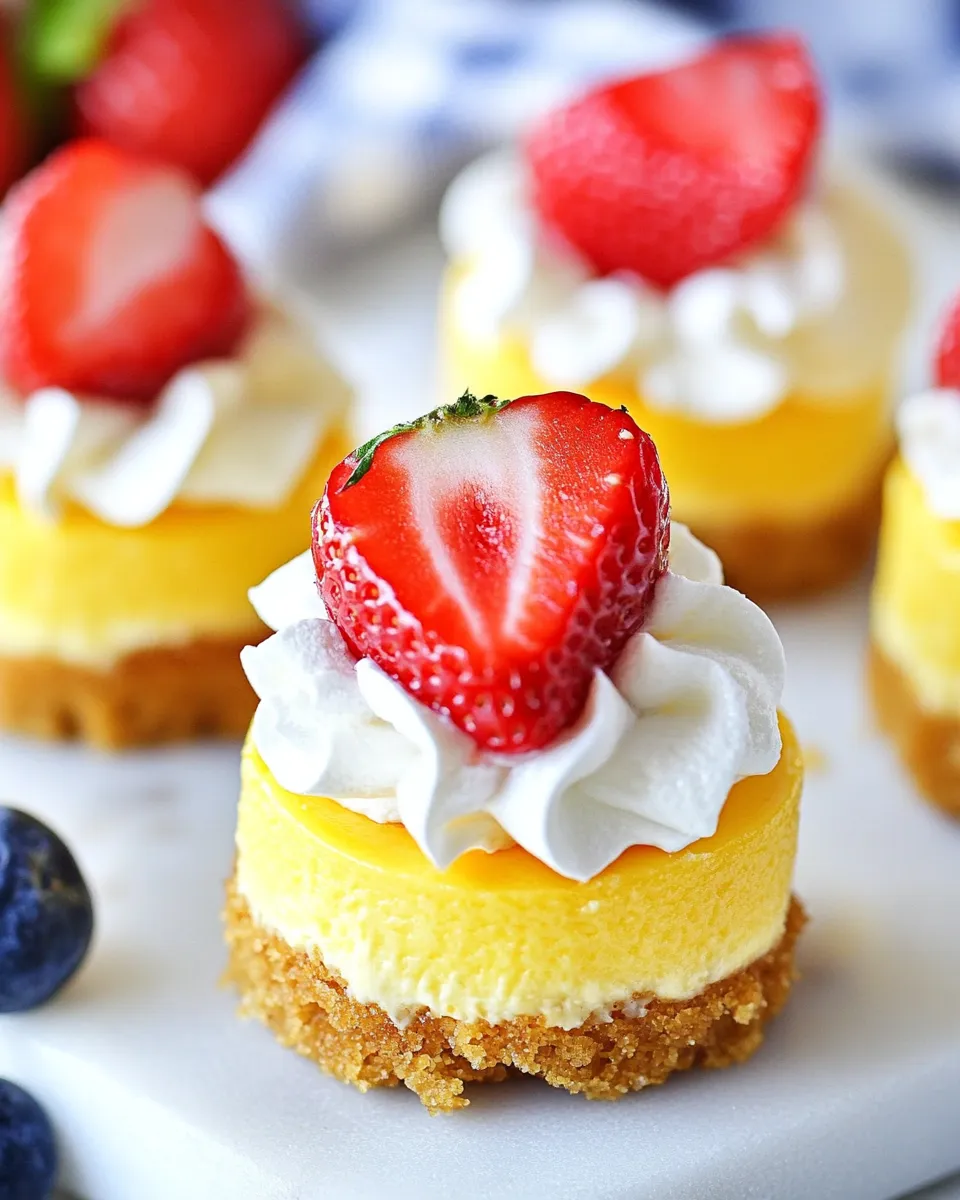
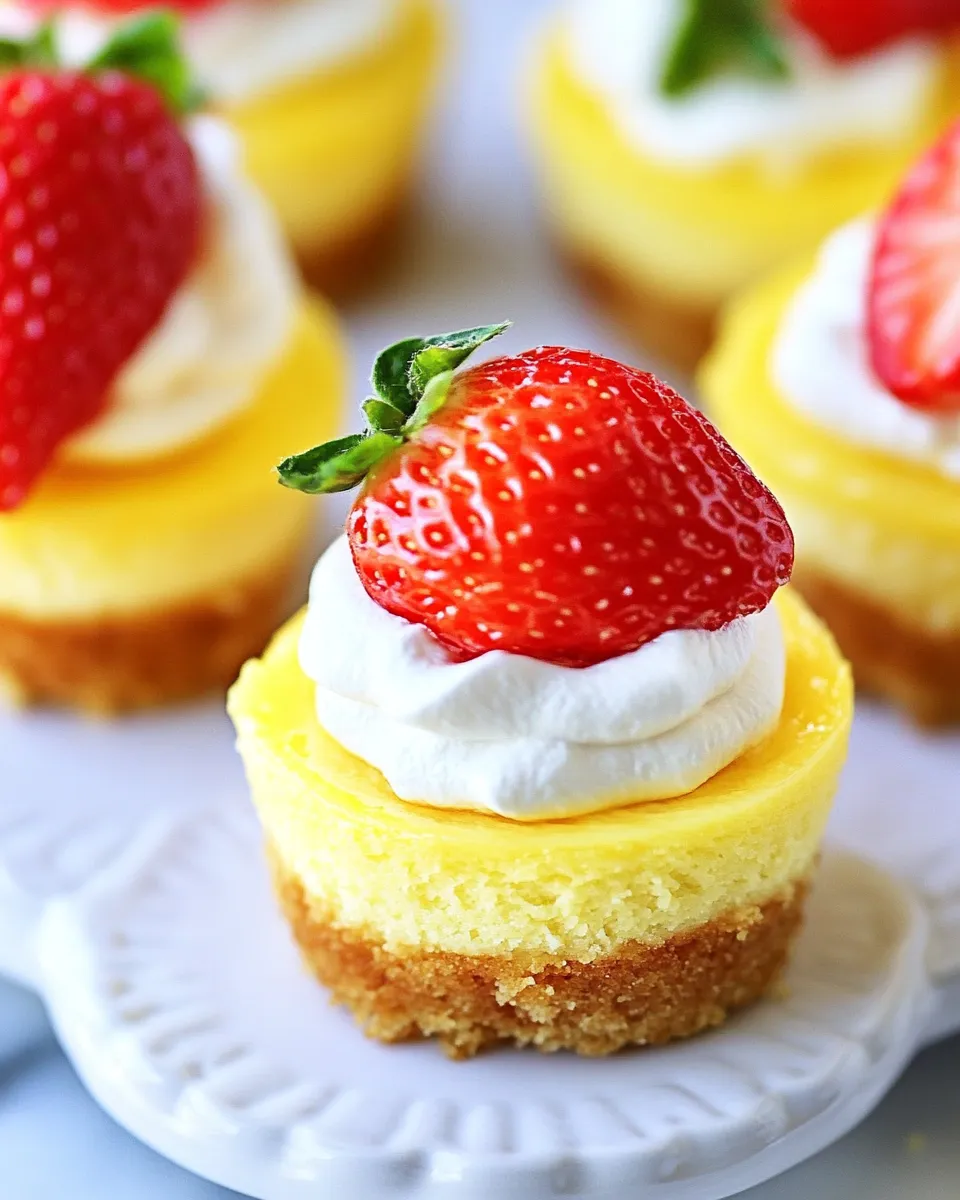
Small, portable, and exactly the kind of dessert you don’t have to apologize for eating more than one of. These mini cheesecakes are streamlined: a crisp graham crust, dense and silky cream-cheese filling, a slick of caramel, and a little cloud of whipped cream on top. They make a great party platter and they behave well in a refrigerator case — no drama, just dessert that works.
I like these for weekday baking because they come together fast and the batch size is forgiving. You can press crusts while the oven preheats, whip up the filling in one bowl, and get everything in the oven in under 20 minutes of hands-on time. The chilling step is non-negotiable for a clean slice, but it’s passive, so you can prep a salad or answer emails while they set.
This recipe yields 24 bite-size cheesecakes — ideal for potlucks, gift boxes, or keeping in the fridge for a week of small sweet treats. Below you’ll find the ingredient list, step-by-step directions exactly as tested, and practical notes on equipment, swaps, and troubleshooting. Read once, then bake. You’ll thank me when the first person asks for the recipe.
Gather These Ingredients
- 1 1/2 cups graham cracker crumbs — from 12 whole crackers; makes the base and provides that classic crunchy contrast.
- 6 Tbsp unsalted butter, melted — binds the crust and keeps the flavor clean; use salted only if you like slightly savory-sweet crusts.
- 1/2 tsp cinnamon — subtle warmth in the crust; optional but recommended.
- 16 oz cream cheese — from two 8oz packages, softened; the primary body and richness of the cheesecakes.
- 3 large eggs — room temperature; they give structure and a silky texture.
- 14 oz sweetened condensed milk — sweetens and lightens the filling while keeping it smooth.
- 1 cup caramel sauce — used after cooling; provides sweetness and a glossy finish (reserve the full cup).
- 1 cup heavy whipping cream, chilled — for topping; whips into stable dollops when well chilled.
- 1 Tbsp granulated sugar — for the whipped cream; balances the dairy.
- 1/2 tsp vanilla extract — brightens the whipped cream.
- 1/4 tsp cinnamon to garnish, optional — a dusting for contrast and aroma.
Mini Cheesecakes: How It’s Done
- Preheat oven to 350°F (175°C). Line a 24‑count muffin tin with standard cupcake liners.
- In a medium bowl, combine 1 1/2 cups graham cracker crumbs, 6 Tbsp melted unsalted butter, and 1/2 tsp cinnamon. Stir until the crumbs are evenly moistened.
- Divide the crumb mixture evenly among the 24 liners (about 1 Tbsp per liner). Press the crumbs firmly into the bottom and slightly up the sides of each liner with the back of a spoon or your fingers to form crusts.
- In a large mixing bowl, beat 16 oz softened cream cheese and 3 large room‑temperature eggs on high speed for 5 minutes, stopping once or twice to scrape down the bowl, until smooth and blended.
- Add 14 oz sweetened condensed milk to the cream cheese mixture and mix on low speed for about 2 minutes, until fully combined and smooth.
- Divide the cheesecake mixture evenly among the 24 crusts, filling each liner about 3/4 full (about a level ice‑cream scoop each).
- Bake at 350°F for 15 minutes. The centers should be set but still have a very slight jiggle. Do not over‑bake; if the tops begin to crack, they are over‑baking.
- Remove the tin from the oven and let the mini cheesecakes cool to room temperature in the tin.
- Spoon the 1 cup caramel sauce evenly over the cooled mini cheesecakes (use the full cup total; this is about 2/3 Tbsp per cheesecake).
- Refrigerate the cheesecakes in the tin for at least 2 hours or until fully chilled and set.
- While the cheesecakes chill (or just before serving), make the whipped cream: in a large bowl combine 1 cup chilled heavy whipping cream, 1 Tbsp granulated sugar, and 1/2 tsp vanilla extract. Beat on high speed for about 2 minutes, or until the cream is whipped and fluffy.
- Once the cheesecakes are fully chilled, pipe or spoon the whipped cream onto each cheesecake. If desired, lightly dust with the optional 1/4 tsp cinnamon to garnish.
- Serve the mini cheesecakes chilled, with or without the cupcake liners.
Why This Recipe is a Keeper
This formula hits reliable texture and flavor without fuss. The graham crust is straightforward and finger-friendly; press it, bake it, and it stays crisp against the creamy filling. The filling relies on just cream cheese, eggs, and sweetened condensed milk, so you avoid curdled mixtures and overworking that leads to a dense, rubbery result. The condensed milk also keeps the filling glossy and smooth — it’s an unsung convenience that works.
Timing is forgiving. The bake is short and you can tell doneness by touch: set edges, tiny jiggle in the center. Caramel and whipped cream are applied after the cheesecakes cool, so you avoid soggy tops and runny decorations. In short: predictable outcome, minimal equipment, and a presentation that always looks better than expected.
Quick Replacement Ideas
If you need to swap a component at short notice, here are practical, tested options that won’t wreck the result. None of these require precise new measurements — just use comparable amounts and adjust to taste.
- Graham cracker crumbs — Use digestive biscuits or a plain shortbread cookie in the same quantity for a different flavor profile.
- Unsalted butter — If you only have salted, use it but leave out any extra salt elsewhere. The difference will be subtle.
- Caramel sauce — A thick dulce de leche works well in equal measure. If you have only thinner caramel, spoon less so it doesn’t run off the sides.
- Whipped cream — Stabilize whipped cream with a teaspoon of instant vanilla pudding mix if you need longer hold for display.
Setup & Equipment
This recipe needs very little specialized gear. A 24‑count muffin tin and standard cupcake liners are the anchors. Use a medium bowl for the crust mix and a large mixing bowl for the filling; an electric mixer speeds the process and ensures a silky batter, but a sturdy whisk and some elbow grease will do in a pinch.
Helpful extras: a small ice-cream scoop or measuring cup to portion filling evenly; a flat-bottomed spoon or tamper to press crusts; a piping bag or spoon for the whipped cream. If you plan to gift these, a small box with parchment or cupcake holders keeps them tidy during transport.
Frequent Missteps to Avoid
These errors show up often, and they’re all preventable.
- Pressing the crust too thin or unevenly — aim for about 1 Tbsp per liner and press up a little on the sides for stability.
- Baking too long — the centers should jiggle slightly; over-baking causes cracks and dryness.
- Using cold eggs or cold cream cheese — this makes the batter lumpy and harder to blend. Bring to room temperature first.
- Skipping the chill — serving before the cheesecakes fully set leads to collapsed centers and messy slices.
Better Choices & Swaps
Small ingredient choices alter the character without breaking the recipe. Full‑fat cream cheese gives the best mouthfeel; reduced-fat versions will yield a softer, less rich texture. Real butter in the crust delivers pure flavor — margarine affects taste and texture noticeably.
For flavor variations: fold a teaspoon of lemon zest into the filling for brightness, or sprinkle chopped toasted pecans over the caramel for crunch. If cinnamon in the crust isn’t your thing, replace it with 1/4 tsp ground ginger for a different warm note.
Testing Timeline
Timing keeps you on track and prevents those last-minute surprises. Here’s a practical timeline for a single-batch session:
- 0:00–0:10 — Preheat oven, crush crackers, melt butter, and assemble crusts in the liners.
- 0:10–0:25 — Beat the filling: soften cream cheese, add eggs, beat, then add condensed milk and combine.
- 0:25–0:30 — Fill the liners and bake 15 minutes.
- 0:30–0:50 — Cool the tin to room temperature on a rack. Make the caramel if you’re using a homemade version (store-bought skips this).
- 0:50–2:50 — Refrigerate at least 2 hours to chill and set.
- Serve — whip cream and top just before serving for best texture.
Keep-It-Fresh Plan
These mini cheesecakes store well. Keep them in an airtight container in the fridge for up to 4 days. If you plan to stack them, separate layers with parchment to avoid smudging the whipped cream. For longer storage, remove whipped cream and freeze the cheesecakes in a single layer until solid, then transfer to a sealed bag for up to 1 month. Thaw overnight in the refrigerator and add freshly whipped cream before serving.
If you’ve already topped them with whipped cream, store them in the fridge and consume within 24–36 hours for best visual and textural quality; the cream will soften over time.
Troubleshooting Q&A
- My filling is lumpy — Make sure the cream cheese and eggs are at room temperature before beating. Beat long enough (and scrape down the bowl once or twice) to eliminate lumps.
- Crust fell apart when I removed liners — These are intended to be served with or without liners. If you want clean removal, let the cheesecakes chill fully, then gently peel the liner away. Pressing a little crust up the sides helps the base stay intact.
- Tops cracked — That means they were over-baked. Shorten bake time slightly and check for a slight jiggle in the center at 12–14 minutes if your oven runs hot.
- Caramel slid off the sides — Use a thicker caramel or apply less per cake. If caramel is warm, let it cool slightly before spooning so it sits instead of running.
Ready to Cook?
Gather the ingredients, line the tin, and set a timer. This recipe rewards attention to simple details: room-temperature dairy, even crust pressing, and an honest chill time. It’s an excellent make-ahead dessert — bake the day before and finish with whipped cream just before serving for a fuss-free presentation.
Have a go at the variations mentioned. Once you’ve made a batch, you’ll find your rhythm: one hand presses crusts while the other scrapes down the cream cheese bowl. These mini cheesecakes are dependable, delightful, and they travel well. Now preheat that oven and enjoy the very satisfying moment of handing a tiny, homemade cheesecake to someone who smiles when they take the first bite.

Mini Cheesecakes Recipe
Ingredients
Ingredients
- 1 1/2 cupsgraham cracker crumbs from 12 whole crackers*
- 6 Tbspunsalted butter melted
- 1/2 tspcinnamon
- 16 ozcream cheese from two 8 oz packages, softened
- 3 large eggs room temperature
- 14 ozsweetened condensed milk
- 1 cupcaramel sauce
- 1 cupheavy whipping cream chilled
- 1 Tbspgranulated sugar
- 1/2 tspvanilla extract
- 1/4 tspcinnamon to garnish optional
Instructions
Instructions
- Preheat oven to 350°F (175°C). Line a 24‑count muffin tin with standard cupcake liners.
- In a medium bowl, combine 1 1/2 cups graham cracker crumbs, 6 Tbsp melted unsalted butter, and 1/2 tsp cinnamon. Stir until the crumbs are evenly moistened.
- Divide the crumb mixture evenly among the 24 liners (about 1 Tbsp per liner). Press the crumbs firmly into the bottom and slightly up the sides of each liner with the back of a spoon or your fingers to form crusts.
- In a large mixing bowl, beat 16 oz softened cream cheese and 3 large room‑temperature eggs on high speed for 5 minutes, stopping once or twice to scrape down the bowl, until smooth and blended.
- Add 14 oz sweetened condensed milk to the cream cheese mixture and mix on low speed for about 2 minutes, until fully combined and smooth.
- Divide the cheesecake mixture evenly among the 24 crusts, filling each liner about 3/4 full (about a level ice‑cream scoop each).
- Bake at 350°F for 15 minutes. The centers should be set but still have a very slight jiggle. Do not over‑bake; if the tops begin to crack, they are over‑baking.
- Remove the tin from the oven and let the mini cheesecakes cool to room temperature in the tin.
- Spoon the 1 cup caramel sauce evenly over the cooled mini cheesecakes (use the full cup total; this is about 2/3 Tbsp per cheesecake).
- Refrigerate the cheesecakes in the tin for at least 2 hours or until fully chilled and set.
- While the cheesecakes chill (or just before serving), make the whipped cream: in a large bowl combine 1 cup chilled heavy whipping cream, 1 Tbsp granulated sugar, and 1/2 tsp vanilla extract. Beat on high speed for about 2 minutes, or until the cream is whipped and fluffy.
- Once the cheesecakes are fully chilled, pipe or spoon the whipped cream onto each cheesecake. If desired, lightly dust with the optional 1/4 tsp cinnamon to garnish.
- Serve the mini cheesecakes chilled, with or without the cupcake liners.
Equipment
- Oven
- 24-count muffin tin
- Cupcake Liners
- Medium Bowl
- Large Mixing Bowl
- Electric Mixer
- Spoon
Notes
*For gluten free, use GF crackers/cookies or omit the crust and proceed with recipe as directed. The crust helps them rise more evenly but they still taste great without it.
**Cooks Tip: Mixing the condensed milk on LOW speed helps knock out excess air bubbles which can cause the cheesecakes to crack.


