
These bars are the kind of recipe I reach for when I want something fast, portable, and kid-approved — without turning on the oven. They come together in one bowl, set in the fridge, and slice into tidy squares that travel well. I love that they lean on supermarket staples and still taste like a treat.
There’s zero baking, minimal cleanup, and a forgiving texture that’s easy to press into a pan. The honey, brown sugar, and butter form a quick caramel that clings to Honey Nut Cheerios, and the optional mix-ins let you make them as simple or studded as you like.
I test these on hectic afternoons and for lunchbox boosts. Read straight through for the exact ingredients and step-by-step microwave directions, and then stick around for storage tips, common slip-ups, and a few sensible swaps.
What You’ll Gather
- ¼ cup creamy unsalted butter, half of one stick — provides the fat for the caramel and keeps the texture soft; use unsalted to control the salt level.
- ¼ cup honey (light-colored corn syrup may be substituted and will keep the bars firmer at room temp than using honey) — the primary sweetener and binder; corn syrup will yield a firmer bar at room temperature.
- ¼ cup light brown sugar, packed — adds caramel depth and helps the syrup set when cooled.
- 1 tablespoon vanilla extract — brightens the caramel flavor; stir in carefully as directed because the mixture will be hot.
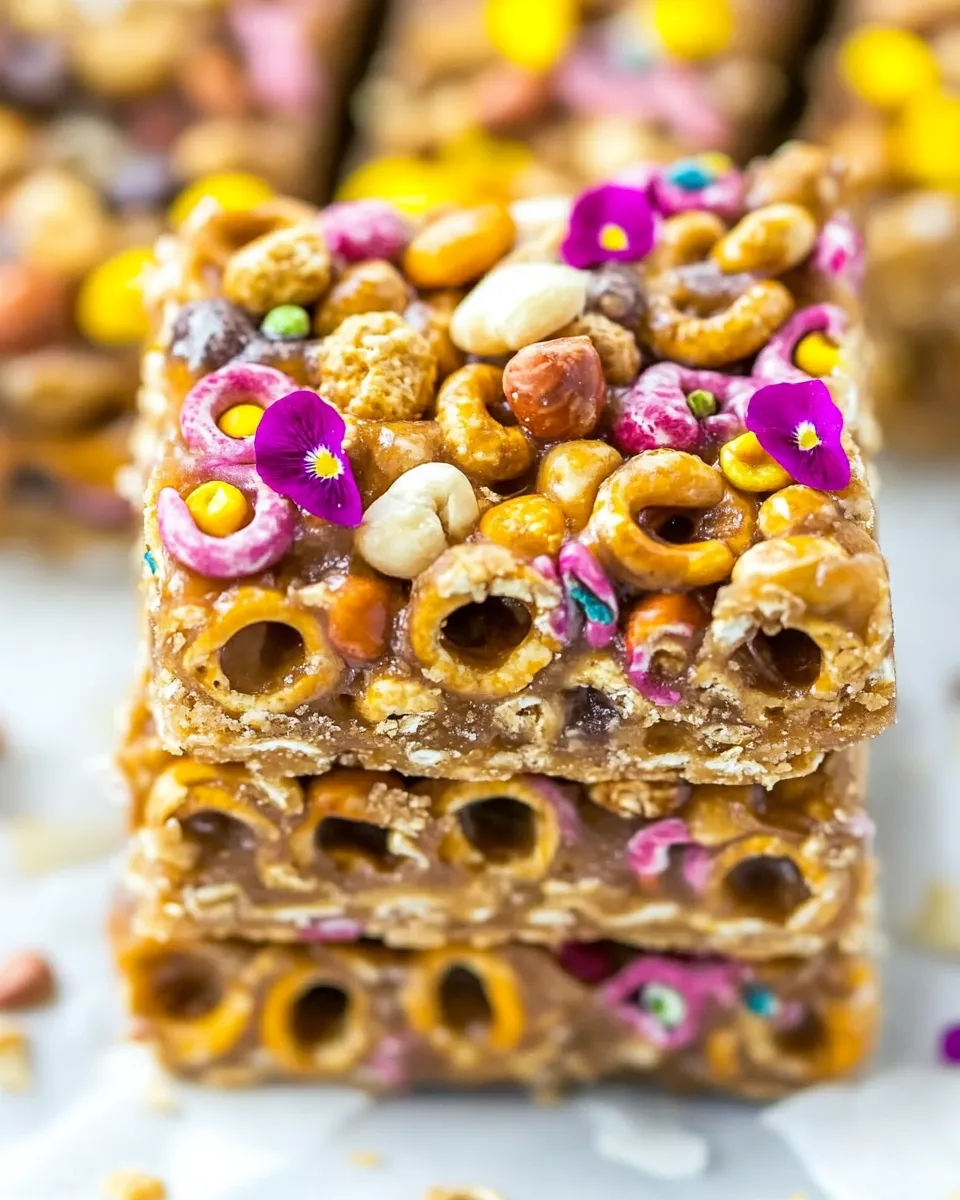
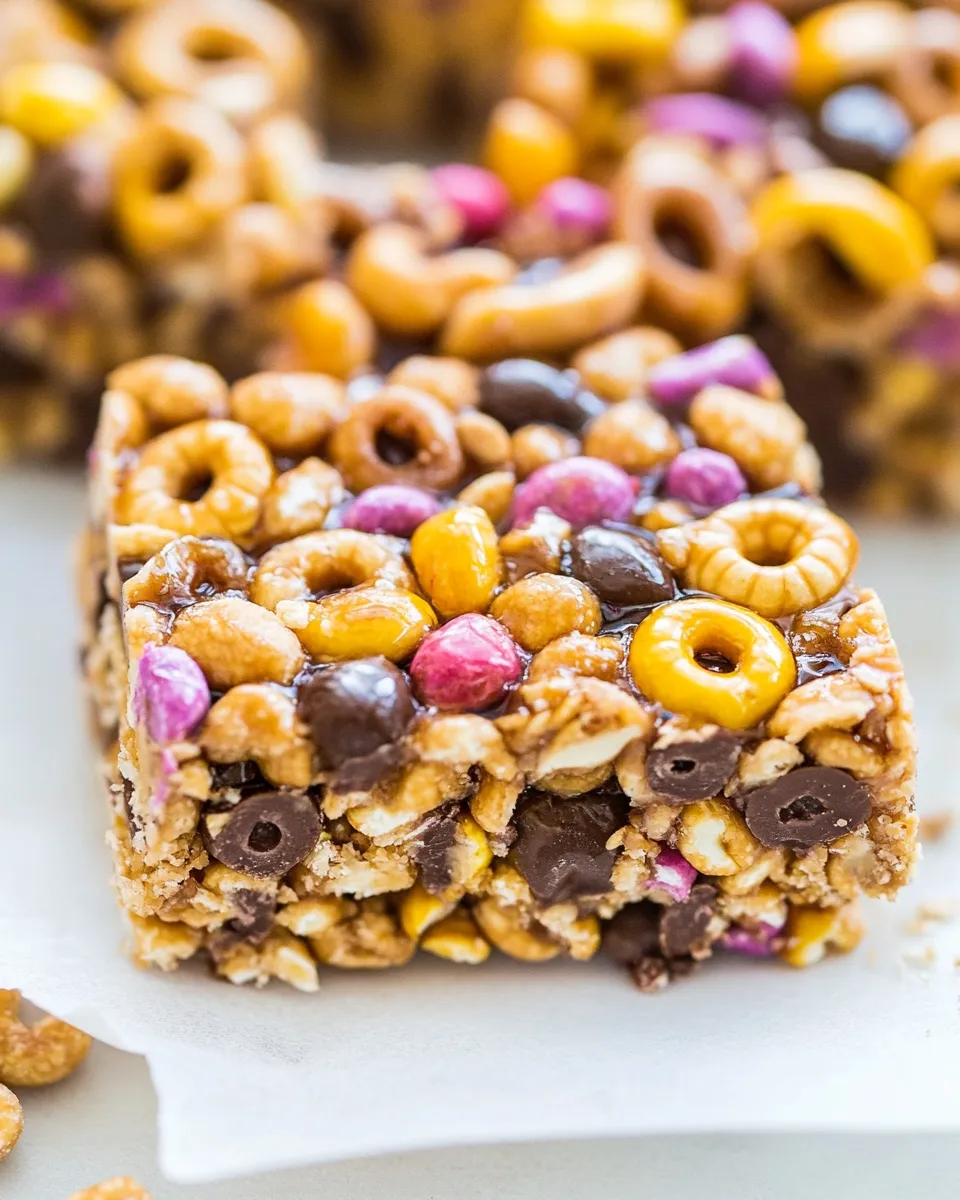
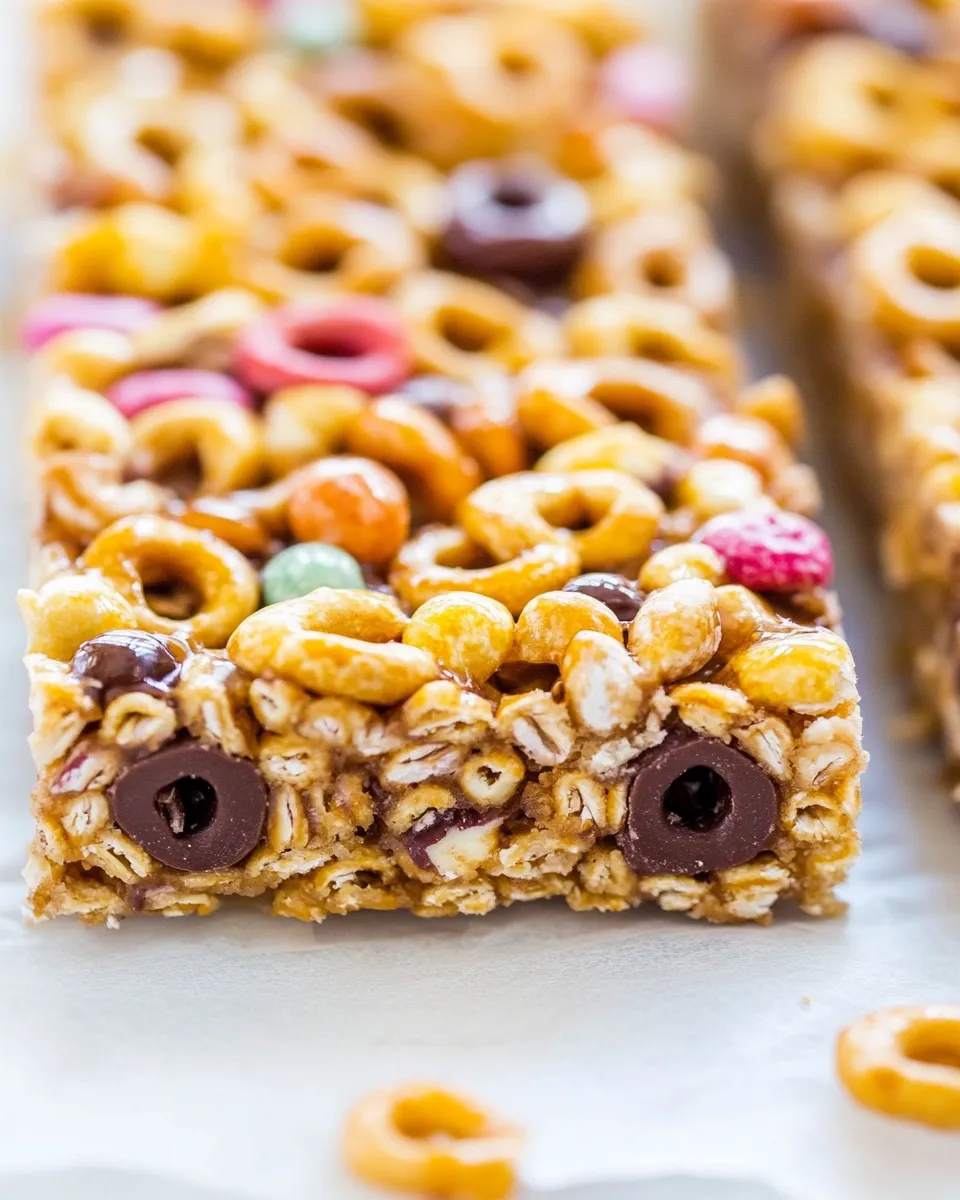
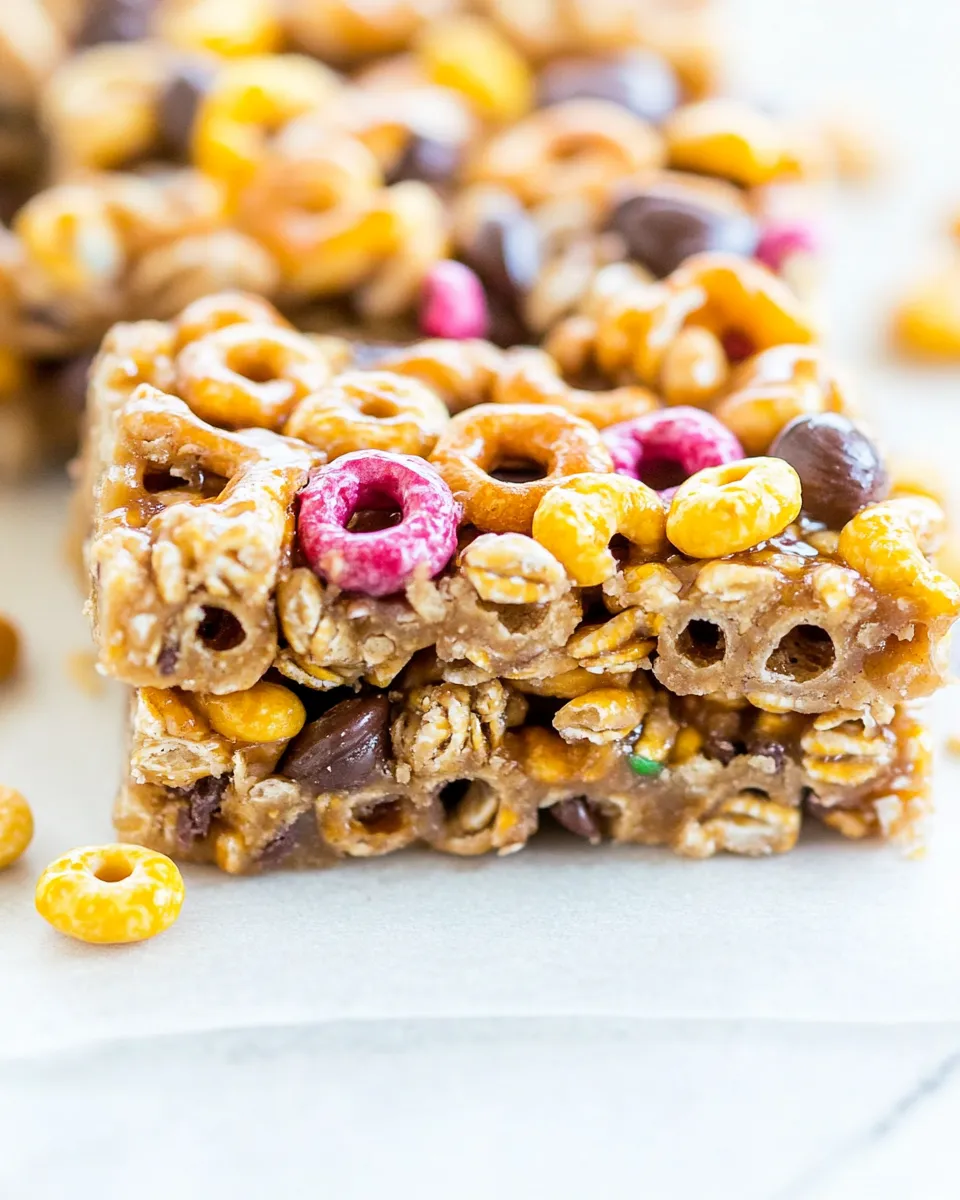
- 3 cups Honey Nut Cheerios — the base cereal; they provide crunch and a honeyed background flavor.
- 1 cup raisins, optional (1 cup honey-roasted peanuts, 1 cup chopped almonds, or 1 cup trail mix may be substituted) — the add-in for chew and contrast; choose one of the listed substitutions if you prefer nuts or mix.
- about 1/2 cup chocolate-covered sunflower seeds, optional (I used Trader Joe’s) — a finishing sprinkle that gives a chocolate hit and extra crunch; optional but nice.
- pinch sea salt or Kosher salt for sprinkling, optional — balances sweetness and enhances flavor if you like a sweet-salty finish.
How to Prepare (No-Bake Honey Nut Cheerios Snack Bars)
- Line an 8-inch square pan with aluminum foil leaving an overhang on two sides; spray the foil with cooking spray and set the pan aside.
- In a large microwave-safe bowl combine 1/4 cup creamy unsalted butter, 1/4 cup honey (or light corn syrup), and 1/4 cup packed light brown sugar.
- Microwave the bowl on high for 1 minute. Remove and stir; the mixture may be granular—this is normal.
- Microwave on high for another 1 minute. Remove and stir.
- Microwave on high for a third 1-minute burst. On this final burst the mixture should become bubbly and foamy—use caution, it is very hot.
- Carefully stir in 1 tablespoon vanilla extract (the mixture may bubble up slightly).
- Add 3 cups Honey Nut Cheerios to the bowl and stir until the cereal is evenly coated with the hot caramel mixture.
- Stir in 1 cup raisins if using (or 1 cup of one of the listed substitutions: honey-roasted peanuts, chopped almonds, or trail mix) until evenly distributed.
- Turn the mixture into the prepared pan. Using a spatula (or the bottom of a lightly oiled measuring cup), press the mixture firmly and evenly into the pan, smoothing the top.
- If desired, sprinkle about 1/2 cup chocolate-covered sunflower seeds evenly over the top and finish with a pinch of sea salt or Kosher salt.
- Cover the pan with a sheet of foil to prevent fridge odors and refrigerate until the bars are completely set, at least 2 to 3 hours or overnight.
- Use the foil overhang to lift the set slab from the pan, place on a cutting board, slice into bars, and serve. Store airtight in the refrigerator for up to 2 weeks or in the freezer for up to 6 months (refrigeration is recommended because the bars soften at room temperature).
Reasons to Love (No-Bake Honey Nut Cheerios Snack Bars)
- Speed: They come together in minutes. Prep and microwave time is negligible; most of the time is passive chilling.
- Simplicity: One bowl and a handful of pantry items. No oven, no thermometer, no tempering—just melt, mix, press, chill.
- Customizable: Raisins, nuts, trail mix, even sunflower seeds on top. Swap one mix-in and you’ve got a different texture and flavor profile.
- Kid- and lunchbox-friendly: They’re sturdy, portable, and sweet without being overly sticky if you use corn syrup instead of honey.
- Make-ahead friendly: These bars keep well chilled and can be frozen for longer storage, so you can portion snacks for a week or more.
Low-Carb/Keto Alternatives
This particular technique depends on a sugar-based binder (honey or corn syrup) to glue the cereal together, so traditional low-carb or keto swaps will change the structure and texture. If you’re aiming to reduce carbs without inventing a new method, here are pragmatic options that keep to ingredients already suggested:
- Skip the raisins and use the 1 cup of chopped almonds or honey-roasted peanuts listed as a substitution. Cutting the dried fruit lowers carbs and boosts protein and fat.
- Use the light corn syrup option in place of honey if you want firmer bars at room temperature; while not keto, it demonstrates how binder choice affects texture.
- If you need strictly low-carb bars, this recipe isn’t ideal without moving to a completely different binder and base (those would require different ingredients and steps).
Cook’s Kit
- 8-inch square pan — for setting and slicing into bars.
- Aluminum foil — lines the pan and creates a lift for easy removal.
- Cooking spray — prevents sticking to the foil.
- Large microwave-safe bowl — big enough to toss 3 cups of cereal with the hot mixture.
- Spatula and/or lightly oiled measuring cup — for pressing the mixture firmly into the pan.
- Microwave — the method relies on quick, controlled bursts of heat.
- Cutting board and sharp knife — to slice neat bars once chilled.
Slip-Ups to Skip
- Under-pressing the mixture: If you don’t firmly compact the cereal, the bars will crumble. Use a spatula or the bottom of an oiled measuring cup and press in even, steady pressure.
- Overheating: The microwave method calls for three 1-minute bursts. The mixture needs to bubble on the final burst. If you overcook, you can scorch the sugars and get a bitter flavor.
- Skipping the foil overhang: Without it, lifting the set slab from the pan is messy and difficult. Leave the two-side overhang for a clean removal.
- Skipping the chill: These bars won’t set properly at room temperature if you use honey. Refrigerate at least 2–3 hours. Corn syrup helps but chilling is still best for clean cuts.
- Mixing too vigorously after adding vanilla: The hot syrup may foam; stir carefully to avoid splatters and allow the mixture to settle a moment before folding in cereal.
Warm & Cool Weather Spins
Weather affects texture. Hot kitchens and humid summers make bars softer. For warm months, press them extra firmly and keep them chilled until serving. If you’re packing them for a picnic, store the bars in a cooler or choose the corn syrup swap noted in the ingredient list for a firmer result.
In cooler months, you can let the bars sit at room temperature for a short while before serving so they’re not overly hard from refrigeration. If you want a more decadent winter version, add the chocolate-covered sunflower seeds and let the chocolate set in the fridge for a subtle snap.
Notes from the Test Kitchen
Microwave wattage varies. If your microwave is weaker or stronger, watch the caramel mixture closely and check it between bursts. The first two minutes usually dissolve the sugar and melt the butter; the third burst is when it bubbles and froths. The mixture may appear granular after the first minute — that’s normal; it smooths as the temperature climbs.
I prefer light brown sugar for a mild molasses note. If you prefer a cleaner honey flavor, use white sugar instead of brown, but the original balance works well for a rounded caramel taste. When pressing the mixture into the pan, press firmly and evenly. Any air pockets will cause crumbling later.
For neat bars, chill overnight. Patience pays off. I often sprinkle the chocolate-covered sunflower seeds and sea salt right after pressing so the seeds adhere and the salt settles into the warm surface.
Storage & Reheat Guide
Store airtight in the refrigerator for up to 2 weeks. Refrigeration is recommended because the bars soften at room temperature, especially if you used honey. For longer storage, freeze flat in a single layer (wrapped) for up to 6 months. Thaw in the refrigerator before slicing or serving.
These bars don’t need reheating. If you prefer them slightly softer, let them sit at room temperature for 10–15 minutes after removing from the fridge. If you want the chocolate on top slightly melty, briefly press the pan onto a warm towel for a minute, but don’t overdo it — the bars are designed to be eaten cold or room-temperature.
(No-Bake Honey Nut Cheerios Snack Bars) FAQs
- Can I use a different cereal? Yes, but the ratio and texture will change. The recipe is built around the size and sweetness of Honey Nut Cheerios. Denser cereals may need a different binder or pressing technique.
- Why did my bars crumble? The most common reason is not pressing firmly enough. Also, skipping the chilling step or using too much airy mix-in can cause crumbling.
- Can I make these without a microwave? You can melt the butter, honey, and sugar on the stovetop in a small saucepan over low-medium heat and follow the same sequence, but watch carefully and stir constantly once it nears bubbling.
- How do I make them less sticky? Using light-colored corn syrup instead of honey will keep the bars firmer at room temperature. Always chill fully before slicing.
- Are these safe for lunchboxes? Yes. Pack cold with an ice pack if the day is warm, or keep refrigerated until leaving home.
The Last Word
These No-Bake Honey Nut Cheerios Snack Bars are one of those dependable recipes I keep on hand when I want something that feels homemade but requires minimal fuss. They’re flexible, fast, and forgiving. Follow the microwave timing, press firmly, and chill thoroughly. Then slice, stash, and enjoy the small wins: a quick snack that actually tastes like you put in effort.
If you try a variation — more nuts, fewer raisins, or a different sprinkle on top — come back and tell me which one won your household. I’m always curious which swap becomes someone’s new favorite.

No-Bake Honey Nut Cheerios Snack Bars
Ingredients
Ingredients
- 1/4 cupcreamy unsalted butter half of one stick
- 1/4 cuphoney light-colored corn syrup may be substituted and will keep the bars firmer at room temp than using honey
- 1/4 cuplight brown sugar packed
- 1 tablespoonvanilla extract
- 3 cupsHoney Nut Cheerios
- 1 cupraisins optional (1 cup honey-roasted peanuts, 1 cup chopped almonds, or 1 cup trail mix may be substituted)
- about 1/2 cup chocolate-covered sunflower seeds optional (I used Trader Joe’s)
- pinchsea salt or Kosher salt for sprinkling optional
Instructions
Instructions
- Line an 8-inch square pan with aluminum foil leaving an overhang on two sides; spray the foil with cooking spray and set the pan aside.
- In a large microwave-safe bowl combine 1/4 cup creamy unsalted butter, 1/4 cup honey (or light corn syrup), and 1/4 cup packed light brown sugar.
- Microwave the bowl on high for 1 minute. Remove and stir; the mixture may be granular—this is normal.
- Microwave on high for another 1 minute. Remove and stir.
- Microwave on high for a third 1-minute burst. On this final burst the mixture should become bubbly and foamy—use caution, it is very hot.
- Carefully stir in 1 tablespoon vanilla extract (the mixture may bubble up slightly).
- Add 3 cups Honey Nut Cheerios to the bowl and stir until the cereal is evenly coated with the hot caramel mixture.
- Stir in 1 cup raisins if using (or 1 cup of one of the listed substitutions: honey-roasted peanuts, chopped almonds, or trail mix) until evenly distributed.
- Turn the mixture into the prepared pan. Using a spatula (or the bottom of a lightly oiled measuring cup), press the mixture firmly and evenly into the pan, smoothing the top.
- If desired, sprinkle about 1/2 cup chocolate-covered sunflower seeds evenly over the top and finish with a pinch of sea salt or Kosher salt.
- Cover the pan with a sheet of foil to prevent fridge odors and refrigerate until the bars are completely set, at least 2 to 3 hours or overnight.
- Use the foil overhang to lift the set slab from the pan, place on a cutting board, slice into bars, and serve. Store airtight in the refrigerator for up to 2 weeks or in the freezer for up to 6 months (refrigeration is recommended because the bars soften at room temperature).
Equipment
- 8-inch square pan
- Aluminum Foil
- Cooking spray
- Microwave-safe Bowl
- Spatula
- Measuring Cup


