
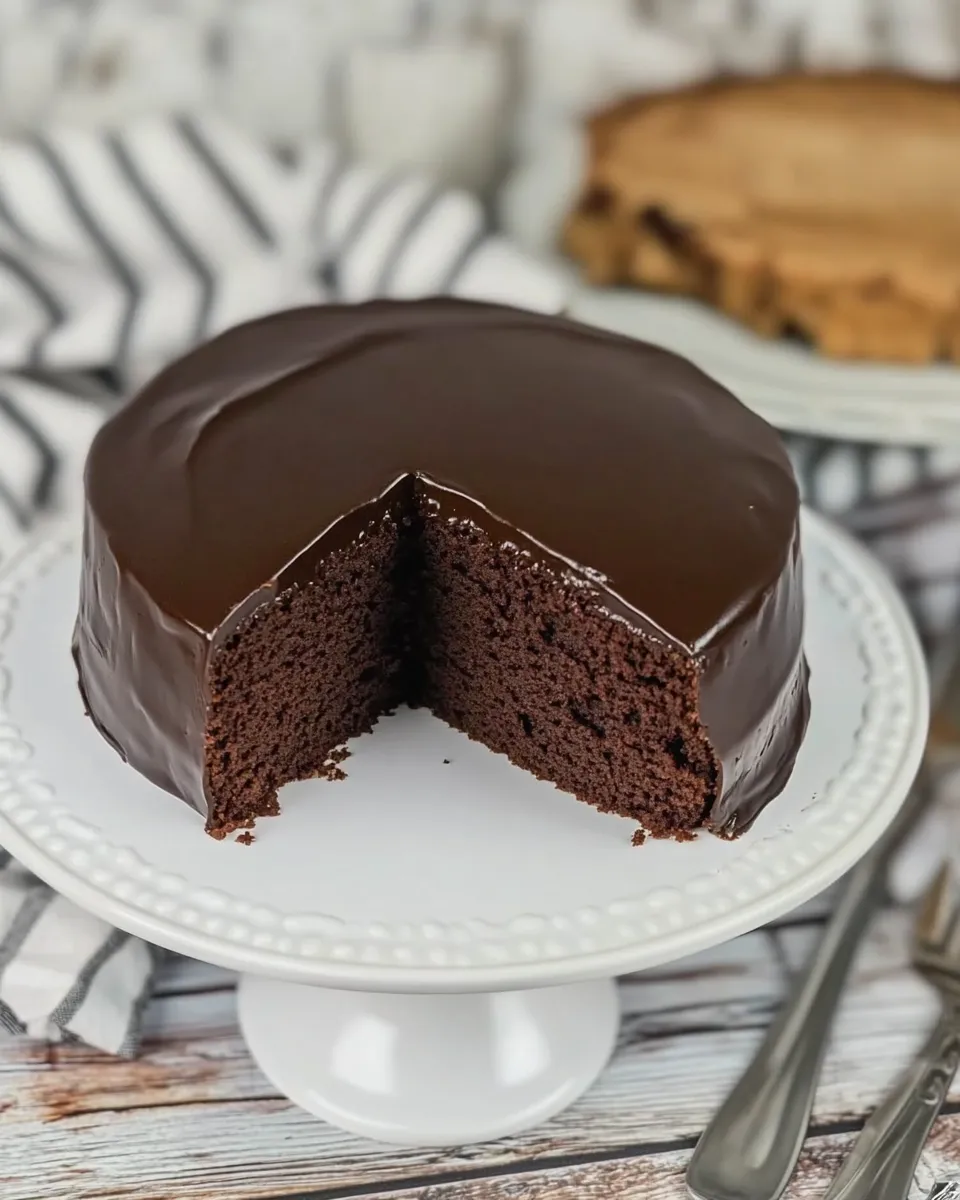
This one layer fudge cake finishes with a simple, glossy ganache that looks and tastes like a treat you’d order at a patisserie — but it takes almost no time and requires very little fuss. The cake itself serves as a sturdy canvas; the real show is the chocolate ganache poured while still silky and warm. If you like rich, saucy chocolate without heavy decorating, this is the approach to take.
I test recipes in a tiny, busy kitchen and write for readers who want reliable, straightforward results. Below you’ll find the exact ingredients and step-by-step method for the ganache, plus practical equipment notes, troubleshooting, and small adjustments for common dietary needs. Read the recipe through once, then gather your ingredients and follow the steps in order.
Ingredients at a Glance
- 8 ounces semisweet chocolate, finely chopped — the primary flavor and body of the ganache; chopping it finely helps it melt quickly and evenly.
- 1 cup heavy cream — provides richness and creates the smooth, pourable texture when warmed and combined with the chocolate.
- 1 tablespoon sugar — adds a touch of sweetness and helps the ganache finish glossy.
(One Layer Fudge Cake) Cooking Guide
- Put the finely chopped semisweet chocolate (8 ounces) into a medium heatproof bowl.
- In a small saucepan (or in a microwave-safe container), heat 1 cup heavy cream until it comes to a gentle simmer—small bubbles at the edge; do not boil.
- Pour the hot cream over the chopped chocolate. Let sit 30–60 seconds to soften the chocolate, then whisk gently from the center outward until the mixture is completely melted and smooth.
- Add 1 tablespoon sugar and whisk until fully incorporated and the ganache is glossy.
- Let the ganache cool at room temperature until it thickens slightly but remains pourable (it should coat the back of a spoon), stirring occasionally—about 10–20 minutes depending on room temperature. If it becomes too firm, warm briefly in the microwave in short bursts (5–10 seconds), stirring between bursts, until pourable.
- Ensure the cake is completely cool. Place the cake on a wire rack set over a rimmed baking sheet or foil to catch drips.
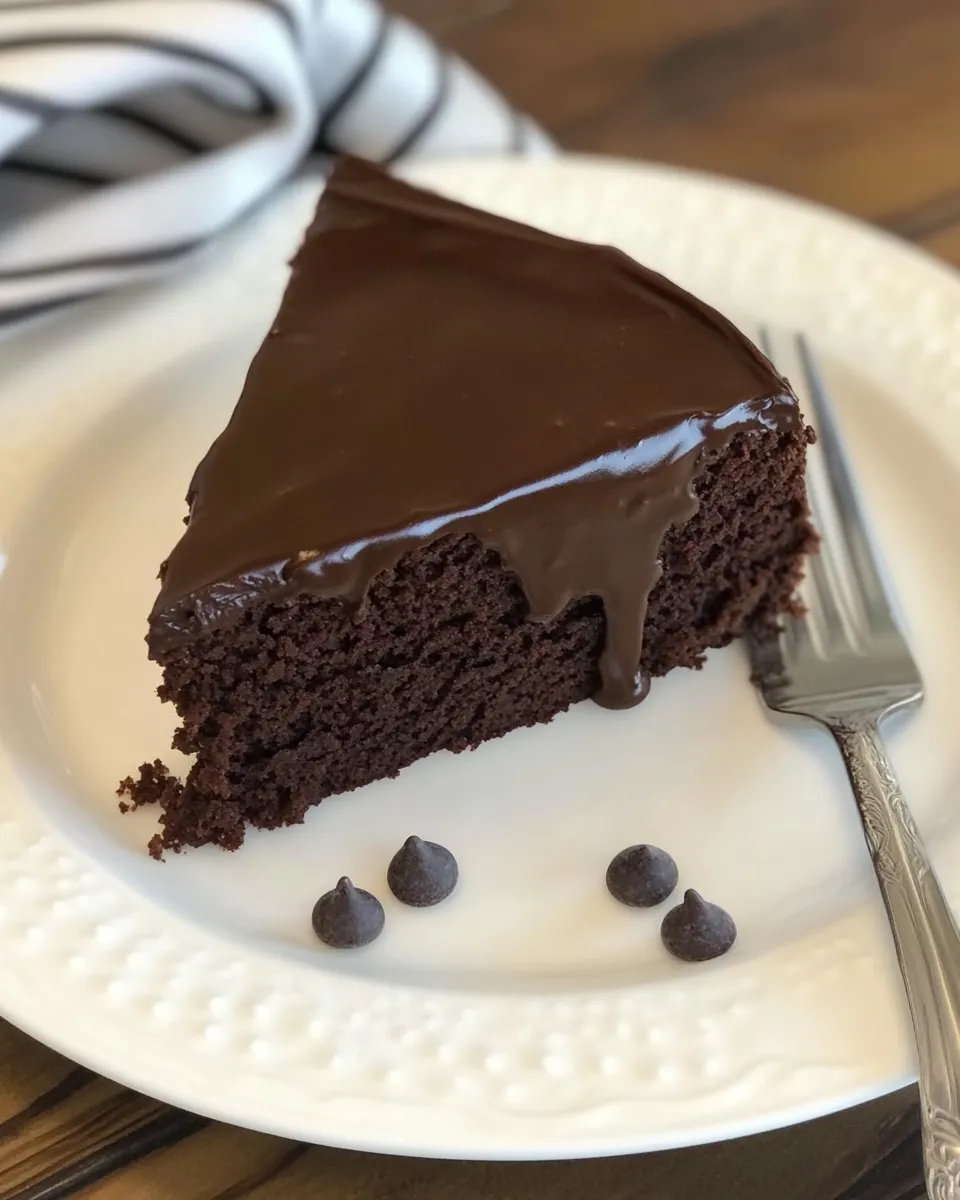
- Pour the ganache into the center of the cake and use an offset spatula or the back of a spoon to spread it outward and let it run down the sides, covering the top and sides evenly. Work while the ganache is still pourable for a smooth finish.
- Allow the ganache to set at room temperature for about 1 hour before slicing and serving.
What Makes This Recipe Special
The appeal of this method is simplicity. You’re making a classic chocolate ganache with three ingredients and using it as a glaze rather than a thick frosting. That keeps the texture elegant and the eating experience focused on glossy, intensely chocolatey flavor.
Because the ganache is poured while still pourable, it naturally smooths over the cake and creates that professional dripping edge without piping or extra tools. The controlled heat of the cream and the fine chop of the chocolate are the small technical choices that lead to a silky finish instead of grainy or separated chocolate.
What to Use Instead
If you need to adapt the ganache to what’s in your kitchen, here are straightforward swap options. I’m not changing measurements — these are substitution ideas only.
- Semisweet chocolate — can be swapped for bittersweet (for deeper, less sweet flavor) or milk chocolate (for a milder, sweeter finish). Choose a bar-quality chocolate for best texture.
- Heavy cream — for a dairy-free alternative, use full-fat coconut milk or a commercial plant-based heavy cream substitute; these provide similar fat content and mouthfeel.
- Sugar — if you prefer less sweetness, you can omit the sugar entirely; the chocolate will still provide sweetness. For alternative sweeteners, use one suitable for high-heat mixing, bearing in mind they may change flavor and gloss.
Equipment at a Glance
- Medium heatproof bowl — for melting and mixing the chocolate and cream.
- Small saucepan or microwave-safe container — to heat the cream gently.
- Whisk — a regular whisk works well for achieving a glossy emulsion.
- Offset spatula or back of a spoon — for spreading the ganache smoothly across the cake.
- Wire rack and rimmed baking sheet or foil — place the cake on the rack so excess ganache can drip onto the sheet for easy cleanup.
- Knife and cutting board — for chopping the chocolate finely.
Troubleshooting Tips
Chocolate won’t melt smoothly / seizes
If the chocolate looks grainy or stiff rather than silky, you likely needed more heat or the chocolate was exposed to too much moisture. Warm the mixture very gently—5–10 second microwave bursts with stirring—or add a teaspoon of warm cream and whisk to bring it back together. Work gently; overheating or vigorous stirring can cause separation.
Ganache too thin
If it’s runny and refuses to thicken, cool it longer at room temperature. Chilling will firm it up, but you’ll lose some of the sheen; rewarming briefly and whisking can help restore gloss. For future batches, allow the cream to cool a moment before pouring to avoid over-thinning.
Ganache too thick
If it sets too quickly and won’t spread, warm it in very short microwave bursts (5–10 seconds), stirring after each, until it reaches a pourable consistency. Keep the cake surface cool so the ganache doesn’t set immediately on contact.
Drips and uneven coverage
Work from the center outward and pour while the ganache is still pourable. If drips collect unevenly, use the offset spatula to nudge ganache toward thin areas; patience while it levels will go a long way.
Adaptations for Special Diets
Small swaps let you keep the method while accommodating dietary needs.
- Dairy-free: use a full-fat coconut milk or plant-based cream alternative instead of heavy cream. Use dairy-free chocolate to keep it fully vegan.
- Less sugar: omit the added tablespoon of sugar; choose a chocolate with the sweetness level you prefer to compensate.
- Allergies and intolerances: check chocolate labels for traces of nuts if needed; use certified allergen-free chocolate when required.
Note: these swaps change flavor and texture slightly, so test with a single batch to confirm the result you like.
Pro Perspective
Working with ganache is mostly about temperature control. Heat the cream just to a simmer — small bubbles at the edge — because boiling can scorch and alter the fat structure. Pouring steaming hot cream over chocolate is fine, but letting it sit for 30–60 seconds before stirring lets the chocolate soften and yields a silkier emulsion when you whisk.
Chop the chocolate finely and evenly. That small prep task reduces the need for aggressive heat and speeds up emulsification. When you add the sugar, do it after the chocolate and cream are fully combined; this helps the sugar dissolve evenly and supports the glossy finish.
Make Ahead Like a Pro
Ganache stores well. If you want to make it ahead, allow it to cool to room temperature and then refrigerate in an airtight container. When you’re ready to use it, warm gently in short bursts and whisk until pourable again.
If you pour ganache on a cake and need to serve later, the set ganache will keep at room temperature for several hours. For longer storage, refrigerate the cake; ganache will firm in the fridge. Bring the cake closer to room temperature before serving so the ganache softens and the texture is pleasing.
Quick Questions
- How long does ganache take to set? Allow about 1 hour at room temperature for a firm but sliceable set on a cool day; in warm kitchens it may take longer.
- Can I reheat ganache if it firms up? Yes—short microwave bursts (5–10 seconds) with stirring will bring it back to a pourable state. Don’t overheat.
- Will the ganache harden completely? It will firm up at room temperature and more so in the fridge, but it won’t become brittle like a candy coating unless you refrigerate for a long period; it stays pleasant and ganache-like.
- Can I flavor the ganache? Yes — a touch of vanilla or a small amount of liqueur is common, but add any liquid flavors sparingly so you don’t affect the emulsion.
Before You Go
This is the sort of finish that elevates a simple cake into a memorable dessert. The technique is forgiving: focus on fine-chopping your chocolate, heating the cream just to a simmer, and working while the ganache is pourable. Those three habits will consistently deliver a smooth, glossy finish.
If you try this recipe, leave a note about what chocolate you used and how you served the cake — little details like chocolate percentage and serving temperature make a big difference in final taste. I read every comment and love hearing how readers adapt the method to their kitchens.
One Layer Fudge Cake
Ingredients
Ingredients
- 8 ounces semisweet chocolate finely chopped
- 1 cup heavy cream
- 1 tablespoon sugar
Instructions
Instructions
- Put the finely chopped semisweet chocolate (8 ounces) into a medium heatproof bowl.
- In a small saucepan (or in a microwave-safe container), heat 1 cup heavy cream until it comes to a gentle simmer—small bubbles at the edge; do not boil.
- Pour the hot cream over the chopped chocolate. Let sit 30–60 seconds to soften the chocolate, then whisk gently from the center outward until the mixture is completely melted and smooth.
- Add 1 tablespoon sugar and whisk until fully incorporated and the ganache is glossy.
- Let the ganache cool at room temperature until it thickens slightly but remains pourable (it should coat the back of a spoon), stirring occasionally—about 10–20 minutes depending on room temperature. If it becomes too firm, warm briefly in the microwave in short bursts (5–10 seconds), stirring between bursts, until pourable.
- Ensure the cake is completely cool. Place the cake on a wire rack set over a rimmed baking sheet or foil to catch drips.
- Pour the ganache into the center of the cake and use an offset spatula or the back of a spoon to spread it outward and let it run down the sides, covering the top and sides evenly. Work while the ganache is still pourable for a smooth finish.
- Allow the ganache to set at room temperature for about 1 hour before slicing and serving.
Equipment
- medium heatproof bowl
- small saucepan or microwave-safe container
- Whisk
- Wire Rack
- rimmed baking sheet or foil
- offset spatula or spoon


