
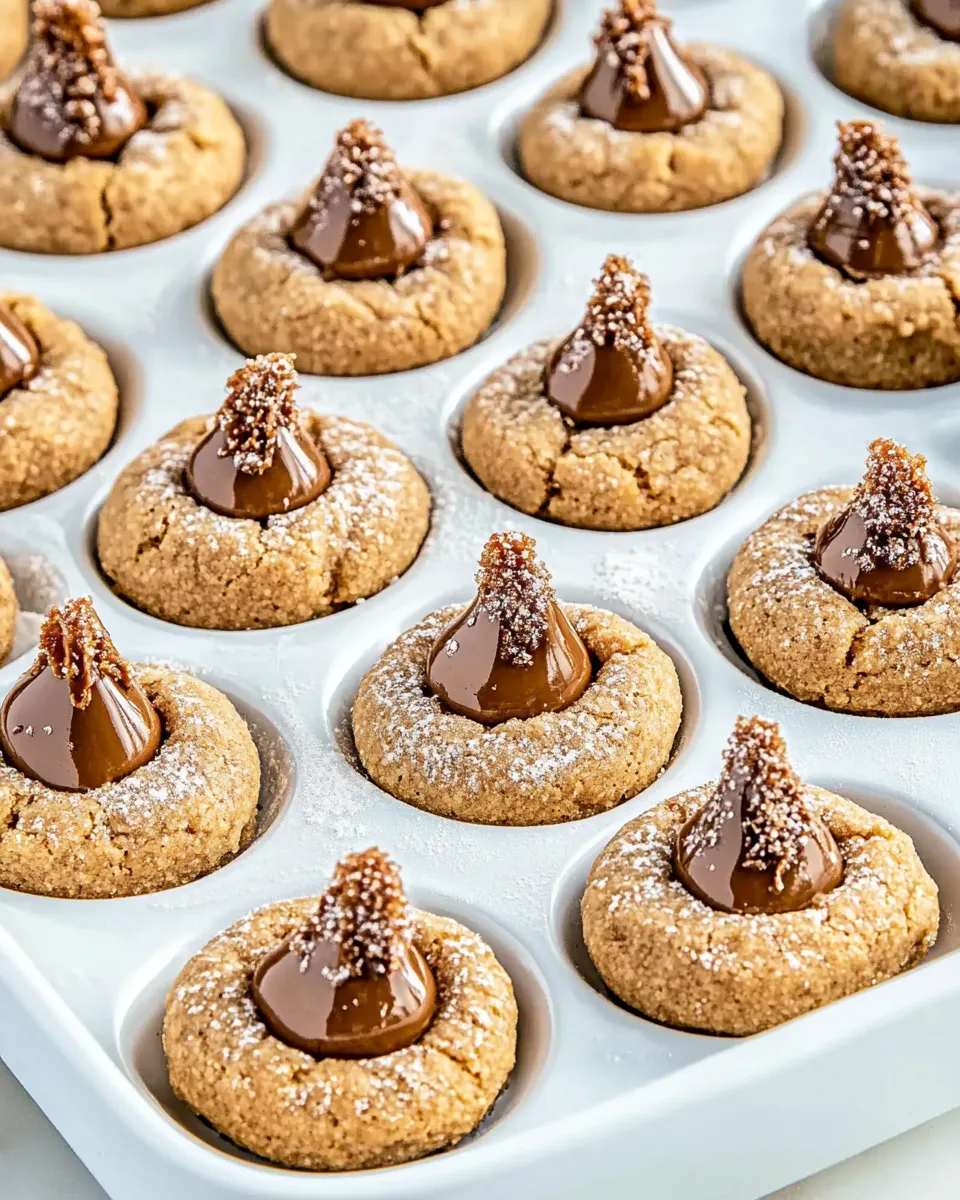
These peanut butter blossoms are the sort of cookie that lands on your baking sheet and disappears faster than you can clean up. They’re classic, reliable, and exactly the texture you expect: tender and peanutty with a glossy chocolate center. No tricks, just straightforward ingredients and a process that works every time.
I test these for holidays, for last-minute school parties, and for when I want something comfortingly simple. The method here focuses on good mixing, a brief chill option, and a quick two-stage bake so the kisses sink in without melting away. If you follow the steps, you’ll get consistent cookies with soft centers and slightly crisp edges.
Below you’ll find a clear shopping list, the exact cooking guide, sensible swaps, and storage tips. Read the ingredients and the steps once before you start. Then put on a timer and enjoy the satisfying rhythm of rolling, baking, and pressing that chocolate kiss into each warm cookie.
Shopping List
- 1/2 cup butter, softened — Provides richness and a tender crumb; bring to room temperature so it creams smoothly.
- 1/2 cup peanut butter — The star flavor; use smooth for the traditional texture.
- 1 cup granulated sugar, divided — One portion goes in the dough, the rest is for coating the balls before baking.
- 1/2 cup light brown sugar — Adds moisture and a gentle caramel note.
- 1 large egg — Binds the dough and adds structure.
- 1 tablespoon milk — Keeps the dough tender and workable.
- 1 teaspoon vanilla extract — Rounds and lifts the peanut flavor.
- 1 3/4 cups all-purpose flour — The base; measured properly for predictable texture.
- 1 teaspoon baking soda — Leavening to help the cookies puff nicely.
- 1/2 teaspoon salt — Balances sweetness and enhances the peanut notes.
- 48 Hershey’s Kisses, unwrapped — Press into the centers while cookies are warm so they adhere and set.
Peanut Butter Blossoms Cooking Guide
- Preheat oven to 375°F (190°C) and position a rack in the center. Line baking sheets with parchment paper or a silicone baking mat, or lightly grease them.
- In a large bowl, combine 1/2 cup softened butter, 1/2 cup peanut butter, 1/2 cup of the granulated sugar (see note about divided sugar), and 1/2 cup light brown sugar. Use an electric mixer and cream on medium speed for 2–3 minutes until light and fluffy.
- Add 1 large egg, 1 tablespoon milk, and 1 teaspoon vanilla extract to the creamed mixture. Beat just until combined.
- In a separate bowl, whisk together 1 3/4 cups all-purpose flour, 1 teaspoon baking soda, and 1/2 teaspoon salt.
- Add the dry ingredients to the wet ingredients and stir with a spoon or low-speed mixer just until the flour is fully absorbed and a uniform dough forms. Do not overmix.
- (Optional) Cover the dough and chill in the refrigerator for up to 1 hour to reduce spreading and deepen flavor. If chilling, wait to preheat the oven until the dough is ready to bake.
- Divide the dough into 48 equal portions and roll each portion into a 1-inch ball. (As an alternative method, divide the dough into four portions and roll each portion into 12 balls for a total of 48.)
- Pour the remaining 1/2 cup granulated sugar into a small bowl. Roll each 1-inch dough ball in the sugar to coat, then place the sugared balls on the prepared baking sheets about 2 inches apart.
- Bake one sheet at a time in the preheated oven for 6–8 minutes, until the cookies have puffed and the edges are beginning to lightly brown.
- Remove the baking sheet from the oven. Working quickly, press one unwrapped Hershey’s Kiss into the center of each cookie (flat base of the Kiss down), gently flattening the cookie around it. Return the baking sheet to the oven for 2 more minutes.
- Remove the cookies from the oven and transfer the baking sheet to a wire rack. Let the cookies cool completely so the chocolate sets. Once cool, store cookies in an airtight container.
Why This Recipe Is Reliable
This recipe delivers consistent cookies because it balances fat, sugar, and leavening in a way that controls spread and texture. Creaming the butter, peanut butter, and sugars incorporates air for lift, while the baking soda ensures a gentle rise and the salt sharpens flavor. The two-stage bake — initial puff, then pressing the chocolate and a short return to the oven — locks the kiss in place without turning the chocolate into a puddle.
There are a few small control points worth noting: room-temperature butter, accurate flour measurement, and spacing the dough balls about 2 inches apart. Those three details make the difference between a tidy batch and one big sheet of fused cookies. Optional chilling is included for anyone who prefers slightly taller cookies or is working in a warm kitchen.
Ingredient Swaps & Substitutions
Substitutions can be useful but will change texture and flavor. Below are practical swaps that maintain the spirit of the cookie.
- Peanut butter — Try a seed butter (sunflower seed butter) if you need nut-free; texture may be slightly oilier, so refrigerate the dough briefly if it feels soft.
- Butter — You can use an equal amount of stick margarine in a pinch; flavor and structure will be slightly different.
- Hershey’s Kisses — If you prefer a different chocolate, use small milk or dark chocolate pieces. Use unwrapped pieces with a flat base so they press in cleanly.
- Milk — Substitute with non-dairy milk (almond, oat) at a 1:1 ratio if needed.
- Sugars — If you only have dark brown sugar, use it in place of light brown for a deeper molasses note; keep the same volume.
Equipment at a Glance

- Electric mixer (hand or stand) — For creaming the fats and sugars efficiently.
- Baking sheets (at least one) — Use good-quality sheets for even browning.
- Parchment paper or silicone baking mat — Prevents sticking and makes cleanup faster.
- Wire rack — For cooling so the chocolate sets properly.
- Spoon, cookie scoop, or small scale — For dividing the dough into 48 equal portions.
- Small bowl — For the coating sugar.
Slip-Ups to Skip
- Don’t overmeasure flour. Scoop and level or, better, weigh it. Too much flour yields dry, dense cookies.
- Avoid overmixing once the flour is added. Mix just until absorbed. Overworking develops gluten and toughens the cookies.
- Don’t skip spacing. If balls are too close, cookies will run together.
- Don’t press the Hershey’s Kiss in too soon or let the cookies cool completely before adding it. The chocolate needs warmth to adhere, but not so much heat that it melts away.
- Watch the first tray closely. Oven temperatures vary; that first batch tells you whether you’ll aim for the lower or higher end of the bake time.
Warm & Cool Weather Spins
Temperature and humidity affect cookie behavior. Here’s what to do depending on the season.
- Warm climates/high humidity: Chill the dough for 20–60 minutes. Slightly firmer dough spreads less and is easier to roll.
- Cold kitchens: Let the butter and peanut butter sit a little longer at room temperature before mixing so they cream properly.
- Summer serving: Keep finished cookies in a cool place or refrigerate briefly if your kitchen is hot — the kisses can soften at room temperature above roughly 75°F (24°C).
- Holiday variations: Swap some rolled cookies in colored sanding sugar for festive flair; press a seasonal chocolate or colored chocolate melt instead of a Kiss.
Cook’s Notes
- Use a small cookie scoop or a teaspoon and a scale to get even cookies. When portions are equal, baking time stays consistent.
- If your peanut butter is oily, stir it before measuring so you’re getting the nut solids and oils together.
- When rolling in the remaining granulated sugar, press lightly so you don’t flatten the dough ball — just a coating is ideal.
- One-sheet-at-a-time baking prevents uneven browning; rotate racks only if you’re baking more than one sheet simultaneously and your oven has hot spots.
- Let cookies cool fully on a rack; moving them too soon can crack the chocolate or leave smudges.
Make-Ahead & Storage
These cookies store well when handled right. Once completely cool, place them in an airtight container in a single layer or separated with parchment to avoid sticking. Stored at room temperature, they keep nicely for about 4–5 days.
For longer storage, freeze baked cookies in a single layer on a tray until solid, then transfer to a freezer-safe container with parchment between layers. Thaw at room temperature; the chocolate will soften but not become runny if your kitchen is cool.
If you need to make dough ahead, cover it tightly and refrigerate up to 24 hours. Let it warm just long enough to roll into balls — refrigerating also reduces spread and can improve texture.
Peanut Butter Blossoms Q&A
- Q: Can I use crunchy peanut butter?
A: Yes. Crunchy will add texture; expect a slightly coarser bite but no change in bake time. - Q: Why do my kisses sink completely?
A: That usually means the cookie was too soft or the chocolate was pressed in too soon while the cookie was still overly molten. Slightly chill the dough and press the kiss after the initial bake. - Q: Can I make smaller or larger cookies?
A: Yes. Adjust bake time: smaller cookies need less time, larger ones need a bit more. Keep an eye on the first tray and adjust accordingly. - Q: Do I have to use Hershey’s Kisses?
A: No. Any small chocolate with a flat base will work, but unwrapped chocolates that melt quickly can create a mess. Choose a chocolate that holds shape when cooled.
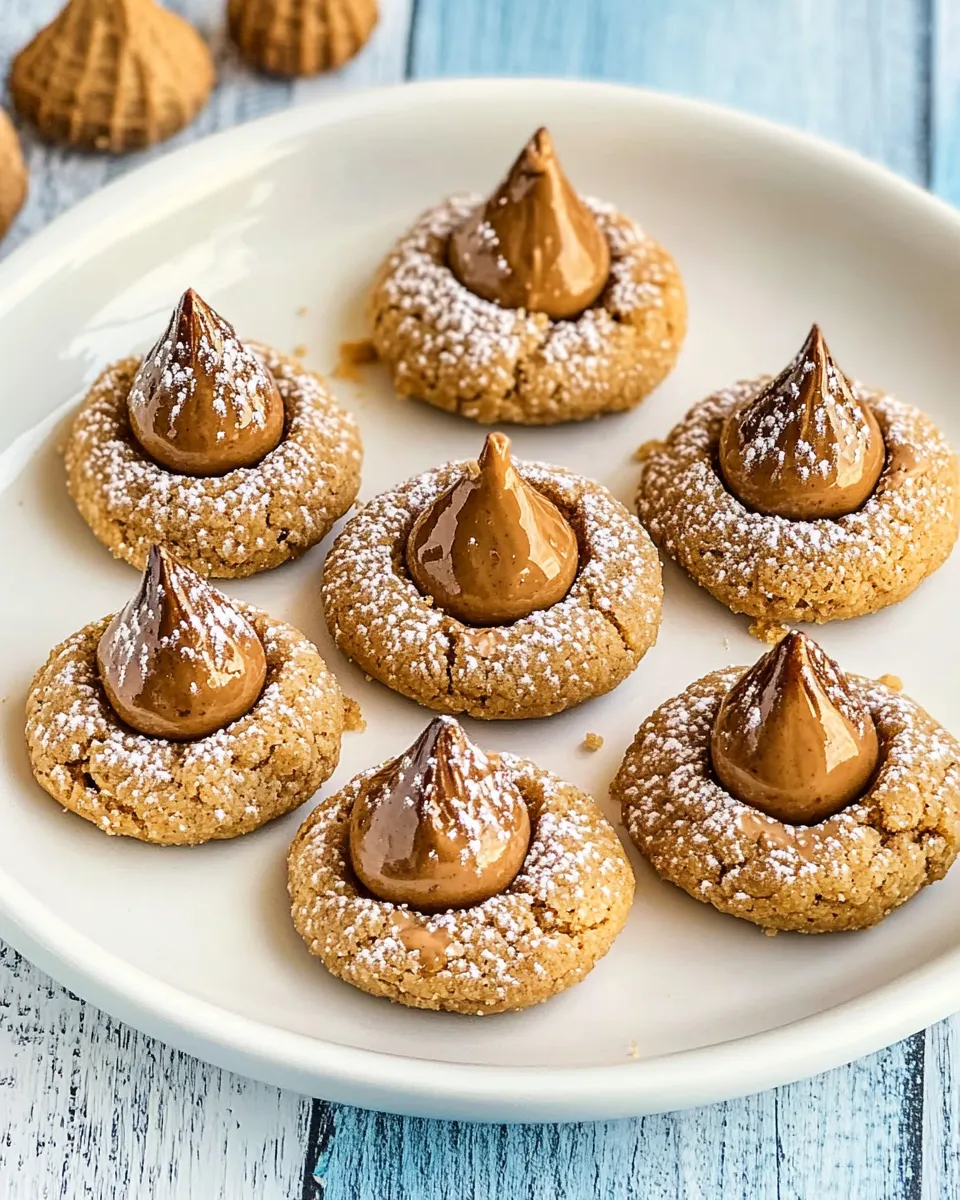
Bring It to the Table
Serve these cookies on a simple platter with a generous napkin stack. They pair perfectly with cold milk, a robust cup of coffee, or a milky hot chocolate for colder nights. For gatherings, arrange them in small piles with a few plain peanut butter cookies or simple sugar cookies for variety.
They make an easy take-along gift: stack six to eight cookies, tie with twine, and add a handwritten label. People tend to appreciate straightforward classics, and these peanut butter blossoms hit that comforting note every time.
Now turn on your oven, line your sheets, and get rolling — the cookies come together quickly and reward you with that exact nostalgic bite everyone loves.

Peanut Butter Blossoms Recipe
Ingredients
Ingredients
- 1/2 cupbuttersoftened
- 1/2 cuppeanut butter
- 1 cupgranulated sugardivded
- 1/2 cuplight brown sugar
- 1 largeegg
- 1 tablespoonmilk
- 1 teaspoonvanilla extract
- 1 3/4 cupsall purpose flour
- 1 teaspoonbaking soda
- 1/2 teaspoonsalt
- 48 Hershey's Kissesunwrapped
Instructions
Instructions
- Preheat oven to 375°F (190°C) and position a rack in the center. Line baking sheets with parchment paper or a silicone baking mat, or lightly grease them.
- In a large bowl, combine 1/2 cup softened butter, 1/2 cup peanut butter, 1/2 cup of the granulated sugar (see note about divided sugar), and 1/2 cup light brown sugar. Use an electric mixer and cream on medium speed for 2–3 minutes until light and fluffy.
- Add 1 large egg, 1 tablespoon milk, and 1 teaspoon vanilla extract to the creamed mixture. Beat just until combined.
- In a separate bowl, whisk together 1 3/4 cups all-purpose flour, 1 teaspoon baking soda, and 1/2 teaspoon salt.
- Add the dry ingredients to the wet ingredients and stir with a spoon or low-speed mixer just until the flour is fully absorbed and a uniform dough forms. Do not overmix.
- (Optional) Cover the dough and chill in the refrigerator for up to 1 hour to reduce spreading and deepen flavor. If chilling, wait to preheat the oven until the dough is ready to bake.
- Divide the dough into 48 equal portions and roll each portion into a 1-inch ball. (As an alternative method, divide the dough into four portions and roll each portion into 12 balls for a total of 48.)
- Pour the remaining 1/2 cup granulated sugar into a small bowl. Roll each 1-inch dough ball in the sugar to coat, then place the sugared balls on the prepared baking sheets about 2 inches apart.
- Bake one sheet at a time in the preheated oven for 6–8 minutes, until the cookies have puffed and the edges are beginning to lightly brown.
- Remove the baking sheet from the oven. Working quickly, press one unwrapped Hershey's Kiss into the center of each cookie (flat base of the Kiss down), gently flattening the cookie around it. Return the baking sheet to the oven for 2 more minutes.
- Remove the cookies from the oven and transfer the baking sheet to a wire rack. Let the cookies cool completely so the chocolate sets. Once cool, store cookies in an airtight container.
Equipment
- Baking Sheet
- Parchment Paper
- Silicone Baking Mat
- Electric Mixer
- Mixing bowls
- Measuring Cups
- Measuring Spoons
- Small Bowl
- Wire Rack
Notes
*If opting to chill the dough, which helps prevent spreading and gives the cookies an amazing flavor, do not preheat oven until ready to bake the cookies.
If you like your cookies gooey and soft, bake for 5 minutes, then place the Kisses on and bake for an additional 2 minutes. Then make sure to let them cool completely on the baking sheet before you attempt to remove them.
Cookies can be stored in an airtight container for 4-5 days, or frozen up to two months.


