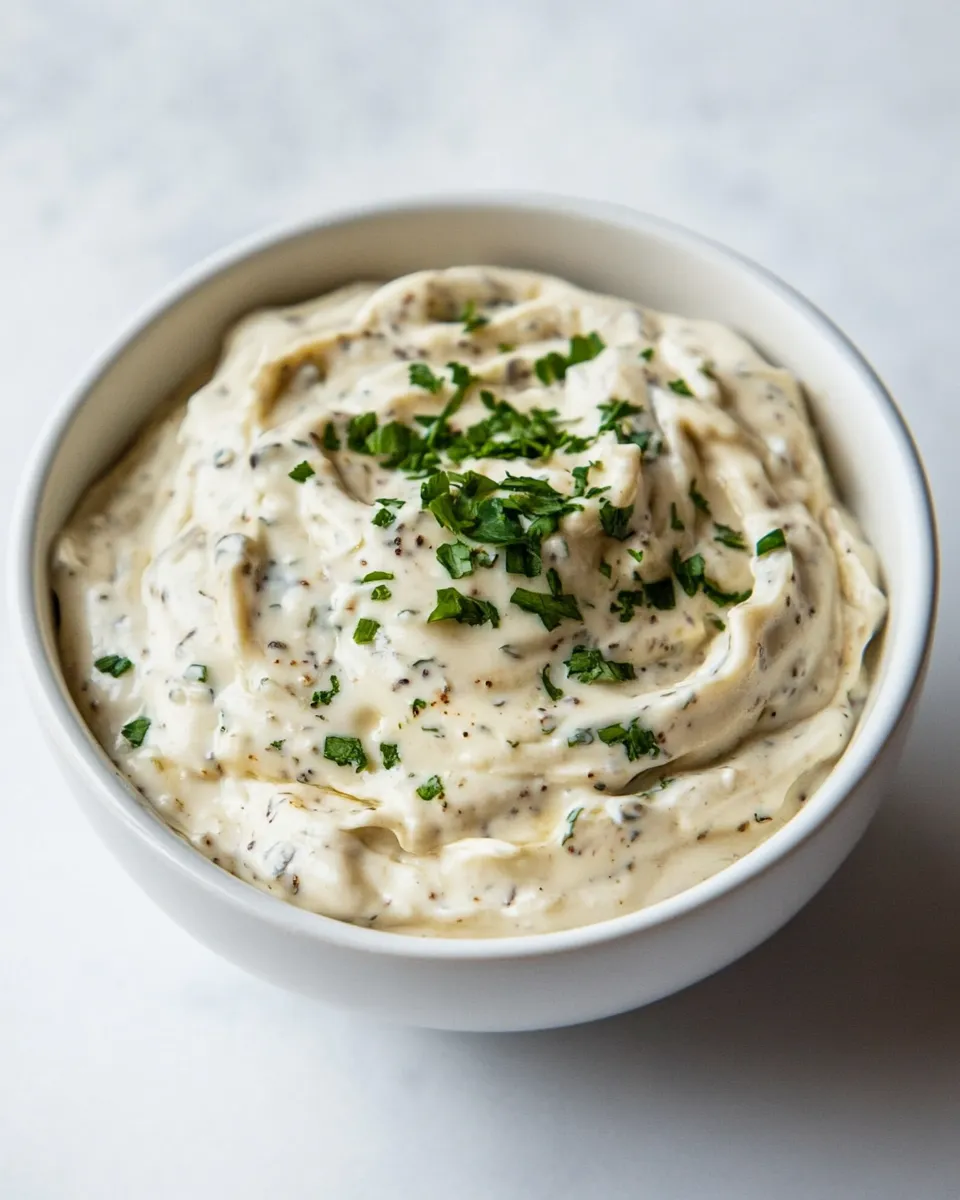
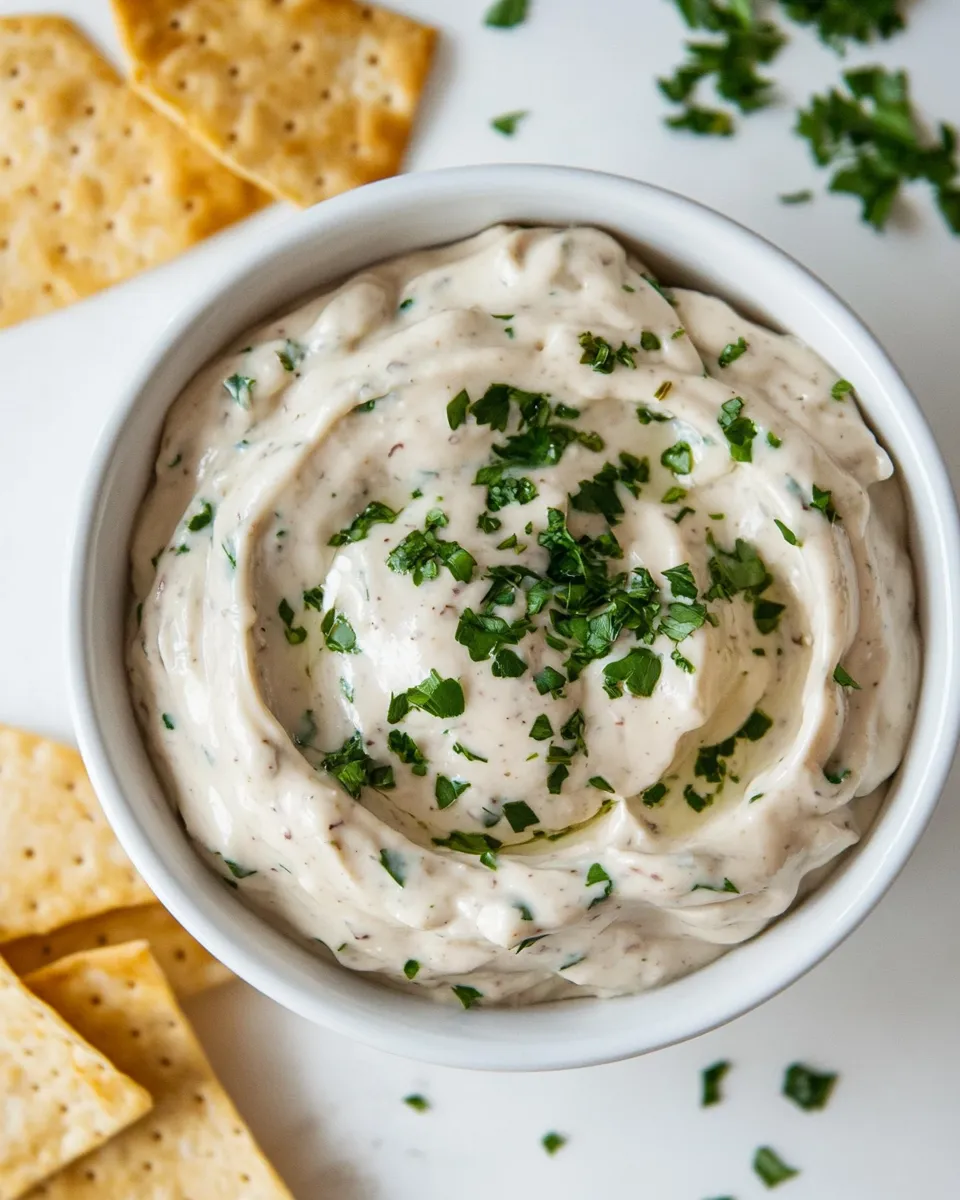
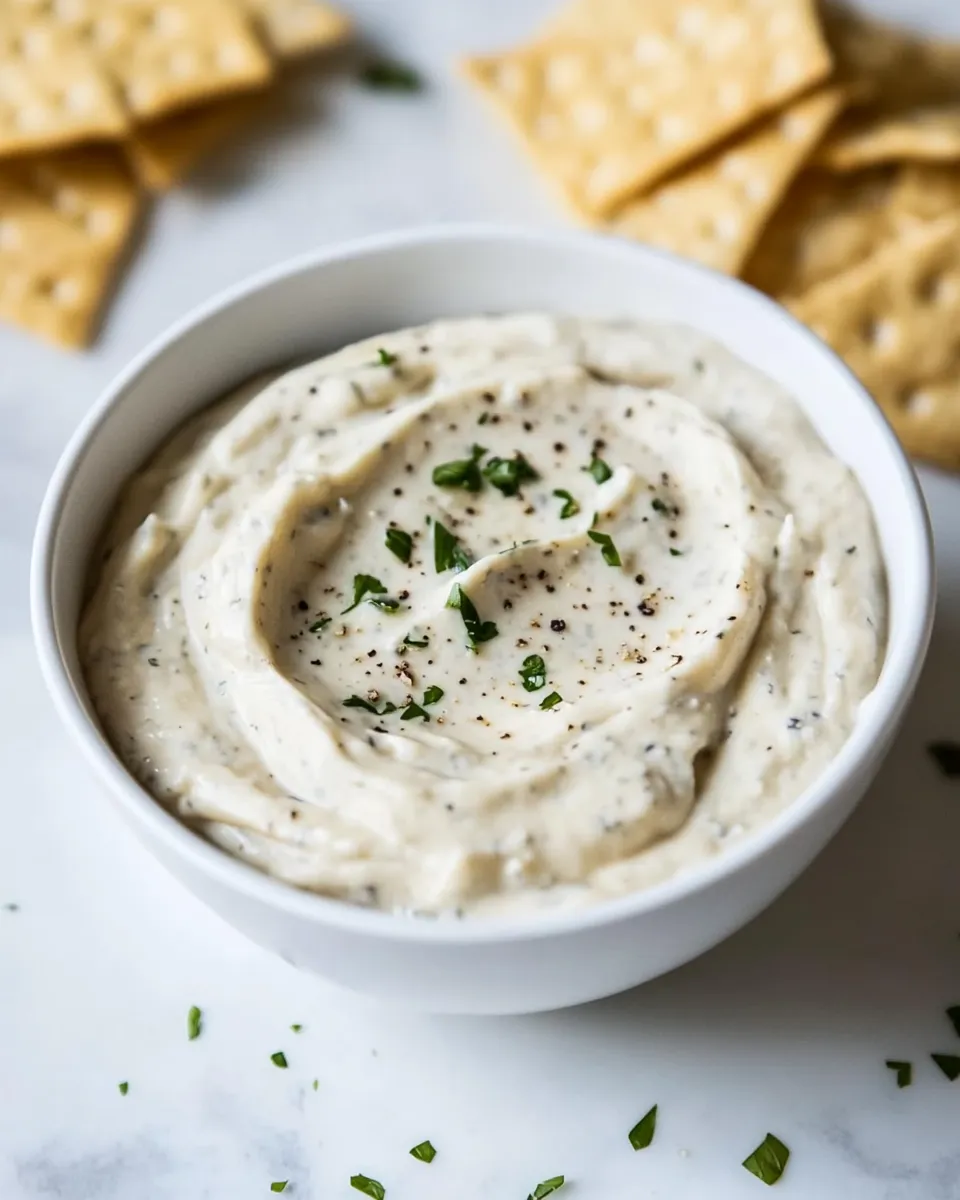
I make this spread all the time because it’s reliable, bright, and forgiving. It comes together quickly, keeps well in the fridge, and turns an ordinary piece of toast, a bowl of steamed veg, or a simple sandwich into something I actually look forward to eating. Texture and flavor are both in focus here: it’s creamy, tangy, and herb-forward without trying too hard.
This recipe uses a short list of pantry-friendly ingredients and a blender or food processor. There’s no culturing, no overnight steps, and no strange powders required. The result is a versatile, savory spread that behaves like cheese in all the best ways—spreads, dollops, and melts lightly if you like it warm.
Below I’ll give the exact ingredient notes, step-by-step directions, practical swaps, and storage tips so you can make it confidently. If you want a basic, everyday plant-based cheese spread that actually tastes like something, let’s get to it.
Gather These Ingredients
- 1 1/2 cups raw cashews — the creamy base; soak ahead if your blender struggles with raw nuts.
- 2 tablespoons nutritional yeast, plus more to taste — provides that cheesy, savory umami note.
- 1 garlic clove, minced — brings a sharp, aromatic lift; mince finely so it blends smoothly.
- 1/2 teaspoon salt — balances and highlights the other flavors; adjust to your preference.
- 1 lemon, zest and juice — acidity brightens and mimics the tang of aged cheese.
- 1/2 cup water, plus 1 tablespoon — controls the spread’s texture; add the extra tablespoon only if needed.
- 8 chives, finely diced — folded in at the end for a mild oniony, fresh hit.
- 1/4 cup parsley, finely chopped — adds herbaceous freshness and color.
Plant-Based Cheese Spread that Tastes Great on Everything: How It’s Done
- Add 1 1/2 cups raw cashews, 2 tablespoons nutritional yeast, 1 minced garlic clove, 1/2 teaspoon salt, the zest and juice of 1 lemon, and 1/2 cup water to a high-powered blender (or a food processor).
- Blend on high, stopping to scrape down the sides as needed, until the mixture is completely smooth and creamy and no large cashew pieces remain.
- If the blender is struggling or the mixture is too thick, add the remaining 1 tablespoon water and blend again until fully smooth.
- Taste and add more nutritional yeast if desired.
- Transfer the spread to a bowl and gently stir in 8 finely diced chives and 1/4 cup finely chopped parsley.
- Cover and refrigerate at least 2–3 hours before serving to allow the flavors to meld and the spread to firm up.
Why It’s My Go-To
This spread hits three practical marks for me: fast, flexible, and flavorful. It takes about ten minutes of active time in the blender and then a short wait in the fridge. I can make it in the morning and have it ready for snacks or lunches, or whip it up for unexpected guests.
Flavor-wise, the combo of nutritional yeast and lemon gives you the tang and savor you want from a cheese spread without any dairy. Cashews create a rich, silky mouthfeel that feels indulgent but isn’t complicated. The fresh herbs at the end keep each bite bright and never heavy.
It’s also fridge- and party-friendly. Use it as a dip at a casual gathering, as a sandwich spread for weekday lunches, or as a creamy addition to grain bowls. The texture is forgiving: if you want it looser for drizzling or thicker for spreading, you can tweak the water and chilling time.
What to Use Instead
- Cashews — if you’re nut-averse, try soaked sunflower seeds or blanched almonds (soak overnight or until very soft) as a substitute; their texture and flavor will be slightly different but still work.
- Nutritional yeast — for a less pronounced cheesy note, reduce the amount; for a bigger hit, add a little more to taste.
- Fresh herbs — swap parsley for dill or cilantro if you prefer a different herb profile. Chives can be replaced with finely sliced green onion.
- Blender vs. food processor — a high-powered blender gives the smoothest result. If your blender struggles, use a food processor and scrape often, or increase liquid slightly.
Kitchen Gear Checklist
- High-powered blender or a food processor — for the smoothest texture.
- Measuring cups and spoons — accurate salt and yeast amounts matter.
- Citrus zester or microplane — for bright lemon zest without bitter pith.
- Sharp knife and cutting board — for finely dicing chives and parsley.
- Mixing bowl and airtight container — for combining and storing the finished spread.
Steer Clear of These
- Skipping the lemon — acid is essential. Without it, the spread tastes flat and heavy.
- Under-blending — grainy cashew bits distract from the “cheesy” experience. Blend until fully smooth.
- Using roasted cashews — roasted nuts change the flavor and can make the spread taste muted or too toasty. Use raw cashews for the clean, creamy base.
- Over-salting before chilling — salt concentrates slightly as the spread sits. Season conservatively and adjust after the 2–3 hour chill if needed.
Tailor It to Your Diet
This recipe is plant-based and naturally free of dairy. You can keep it nut-free by using soaked sunflower seeds as the base. If you follow a low-sodium diet, reduce the salt and rely more on lemon and herbs for flavor; taste as you go. For a lower-fat option, reduce the cashew amount slightly and add a tablespoon of water at a time until you reach the texture you like—though the spread will be less rich.
If you need it gluten-free, no changes are necessary—the recipe is inherently gluten-free. For whole-food focused diets, use whole-food nutritional yeast rather than fortified versions if you prefer. Always check labels if you have allergies or specific dietary restrictions.
Pro Tips & Notes
Texture
For the silkiest result, soak the cashews in hot water for 15–30 minutes before draining and using, especially if your blender isn’t high-powered. If you have a high-speed blender, you can often skip the soak. Control thickness with water: 1/2 cup gives a spreadable, thick consistency; add the extra 1 tablespoon only if needed.
Flavor
Let it rest in the fridge for the full 2–3 hours. Chilling helps flavors meld and lets the spread firm up so it spreads cleanly. If you taste after chilling and want more depth, a pinch more salt or another 1/2 teaspoon of nutritional yeast can round it out.
Serving
Fold the herbs in gently so they stay bright and don’t turn gray from over-mixing. If you’re prepping ahead, add fresh herbs right before serving for best color and texture.
Storing, Freezing & Reheating
Store in an airtight container in the refrigerator for up to 5–7 days. The flavor may mellow slightly over time; stir well before serving and brighten with a squeeze of lemon if it feels flat.
Freezing is possible but changes the texture a bit. Freeze in a shallow, airtight container for up to 2 months. Thaw overnight in the fridge, then stir vigorously or briefly re-blend to refresh the texture. After thawing, the spread might be slightly grainier; a quick pulse in a blender smooths it back out.
To serve warm, gently heat small amounts in a saucepan over low heat with a splash of water, stirring constantly until warmed. Do not boil. Warmed spread is great dolloped over steamed vegetables or mixed into hot grains, but it won’t melt like dairy cheese.
Popular Questions
- Q: Can I make this oil-free?
A: Yes. The recipe as written contains no added oils—the cashews provide the fat and creaminess. - Q: Do the cashews need to be soaked?
A: Not strictly. If you have a high-powered blender, you can skip soaking. Otherwise, soaking softens them and helps achieve a smoother texture. - Q: Can I omit the garlic?
A: You can. Omit it if you’re avoiding raw garlic; note that you’ll lose some savory bite, so consider a touch more nutritional yeast or lemon to compensate. - Q: How can I make it spicier?
A: Stir in a pinch of crushed red pepper, a few drops of hot sauce, or finely chopped jalapeño to taste. Add sparingly and taste as you go. - Q: Will it melt?
A: It softens and becomes more spreadable when warmed, but it won’t behave exactly like melting dairy cheese. It’s best used warm as a sauce or cold as a spread.
Bring It Home
Make a batch, and keep it on hand for mornings when toast needs a glow-up, for salads that crave cream, or when a bowl of roasted veg needs a savory finish. It’s one of those recipes that rewards small tweaks—more yeast for cheesiness, more lemon for brightness, or extra herbs for freshness. The base is dependable; your variations are welcome.
I hope this becomes as useful in your kitchen as it is in mine. Enjoy spreading it, spooning it, and folding it into dishes. When a simple recipe routinely makes weeknight food taste better, it’s earned a spot in rotation.

Plant-Based Cheese Spread that Tastes Great on Everything
Ingredients
Ingredients
- 1 1/2 cupscashewsraw
- 2 tablespoonsnutritional yeastplus more to taste
- 1 garlic cloveminced
- 1/2 teaspoonsalt
- 1 lemonzest and juice
- 1/2 cupwaterplus 1 tablespoon
- 8 chivesfinely diced
- 1/4 cupparsleyfinely chopped
Instructions
Instructions
- Add 1 1/2 cups raw cashews, 2 tablespoons nutritional yeast, 1 minced garlic clove, 1/2 teaspoon salt, the zest and juice of 1 lemon, and 1/2 cup water to a high-powered blender (or a food processor).
- Blend on high, stopping to scrape down the sides as needed, until the mixture is completely smooth and creamy and no large cashew pieces remain.
- If the blender is struggling or the mixture is too thick, add the remaining 1 tablespoon water and blend again until fully smooth.
- Taste and add more nutritional yeast if desired.
- Transfer the spread to a bowl and gently stir in 8 finely diced chives and 1/4 cup finely chopped parsley.
- Cover and refrigerate at least 2–3 hours before serving to allow the flavors to meld and the spread to firm up.
Equipment
- High-Powered Blender
- Food Processor
- Bowl