
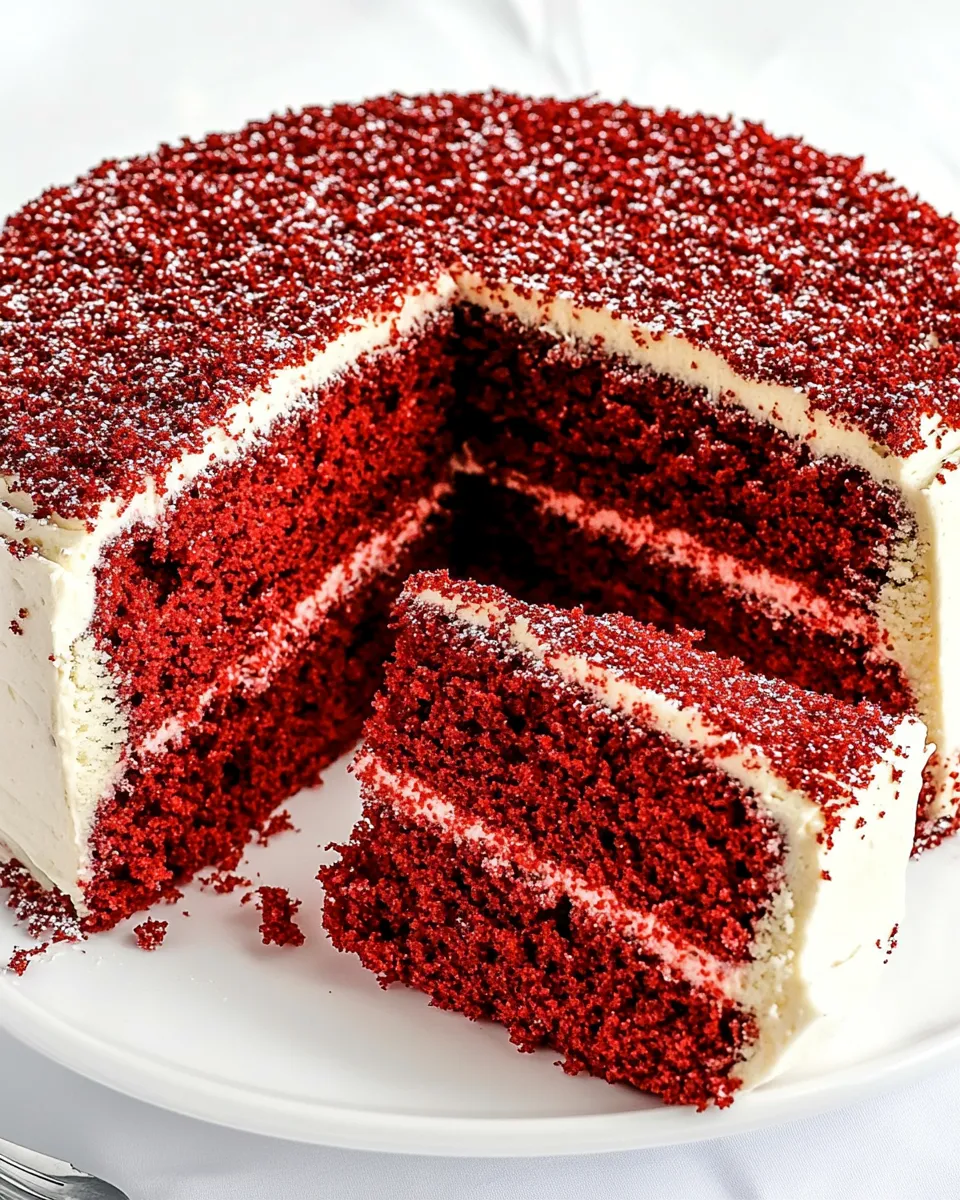
This red velour cake is my practical, no-nonsense celebration cake. It’s rich, tender, and balanced — the crumb holds up well, the frosting is stable, and the dramatic red crumb finish is worth the little extra work. Over the years I refined this into a repeatable process that fits a busy kitchen without sacrificing the final showstopper look.
You’ll find clear steps below: what to buy, the exact build, and the little techniques that keep the layers even and the frosting smooth. I focus on method and timing so you get consistent results every time. No fluff — just dependable directions and sensible tips.
If you like a cake that looks impressive but bakes like a weekday project, this one is for you. Read through once before you start, lay out your ingredients, and you’ll move through it cleanly. Let’s get organized and make a cake you’ll be proud to slice and serve.
What to Buy
Before you begin, gather all your pantry and dairy items. The recipe relies on common baking staples and a few easily missed items like red gel food coloring and cream cheese. Buying good-quality cream cheese and fresh buttermilk makes a noticeable difference in texture and flavor.
Also pick up parchment circles or a roll of parchment you can cut to size, and a small amount of extra butter for greasing pans. Having the right tools and ingredients on the counter before you start keeps the process flowing and prevents last-minute scrambles.
Ingredients
- 2 1/4 cups all-purpose flour — the structure of the cake; measure accurately using the spoon-and-level method.
- 2 teaspoons baking powder — leavening for lift.
- 1/2 teaspoon baking soda — works with acidic ingredients for proper rise.
- 1/4 teaspoon salt — enhances flavor in the cake batter.
- 2 tablespoons cocoa powder — gives classic red velvet depth and color contrast.
- 1 tablespoon vinegar — reacts with baking soda and brightens the red; folded into the cocoa-color mix.
- 2 teaspoons vanilla extract — primary flavoring for the cake layers.
- 1 tablespoon red gel food coloring — gel gives vivid color without thinning the batter.
- 1/2 cup butter (unsalted, softened) — for the cake batter; cream well for light texture.
- 1 1/2 cups sugar — sweetness and structure for the cake.
- 2 eggs — provide structure and richness; add one at a time for even incorporation.
- 1 cup buttermilk — acidity and moisture; helps tenderize the crumb.
- 3/4 cup butter (unsalted) — total measured for the frosting; a portion is melted for the roux base, the rest is added softened.
- 2 1/2 tablespoons all-purpose flour — for the stabilized roux that keeps the frosting firm.
- 1/2 cup milk (I used 3%) — whisked into the roux to make the paste; adds creaminess.
- 1/2 teaspoon vanilla extract — additional vanilla for the frosting base.
- 1/4 teaspoon salt — balances sweetness in the frosting.
- 8 ounce cream cheese (softened) — provides tang and body to the frosting; bring to room temp for smooth mixing.
- 1 cup icing sugar (same as confectioner sugar or powdered sugar) — sweetens and firms the frosting; add and taste for consistency.
Build Red Velour Cake Step by Step
- Preheat oven to 350°F (175°C). Grease the sides of three 8-inch cake pans, line the bottoms with parchment circles sized to fit, and grease the parchment.
- In a medium bowl whisk together 2 1/4 cups all-purpose flour, 2 teaspoons baking powder, 1/2 teaspoon baking soda, and 1/4 teaspoon salt. Set aside.
- In a smaller bowl whisk together 2 tablespoons cocoa powder, 1 tablespoon vinegar, 2 teaspoons vanilla extract, and 1 tablespoon red gel food coloring until smooth and evenly colored.
- In the bowl of a stand mixer (or a large bowl with a hand mixer) cream 1/2 cup softened butter and 1 1/2 cups sugar on medium speed until light and fluffy, about 2–3 minutes. Scrape down the bowl as needed.
- Add the cocoa-color mixture to the creamed butter and sugar and beat until incorporated. Add the 2 eggs, one at a time, beating until each is fully incorporated and the batter is smooth.
- With the mixer on low, add half of the dry flour mixture and mix until just incorporated. Add half of the 1 cup buttermilk and mix until smooth. Repeat with the remaining flour mixture and the remaining buttermilk, mixing until the batter is smooth and uniform.
- Divide the batter evenly among the three prepared pans and smooth the tops. Bake 30–35 minutes, or until a toothpick inserted into the center comes out clean. Cool in the pans for 5 minutes, then run a knife around the edges, invert the cakes, and transfer to a wire rack to cool completely.
- Using a serrated knife, level and remove the domes from each cooled cake. Break the trimmed pieces into crumbs and spread them in an even layer on a baking sheet.
- Bake the crumbs on the baking sheet for 15 minutes to dry them. Let the crumbs cool completely.
- Place the cooled crumbs in a food processor and pulse until very fine (about 30 seconds–1 minute). Set the fine crumbs aside.
- For the frosting base (stabilized roux): from the 3/4 cup unsalted butter measured for the frosting, measure out and melt 2 tablespoons in a small saucepan over medium heat. Whisk in 2 1/2 tablespoons all-purpose flour and cook, whisking constantly, for 1 minute.
- Gradually whisk in 1/2 cup milk, 1/2 teaspoon vanilla extract, and 1/4 teaspoon salt. Whisk constantly until the mixture thickens into a paste (about 1 minute). Transfer the paste to a small bowl, press plastic wrap directly onto the surface to prevent a skin, and cool completely (refrigerate to speed cooling if desired).
- Transfer the cooled paste to a larger mixing bowl. Add the remaining butter from the 3/4 cup (the rest of the measured 3/4 cup), 8 ounces softened cream cheese, and beat until smooth and well combined. Add 1 cup icing sugar and beat until the frosting is smooth and creamy. If the frosting is too soft, chill briefly and rebeat.
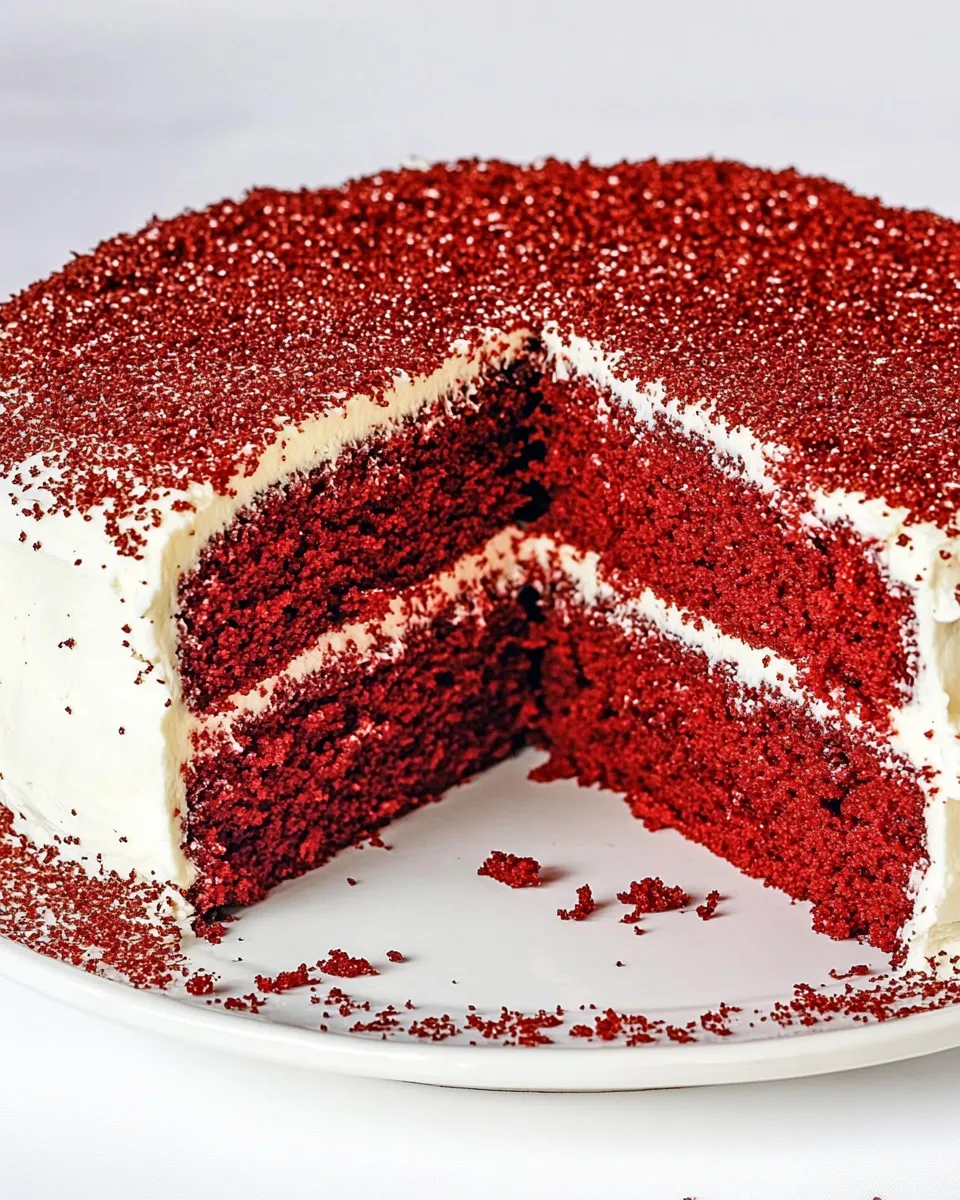
- To assemble the cake, place four 6×6-inch parchment squares overlapped on your cake platter to protect the platter. Set one cake layer in the center (right-side-up) and spread about 3/4 cup of frosting evenly over the top.
- Place the second cake layer on top and spread another 3/4 cup of frosting evenly over that layer.
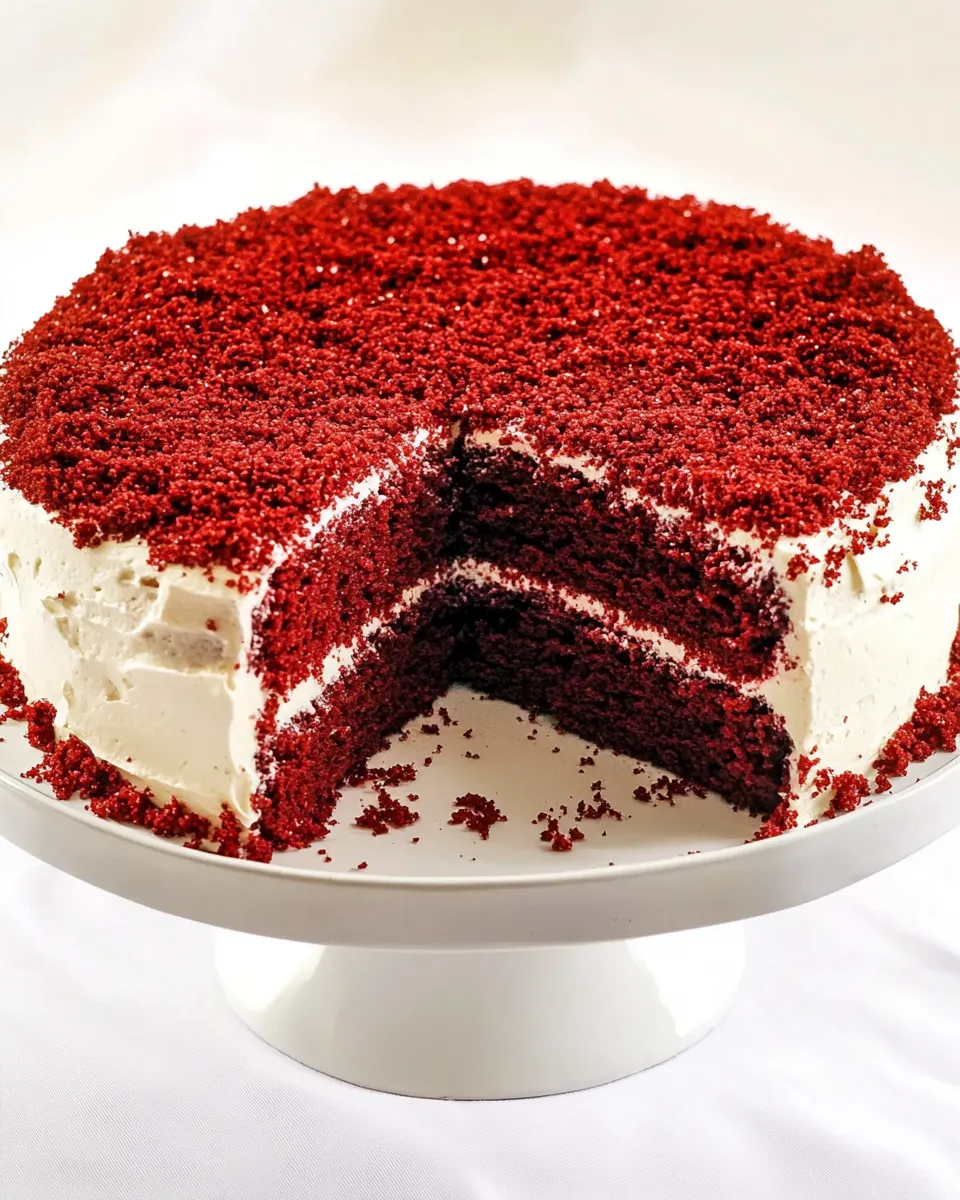
- Place the final cake layer on top with its top-side-up. Use the remaining frosting to cover the top and sides of the cake evenly.
- Sprinkle about 1/2 cup of the fine cake crumbs over the top and gently press them into the frosting. Press additional crumbs onto the sides with your hands or a spatula until the cake is evenly coated.
- Carefully pull out the parchment squares from under the cake, wipe any stray crumbs from the platter, slice, and serve.
Why It’s My Go-To
This version balances practicality and presentation. The stabilized roux in the frosting gives you a tangy, creamy icing that sets up firm enough to handle the crumb coat and the crumb press-on without sliding. That means fewer runny edges and a neater final cake.
I like that the cake layers are moist but not fragile. The use of buttermilk and the methodical addition of wet and dry ingredients prevent a gummy or dense result. The red gel keeps the batter vivid without watering it down.
Ingredient Swaps & Substitutions
Keep substitutions minimal because this recipe depends on acid (buttermilk, vinegar) and fat ratios to get the texture and color right. If you must swap, focus on like-for-like changes:
- Dairy: Lower-fat milk will produce a slightly drier crumb. If you use a lower-fat option, monitor baking time and don’t overbake.
- Butter: Unsalted butter is called for to control salt levels. If you use salted butter, omit any extra salt or reduce it in final seasoning.
- Color: Use gel coloring for vibrancy without thinning the batter. Powdered color or natural alternatives will not give the same intensity.
Appliances & Accessories
These tools make the job easier and more consistent:
- Stand mixer or hand mixer — for creaming butter and sugar and getting a smooth batter.
- Three 8-inch cake pans — same size ensures even layer stacking.
- Parchment paper circles and extra parchment squares — for clean removal and protecting the platter.
- Food processor — for turning trimmed cake into very fine crumbs quickly.
- Serrated knife and bench scraper — for leveling layers and smoothing frosting.
- Wire rack and baking sheet — for cooling and drying crumbs.
Problems & Prevention
Common issues and how to avoid them
- Sinking centers: Make sure your leavening is fresh and don’t open the oven early. Bake until a toothpick comes out clean.
- Uneven layers: Level each layer with a serrated knife while completely cool. Trimming and saving those trimmings for crumbs improves the visual finish.
- Runny frosting: The stabilized roux is your friend. Chill the roux paste before adding to butter and cream cheese if your kitchen is very warm. If frosting gets too soft, chill briefly and rebeat.
- Crumb coating failure: Pressing fine, dry crumbs into a chilled crumb coat helps them stick. If crumbs slide, refrigerate the cake 10–15 minutes between coats.
Seasonal Spins
Red Velour Cake fits many seasons. In colder months, serve with spiced whipped cream on the side. In spring or summer, a light scattering of fresh berries and a dusting of powdered sugar give a fresh contrast. For a holiday table, small seasonal decorations or edible gold accents make it feel festive without changing the core recipe.
If You’re Curious
Quick notes on technique and history: red velvet’s classic tang comes from the interplay of acid (buttermilk, vinegar) and cocoa. The roux-style stabilized frosting imitates pastry techniques to create a buttercream-cream cheese hybrid that holds up better than plain cream cheese frosting at room temperature.
Storage Pro Tips
Store the finished cake covered in the refrigerator for up to 4–5 days. Unless you need it chilled for serving, let slices come to room temperature before eating — about 20–30 minutes — so the texture and flavors open up. For longer storage, freeze wrapped slices or the whole cake (well wrapped) for up to 2 months; thaw overnight in the fridge and then bring to room temperature before serving.
Helpful Q&A
Q: Can I make the layers ahead of time?
A: Yes. Bake and cool the layers, wrap tightly, and refrigerate up to 2 days or freeze for longer. Trim and assemble when ready.
Q: What if my crumbs aren’t fine enough?
A: Pulse longer in the food processor, or sieve them. Finer crumbs stick better to the frosting and give a cleaner finish.
Q: Can I skip the roux step for frosting?
A: You can, but the roux stabilizes the frosting. Skipping it will make a softer frosting that may not hold crumbs as well at room temperature.
Ready, Set, Cook
Set aside time for baking, cooling, and assembly. Read steps through once before you begin, pre-measure ingredients, and keep an eye on oven time. The rhythm is simple: prep, bake, cool, trim, make crumbs, make stabilized frosting, and assemble. Follow the steps, keep your workspace organized, and you’ll end up with a dependable, beautiful Red Velour Cake.
Enjoy the process and the cake — it’s one of my favorite crowd-pleasers because it looks refined and tastes reliably delicious. Happy baking.
Red Velour Cake
Ingredients
Ingredients
- 2 1/4 cupsall-purpose flour
- 2 teaspoonbaking powder
- 1/2 teaspoonbaking soda
- 1/4 teaspoonsalt
- 2 tablespooncocoa powder
- 1 tablespoonvinegar
- 2 teaspoonvanilla extract
- 1 tablespoonred gel food coloring
- 1/2 cupbutter unsalted, softened
- 1 1/2 cupssugar
- 2 eggs
- 1 cupbuttermilk
- 3/4 cupbutter unsalted
- 2 1/2 tablespoonall-purpose flour
- 1/2 cupmilk I used 3%
- 1/2 teaspoonvanilla extract
- 1/4 teaspoonsalt
- 8 ouncecream cheese softened
- 1 cupicing sugar same as confectioner sugar or powdered sugar
Instructions
Instructions
- Preheat oven to 350°F (175°C). Grease the sides of three 8-inch cake pans, line the bottoms with parchment circles sized to fit, and grease the parchment.
- In a medium bowl whisk together 2 1/4 cups all-purpose flour, 2 teaspoons baking powder, 1/2 teaspoon baking soda, and 1/4 teaspoon salt. Set aside.
- In a smaller bowl whisk together 2 tablespoons cocoa powder, 1 tablespoon vinegar, 2 teaspoons vanilla extract, and 1 tablespoon red gel food coloring until smooth and evenly colored.
- In the bowl of a stand mixer (or a large bowl with a hand mixer) cream 1/2 cup softened butter and 1 1/2 cups sugar on medium speed until light and fluffy, about 2–3 minutes. Scrape down the bowl as needed.
- Add the cocoa-color mixture to the creamed butter and sugar and beat until incorporated. Add the 2 eggs, one at a time, beating until each is fully incorporated and the batter is smooth.
- With the mixer on low, add half of the dry flour mixture and mix until just incorporated. Add half of the 1 cup buttermilk and mix until smooth. Repeat with the remaining flour mixture and the remaining buttermilk, mixing until the batter is smooth and uniform.
- Divide the batter evenly among the three prepared pans and smooth the tops. Bake 30–35 minutes, or until a toothpick inserted into the center comes out clean. Cool in the pans for 5 minutes, then run a knife around the edges, invert the cakes, and transfer to a wire rack to cool completely.
- Using a serrated knife, level and remove the domes from each cooled cake. Break the trimmed pieces into crumbs and spread them in an even layer on a baking sheet.
- Bake the crumbs on the baking sheet for 15 minutes to dry them. Let the crumbs cool completely.
- Place the cooled crumbs in a food processor and pulse until very fine (about 30 seconds–1 minute). Set the fine crumbs aside.
- For the frosting base (stabilized roux): from the 3/4 cup unsalted butter measured for the frosting, measure out and melt 2 tablespoons in a small saucepan over medium heat. Whisk in 2 1/2 tablespoons all-purpose flour and cook, whisking constantly, for 1 minute.
- Gradually whisk in 1/2 cup milk, 1/2 teaspoon vanilla extract, and 1/4 teaspoon salt. Whisk constantly until the mixture thickens into a paste (about 1 minute). Transfer the paste to a small bowl, press plastic wrap directly onto the surface to prevent a skin, and cool completely (refrigerate to speed cooling if desired).
- Transfer the cooled paste to a larger mixing bowl. Add the remaining butter from the 3/4 cup (the rest of the measured 3/4 cup), 8 ounces softened cream cheese, and beat until smooth and well combined. Add 1 cup icing sugar and beat until the frosting is smooth and creamy. If the frosting is too soft, chill briefly and rebeat.
- To assemble the cake, place four 6x6-inch parchment squares overlapped on your cake platter to protect the platter. Set one cake layer in the center (right-side-up) and spread about 3/4 cup of frosting evenly over the top.
- Place the second cake layer on top and spread another 3/4 cup of frosting evenly over that layer.
- Place the final cake layer on top with its top-side-up. Use the remaining frosting to cover the top and sides of the cake evenly.
- Sprinkle about 1/2 cup of the fine cake crumbs over the top and gently press them into the frosting. Press additional crumbs onto the sides with your hands or a spatula until the cake is evenly coated.
- Carefully pull out the parchment squares from under the cake, wipe any stray crumbs from the platter, slice, and serve.
Equipment
- Oven
- three 8-inch cake pans
- Parchment Paper
- Stand Mixer or Hand Mixer
- Mixing bowls
- Whisk
- Spatula
- Wire Rack
- Baking Sheet
- Food Processor
- Small Saucepan
- Plastic Wrap
Notes
You can skip step 1 under assembly, if you have alarge cake lifter. You can assemble the cake on a large cutting board, then use the cake lifter to transfer the cake onto a cake plate.
This cake can also be made in 2 cake pans and then cut the cake in half using a serrated knife. Baking time should still be around 35 minutes, but it’s best to use a toothpick to check for doneness.
You should have more than enough crumbs for the entire surface of the cake. I only used about half of the crumbs.
Recipe adapted from Ricardo Magazine.


