
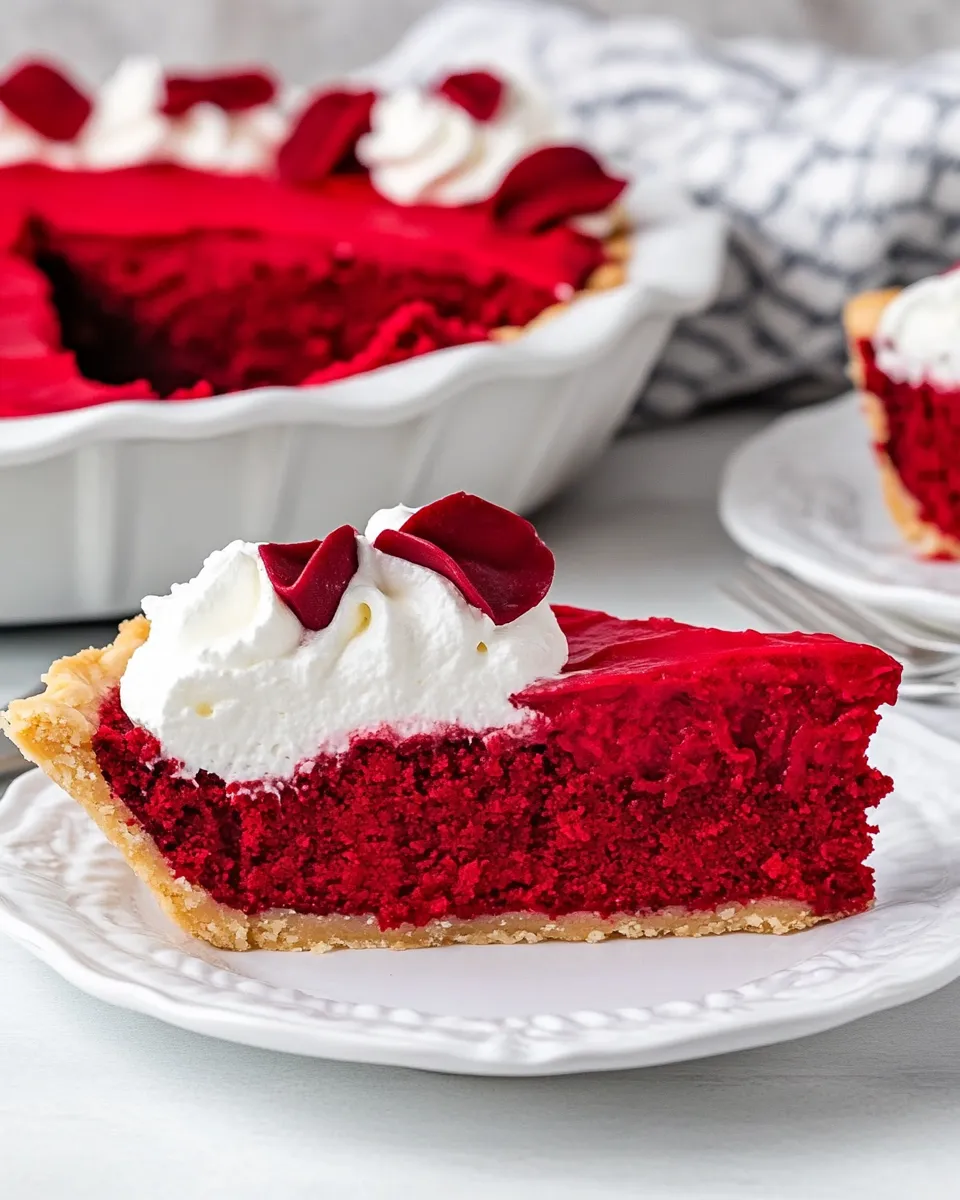
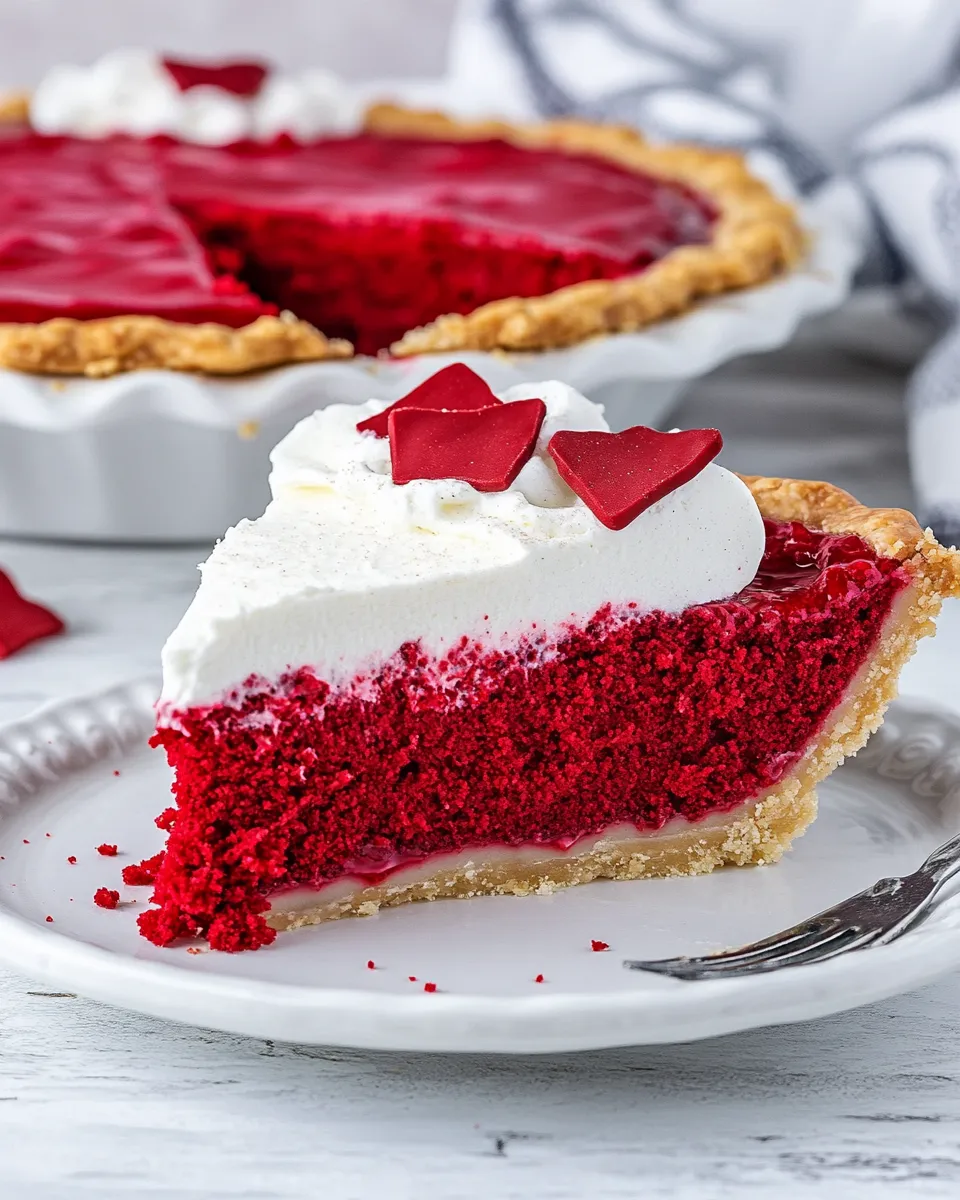
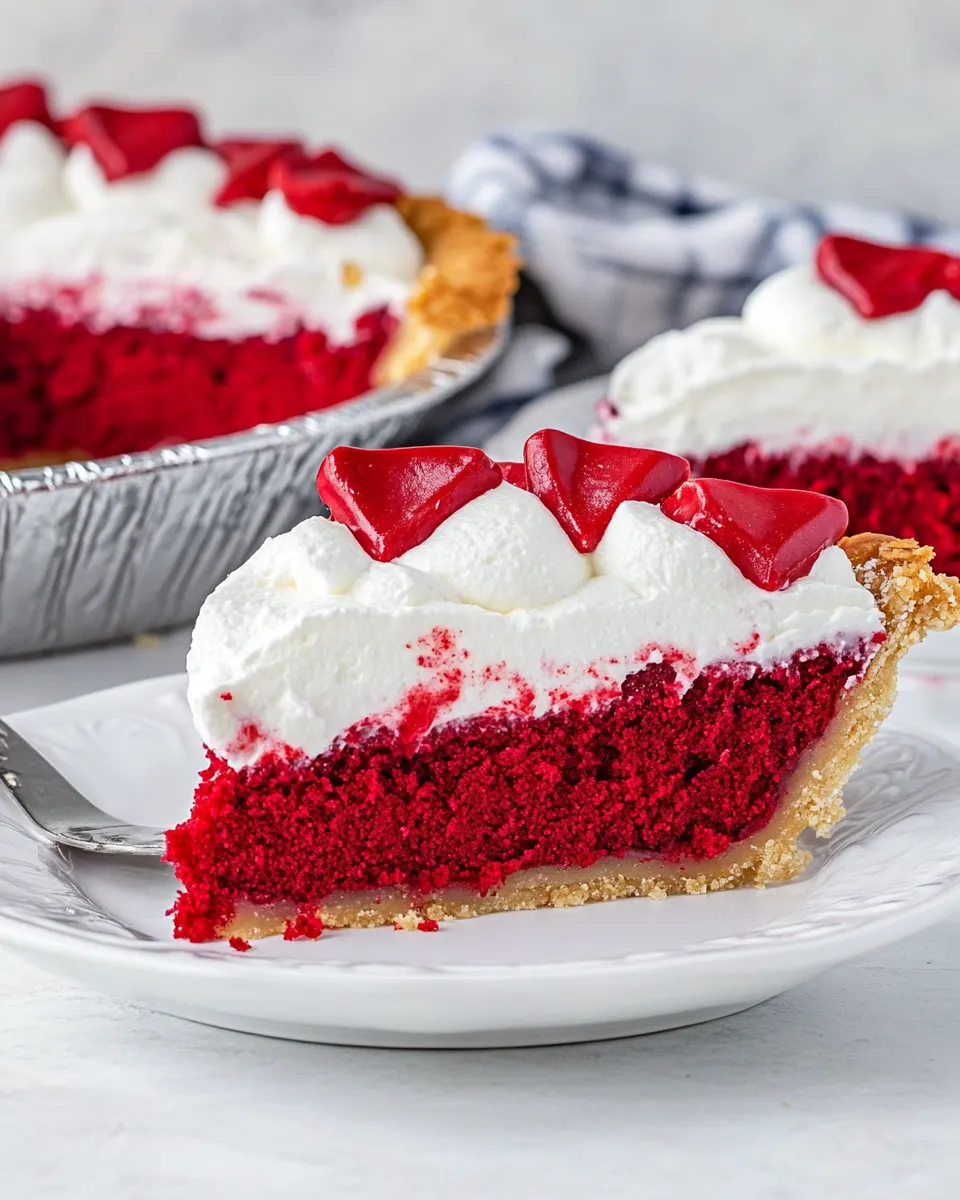
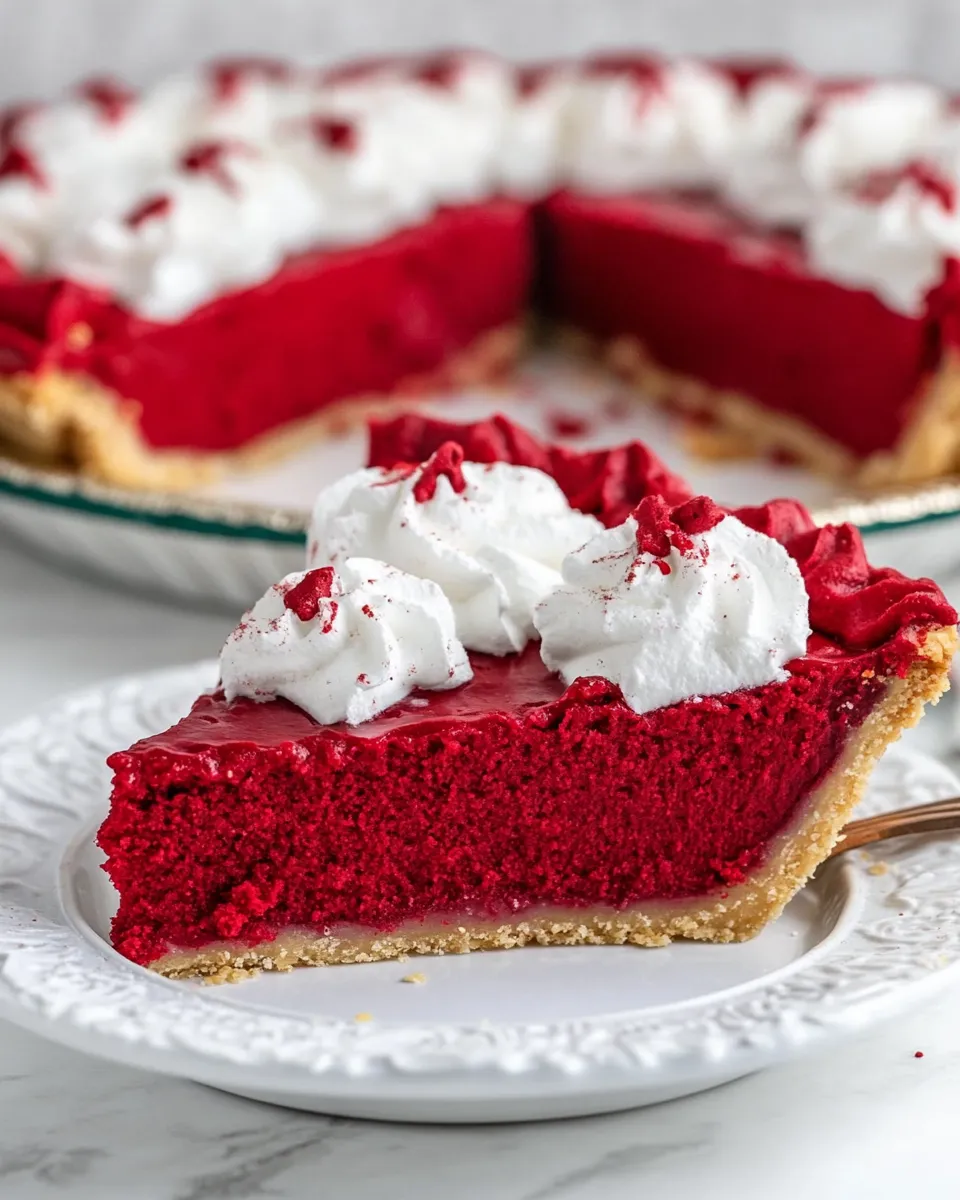
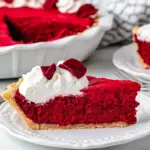
Red Velvet Pie is one of those desserts that looks special but doesn’t require extra drama. The filling is dense and velvety, dusted with cocoa and made vivid with red food coloring. It bakes into a slightly crackled surface and gets a silky cream topping that keeps each slice balanced.
I keep this recipe in regular rotation when I need a show-stopping dessert that comes together from pantry staples and one packaged pie crust. It’s forgiving, straightforward, and the whipped cream–cream cheese topping makes it feel indulgent without fuss. You can serve it at a weeknight dinner or tuck it into a holiday spread.
Below you’ll find the exact ingredients and one-by-one instructions I follow every time. I’ve added practical tips, common mistakes to avoid, and freezer and storage notes so the pie behaves well before and after baking.
What Goes Into Red Velvet Pie
Ingredients
- ½ cup (113 g) unsalted butter, softened — provides richness and structure; soften until easily creamed.
- 2 cups (400 g) packed brown sugar — gives moistness and a deep caramel note that complements the cocoa.
- 2 large eggs — bind the filling and help it set while baking.
- 1 teaspoon vanilla extract — lifts flavor; use pure vanilla if you have it.
- 1 teaspoon baking powder — a small lift so the filling puffs lightly while baking.
- 1 tablespoon (5 g) unsweetened cocoa powder — adds that subtle chocolate backbone typical of red velvet.
- ½ teaspoon salt — balances sweetness and enhances overall flavor.
- 2 cups (248 g) all-purpose flour — the main dry structure for the filling.
- 1 teaspoon white vinegar — reacts with baking powder and emphasizes the tangy red velvet profile.
- 1 tablespoon red food coloring — gives the pie its signature color; gel or liquid both work.
- 1 pie crust, packaged or from scratch — a 9″ crust is specified; keep it chilled until filling is ready.
- 2 ounces (56 g) cream cheese, softened — base for the cream topping; room temperature for smooth mixing.
- ½ cup (50 g) granulated sugar — sweetens the cream cheese topping; adjust slightly if you prefer less sweet topping.
- ½ teaspoon vanilla — pairs with the cream cheese for a bright, rounded topping.
- ½ cup (118 ml) cold heavy whipping cream — whipped into stiff peaks to fold into the sweetened cream cheese for a light, spreadable frosting.
Red Velvet Pie Made Stepwise
- Preheat the oven to 350°F (175°C). Unroll the pie crust into a 9″ pie plate and refrigerate the crust while you prepare the filling.
- In the bowl of an electric mixer (or a large mixing bowl with a hand mixer), beat 1/2 cup (113 g) softened unsalted butter and 2 cups (400 g) packed brown sugar until the mixture is combined and slightly crumbly.
- Add the 2 large eggs and mix until incorporated.
- Add 1 teaspoon vanilla extract, 1 teaspoon baking powder, and 1 tablespoon (5 g) unsweetened cocoa powder. Mix until the mixture is smooth.
- Add 2 cups (248 g) all-purpose flour and 1/2 teaspoon salt. Mix on low speed until the flour is mostly incorporated and there are no large streaks of dry flour.
- Add 1 teaspoon white vinegar and 1 tablespoon red food coloring. Mix until the batter is smooth and evenly colored, scraping the bowl as needed.
- Remove the chilled pie crust from the refrigerator and set the pie plate on a rimmed baking sheet (to catch any overflow). Pour the batter into the prepared crust and smooth the top with a spatula.
- Bake on the baking sheet at 350°F (175°C) for 50–60 minutes, or until the filling is puffed, cracked around the edges, and set in the center. (A gentle jiggle is okay; the center should not be very liquid.)
- Remove the pie from the oven and let it cool completely before adding the topping.
- To make the cream topping: in a mixing bowl, beat 2 ounces (56 g) softened cream cheese with 1/2 cup (50 g) granulated sugar and 1/2 teaspoon vanilla until smooth.
- With the mixer running, slowly add 1/2 cup (118 ml) cold heavy whipping cream and continue to beat until stiff peaks form. Use this cream to frost the cooled pie or serve it alongside slices.
- Store leftovers in the refrigerator. Unfrosted pie will keep up to 4 days; frosted pie will keep less time because the whipped cream may weep. Freeze an unfrosted pie for up to 2 months.
Why I Love This Recipe
It’s dependable. The filling sets up with a custard-like density but doesn’t require tempering or special equipment. One crust and a handful of pantry staples produce a pie that looks like you spent all afternoon on it.
The flavor balance is simple and honest: brown sugar and butter give warmth, a little cocoa keeps it grounded, and the touch of vinegar and vanilla offset the sweetness. The whipped cream–cream cheese topping adds tang and lift so each bite feels light rather than cloying.
Flavor-Forward Alternatives
- Swap some brown sugar for molasses: up to 1/4 cup for deeper caramel notes (reduce brown sugar accordingly).
- Stir in 1 teaspoon instant espresso powder with the dry ingredients to amplify the cocoa.
- Top with toasted pecans or sliced almonds just before serving for crunch and contrast.
- For a brighter finish, fold 1 teaspoon of lemon zest into the cream topping to add an unexpected lift.
Kitchen Gear Checklist
- 9″ pie plate — for the crust and baking depth specified.
- Rimmed baking sheet — catches spills and makes oven handling easier.
- Electric mixer or hand mixer — speeds up creaming the butter and beating the topping.
- Mixing bowls — one large for the filling, one for the cream topping.
- Spatula — to smooth the batter and scrape the bowl clean.
- Measuring cups and spoons and a kitchen scale(optional) — precision matters most for flour and butter.
Mistakes Even Pros Make
- Overbaking until the filling is rock-hard. The pie should be set with a gentle jiggle; it will finish setting as it cools.
- Adding too much food coloring. One tablespoon is specified—don’t assume “more equals better” or you’ll risk an artificial taste or runny color bleed.
- Frosting a warm pie. Apply the cream topping only after the pie cools completely to prevent the whipped cream from melting and weeping.
- Skipping the rimmed baking sheet. This crust is forgiving but can bubble and spill; the sheet saves an oven cleanup and keeps the crust edge intact.
In-Season Swaps
Red Velvet Pie doesn’t depend on seasonal fruit, which is its strength in off-seasons. When berries are at their peak, serve a small bowl of macerated raspberries on the side. The bright acidity complements the dense filling and cuts through the richness.
In fall, serve thin slices with a drizzle of warm salted caramel and toasted pecans for a seasonal spin. In summer, a few fresh strawberries and a mint leaf brighten each plate without changing the core recipe.
What I Learned Testing
During multiple runs, the single biggest factor was chilling the crust until the filling was ready. A cold crust holds up better against the wet batter during the initial oven heat. I also found that using packed brown sugar (not loosely measured) gives consistent texture—light differences in sugar packing change moisture and ultimately the bake time slightly.
I experimented with oven positions. Placing the pie on the middle rack with a rimmed baking sheet underneath created the most even browning without burning the crust edge. One test batch ran the full 60 minutes; another hit the center set at 50. Watch for the visual cues: puffed filling and slight edge cracking.
Freezer-Friendly Notes
Freeze only unfrosted pies. The directions explicitly note an unfrosted pie freezes best for up to 2 months. Wrap it tightly—first with plastic wrap, then with foil—to prevent freezer burn and color transfer.
To thaw, move the pie to the refrigerator overnight. Finish by whipping the cream topping fresh and applying just before serving for best texture. Do not refreeze a pie once it has been thawed and frosted.
Common Qs About Red Velvet Pie
- Can I make the pie in advance? Yes. Bake and cool the pie, then store unfrosted in the refrigerator for up to 4 days or freeze unfrosted for up to 2 months. Add the cream topping shortly before serving for the best texture.
- Can I use a homemade crust? Absolutely. The recipe calls for a 9″ pie crust, packaged or from scratch—just refrigerate the crust before filling.
- Is the red food coloring necessary? For the classic look, yes. The color doesn’t affect the bake much, but you can reduce the amount if you prefer a subtler hue.
- Why is there vinegar in the filling? The small amount of white vinegar brightens the flavor and plays into the traditional red velvet profile by reacting slightly with the leavening.
- My whipped topping weeps—what went wrong? Make sure the cream cheese is fully smoothed with the sugar before adding the cold cream. Also whip the cream to stiff peaks; if under-whipped, it can weep faster. Apply topping only once the pie is completely cool.
That’s a Wrap
Red Velvet Pie is a reliable dessert that reads as elevated but plays well under pressure. Keep the process simple: chill the crust, follow the order of mixing, watch for visual doneness in the oven, and top only after cooling. The result is a crowd-pleasing slice with a custardy interior and a bright, creamy finish.
If you try it, I’d love to know how you decorated yours—crumbs, nuts, or fruit? Small tweaks can personalize the pie without changing what makes it great: straightforward technique and consistently delicious results.
Red Velvet Pie
Ingredients
Ingredients
- 1/2 cup 113 g unsalted butter, softened
- 2 cups 400 g packedbrown sugar
- 2 largeeggs
- 1 teaspoonvanilla extract
- 1 teaspoonbaking powder
- 1 tablespoon 5 g unsweetened cocoa powder
- 1/2 teaspoonsalt
- 2 cups 248 g all-purpose flour
- 1 teaspoonwhite vinegar
- 1 tablespoonred food coloring
- 1 pie crust packaged or from scratch
- 2 ounces 56 g cream cheese, softened
- 1/2 cup 50 g granulated sugar
- 1/2 teaspoonvanilla
- 1/2 cup 118 ml cold heavy whipping cream
Instructions
Instructions
- Preheat the oven to 350°F (175°C). Unroll the pie crust into a 9" pie plate and refrigerate the crust while you prepare the filling.
- In the bowl of an electric mixer (or a large mixing bowl with a hand mixer), beat 1/2 cup (113 g) softened unsalted butter and 2 cups (400 g) packed brown sugar until the mixture is combined and slightly crumbly.
- Add the 2 large eggs and mix until incorporated.
- Add 1 teaspoon vanilla extract, 1 teaspoon baking powder, and 1 tablespoon (5 g) unsweetened cocoa powder. Mix until the mixture is smooth.
- Add 2 cups (248 g) all-purpose flour and 1/2 teaspoon salt. Mix on low speed until the flour is mostly incorporated and there are no large streaks of dry flour.
- Add 1 teaspoon white vinegar and 1 tablespoon red food coloring. Mix until the batter is smooth and evenly colored, scraping the bowl as needed.
- Remove the chilled pie crust from the refrigerator and set the pie plate on a rimmed baking sheet (to catch any overflow). Pour the batter into the prepared crust and smooth the top with a spatula.
- Bake on the baking sheet at 350°F (175°C) for 50–60 minutes, or until the filling is puffed, cracked around the edges, and set in the center. (A gentle jiggle is okay; the center should not be very liquid.)
- Remove the pie from the oven and let it cool completely before adding the topping.
- To make the cream topping: in a mixing bowl, beat 2 ounces (56 g) softened cream cheese with 1/2 cup (50 g) granulated sugar and 1/2 teaspoon vanilla until smooth.
- With the mixer running, slowly add 1/2 cup (118 ml) cold heavy whipping cream and continue to beat until stiff peaks form. Use this cream to frost the cooled pie or serve it alongside slices.
- Store leftovers in the refrigerator. Unfrosted pie will keep up to 4 days; frosted pie will keep less time because the whipped cream may weep. Freeze an unfrosted pie for up to 2 months.
Equipment
- Electric Mixer
- Hand Mixer
- Mixing Bowl
- 9-inch pie plate
- Rimmed baking sheet
- Spatula
Notes
The top will fall slightly as it cools. This is normal.


