
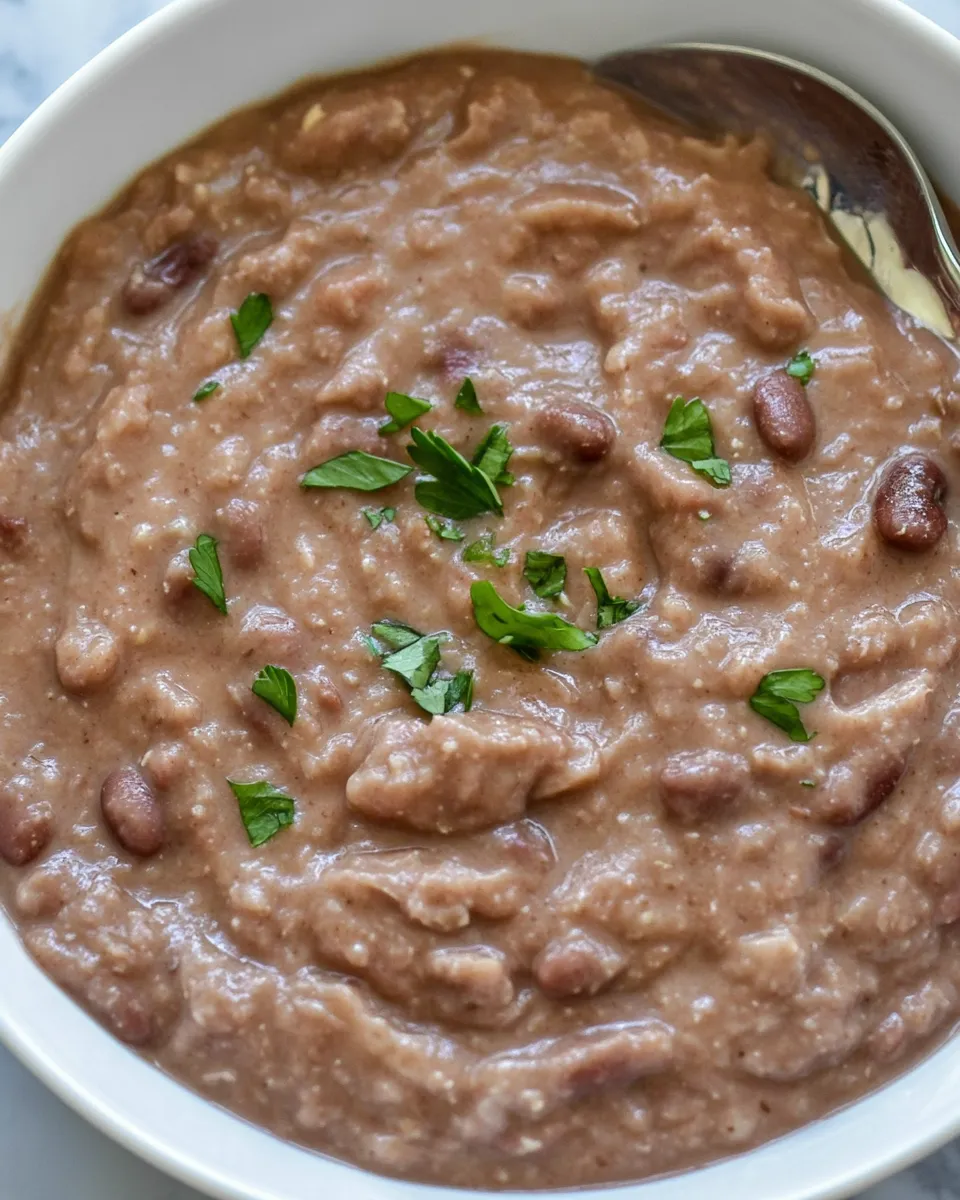
These refried beans are the kind of pantry-friendly, comforting staple I reach for when I want something reliable and delicious with minimal fuss. They start with either home-cooked pinto beans or a good-quality 15-ounce can, and finish on the stovetop with olive oil, a little onion and garlic if you have them, and warming spices. Texture is everything here — slightly creamy, with a little body left so they feel homemade, not chalky or gluey.
I like making a batch on a weeknight because they pair with so many meals: tucked into tacos, spooned over roasted vegetables, or served alongside eggs and sautéed greens. The technique is straightforward and forgiving — heat, mash, adjust with reserved bean liquid — but a few small decisions (how much to mash, whether you brown the aromatics) will change the final result. That’s the fun: one recipe, many personalities.
Below you’ll find the ingredients, the exact step-by-step method, practical troubleshooting, and serving ideas. Read through once so you know where you might want a creamier finish or a chunkier texture, then follow the steps and taste as you go. These beans reward small adjustments.
The Essentials
What you need at minimum: cooked or canned pinto beans, olive oil, cumin, kosher salt and black pepper. Optional aromatics — onion and garlic — give depth, but the base recipe stands on its own. The reserved bean liquid or a bit of canning liquid is how you control consistency without diluting the flavor.
Technique highlights: warm the oil, sweat the onion until translucent, add garlic briefly so it stays fragrant and doesn’t burn, then heat the beans and mash to the texture you prefer. If the mixture is too dry, add a tablespoon or two of reserved liquid at a time until it loosens. Finish off the heat and serve right away for best texture.
Ingredients
- 2 cups cooked pinto beans, drained (with cooking liquid reserved) — the base of the dish; use the reserved liquid to loosen as needed, and it keeps flavor concentrated.
- or 1 (15-ounce) can — a reliable shortcut; reserve a little of the canning liquid to adjust consistency if you need it.
- 1 tablespoon olive oil — carries heat, prevents sticking and adds a clean background fat that improves mouthfeel.
- ½ cup chopped onion, optional — sweated in the oil for sweetness and depth; skip if you prefer a simpler pantry version.
- 2 cloves garlic, minced (optional) — adds a bright, savory note; cook briefly so it becomes fragrant but doesn’t brown.
- 1 teaspoon ground cumin — the key spice here; brings warmth and an earthy note that complements the beans.
- 1½ teaspoons kosher salt — seasons the beans; adjust to taste, especially if using salted canned beans.
- 1 teaspoon ground black pepper — adds bright, peppery lift; add more if you like heat from pepper rather than chiles.
Method: Refried Beans
- If using home-cooked beans, drain the 2 cups of cooked pinto beans and reserve the cooking liquid. If using a 15-ounce can, drain the beans and optionally reserve a little of the canning liquid to loosen the beans later.
- Heat 1 tablespoon olive oil in a large skillet over medium heat until shimmering.
- If using onion, add ½ cup chopped onion to the skillet and cook, stirring occasionally, until tender and translucent (about 4–6 minutes).
- If using garlic, add 2 minced cloves and cook, stirring, for about 30–60 seconds until fragrant; do not let the garlic brown.
- Add the drained beans, 1 teaspoon ground cumin, 1½ teaspoons kosher salt, and 1 teaspoon ground black pepper to the skillet. Stir to combine.
- Cook, stirring occasionally, until the beans are heated through (about 3–5 minutes). Mash the beans in the skillet with a potato masher or the back of a wooden spoon to your desired texture. If the mixture is too dry, add a little of the reserved bean or canning liquid a small amount at a time until you reach the desired consistency.
- Once the beans are at the texture and consistency you want and are heated through, remove the skillet from the heat and serve.
Why This Recipe Belongs in Your Rotation
This recipe is fast, frugal, and flexible. It makes use of pantry staples and can be scaled up easily if you want to feed more people or batch-cook for the week. The combination of cumin, salt and black pepper is simple but effective — it seasons the beans in a way that’s familiar and crowd-pleasing without masking the bean flavor.
Refried beans are also incredibly versatile: they’re a protein-rich addition to vegetarian meals, a creamy binder in wraps and tacos, and an excellent base for bowls. Because the recipe relies on a small set of steps rather than precise timing, it’s approachable for cooks at any level and forgiving if you need to pause and come back to them.
International Equivalents
Many cuisines have mashed or puréed bean dishes that play a role similar to refried beans. In Mexican and Tex-Mex cooking, frijoles refritos (refried beans) are the classic version made with pinto beans. In parts of the Caribbean and Latin America you’ll find mashed black beans or stewed beans served similarly. Middle Eastern and Mediterranean cuisines offer dips like hummus (chickpeas) and ful medames (stewed fava beans), which echo the same idea: cooked legumes mashed and dressed with oil and aromatics.
While the seasonings vary — cumin here, tahini or lemon there — the concept of transforming simple cooked beans into a creamy, savory accompaniment is universal. Swap the bean variety and the supporting flavors and you still have a comforting, protein-rich dish.
Gear Checklist
- Large skillet — wide surface area helps evaporate excess moisture and gives you room to mash.
- Potato masher or sturdy wooden spoon — for mashing to your preferred texture.
- Measuring spoons — for the cumin, salt and pepper.
- Can opener — if you’re using a canned option.
- Heatproof spatula or spoon — to stir and scrape the pan cleanly.
Mistakes That Ruin Refried Beans
Overworking the beans until they become gluey. Pinto beans have a natural creaminess; if you mash them excessively — especially at high speed or with a blender — you’ll lose that pleasant texture and end up with a pasty result. Mash just enough to break them down and create a cohesive texture.
Burning the garlic. Garlic needs very little time in the pan. Add it after the onion is translucent and remove it from heat soon after it becomes fragrant. Burnt garlic tastes bitter and will dominate the otherwise mild flavor of the beans.
Too much liquid all at once. It’s tempting to pour a lot of the reserved bean liquid into the pan to loosen things quickly. Add liquid sparingly, a tablespoon at a time, and stop when the beans glide off the spoon but still hold some shape.
Under-seasoning or over-salting. If you use canned beans, taste before adding the full 1½ teaspoons of kosher salt — canned beans can already contain salt. Conversely, don’t be afraid to season; beans need enough salt to sing.
In-Season Swaps
Onions: in summer use sweet onions for a lighter, sweeter note; in winter, a yellow or even a small shallot adds a rounder, deeper flavor. No onion? Use a pinch of onion powder as a fallback, but skip inventing measurements — just season to taste.
Garlic alternatives: roasted garlic folded in at the end will lend a mellow, caramelized sweetness. If you want a touch of heat, add a spoonful of your favorite hot sauce or a pinch of chili flakes at the end rather than changing the base recipe.
Bean variety: though this recipe is written for pinto beans, you can use other mild, starchy beans if you prefer. Remember the texture will shift — darker beans will give a different color and flavor profile but the same technique applies.
Cook’s Commentary
Texture notes
I aim for a texture that’s mostly mashed but still has some intact bean pieces for mouthfeel. If you like them ultra-smooth, you can push them further with a masher or pass the mixture through a food mill. For chunkier beans, mash briefly and stop when you have a mix of whole and mashed beans.
Serving ideas
Spoon refried beans onto warm tortillas and top with shredded cheese and pico de gallo for instant tacos. Use them as a base for a grain bowl with roasted vegetables and avocado. They’re also fantastic alongside grilled meats or as a spread on toast for a savory breakfast. A drizzle of olive oil, a squeeze of lime, or a scattering of chopped cilantro brightens them at the table.
Keep-It-Fresh Plan
Cool leftover beans quickly and store them in an airtight container in the refrigerator. They keep well and can be reheated gently on the stovetop with a splash of water or reserved bean liquid to loosen them back up. For longer storage, freeze in portioned containers; thaw in the refrigerator overnight before reheating.
When reheating, do it over low heat and stir frequently so they don’t stick or dry out. If they seem dry after reheating, add a small amount of liquid and finish with a quick stir to bring back the creamy texture.
Refried Beans Q&A
Q: Can I use canned beans straight from the can?
A: Yes. Drain them and reserve a bit of the canning liquid in case you need to loosen the texture. Taste before adding the full amount of salt since canned beans can be seasoned already.
Q: How can I make them creamier without extra fat?
A: Mash more thoroughly and add small amounts of reserved bean liquid to achieve a creamier texture; warm liquid helps integrate the mash without adding oil or dairy.
Q: Can this be made vegan?
A: Absolutely. The recipe as written is vegan when olive oil is used and no dairy is added. It’s a great plant-based source of protein and texture.
Q: What if my beans taste flat?
A: Check salt first — beans often need a firm hand with salt. Add a little acid at the end (a squeeze of lime or a splash of vinegar) to brighten the flavors if salt alone doesn’t do it.
The Last Word
Refried Beans are one of those recipes that reward attention without demanding sheets of instructions. Use decent beans, sweat the aromatics gently, season properly, and mash to the texture you enjoy. Whether you start from home-cooked beans or reach for a can, this method delivers a reliable, adaptable dish that complements countless meals. Keep a stash in the fridge and you’ll find yourself reaching for them more often than you expect.

Refried Beans Recipe
Ingredients
Ingredients
- 2 cupscooked pinto beans drained with cooking liquid reserved or 1 (15-ounce) can
- 1 tablespoonolive oil
- 1/2 cupchopped onion optional
- 2 clovesgarlic minced (optional)
- 1 teaspoonground cumin
- 1 1/2 teaspoonskosher salt
- 1 teaspoonground black pepper
Instructions
Instructions
- If using home-cooked beans, drain the 2 cups of cooked pinto beans and reserve the cooking liquid. If using a 15-ounce can, drain the beans and optionally reserve a little of the canning liquid to loosen the beans later.
- Heat 1 tablespoon olive oil in a large skillet over medium heat until shimmering.
- If using onion, add ½ cup chopped onion to the skillet and cook, stirring occasionally, until tender and translucent (about 4–6 minutes).
- If using garlic, add 2 minced cloves and cook, stirring, for about 30–60 seconds until fragrant; do not let the garlic brown.
- Add the drained beans, 1 teaspoon ground cumin, 1½ teaspoons kosher salt, and 1 teaspoon ground black pepper to the skillet. Stir to combine.
- Cook, stirring occasionally, until the beans are heated through (about 3–5 minutes). Mash the beans in the skillet with a potato masher or the back of a wooden spoon to your desired texture. If the mixture is too dry, add a little of the reserved bean or canning liquid a small amount at a time until you reach the desired consistency.
- Once the beans are at the texture and consistency you want and are heated through, remove the skillet from the heat and serve.
Equipment
- Large Skillet
- potato masher
- Wooden Spoon


