
This is a reliable same-day sourdough that gives you a crisp crust, open crumb and genuine sourdough flavor without a full 24-hour schedule. I developed this routine so I could bake a loaf that feels slow-made, but fits into a single day. It’s honest, practical, and forgiving.
Expect a little hands-on time early on, then long rests where the dough does the work. The method below follows a straightforward stretch-and-fold approach, a short bulk rise, an overnight option in the fridge for flexibility, and baking in a hot Dutch oven for the best oven spring and crust.
Gather These Ingredients
Ingredients
- 150g active sourdough starter — provides the leavening and flavor; should be bubbly and recently fed.
- 300g warm filtered water, around 90°F — hydrates the dough and helps activate the starter; filtered water prevents off flavors.
- 450g flour, I use 300g bread flour + 150g all-purpose — bread flour boosts gluten for structure; AP lightens the crumb.
- 12g salt — controls fermentation and enhances flavor; add it after the flour and water are combined.
Make Same Day Sourdough Bread: A Simple Method
- In the bowl of a stand mixer fitted with a dough hook, add 150 g active sourdough starter, 300 g warm filtered water (about 90°F), 450 g flour (300 g bread flour + 150 g all-purpose), and 12 g salt. Mix on low speed until the ingredients come together, then increase to medium-low and mix for about 5 minutes, until the dough is cohesive and slightly elastic. Stop the mixer, cover the bowl, and let the dough rest for 15 minutes.
- After the 15-minute rest, wet your hands and perform a set of stretch-and-folds: reach under one side of the dough, stretch it up and fold it over the top; repeat for all four “sides” of the dough. Cover the bowl and wait 15 minutes.
- Repeat the stretch-and-fold set one more time (wet hands, stretch and fold each of the four sides). Cover the bowl.
- Bulk rise: Let the dough rest, covered, in the bowl until it has increased by about 75% (this usually takes about 3–4 hours at room temperature). If your kitchen is cool, place the covered bowl in your oven with only the oven light on to keep it slightly warm.
- Lightly flour your work surface. Gently turn the dough out onto the surface, handling it gently to preserve air. Flatten it into a rough rectangle, fold each long side toward the center, then roll the dough up and shape it into a tight round by pulling and tucking the dough in a circular motion 3–4 times. Finish with the seam on the bottom and the top smoothed.
- Place the shaped dough seam-side up into a well-floured banneton or a bowl lined with a heavily floured kitchen towel. Cover the dough with plastic wrap or a towel and place it in the refrigerator to cold-proof for at least 2 hours (you may cold-proof up to 48 hours if desired).
- At least 45 minutes before baking (or while the Dutch oven heats if you prefer), preheat your oven to 425°F with the Dutch oven (with its lid on) inside. If you use a baking stone or a baking sheet to protect the bottom of the loaf, place it on the lower rack before preheating.
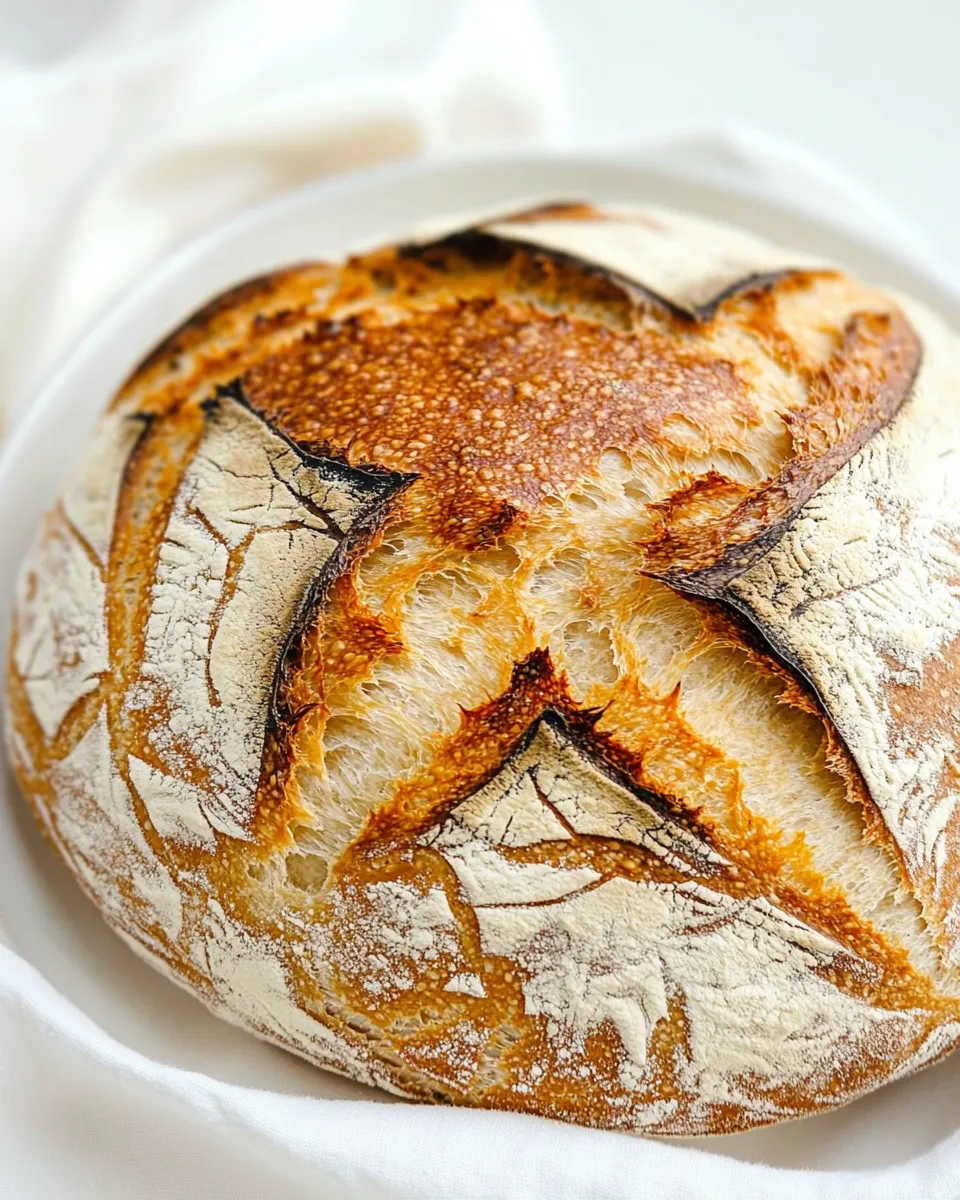
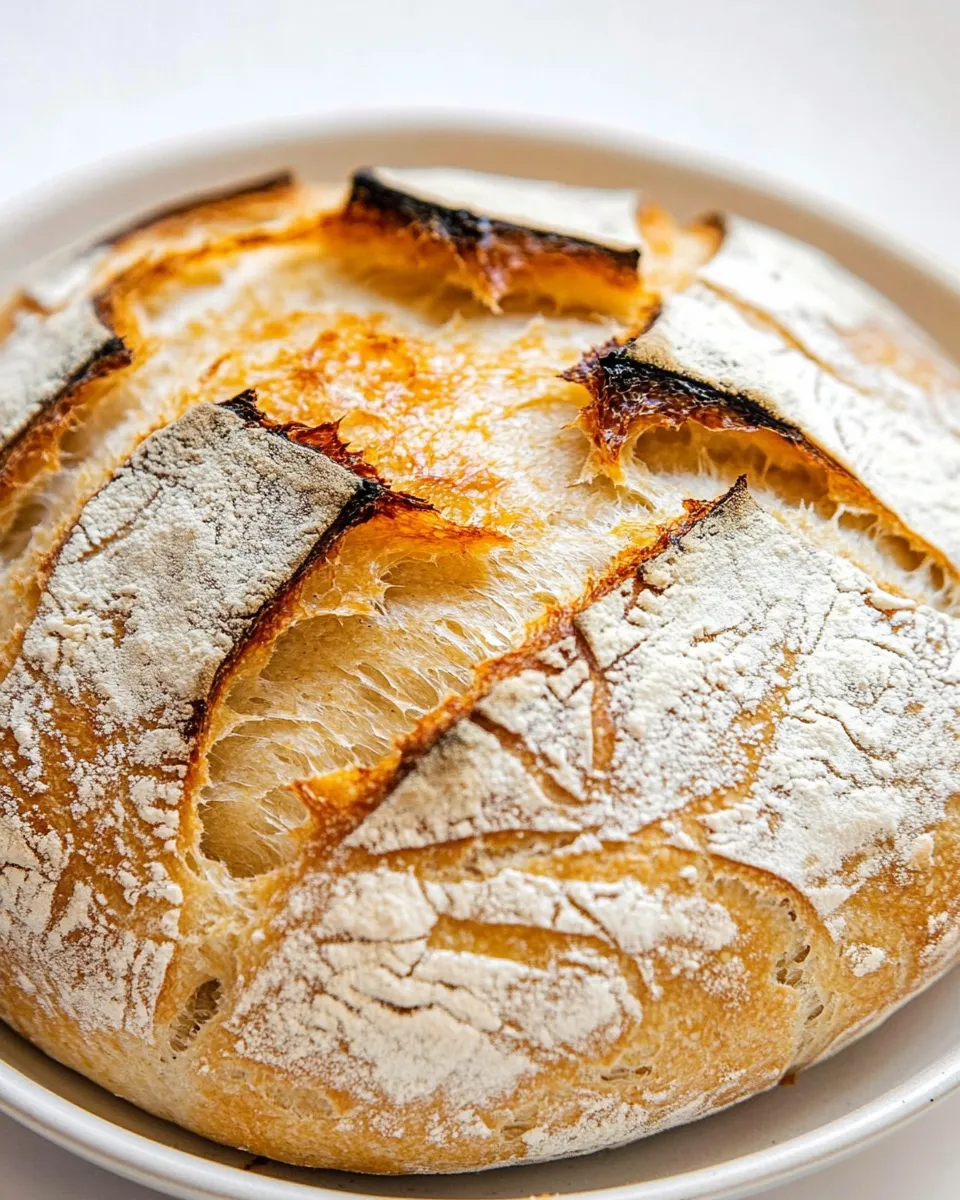
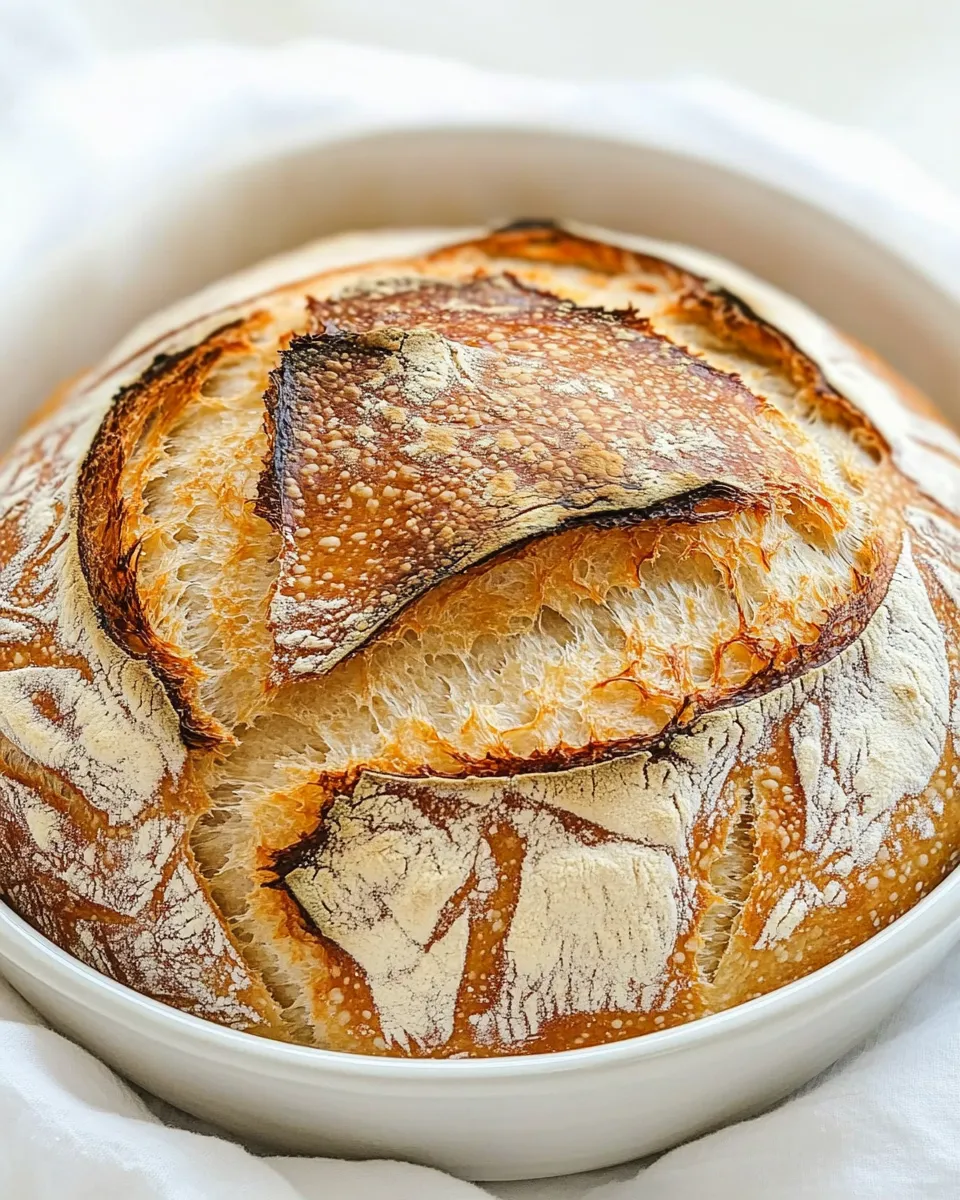
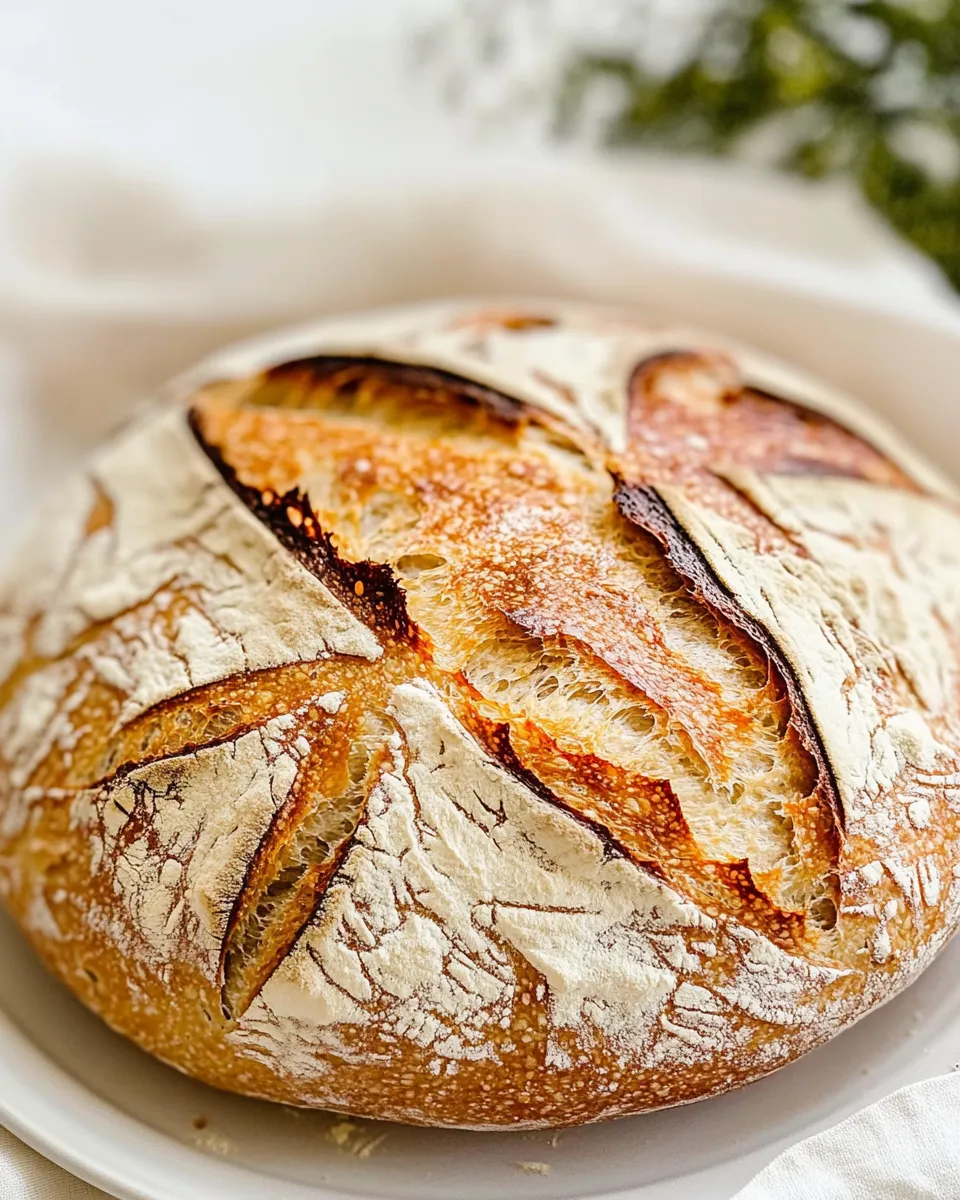
- When the oven and Dutch oven are fully hot, remove the dough from the refrigerator. Invert the banneton bowl to release the dough onto a piece of parchment paper so the seam is now on the bottom (seam-side down). Lightly flour the top, then score the top of the loaf (a simple X or a single long slash).
- Using the parchment, lift the dough and carefully place it into the preheated Dutch oven. Cover and bake for 40 minutes.
- After 40 minutes, remove the lid and bake uncovered for an additional 10–15 minutes, until the crust reaches your desired color and crispness.
- Remove the loaf from the Dutch oven and transfer it to a wire rack. Cool for at least 1 hour before slicing to allow the crumb to finish setting.
- Slice with a bread knife or electric knife and serve.
Top Reasons to Make Same Day Sourdough Bread
There are a few practical reasons I reach for this method when I want sourdough without the full multi-day timeline.
- Speed: You can get a genuine sourdough loaf in the same day while still developing flavor and texture.
- Predictability: The stretch-and-fold routine is forgiving and consistent; it tolerates modest temperature differences.
- Flexibility: Cold-proofing gives you scheduling freedom—bake after 2 hours or wait up to 48 hours.
- Great crust and oven spring: The hot Dutch oven captures steam, producing a blistered, crunchy crust and good rise.
Dairy-Free/Gluten-Free Swaps
This recipe is naturally dairy-free; there’s no dairy to replace. For gluten-free, note that the method—and the structure it relies on—assumes wheat gluten. If you need gluten-free bread, use a recipe specifically formulated for gluten-free flours and gums; the timings, hydrations and techniques will be different.
Before You Start: Equipment
You don’t need a pro setup, but a few items make this reliable and repeatable.
- Stand mixer with dough hook — speeds up initial mixing and gives consistent dough development. You can mix by hand if you prefer.
- Digital scale — weigh ingredients; sourdough is precise by weight, not volume.
- Banneton or bowl with heavily floured towel — supports the loaf for the cold proof and helps form a round shape.
- Dutch oven with lid (6–7 quarts recommended) — for steam-trapping and even heat; a heavy pot works best.
- Parchment paper and a sharp lame or razor — for easy transfer and clean scoring.
- Wire rack — for cooling so steam doesn’t condense on the bottom of the loaf.
Avoid These Traps
Small mistakes are easy to make. Here’s what I see most often and how to prevent them.
- Inactive starter — if your starter isn’t bubbly and active, your dough won’t rise reliably. Feed it 4–8 hours before you plan to mix, or keep a fed jar in a warm spot.
- Too-cool bulk rise — cold dough ferments slowly. If your kitchen is under 70°F, use the oven light trick or a slightly warmer proofing spot.
- Over-handling after bulk rise — vigorous handling deflates gas pockets. Be gentle when shaping; preserve the air you developed.
- Undercooking — opening the oven early can deflate the loaf. Trust the times: 40 minutes covered plus 10–15 uncovered gives a good base. If your loaf stays pale, bake a few minutes longer.
Customize for Your Needs
There are small, safe ways to make this loaf your own without changing the core formula.
- Seeds and add-ins: Fold seeded mixes or chopped olives into the dough during the final pre-shape phase. Add-ins change hydration slightly, so add sparingly.
- Hydration tweaks: The recipe hydration is set by the measurements given. If you want a softer, more open crumb over time, experiment with a slightly higher hydration in future bakes and note the changes.
- Flour swaps: Substitute part of the bread flour with whole wheat (up to ~20–30%) for nuttiness; whole grain will ferment faster and absorb more water, so watch dough feel.
- Shaping: Make bâtards or batards with the same method—shape differently, but keep the cold proof and baking steps the same.
Cook’s Notes
These are the practical, “I wish someone had told me” details I use every bake.
- Starter temperature: If your starter is cooler (straight from the fridge), bring it to room temperature or feed it so it’s active. A lively starter at mix time influences the bulk rise time.
- Hands wet for stretch-and-fold: Wetting your hands prevents sticking and lets you gently stretch the dough without tearing the gluten.
- How to judge the bulk rise: Look for roughly 75% volume increase. It won’t necessarily double; trust the look and feel rather than exact time.
- Scoring: A shallow initial cut lets the loaf open predictably. If you want dramatic ears, use a slightly more confident, swift slash.
- Cooling is not optional: The crumb continues to set as the loaf cools. Slicing too early yields a gummy interior.
Storing, Freezing & Reheating
Keep the loaf on the counter in a paper bag or wrapped in a clean tea towel for 1–2 days. For longer storage, slice and freeze:
- Freeze whole or pre-sliced; wrap tightly in plastic and a layer of foil or in a freezer-safe bag.
- To refresh frozen slices, toast straight from the freezer or thaw at room temperature and reheat briefly in a 350°F oven for 8–12 minutes to restore crust.
- To re-crisp a day-old whole loaf, heat the oven to 350°F and bake for 10–12 minutes; for a crisper crust, briefly spritz the loaf with water before returning it to the oven.
Troubleshooting Q&A
Here are concise answers to the problems you’re most likely to encounter.
My loaf didn’t rise much—what went wrong?
Check your starter first. If it wasn’t active, the dough won’t generate gas. Temperature is next: cool bulk rises slow fermentation. Also verify you measured the starter and water correctly by weight.
The crumb is dense and gummy—any fixes?
Gummy crumb often means underbaked or cut too soon. Make sure you gave the loaf the full baking time and cooled it at least an hour. If the dough felt overly wet and hard to shape, reduce any add-ins or let it sit a bit longer during the bulk rise.
The crust is tough or too dark.
Dark crust can mean your oven runs hot—use an oven thermometer. If the crust is tough but the crumb is fine, try removing the lid earlier or baking uncovered 5–10 minutes less, depending on your oven.
How do I get more open holes in the crumb?
Higher hydration, more gentle handling during shaping, and strong gluten development help open the crumb. That said, this same-day formula balances speed and openness. Small tweaks to hydration and a looser shaping technique will move things in the right direction.
Save & Share
If this loaf worked for you, save the recipe where you keep favorites. I like to keep a note of the starter state and the room temperature for each bake—that makes repeatable results easy. Share photos and your tweaks with friends or on social so others can try the same-day approach.
Want faster feedback? Drop a note in the comments below the blog post with a photo and a short description of how your bake behaved—temperature, starter activity, and shaping style are the most helpful details. I read every one and love troubleshooting with fellow bakers.

Same Day Sourdough Bread
Ingredients
Ingredients
- 150 gactive sourdough starter
- 300 gwarm filtered water around 90°F
- 450 gflour I use 300 g bread flour + 150 g all-purpose
- 12 gsalt
Instructions
Instructions
- In the bowl of a stand mixer fitted with a dough hook, add 150 g active sourdough starter, 300 g warm filtered water (about 90°F), 450 g flour (300 g bread flour + 150 g all-purpose), and 12 g salt. Mix on low speed until the ingredients come together, then increase to medium-low and mix for about 5 minutes, until the dough is cohesive and slightly elastic. Stop the mixer, cover the bowl, and let the dough rest for 15 minutes.
- After the 15-minute rest, wet your hands and perform a set of stretch-and-folds: reach under one side of the dough, stretch it up and fold it over the top; repeat for all four “sides” of the dough. Cover the bowl and wait 15 minutes.
- Repeat the stretch-and-fold set one more time (wet hands, stretch and fold each of the four sides). Cover the bowl.
- Bulk rise: Let the dough rest, covered, in the bowl until it has increased by about 75% (this usually takes about 3–4 hours at room temperature). If your kitchen is cool, place the covered bowl in your oven with only the oven light on to keep it slightly warm.
- Lightly flour your work surface. Gently turn the dough out onto the surface, handling it gently to preserve air. Flatten it into a rough rectangle, fold each long side toward the center, then roll the dough up and shape it into a tight round by pulling and tucking the dough in a circular motion 3–4 times. Finish with the seam on the bottom and the top smoothed.
- Place the shaped dough seam-side up into a well-floured banneton or a bowl lined with a heavily floured kitchen towel. Cover the dough with plastic wrap or a towel and place it in the refrigerator to cold-proof for at least 2 hours (you may cold-proof up to 48 hours if desired).
- At least 45 minutes before baking (or while the Dutch oven heats if you prefer), preheat your oven to 425°F with the Dutch oven (with its lid on) inside. If you use a baking stone or a baking sheet to protect the bottom of the loaf, place it on the lower rack before preheating.
- When the oven and Dutch oven are fully hot, remove the dough from the refrigerator. Invert the banneton bowl to release the dough onto a piece of parchment paper so the seam is now on the bottom (seam-side down). Lightly flour the top, then score the top of the loaf (a simple X or a single long slash).
- Using the parchment, lift the dough and carefully place it into the preheated Dutch oven. Cover and bake for 40 minutes.
- After 40 minutes, remove the lid and bake uncovered for an additional 10–15 minutes, until the crust reaches your desired color and crispness.
- Remove the loaf from the Dutch oven and transfer it to a wire rack. Cool for at least 1 hour before slicing to allow the crumb to finish setting.
- Slice with a bread knife or electric knife and serve.
Equipment
- Stand mixer
- dough hook
- Bowl
- banneton or bowl lined with a towel
- Dutch Oven
- Parchment Paper
- Oven
- Wire Rack
Notes
8 am: 3-4 hour rise
12 pm: Shape and 2-3 hour rise in fridge
3 pm: Preheat oven
3:30 pm: Bake bread and then allow to rest
5:30 pm: Slice and enjoy with dinner


