
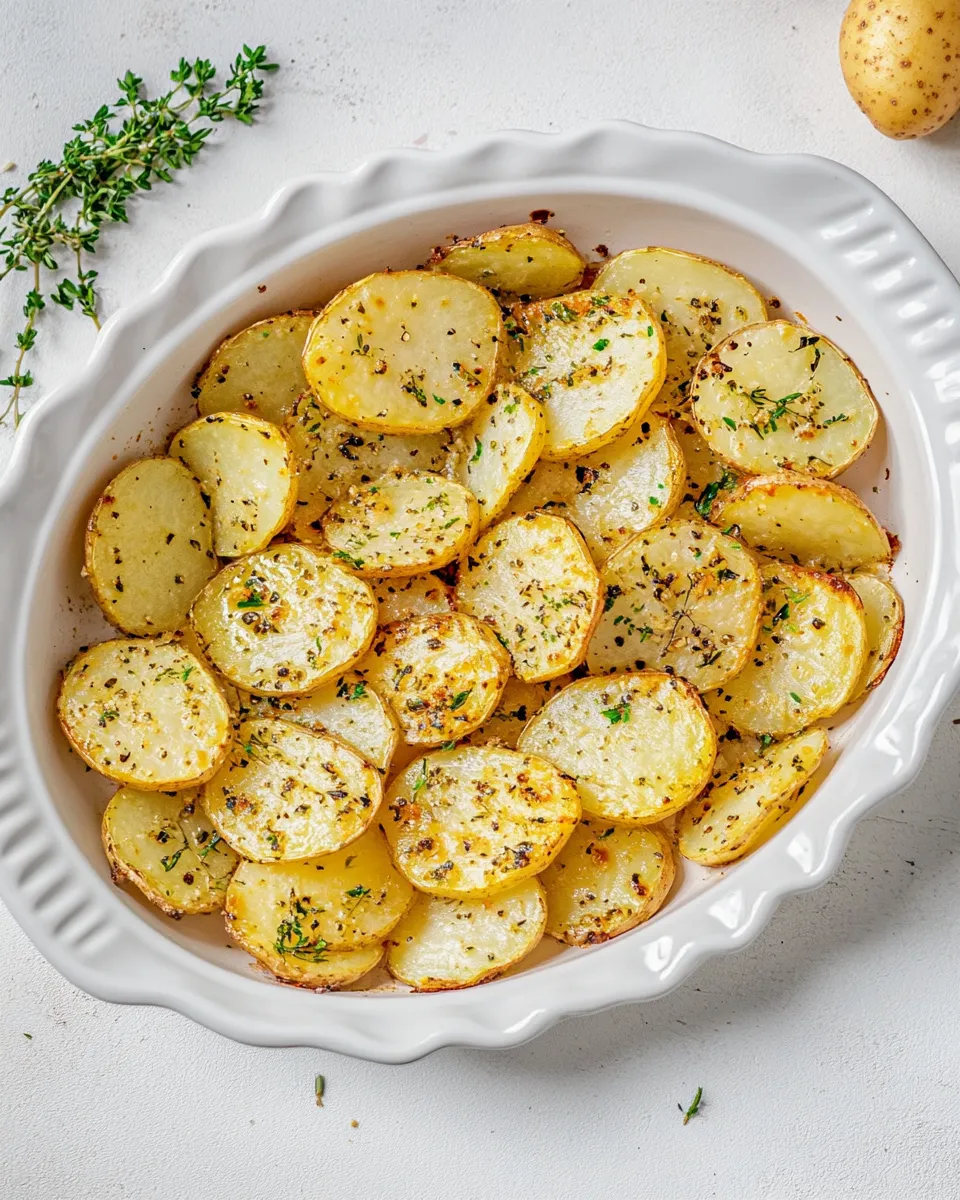
These oven-sliced potatoes are the kind of recipe I make when I want something honest, straightforward, and reliably good. Two russet potatoes, a touch of olive oil, a few pantry spices, and a very hot oven deliver edges that brown and centers that soften just right. The result feels homey but deliberate — like a side dish that elevates the whole meal without fuss.
I like this method because it gives you control: slice thickness, seasoning, and oven time all change the texture, so you can aim for crunchy chips or tender gratin-like rounds. The technique is forgiving, too. Even if your slices aren’t identical, the heat does most of the work and turning the pieces halfway through keeps the color even.
Below I’ve laid out the ingredients and the exact steps I follow, plus sensible substitutions, common traps to avoid, and serving ideas. If you want crisp edges or a softer center, you’ll find tips to reach that texture. It’s a simple recipe, but treated with a little attention it becomes a keeper.
Ingredient List

- 2 large russet potatoes — washed; russets give a fluffy interior and crisp edges.
- 2 1/2 tablespoons olive oil — coats slices for browning and helps carry the seasoning.
- 1/4 teaspoon salt — plus more to taste; seasons the potatoes while roasting.
- 1/4 teaspoon ground black pepper — adds a warm, sharp note to contrast the starch.
- 1/2 teaspoon garlic powder — optional; an easy way to add savory depth without fresh garlic.
- 1/4 teaspoon onion powder — optional; rounds the flavor without extra prep.
- A pinch of dried rosemary — optional; use sparingly to avoid overpowering the potatoes.
- Fresh parsley — chopped, for garnish; adds a bright finish and color.
Cook Sliced Potatoes In Oven Like This
- Preheat oven to 450°F. Line a baking sheet with parchment paper.
- Pat the 2 large russet potatoes dry with paper towels. Using a sharp knife or mandoline, slice the potatoes into about 1/4-inch-thick rounds.
- Put the potato slices into a large bowl. Add 2 1/2 tablespoons olive oil, 1/4 teaspoon salt, 1/4 teaspoon ground black pepper, 1/2 teaspoon garlic powder (optional), 1/4 teaspoon onion powder (optional), and a pinch of dried rosemary (optional). Toss gently until all slices are evenly coated.
- Arrange the slices in a single layer on the prepared baking sheet, leaving small gaps between slices and avoiding overlap.
- Bake at 450°F for 20–30 minutes, turning the slices once halfway through baking (about 10–15 minutes), until edges are golden and crisp and centers are tender.
- Remove from oven, taste, and add more salt if desired.
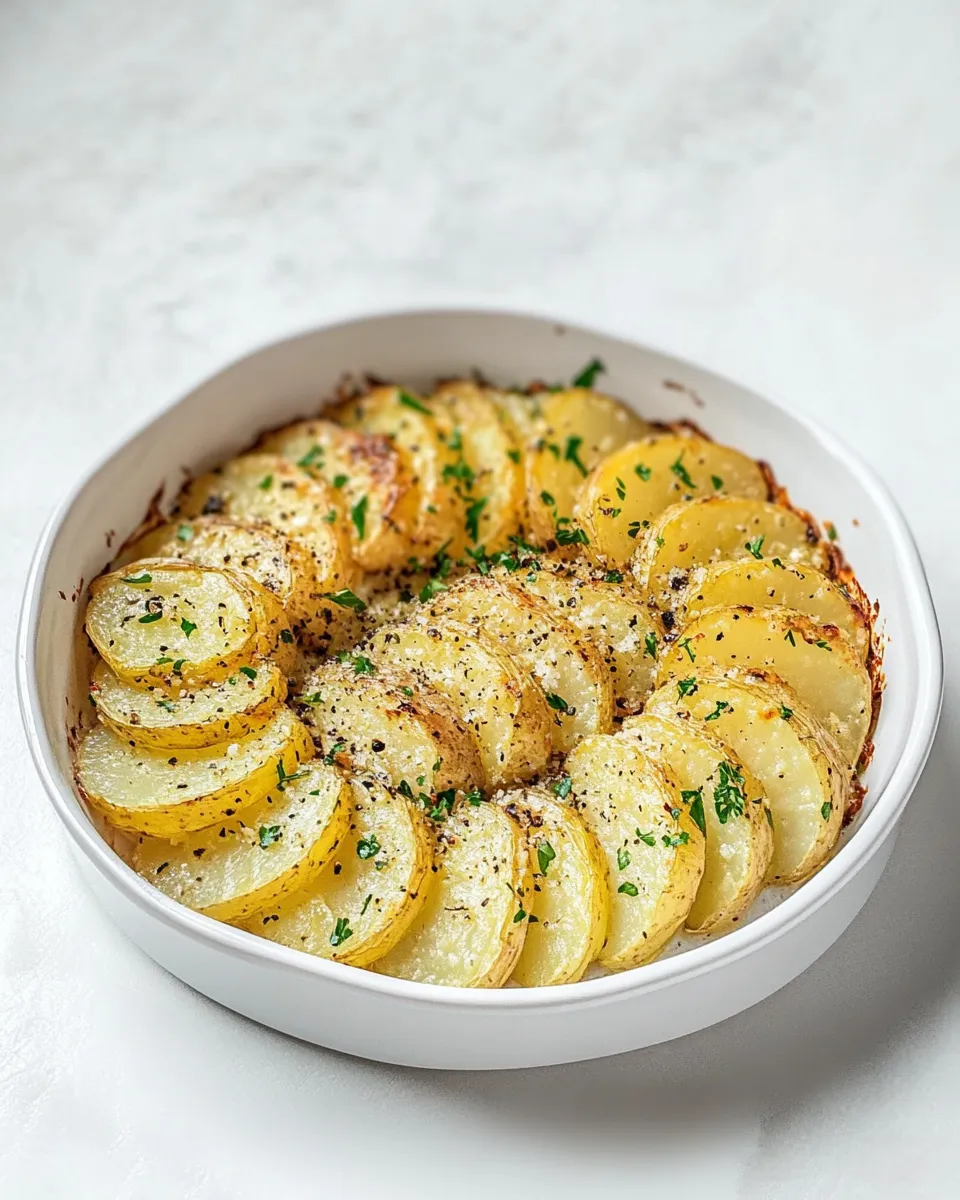
- Garnish with chopped fresh parsley and serve.
Why This Recipe is a Keeper
This recipe checks several boxes. It uses inexpensive, long-keeping ingredients and gives consistent results with minimal effort. The high oven temperature creates Maillard browning quickly, so you get crisp, flavorful edges without drying out the centers. Because the method is so simple, it’s easy to customize for whatever you’re serving: dial the seasonings toward herbs and lemon for fish, or toward smoked paprika and cumin for a heartier roast.
It’s also forgiving. If your slices vary a little in thickness, turning halfway through helps equalize the finish. And because the bake time is a range (20–30 minutes), you can watch and stop when the texture suits your taste. Lastly, it’s a weeknight hero that doubles as a show-off side when guests arrive.
Substitutions by Category

- Potatoes: Yukon Golds or red potatoes can be used if you prefer a creamier, less floury interior. They’ll brown well but may be slightly waxier.
- Oils: Swap olive oil for avocado oil or neutral vegetable oil if you want a higher smoke point or milder flavor; use the same amount.
- Salt & Pepper: Kosher salt can replace table salt — use about 1.5 times the volume of table salt if measuring by the same teaspoon. Adjust to taste rather than strict conversion.
- Flavorings: Fresh garlic (minced) can replace garlic powder — add it in the last 5–10 minutes of baking to avoid burning. Fresh herbs (rosemary, thyme) can be used instead of dried; add them whole or chopped before baking.
- Herb alternatives: Swap parsley garnish for chives, dill, or a squeeze of lemon for brightness.
Equipment & Tools
- Baking sheet — a rimmed half-sheet works best to catch any oil and to allow even heat circulation.
- Parchment paper — keeps potatoes from sticking and eases cleanup.
- Sharp knife or mandoline — for consistent 1/4-inch slices; a mandoline speeds the job and produces even slices, but use the guard.
- Large mixing bowl — to toss slices with oil and spices so they’re evenly coated.
- Spatula or tongs — for turning slices halfway through baking.
Avoid These Traps
- Overlapping slices: Crowding the pan steams the potatoes instead of roasting them. Keep a single layer with small gaps so hot air reaches edges.
- Soggy exterior: Not drying washed potatoes well enough leaves surface moisture that inhibits browning. Pat them thoroughly with paper towels before slicing or after slicing if needed.
- Slices too thick or too thin: If slices are thicker than 1/4 inch, the center will take longer and may stay firm; if much thinner, they’ll crisp fast and could burn. Aim for about 1/4 inch for reliable results.
- Too low heat: Oven temperatures under 450°F won’t produce the same quick browning; bake time will increase and texture will change.
- Burnt spices: If using fresh minced garlic at the start, it can burn and taste bitter. If using fresh garlic, add it toward the end of the bake.
Fresh Takes Through the Year
Seasonal tweaks brighten this basic recipe. In spring and summer, fold in fresh herbs like chives, tarragon, or basil right after the potatoes come out of the oven. A light squeeze of lemon or a dusting of grated hard cheese (Parmesan or Pecorino) while hot adds a fresh finish.
In fall and winter, use heartier flavors: sprinkle smoked paprika, ground cumin, or a touch of chili powder into the oil mix before roasting. Finish with chopped roasted garlic or a drizzle of browned butter for a cozy, richer touch.
Author’s Commentary
I keep this recipe in my rotation because it’s the kind of side that’s both dependable and adaptable. I often double it for a crowd, spreading the slices across two baking sheets so they brown rather than steam. When I’m short on time, I’ll thicken the slices slightly, roast at the higher end of the time range, and call it a quick roasted side. When entertaining, I let guests choose toppings: grated cheese, lemon zest, a dollop of sour cream, or chopped herbs—everyone gets exactly what they want.
One small personal note: I almost always use the garlic and onion powders because they distribute evenly and I don’t have to worry about burning fresh aromatics. If you prefer fresh flavors, though, add minced shallot or garlic in the last 5–7 minutes of baking.
Refrigerate, Freeze, Reheat
Refrigerate leftover roasted slices in an airtight container for up to 3–4 days. For best texture, re-crisp them in a hot oven (400–425°F) on a sheet pan for 8–12 minutes or in a preheated skillet over medium-high heat for a few minutes per side.
Freezing is possible but not ideal for maintaining crispness. If you must freeze, flash-freeze slices in a single layer on a sheet, transfer to a freezer-safe bag, and keep up to 1 month. Reheat from frozen in a hot oven (425°F) for 15–20 minutes, turning once, until heated through and edges re-crisp.
Helpful Q&A
- Do I need to peel the potatoes? No, peeling is optional. Russets have a relatively thin skin that crisps nicely and adds texture. If you prefer peeled potatoes, go ahead — the method is the same.
- Can I make these ahead? Yes. Roast them, store in the fridge, and reheat as described above. For best results re-crisp in the oven or skillet just before serving.
- How do I get them extra-crispy? Make sure slices are dry, use a hot oven (450°F), don’t overcrowd the pan, and flip once halfway through. A light dusting of fine cornmeal or a brief spray of oil on the baking sheet can add extra crunch.
- Is a mandoline necessary? No. A sharp knife works perfectly; a mandoline helps with speed and uniformity but requires caution and a guard for safety.
- Why russet potatoes? They have a high starch content that flakes and crisps well. If you want a waxier bite, choose Yukon Gold or red potatoes instead.
Bring It to the Table
These potatoes pair beautifully with a roast chicken, pan-seared fish, grilled steak, or a simple salad for a lighter meal. For a casual spread, plate them in a shallow bowl or on a platter, scatter chopped fresh parsley over the top, and offer lemon wedges, hot sauce, or a bowl of sour cream or plain yogurt for dipping.
When serving to company, I arrange slices in overlapping rows on a warm platter and sprinkle a final pinch of flaky sea salt right before passing. The contrast of the golden edges, the flecks of green parsley, and the steam coming off the warm potatoes is always a crowd-pleaser.
Sliced Potatoes In Oven
Ingredients
Ingredients
- 2 large russet potatoeswashed
- 2 1/2 tablespoonsolive oil
- 1/4 teaspoonsaltplus more to taste
- 1/4 teaspoonground black pepper
- 1/2 teaspoongarlic powderoptional
- 1/4 teaspoononion powderoptional
- A pinch of dried rosemaryoptional
- Fresh parsleychopped for garnish
Instructions
Instructions
- Preheat oven to 450°F. Line a baking sheet with parchment paper.
- Pat the 2 large russet potatoes dry with paper towels. Using a sharp knife or mandoline, slice the potatoes into about 1/4-inch-thick rounds.
- Put the potato slices into a large bowl. Add 2 1/2 tablespoons olive oil, 1/4 teaspoon salt, 1/4 teaspoon ground black pepper, 1/2 teaspoon garlic powder (optional), 1/4 teaspoon onion powder (optional), and a pinch of dried rosemary (optional). Toss gently until all slices are evenly coated.
- Arrange the slices in a single layer on the prepared baking sheet, leaving small gaps between slices and avoiding overlap.
- Bake at 450°F for 20–30 minutes, turning the slices once halfway through baking (about 10–15 minutes), until edges are golden and crisp and centers are tender.
- Remove from oven, taste, and add more salt if desired.
- Garnish with chopped fresh parsley and serve.
Equipment
- Oven
- Baking Sheet
- Parchment Paper
- Large Bowl
- knife or mandoline
- Tongs or spatula


