
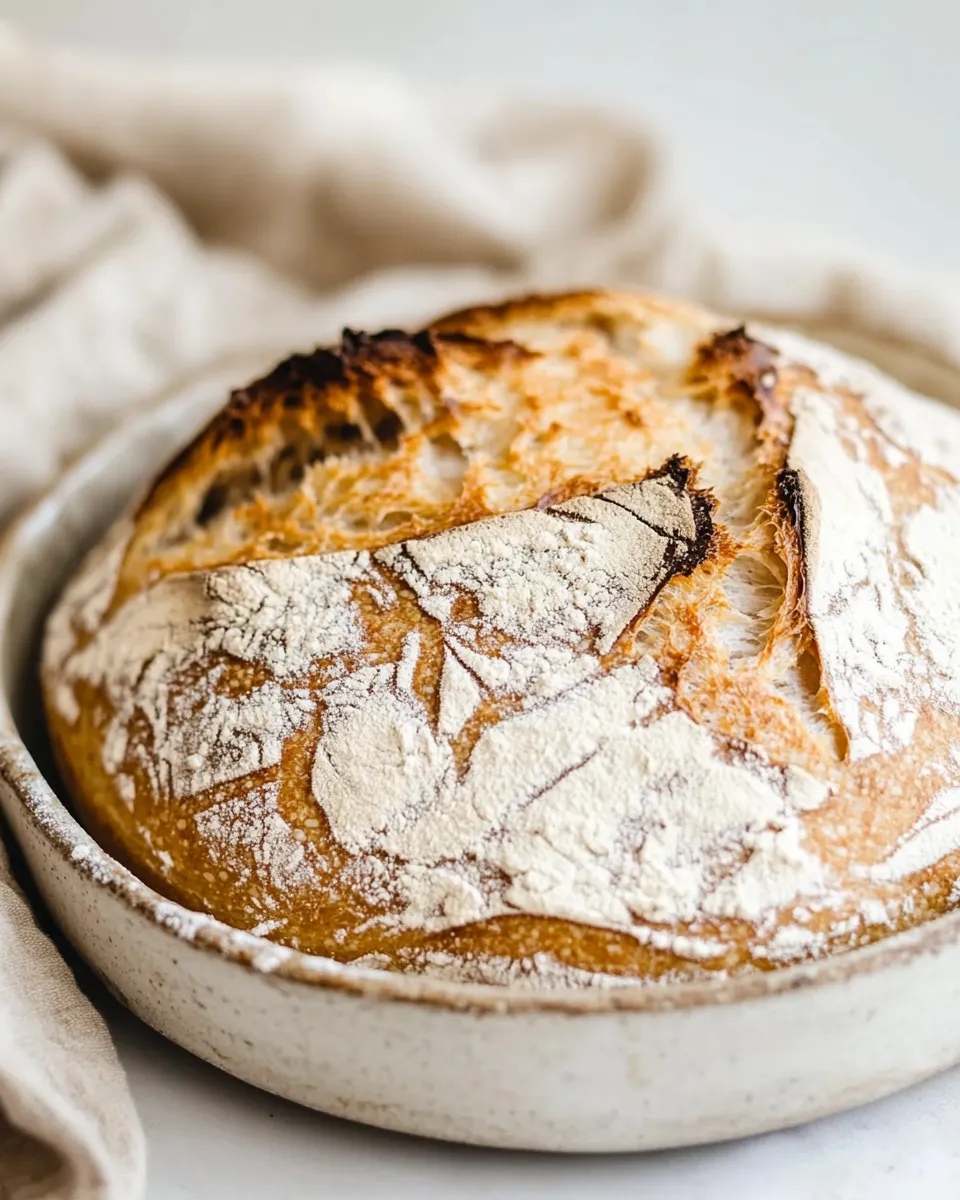
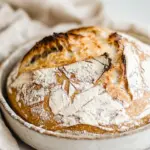
This sourdough is the kind of loaf I bake when I want a reliable, crusty bread that rewards patience. It asks for time rather than fuss: a handful of ingredients, stretch-and-folds, and a long bulk ferment. The result is a deep-flavored crumb with a crackly crust that holds up to anything from butter to bold stews.
I’ve written this recipe to be straightforward and practical. Follow the steps in order, respect the timings as a guide, and use the thermometer check at the end rather than guessing doneness. There’s room to adapt based on your starter strength and kitchen temperature; I’ll point out where to slow down or speed up.
If you’re new to sourdough, this is a forgiving method: no complex laminations, no scoring artistry required to get a good rise. If you’ve baked many loaves, you’ll still find this method crisp, dependable, and easy to repeat. Read through the full guide, then set aside a day or an evening—the payoff is worth it.
Ingredient Rundown
Ingredients
- 1/3 cup sourdough starter (90 grams) — active starter provides the lift and flavor; feed 4–12 hours before use so it’s bubbly.
- 1 ½ cups water (346 grams) — hydrates the flour; temperature will affect fermentation speed.
- 3 ½ cups bread flour (520 grams) — gives structure and a good gluten framework for oven spring.
- 2 teaspoons salt — strengthens gluten and balances flavor; add after initial mixing.
Sourdough Bread: Step-by-Step Guide
- In a large bowl, mix 1/3 cup sourdough starter (90 g) and 1 1/2 cups water (346 g) with a fork until combined.
- Add 3 1/2 cups bread flour (520 g) and 2 teaspoons salt to the bowl. Mix with a spoon or your hands until a shaggy dough forms. You may need to use your hands to fully incorporate the flour.
- Cover the bowl with a damp cloth and let the dough rest for 30 minutes.
- Perform the first set of stretch-and-folds: with wet or lightly floured hands, reach under one side of the dough, gently stretch it upward and fold it over the top. Give the bowl a quarter turn and repeat three more times (four folds total per set).
- Cover the dough and rest 15–30 minutes. Repeat step 4 for a total of 3–4 sets (i.e., 3–4 rounds of four stretch-and-folds), covering and resting 15–30 minutes between each set.
- After the final set, cover the bowl and allow the dough to bulk ferment on the countertop for 7–10 hours, or refrigerate for up to 24 hours for slower fermentation. The dough should increase by about 50% (timing will vary with kitchen temperature).
- Lightly flour a work surface. Turn the dough out gently onto the surface and form it into a round by folding each side toward the center (stretch the top side up and fold into the center, rotate, and repeat until all sides are folded). Use a bench scraper or your hands to create surface tension by gently pushing and pulling the dough—only enough to tighten the round.
- Place a sheet of parchment in a bowl (or proofing basket) and dust the parchment lightly with flour. Place the shaped dough seam-side down on the parchment, cover, and refrigerate for 1 hour while you preheat the oven.
- Place your Dutch oven with its lid in the oven and preheat to 500°F. Allow the Dutch oven to heat for 50–60 minutes while the dough rests in the fridge.
- When ready to bake, remove the dough from the fridge. Using a sharp knife or razor blade, score the top of the dough at a 35–40° angle to about 1/2 inch deep.
- Carefully use the parchment as a sling to transfer the dough into the preheated Dutch oven. Immediately reduce the oven temperature to 450°F, cover the Dutch oven, and bake for 20 minutes.
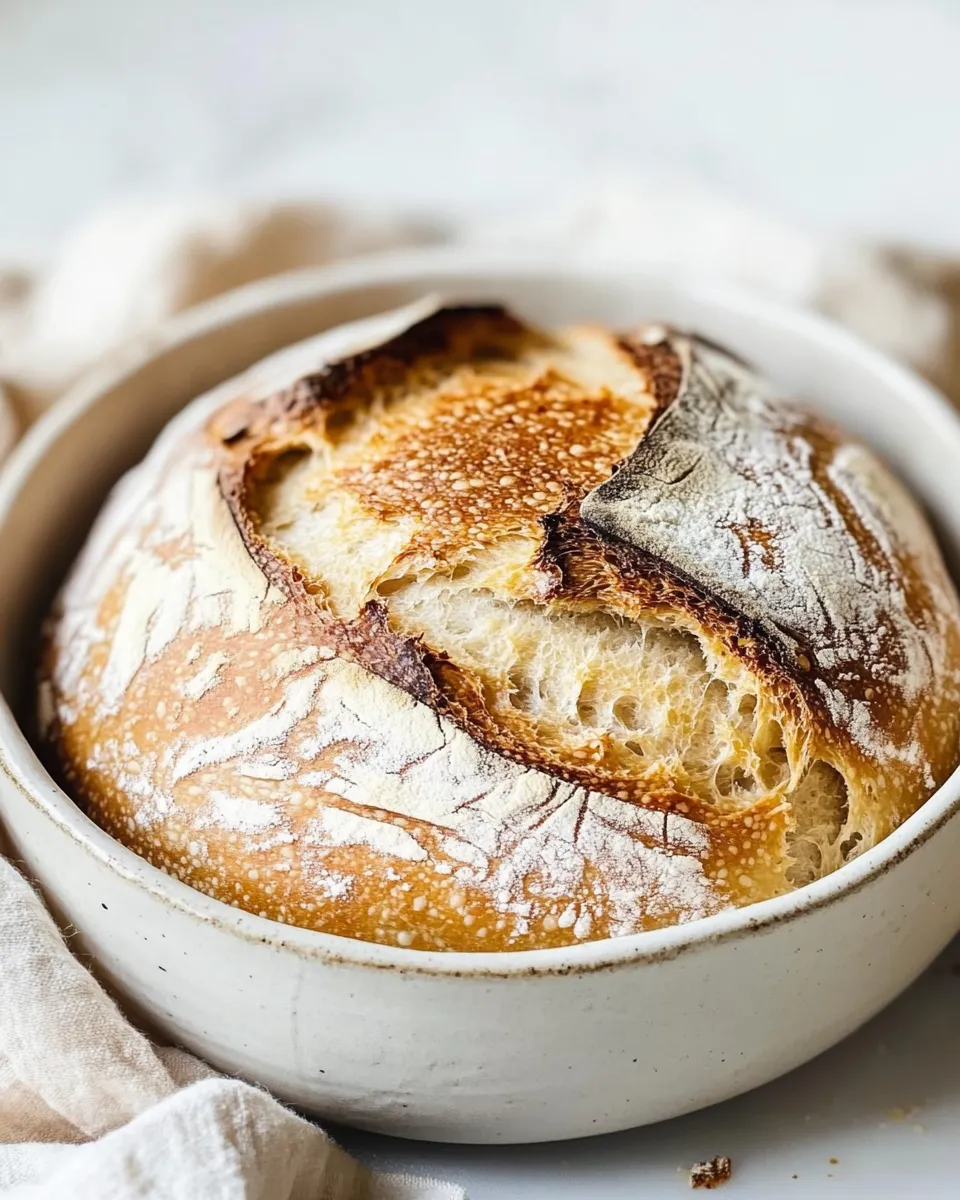
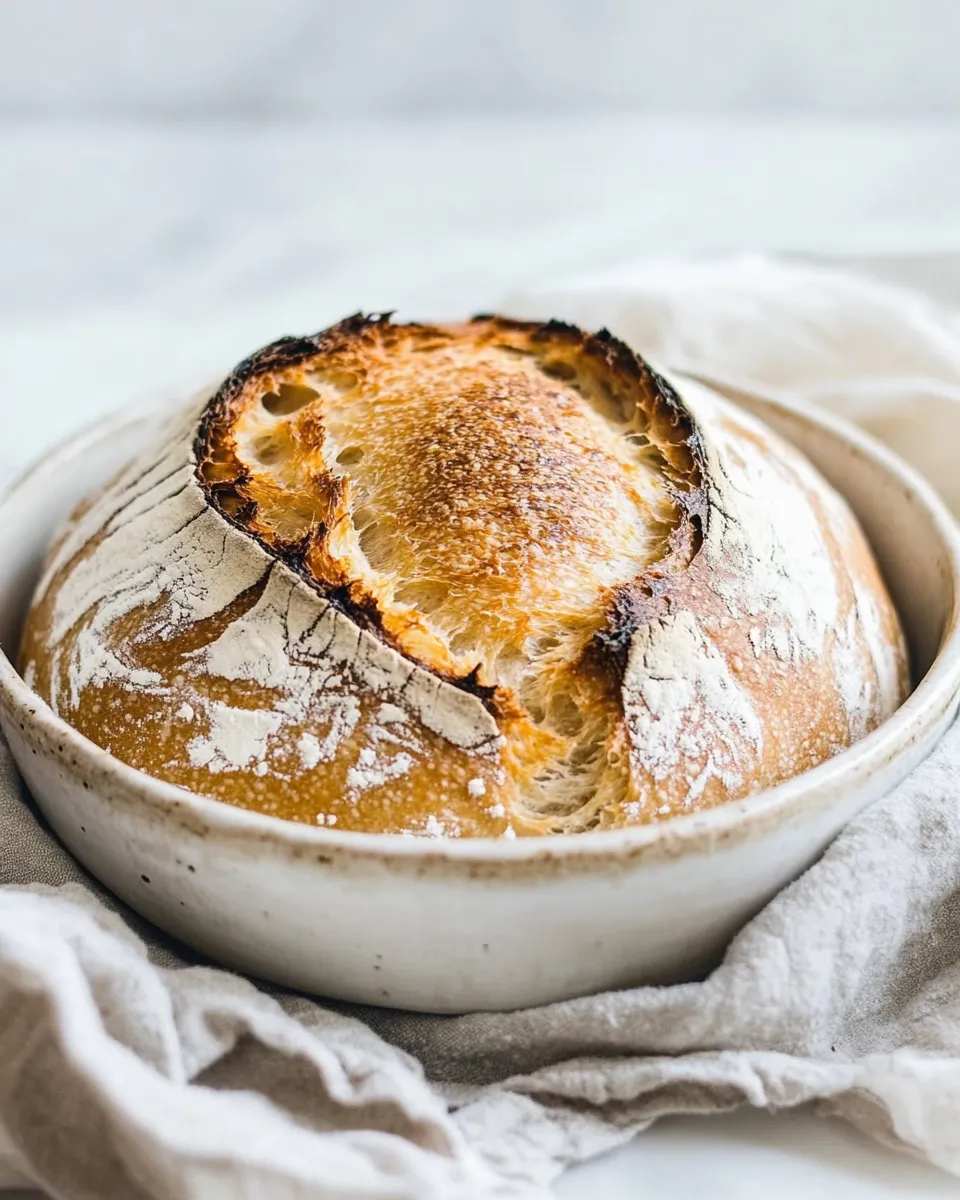
- After 20 minutes, remove the lid and continue baking for another 20–25 minutes, until the crust is a deep golden brown and the internal temperature registers 205°–210°F.
- Remove the bread from the Dutch oven and cool on a cooling rack for at least 1 hour before slicing.
Why This Recipe Is Reliable
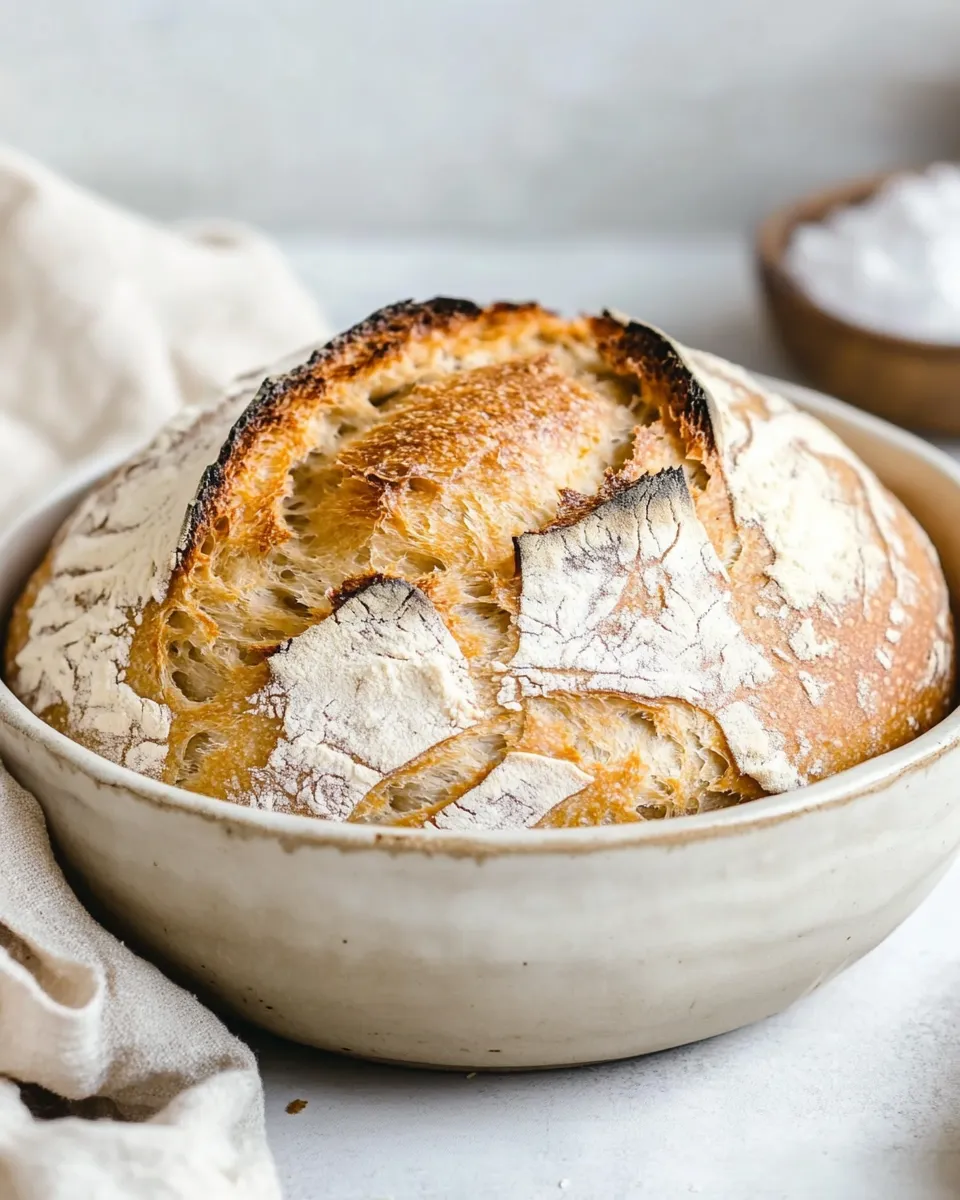
This method leans on fundamentals that produce consistent results: a measured hydration, controlled stretch-and-folds, a long bulk ferment, and the steam environment from a preheated Dutch oven. The starter-to-flour ratio creates a dough that’s workable yet open enough to develop irregular crumb, and the salt is added early enough to strengthen gluten without slowing initial enzyme activity too much.
The technique of resting the dough in the fridge before baking tightens gluten and makes scoring and transferring easier. Preheating the Dutch oven for nearly an hour ensures a hot chamber that mimics professional steam-injected ovens, which gives predictable oven spring and a glossy, bronzed crust.
Quick Replacement Ideas
- If you don’t have a Dutch oven, use any heavy lidded pot that can withstand oven heat; a cast-iron pot or heavy stainless pot will work. Add a small pan of boiling water to the oven for extra steam if needed.
- If your starter is less active, extend the bulk ferment time at room temperature or favor the overnight refrigeration to develop flavor while controlling rise.
- If bread flour isn’t available, you can try all-purpose flour, but expect a slightly softer crust and a different crumb structure; allow a little extra handling to build strength.
Gear Checklist
- Large mixing bowl — roomy enough for bulk fermentation and folds.
- Bench scraper — for folding and transferring the dough.
- Kitchen scale — critical for consistent results when measuring starter, water, and flour.
- Dutch oven with lid, oven-safe heavy pot, or cloche — for steam-retaining bake.
- Parchment paper — makes transferring the loaf simple and safe.
- Sharp knife or razor blade (lame) — for scoring the dough cleanly.
- Cooling rack and instant-read thermometer — for checking internal temperature and proper cooling.
Missteps & Fixes
Underproofed dough
- Symptom: Dense crumb, limited oven spring. Fix: Give more bulk ferment time at room temperature or allow longer final proof before refrigerating. Look for a roughly 50% volume increase as your cue.
Overproofed dough
- Symptom: Flat loaf with large, collapsed bubbles. Fix: Bake immediately if you notice collapse, or reshape and give a short second rise if structure remains. Next time, shorten the bulk ferment or chill sooner.
Pale or soft crust
- Symptom: Crust lacks color or crunch. Fix: Ensure you fully preheated the Dutch oven to 500°F and baked uncovered long enough at the end. Check oven accuracy with an oven thermometer.
Better Choices & Swaps
- Choose a mature, bubbly starter for best oven spring; feed it so it peaks near use. A sluggish starter will slow fermentation and reduce rise.
- Opt for bread flour if you want more chew and structure; the higher protein supports loft and open crumb.
- When in doubt about timing, favor cooler temperatures: refrigerate for a slow ferment rather than risking overproofing at a warm room temperature.
Cook’s Commentary
I return to this method because it balances predictability and character. The stretch-and-fold rhythm is almost meditative, and it takes the guesswork out of kneading. My kitchen is rarely exactly the same temperature from one week to the next, so I treat timings as ranges and watch dough behavior instead of the clock. That 1-hour chill while the Dutch oven preheats is a tiny trick that makes the final transfer less frantic and reduces the chance of degassing the loaf.
Scoring at a 35–40° angle gives a clean ear without tearing the dough too deeply. I aim for a half-inch depth and a confident, single stroke. If your scores fuse, the dough may be too cold—let it sit out a few minutes before scoring—if they blow out, the dough was probably underproofed or had weaker surface tension.
Leftovers & Meal Prep
Cool the loaf completely before storing to avoid a gummy crumb. Keep at room temperature in a breathable bag or wrapped in a kitchen towel for 2–3 days. For longer storage, slice and freeze in an airtight bag; toast slices straight from the freezer or thaw at room temperature.
Stale slices make excellent croutons, breadcrumbs, or a base for panzanella. Recrisp slices on a sheet tray in a 350°F oven for 5–10 minutes if you want fresh texture without toasting.
Common Qs About Sourdough Bread
Q: How do I know if my starter is ready?
A: Use a starter that’s bubbly and has risen after feeding. It should pass the float test (a spoonful floats) or be near its peak activity—both are reliable indicators.
Q: Can I bake without preheating the Dutch oven for 50–60 minutes?
A: You can, but the intense initial heat from a fully preheated Dutch oven gives better oven spring and crust. Shortening preheat time may yield a slower rise and paler crust.
Q: Why is the internal temperature target 205°–210°F?
A: That range ensures the crumb is fully set and the loaf is baked through without being overly dry. Use an instant-read thermometer for accuracy.
Q: Can I shorten the bulk ferment?
A: Shortening will affect flavor and texture; a cooler bulk ferment will slow activity without sacrificing taste. If time is tight, expect a denser crumb and less developed sour notes.
In Closing
This Sourdough Bread method rewards patience and attention to dough feel more than precision in minutes. Keep your starter active, watch dough behavior, and use the oven and thermometer cues the recipe provides. With a few loaves, you’ll learn how your kitchen temperature and starter strength influence timing, and you’ll start dialing the method to suit your schedule and taste.
Bake intentionally: set aside a chunk of time, prepare your tools, and enjoy the process. The first slice is worth every minute of waiting.
Sourdough Bread
Ingredients
Ingredients
- 1/3 cupSourdough starter 90 grams
- 1 1/2 cupswater 346 grams
- 2 teaspoonssalt
- 3 1/2 cupsbread flour 520 grams
Instructions
Instructions
- In a large bowl, mix 1/3 cup sourdough starter (90 g) and 1 1/2 cups water (346 g) with a fork until combined.
- Add 3 1/2 cups bread flour (520 g) and 2 teaspoons salt to the bowl. Mix with a spoon or your hands until a shaggy dough forms. You may need to use your hands to fully incorporate the flour.
- Cover the bowl with a damp cloth and let the dough rest for 30 minutes.
- Perform the first set of stretch-and-folds: with wet or lightly floured hands, reach under one side of the dough, gently stretch it upward and fold it over the top. Give the bowl a quarter turn and repeat three more times (four folds total per set).
- Cover the dough and rest 15–30 minutes. Repeat step 4 for a total of 3–4 sets (i.e., 3–4 rounds of four stretch-and-folds), covering and resting 15–30 minutes between each set.
- After the final set, cover the bowl and allow the dough to bulk ferment on the countertop for 7–10 hours, or refrigerate for up to 24 hours for slower fermentation. The dough should increase by about 50% (timing will vary with kitchen temperature).
- Lightly flour a work surface. Turn the dough out gently onto the surface and form it into a round by folding each side toward the center (stretch the top side up and fold into the center, rotate, and repeat until all sides are folded). Use a bench scraper or your hands to create surface tension by gently pushing and pulling the dough—only enough to tighten the round.
- Place a sheet of parchment in a bowl (or proofing basket) and dust the parchment lightly with flour. Place the shaped dough seam-side down on the parchment, cover, and refrigerate for 1 hour while you preheat the oven.
- Place your Dutch oven with its lid in the oven and preheat to 500°F. Allow the Dutch oven to heat for 50–60 minutes while the dough rests in the fridge.
- When ready to bake, remove the dough from the fridge. Using a sharp knife or razor blade, score the top of the dough at a 35–40° angle to about 1/2 inch deep.
- Carefully use the parchment as a sling to transfer the dough into the preheated Dutch oven. Immediately reduce the oven temperature to 450°F, cover the Dutch oven, and bake for 20 minutes.
- After 20 minutes, remove the lid and continue baking for another 20–25 minutes, until the crust is a deep golden brown and the internal temperature registers 205°–210°F.
- Remove the bread from the Dutch oven and cool on a cooling rack for at least 1 hour before slicing.
Equipment
- Large Bowl
- Bench scraper
- parchment
- proofing basket (optional)
- Dutch Oven
- sharp knife or razor blade
- Cooling rack
Notes
I


