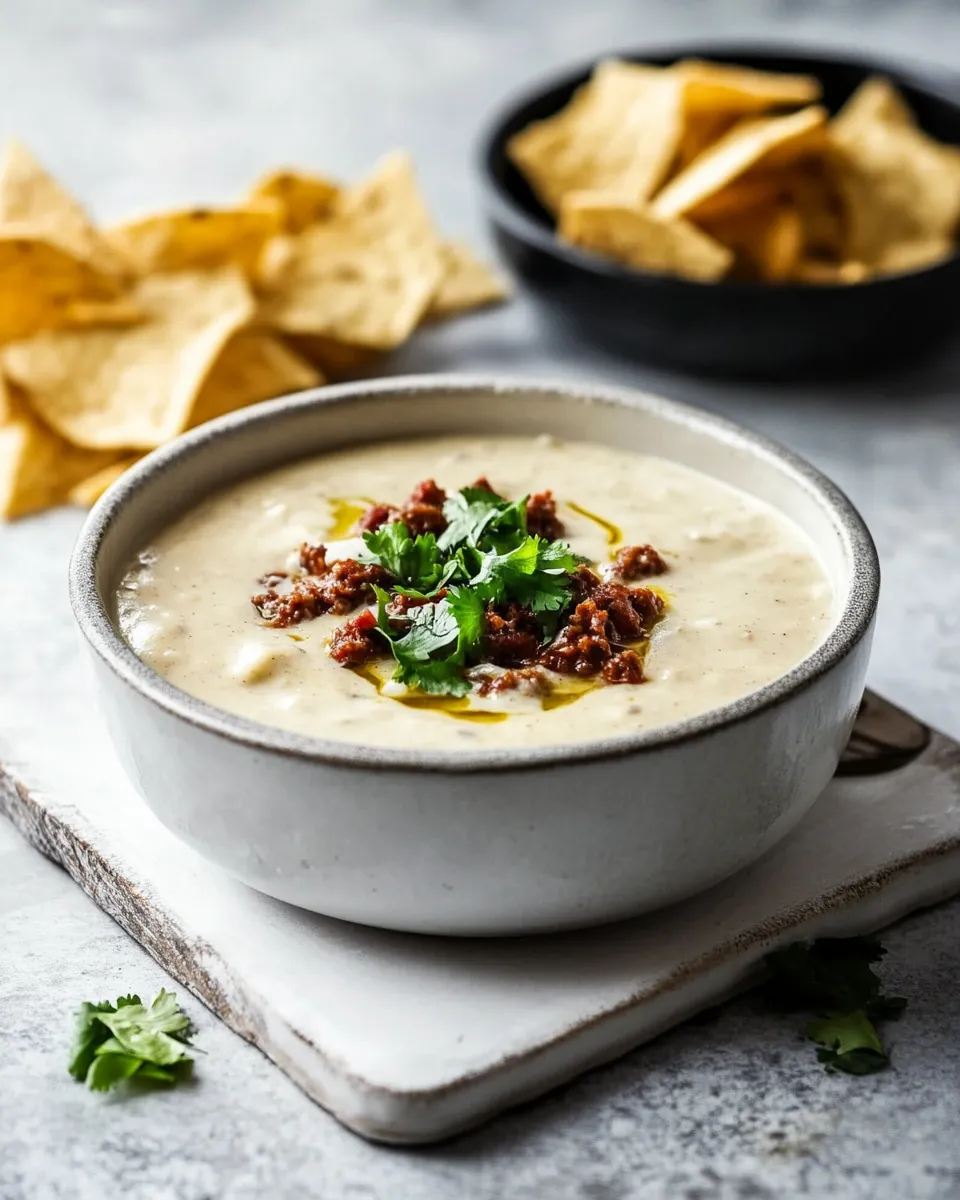
This Spicy Chorizo Queso Dip is the kind of party starter that disappears faster than you can refill the chip bowl. It’s loud, cheesy, and unapologetically meaty — thanks to the rich, fennel-tinged bite of raw chorizo that crisps up in the pan. I like it for game days, casual gatherings, or any night when you want something satisfying with minimal fuss.
It’s built on a simple, stable cheese sauce: evaporated milk, a splash of whole milk, and grated queso blanco or white American cheese. Low heat and patient whisking keep the sauce smooth so the final dip stays creamy instead of oily. A little green chile and pickled jalapeño add brightness and a sharp vinegary lift.
Below you’ll find a clear shopping list, straightforward steps you can follow verbatim, troubleshooting tips, and serving ideas. If you’re bringing this to a crowd, prep notes and storage guidance are included so nothing goes cold or clumpy. Let’s make a dip everyone will ask for again.
Ingredients
- 6 ounces raw chorizo — the star protein; cooks down and crisps for texture and spicy, savory flavor.
- 8 ounces queso blanco or white american cheese, grated — the melting cheese that forms the creamy base; use the specified cheese for the intended texture.
- 1 small (5 oz) can evaporated milk — concentrates dairy richness and helps stabilize the sauce without thinning it too much.
- 1/4 cup whole milk — used with evaporated milk to adjust sauce consistency; keeps the dip silky.
- 2 tablespoons diced green chiles — adds gentle heat and a vegetal note; drain if very wet.
- 1 tablespoon chopped pickled jalapenos, or more to taste — brings acidity and a pickled kick; reserve some for topping if you like extra zip.
- cilantro, for topping — fresh herb to brighten the finished dip; chop coarsely.
- tortilla chips, for serving — the classic vehicle; sturdy chips work best for dipping into a hot, cheesy skillet.
What to Buy
Stick to the ingredient list above. Buy fresh raw chorizo from a reliable butcher or supermarket brand you trust — it should be bright in color and packed fairly tightly in its casing or chub. For the cheese, queso blanco or white American gives the right texture and neutral flavor that lets the chorizo shine. If your store sells grated cheese, that’s fine; otherwise grate a block for best melt behavior.
Grab a small can of evaporated milk rather than trying to reduce fresh milk; that concentrated canned milk is part of what helps the sauce stay smooth at low heat. Pickled jalapeños are sold jarred; use the brine-drained jalapeños and reserve a little for garnish if you want an eye-catching pop on top.
Make Spicy Chorizo Queso Dip: A Simple Method
- Heat a large skillet over medium-high heat. Add the chorizo and cook, breaking it into smaller pieces with a spoon, until browned and slightly crispy, about 10 to 15 minutes.
- Use a slotted spoon to transfer the cooked chorizo to a paper-towel–lined plate; set aside and reserve a spoonful or two for topping.
- Wipe out the skillet and return it to low heat. Pour in the evaporated milk (5 oz can) and the whole milk (1/4 cup) and warm until the mixture just begins to steam (do not boil).
- Gradually add the grated queso blanco or white American cheese (8 oz), a handful at a time, stirring or whisking gently over low heat until each addition is fully melted and the sauce is smooth. Keep the heat low to avoid the sauce separating.
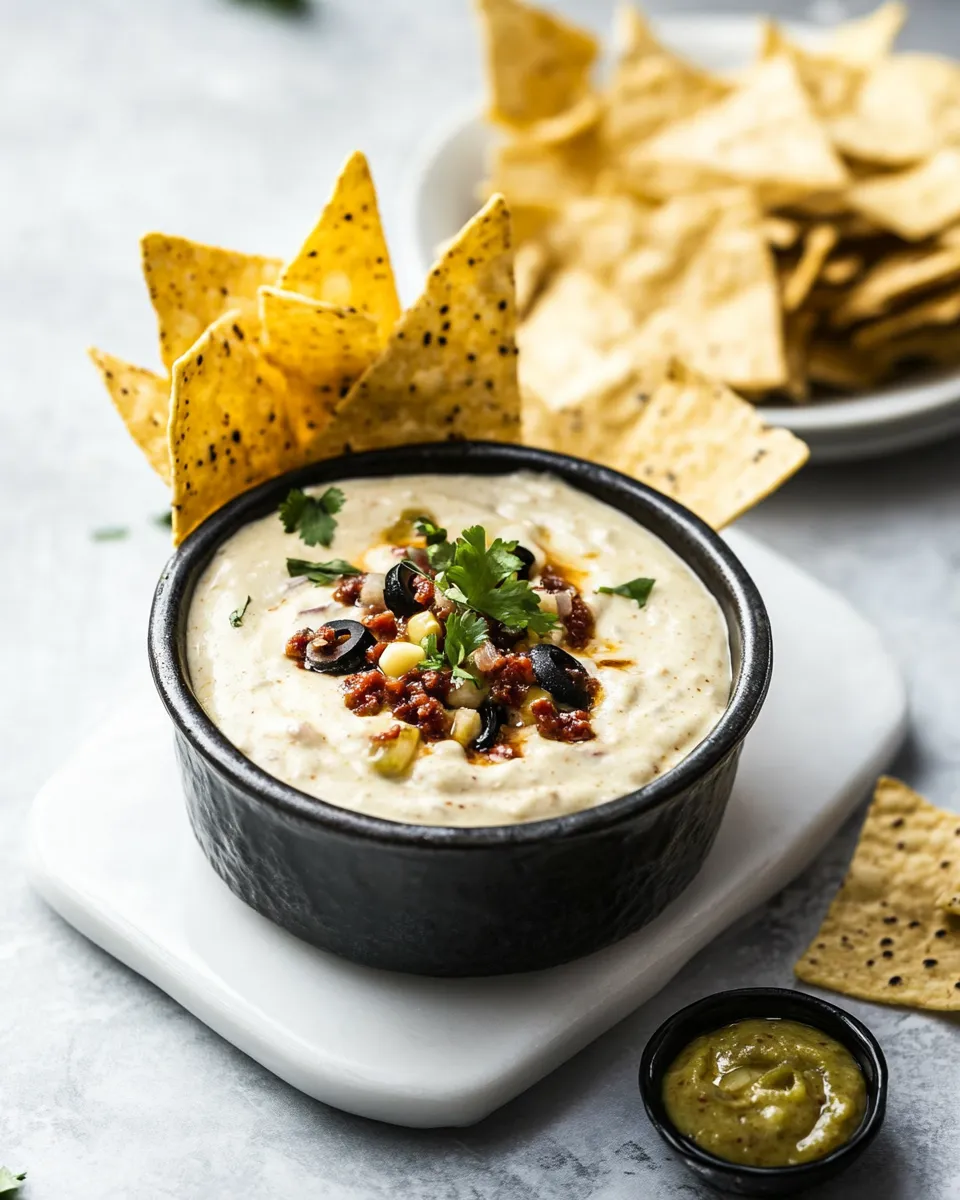
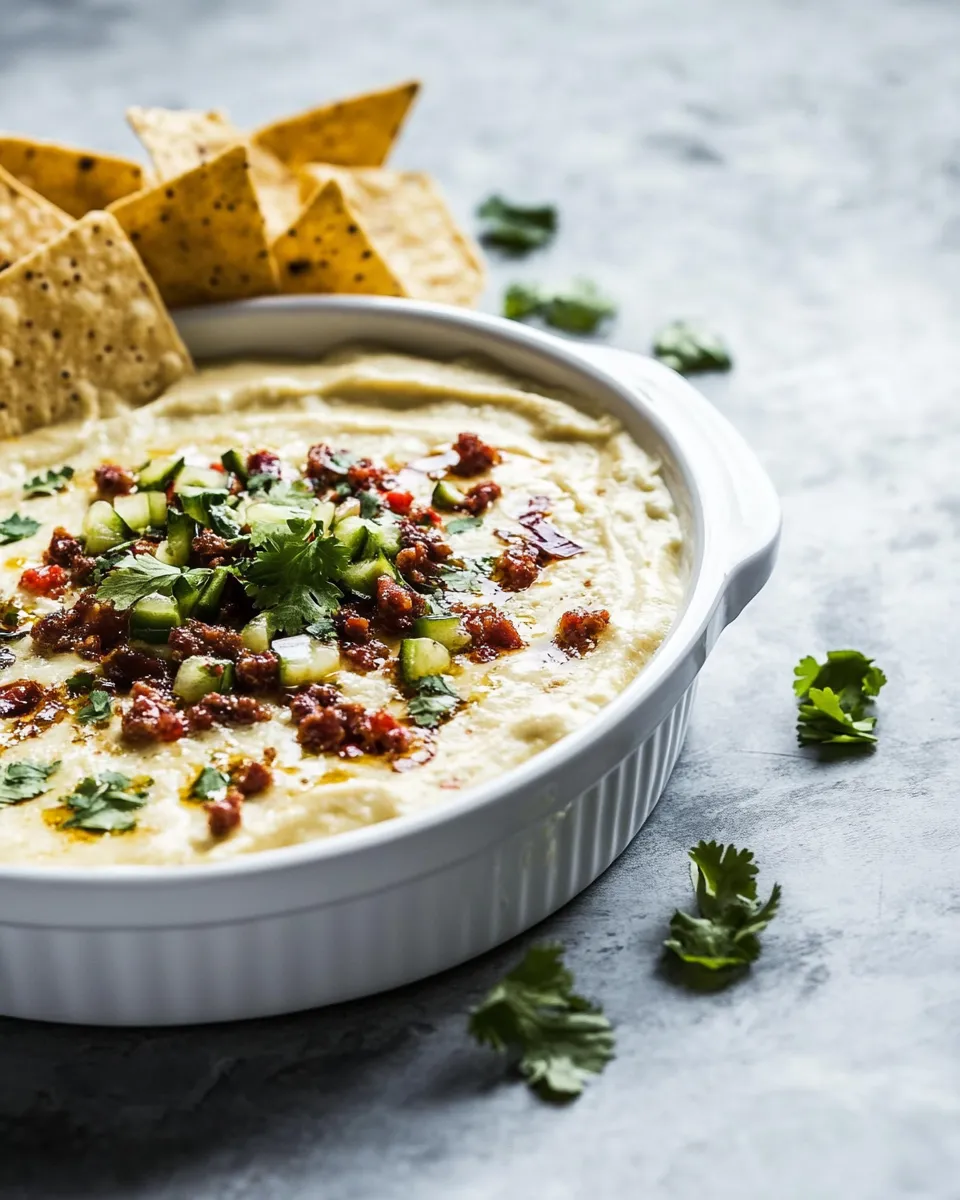
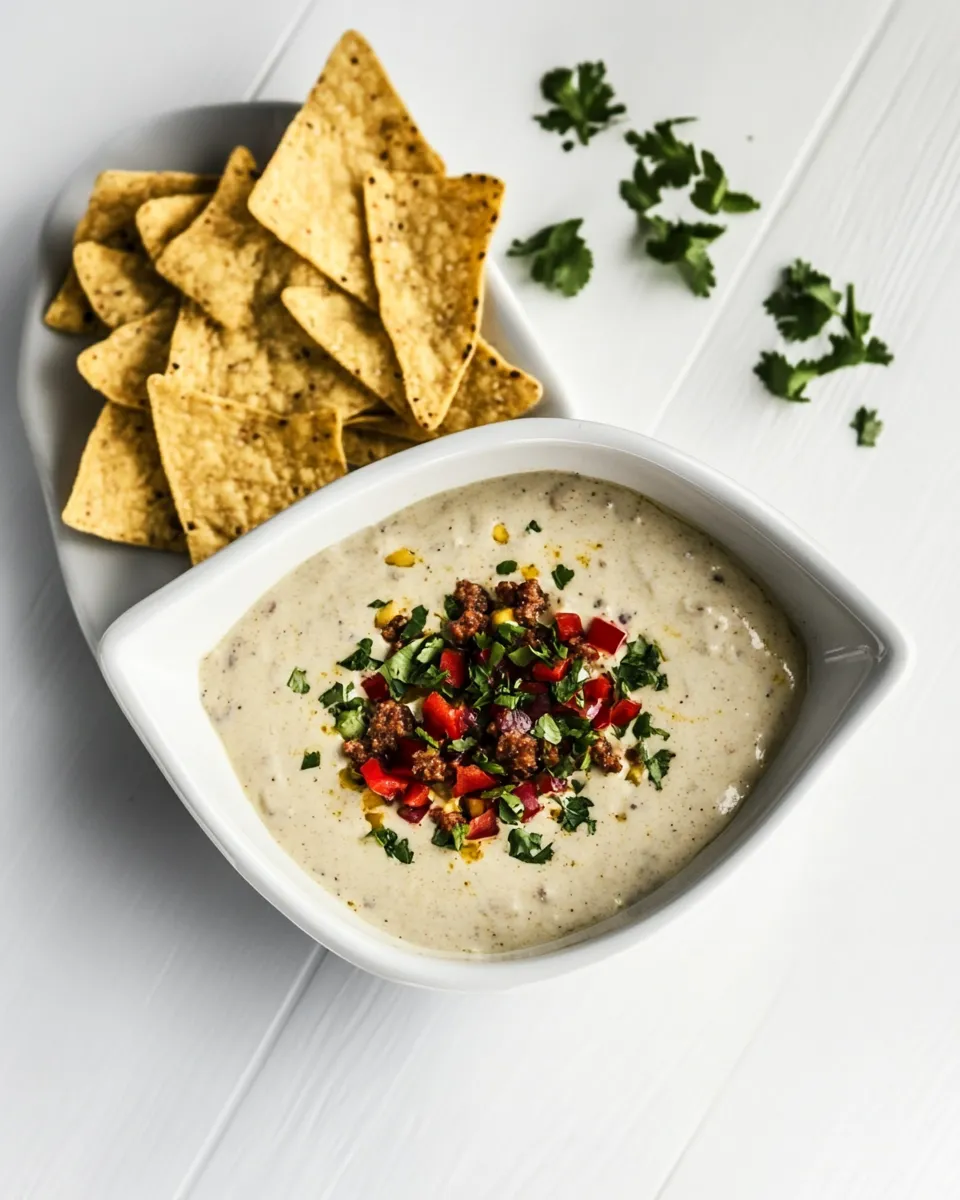
- Stir the diced green chiles (2 tablespoons) and the chopped pickled jalapenos (1 tablespoon) into the cheese sauce, then fold in most of the cooked chorizo, keeping the reserved spoonfuls for topping.
- Pour the queso into a warm serving dish (if you like, you can preheat a 6-inch cast-iron skillet in the oven for about 15 minutes to help the queso stay warm longer).
- Top the queso with the reserved chorizo, additional chopped pickled jalapenos if desired, and cilantro. Serve warm with tortilla chips.
- To make ahead: refrigerate cooled queso in an airtight container for up to one day. Reheat over low heat on the stovetop, stirring until smooth, or in the microwave in 30-second intervals, stirring between intervals, until fully warmed.
The Upside of Spicy Chorizo Queso Dip
This dip wins on flavor and speed. The chorizo contributes a concentrated, seasoned meatiness that elevates plain queso to an unapologetically savory crowd-pleaser. Because the sauce relies on evaporated milk and controlled low-heat melting, it stays stable and glossy instead of separating into greasy puddles.
It’s also very forgiving: if you want it hotter, add more pickled jalapeños; if you prefer a milder profile, omit the jalapeño and keep the green chiles. The structure of the recipe scales well for a larger skillet or warming pot, so it’s easy to make for small groups or big parties with minimal changes.
Texture-Safe Substitutions
If you need to swap something, prioritize similar melting behavior and moisture levels.
Cheese options
Queso blanco or white American is specified because they melt smoothly. If you must substitute, use a mild, high-moisture melting cheese—avoid dry, crumbly cheeses. Expect slight changes in tang or salt if you choose a replacement.
Chorizo options
If raw chorizo isn’t available, you can use another strongly seasoned raw sausage as long as you drain excess fat and crisp it up; the flavor profile will differ but the approach remains the same. Pre-cooked chorizo can work but won’t render the same fat and sear.
Milk alternatives
Evaporated milk is part of the sauce’s backbone. If you don’t have it, you can reduce whole milk on the stove to concentrate it slightly, but exact results will vary. Avoid non-dairy milks if you want the same texture and flavor.
Equipment Breakdown
You don’t need a lot of gadgets, but a few pieces make the process smoother and safer.
- Large skillet — big enough for the chorizo to spread so it browns rather than steams.
- Slotted spoon — removes cooked chorizo while leaving most fat behind if you prefer to wipe the pan.
- Whisk or sturdy spoon — for gradual cheese incorporation and keeping the sauce smooth.
- Grater — if you buy block cheese; freshly grated cheese melts more evenly than pre-shredded blends.
- 6-inch cast-iron skillet or warm serving dish (optional) — helps keep the dip warm at the table.
Troubles You Can Avoid
Here are the common missteps and how to prevent them.
Sauce breaks or becomes oily
Keep the heat low when melting the cheese and add it slowly. High heat or adding all the cheese at once can cause the fat to separate from the proteins. If it starts to look oily, immediately reduce heat and whisk gently; adding a small splash of milk can sometimes bring it back together.
Chorizo undercooked or too greasy
Cook the chorizo over medium-high heat and break it into small pieces so moisture escapes and it can brown. Use a slotted spoon to transfer it off the pan and wipe out the skillet if you prefer less fat mixed into the sauce.
Dip too thin
If the dip is thin, it likely didn’t have enough cheese or the cheese was added too quickly. Remove from heat and gradually whisk in more grated cheese until the desired thickness is reached.
Seasonal Flavor Boosts
Small, seasonal additions can brighten or deepen the dip without overwhelming it.
- Summer — finely chopped fresh pico de gallo on top for a fresh tomato bite.
- Fall — a scattering of roasted pumpkin seeds for crunch and a toasty note.
- Winter — a spoonful of caramelized onions stirred in for sweet, savory depth.
- Spring — extra cilantro and thinly sliced radish on top for crisp freshness.
Testing Timeline
Follow these checkpoints while you make the recipe so you can catch issues early:
- After 10–15 minutes of cooking the chorizo — check for deep color and slight crisping; this signals proper browning.
- When warming milks — stop at the first visible steam, before boiling; this prevents scorching.
- During cheese incorporation — add small handfuls and confirm each addition melts into a smooth sauce before the next addition.
- Right before serving — taste for salt and acidity; the pickled jalapeños add brine, so adjust sparingly.
How to Store & Reheat
Make-ahead and leftovers are straightforward, but follow these steps to keep texture intact.
- Storage — cool the queso to room temperature and refrigerate in an airtight container for up to one day.
- Stovetop reheating — rewarm over low heat, stirring until smooth. Add a splash of whole milk if the sauce seems too thick.
- Microwave — reheat in 30-second intervals, stirring between intervals, until evenly heated.
A note: refrigerated cheese sauces can thicken and firm up. Gentle heat and stirring bring them back. Avoid high heat while reheating to prevent separation.
Frequently Asked Questions
Below are short answers to the questions I get most often about this recipe.
Can I make this vegetarian?
The recipe centers on chorizo for flavor and texture, so omitting it changes the character. For a vegetarian version, consider using a smoked, seasoned plant-based crumble with similar fat content, or increase roasted vegetables and add smoked paprika to mimic depth.
Is this very spicy?
The heat level is moderate and comes from the chorizo, diced green chiles, and pickled jalapeños. You control the burn by adjusting the amount of pickled jalapeños and by choosing mild or hot chorizo.
Can I use pre-shredded cheese?
Yes, but freshly grated cheese melts more smoothly. Pre-shredded cheeses often contain anti-caking agents that can slightly affect melt. If you use pre-shredded, add it slowly and keep heat low.
Why evaporated milk?
Evaporated milk provides concentrated creaminess without requiring heavy cream. It helps stabilize the sauce and gives a richer mouthfeel than regular milk alone.
Serve & Enjoy
Bring the queso to the table in a warm dish with a pile of sturdy tortilla chips for scooping. Offer extra pickled jalapeños on the side for people who want more heat, and a bowl of chopped cilantro for garnish. If you preheat a small cast-iron skillet, the queso will stay warm longer and create a bit of showmanship.
Leftovers reheat well, so don’t be shy about making the full batch. Serve with cold beer, crisp margaritas, or a bright sparkling water. This Spicy Chorizo Queso Dip is meant to be shared — set it in the center, pass the chips, and let the casual conversation follow.

Spicy Chorizo Queso Dip
Ingredients
Ingredients
- 6 ounces raw chorizo
- 8 ounces queso blanco or white american cheese grated
- 1 small 5 oz can evaporated milk
- 1/4 cup whole milk
- 2 tablespoons diced green chiles
- 1 tablespoon chopped pickled jalapenos or more to taste
- cilantro for topping
- tortilla chips for serving
Instructions
Instructions
- Heat a large skillet over medium-high heat. Add the chorizo and cook, breaking it into smaller pieces with a spoon, until browned and slightly crispy, about 10 to 15 minutes.
- Use a slotted spoon to transfer the cooked chorizo to a paper-towel–lined plate; set aside and reserve a spoonful or two for topping.
- Wipe out the skillet and return it to low heat. Pour in the evaporated milk (5 oz can) and the whole milk (1/4 cup) and warm until the mixture just begins to steam (do not boil).
- Gradually add the grated queso blanco or white American cheese (8 oz), a handful at a time, stirring or whisking gently over low heat until each addition is fully melted and the sauce is smooth. Keep the heat low to avoid the sauce separating.
- Stir the diced green chiles (2 tablespoons) and the chopped pickled jalapenos (1 tablespoon) into the cheese sauce, then fold in most of the cooked chorizo, keeping the reserved spoonfuls for topping.
- Pour the queso into a warm serving dish (if you like, you can preheat a 6-inch cast-iron skillet in the oven for about 15 minutes to help the queso stay warm longer).
- Top the queso with the reserved chorizo, additional chopped pickled jalapenos if desired, and cilantro. Serve warm with tortilla chips.
- To make ahead: refrigerate cooled queso in an airtight container for up to one day. Reheat over low heat on the stovetop, stirring until smooth, or in the microwave in 30-second intervals, stirring between intervals, until fully warmed.
Equipment
- Large Skillet
- Slotted spoon
- Whisk
- Paper Towels
- Serving dish
- 6-inch cast-iron skillet (optional)