
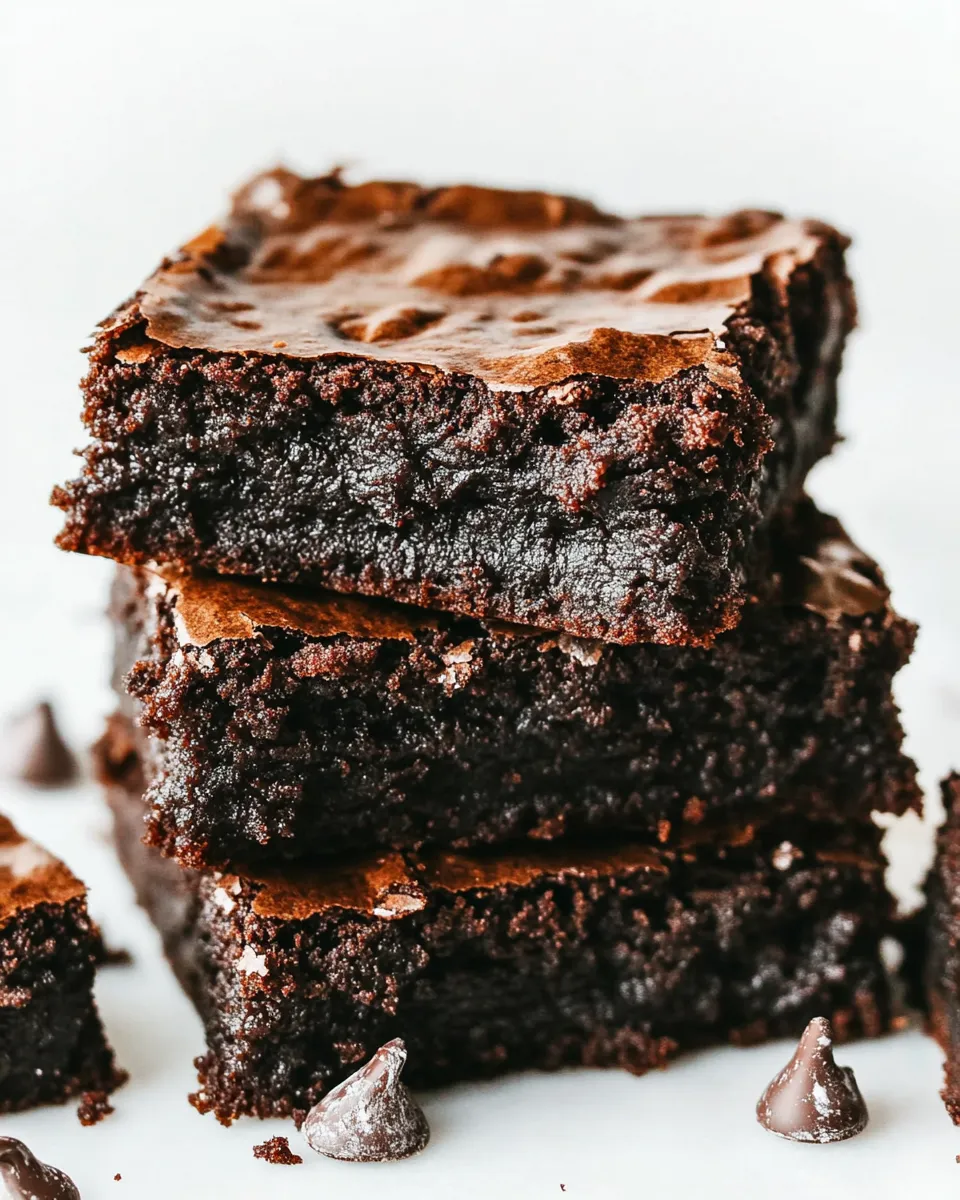
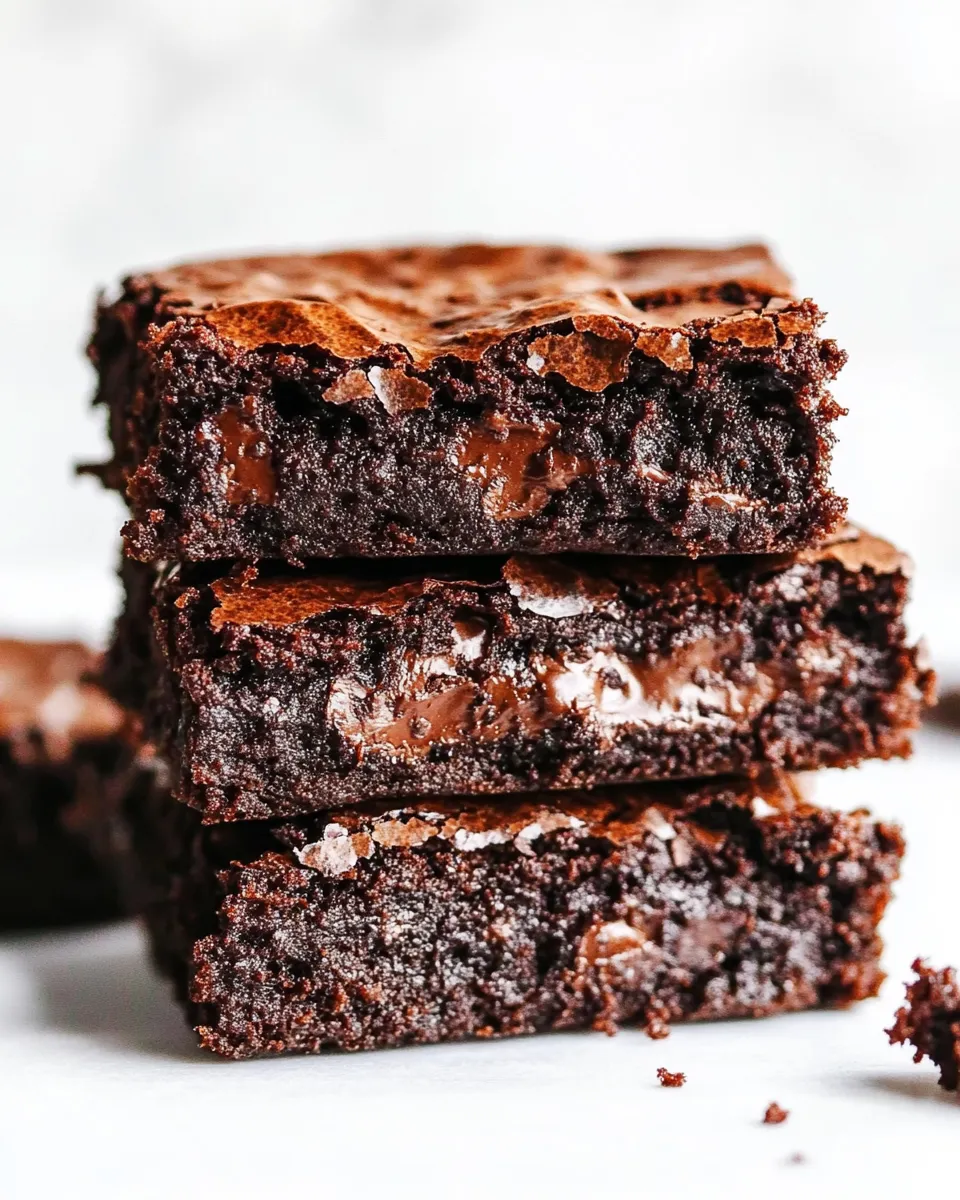
These brownies are the recipe I reach for when I need something reliably rich, chocolatey, and just the right side of fudgy. No fuss, no tricks—just a handful of pantry staples and a simple method that gives consistent results. They bake into a glossy top, crackly edge, and dense, moist crumb that holds together beautifully.
I tested this recipe across ovens and pans until the texture landed exactly where I wanted it: slightly underbaked in the center for a fudgy bite, set at the edges so you can pick up a square without it sagging everywhere. The technique is straightforward and forgiving, which is my favorite kind of dessert to keep in rotation.
Below you’ll find the exact ingredients, step-by-step directions straight from the recipe, and practical tips for swapping, troubleshooting, and storing. Read through once, preheat your oven, and you’ll be pulling warm brownies from the pan in under an hour.
Ingredient Rundown
Ingredients
- 1 cup unsalted butter, melted — provides fat for richness and contributes to the fudgy texture.
- 2 1/4 cups granulated sugar — sweetness and helps create that shiny, crackly top.
- 4 large eggs — structure and moisture; more eggs mean a denser, cakier lift if overworked.
- 1 tablespoon vanilla — rounds and deepens the chocolate flavor.
- 1 1/3 cups all purpose flour — provides structure; enough to hold the brownies without making them cakey.
- 1 teaspoon salt — balances sweetness and enhances chocolate notes.
- 1 teaspoon baking powder — gives a touch of lift so the brownies aren’t too flat.
- 3/4 cup cocoa powder — primary chocolate flavor; unsweetened cocoa gives richness.
- 1/4 cup dark cocoa powder (I used Hershey’s special dark cocoa powder) — intensifies color and depth for a darker, more grown-up chocolate.
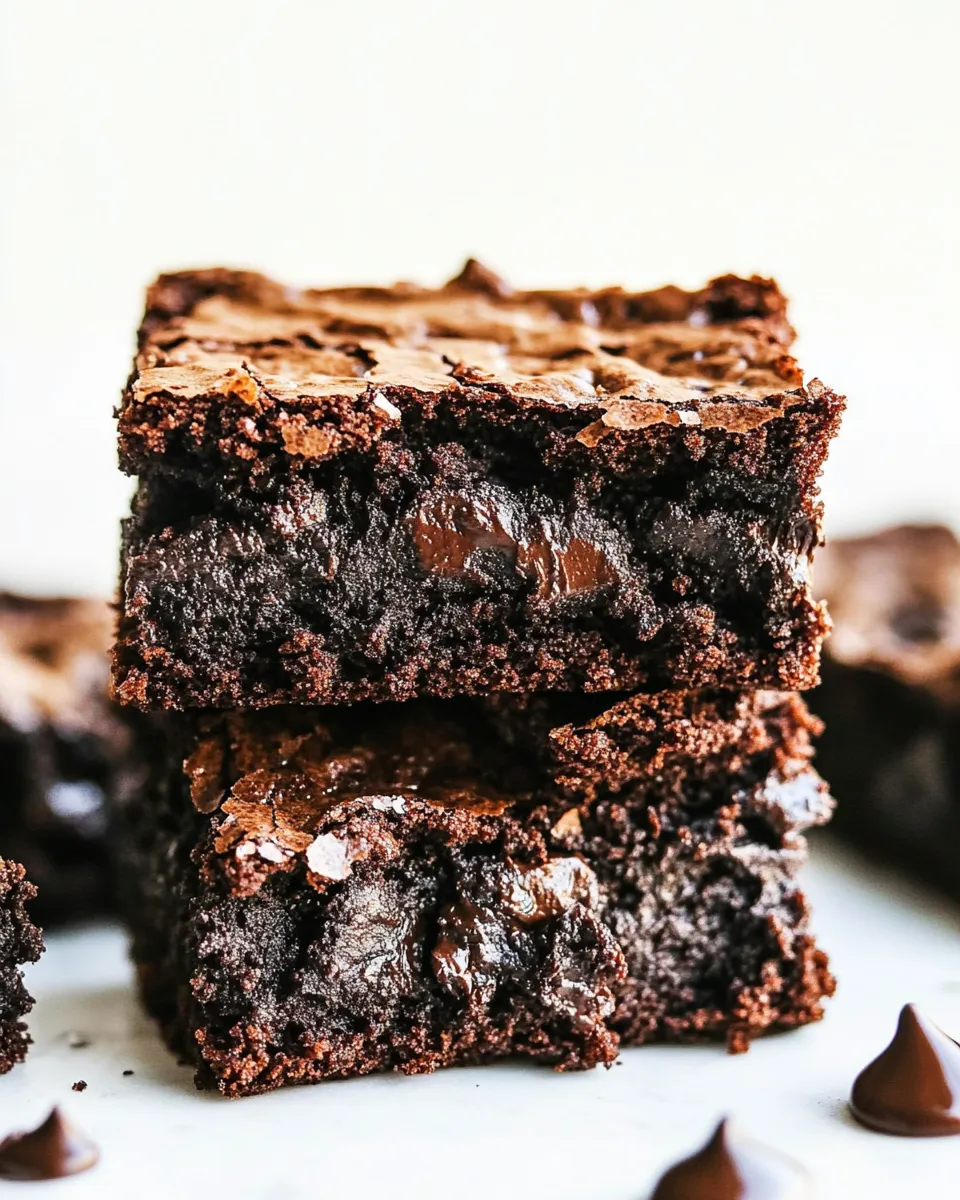
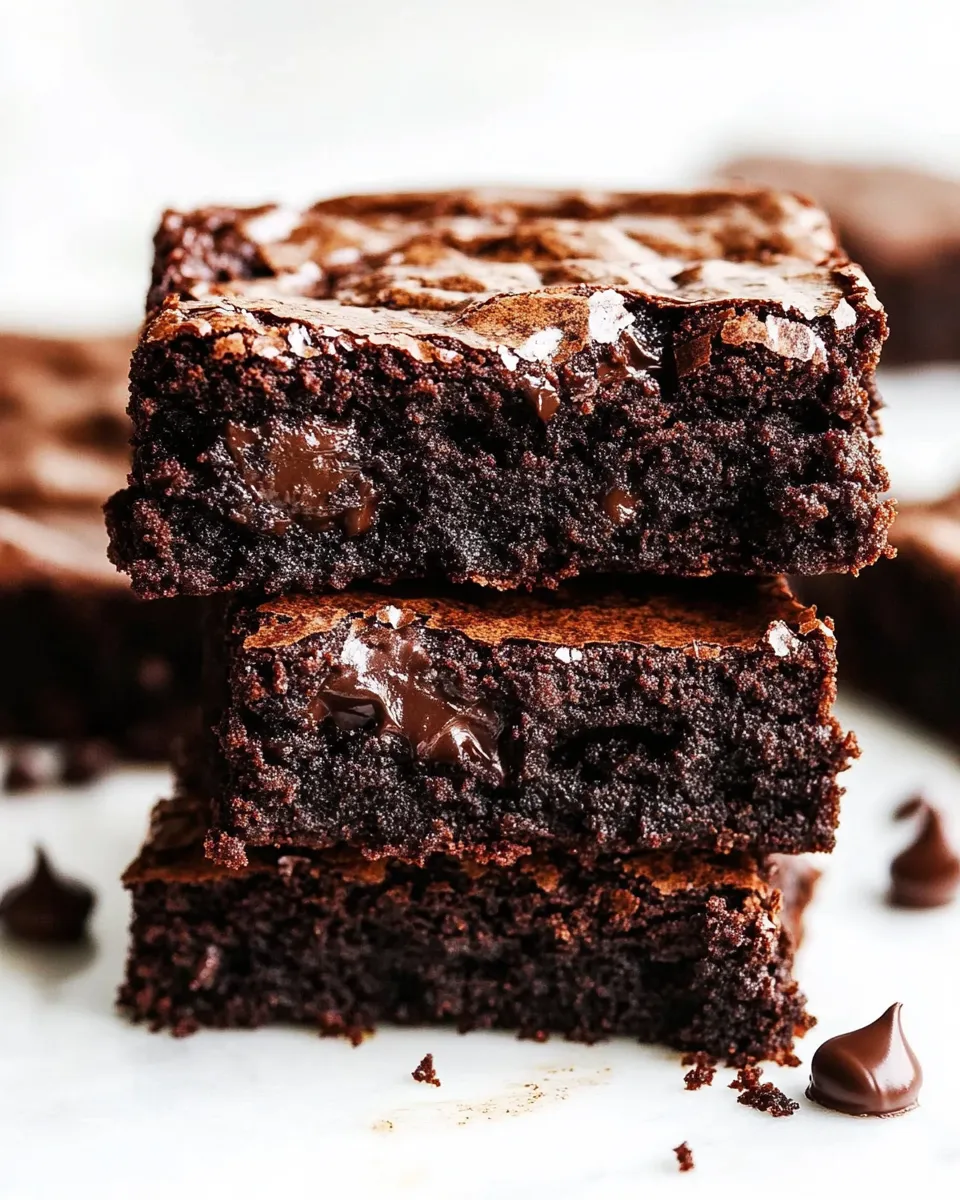
- 4 ounces chocolate chips or chunks — pockets of melty chocolate through the brownies; use chips or chopped bars based on preference.
How to Prepare Perfect Brownies
- Preheat the oven to 350°F. Spray a 9×13‑inch baking pan with nonstick spray, line the pan with parchment paper leaving an overhang on two sides, and lightly spray the parchment. Set the pan aside.
- In a medium bowl, whisk together 1 cup melted unsalted butter and 2 1/4 cups granulated sugar until well combined. If the butter is very hot, let it sit 1–2 minutes to cool slightly before adding the eggs.
- Add 4 large eggs and 1 tablespoon vanilla to the butter‑sugar mixture and whisk until smooth and combined.
- In a separate bowl, sift together 1 1/3 cups all‑purpose flour, 1 teaspoon salt, 1 teaspoon baking powder, 3/4 cup cocoa powder, and 1/4 cup dark cocoa powder.
- Add the dry ingredients to the wet ingredients and gently fold with a spatula or whisk until just combined and there are no large streaks of flour. Do not overmix.
- Stir in 4 ounces chocolate chips or chunks until evenly distributed.
- Pour the batter into the prepared pan and spread it into an even layer.
- Bake for 30–40 minutes: bake 30–35 minutes for fudgier brownies or 35–40 minutes for more set brownies. Test by inserting a toothpick into the center — it should come out with a few moist crumbs (not wet batter and not completely clean).
- Remove the pan from the oven and cool on a wire rack for at least 30 minutes. Use the parchment overhang to lift the brownies from the pan, then cut and serve.
Why This Recipe Works
This formula balances fat, sugar, eggs, and flour to create that beloved fudgy interior with a slightly set perimeter. Melted butter mixes seamlessly with sugar and eggs to form a glossy batter that contributes to both texture and the signature crackly top. The combination of regular cocoa and a splash of dark cocoa deepens the chocolate profile without adding bitterness.
The baking powder here is used sparingly—just enough to prevent a completely flat slab while keeping the density that defines a brownie. The moderate flour amount keeps structure but avoids drying the crumb. Finally, stirring in chocolate chips gives melted pockets that elevate each bite without altering the overall bake time.
Low-Carb/Keto Alternatives
If you need lower-carb options, you can adapt the structure and technique while keeping the method the same. Replace the granulated sugar with a granular erythritol or monk-fruit blend meant for one-to-one substitution, and swap all‑purpose flour for a low-carb baking mix or a combination of almond flour and a small amount of a thickener to mimic the structure. Keep cocoa powders the same for chocolate intensity.
Note: these swaps change texture and baking time. Low-carb flours absorb differently; expect a denser, sometimes crumblier brownie. Start checking doneness a few minutes earlier and rely on the toothpick-with-crumb test rather than strict bake times.
Prep & Cook Tools
- 9×13‑inch baking pan — the recipe is scaled for this size for even baking.
- Parchment paper — makes lifting the brownies clean and easy.
- Nonstick spray — ensures the parchment and pan release cleanly.
- Medium mixing bowls — one for wet, one for dry ingredients.
- Whisk and spatula — whisk for combining wet ingredients, spatula for gentle folding.
- Sifter or fine mesh strainer — optional, for aerating dry ingredients and avoiding lumps.
- Wire rack — for cooling the pan so the brownies finish setting correctly.
- Toothpick or cake tester — the most reliable doneness check.
Learn from These Mistakes
Overmixing
Fold the dry ingredients in gently. Vigorous mixing develops gluten and creates cakier brownies. Stop when large streaks are gone and the batter looks uniform.
Too-hot butter
If your melted butter is piping hot when you add the eggs, it can scramble them. Let it rest 1–2 minutes as the recipe directs so the eggs remain glossy and emulsified into the batter.
Baking time errors
Ovens vary. Rely on the toothpick test: a few moist crumbs clinging to the tester mean fudgy. Fully clean means overbaked. If you’re between sizes or using a darker pan, shave a few minutes off the time on your first try.
Not lining the pan
Parchment with an overhang is a small step that makes removal seamless and prevents any tearing that can ruin the edges.
Make It Your Way
Want to customize? Here are practical, safe swaps and enhancements that don’t compromise the method:
- Swirl-ins: Add a ribbon of peanut butter, dulce de leche, or cream cheese on top of the batter before baking for a marbled effect—drop spoonfuls and swirl gently with a knife.
- Texture play: Fold in chopped toasted nuts for crunch, or add extra chocolate chunks for pockets of molten chocolate.
- Salted top: Sprinkle flaky sea salt on the warm brownies as soon as they come out of the oven for a sweet-salty contrast.
- Flavor twists: A small dash of espresso powder in the batter amplifies chocolate without tasting like coffee; add a half-teaspoon if desired.
Testing Timeline
Testing as you bake helps dial in results. Here’s a simple timeline to follow the first time you make this recipe:
- 0:00–0:10 — Prep and preheat: Preheat oven to 350°F, line and spray the pan, melt butter, and measure ingredients.
- 0:10–0:20 — Mix: Whisk melted butter and sugar, add eggs and vanilla, sift and fold dry ingredients, stir in chocolate.
- 0:20–0:22 — Transfer: Spread batter in pan and smooth the top.
- 0:22–0:52 — Bake: Start checking at 30 minutes for a fudgier result; expect 30–40 minutes total.
- 0:52–1:20 — Cool and rest: Cool 30+ minutes on a wire rack before lifting and cutting so the brownies set.
If you prefer very fudgy centers, aim for the lower end of the bake time. If you need cleaner squares for transport, nudge the time a bit longer within the range and cool completely before cutting.
Shelf Life & Storage
Store brownies at room temperature in an airtight container for up to 3 days. For longer storage, wrap tightly and refrigerate up to one week—bring to room temperature or warm briefly before serving to soften. Freeze cooled brownies in a sealed container for up to 3 months; thaw overnight in the refrigerator or at room temperature.
If you layer brownies for storage, place parchment between layers to prevent sticking and retain the crackly top as much as possible.
Ask & Learn
Q: Can I halve the recipe?
A: Yes—reduce everything proportionally and bake in a smaller pan. Keep a close eye on bake time; smaller pan = less time.
Q: Can I use salted butter?
A: You can; reduce added salt slightly or omit it. The recipe calls for 1 teaspoon salt to balance sweetness, so taste and adjust in future bakes if needed.
Q: Why both cocoa powders?
A: Using regular and dark cocoa lets you deepen chocolate flavor and color without adding more chocolate or sweetness. It’s an easy way to intensify chocolate character.
Make It Tonight
Ready to bake? Preheat the oven to 350°F, grab your 9×13 pan and parchment, and follow the steps above. The method is forgiving and quick: about 20 minutes hands-on, 30–40 minutes in the oven, plus a short cool-down. Cut into squares, pair with a scoop of vanilla ice cream if you like, and enjoy the kind of brownie that gets requests to be made again.
Let me know how yours turn out—did you go fudgy or more set? Any favorite add-ins? I love hearing what readers try and what becomes their new go-to tweak.

The MOST Perfect Brownies Ever!
Ingredients
Ingredients
- 1 cupunsalted buttermelted
- 2 1/4 cupgranulated sugar
- 4 largeeggs
- 1 tablespoonvanilla
- 1 1/3 cupall purpose flour
- 1 teaspoonsalt
- 1 teaspoonbaking powder
- 3/4 cupcocoa powder
- 1/4 cupdark cocoa powder I used Hershey’s special dark cocoa powder
- 4 ounceschocolate chips or chunks
Instructions
Instructions
- Preheat the oven to 350°F. Spray a 9×13‑inch baking pan with nonstick spray, line the pan with parchment paper leaving an overhang on two sides, and lightly spray the parchment. Set the pan aside.
- In a medium bowl, whisk together 1 cup melted unsalted butter and 2 1/4 cups granulated sugar until well combined. If the butter is very hot, let it sit 1–2 minutes to cool slightly before adding the eggs.
- Add 4 large eggs and 1 tablespoon vanilla to the butter‑sugar mixture and whisk until smooth and combined.
- In a separate bowl, sift together 1 1/3 cups all‑purpose flour, 1 teaspoon salt, 1 teaspoon baking powder, 3/4 cup cocoa powder, and 1/4 cup dark cocoa powder.
- Add the dry ingredients to the wet ingredients and gently fold with a spatula or whisk until just combined and there are no large streaks of flour. Do not overmix.
- Stir in 4 ounces chocolate chips or chunks until evenly distributed.
- Pour the batter into the prepared pan and spread it into an even layer.
- Bake for 30–40 minutes: bake 30–35 minutes for fudgier brownies or 35–40 minutes for more set brownies. Test by inserting a toothpick into the center — it should come out with a few moist crumbs (not wet batter and not completely clean).
- Remove the pan from the oven and cool on a wire rack for at least 30 minutes. Use the parchment overhang to lift the brownies from the pan, then cut and serve.
Equipment
- 9x13 inch Baking Pan
- Parchment Paper
- nonstick spray
- Mixing bowls
- Whisk
- Spatula
- Wire Rack
Notes
If desired, these brownies can be topped with crushed oreos, more chocolate chips, or M&Ms.


