
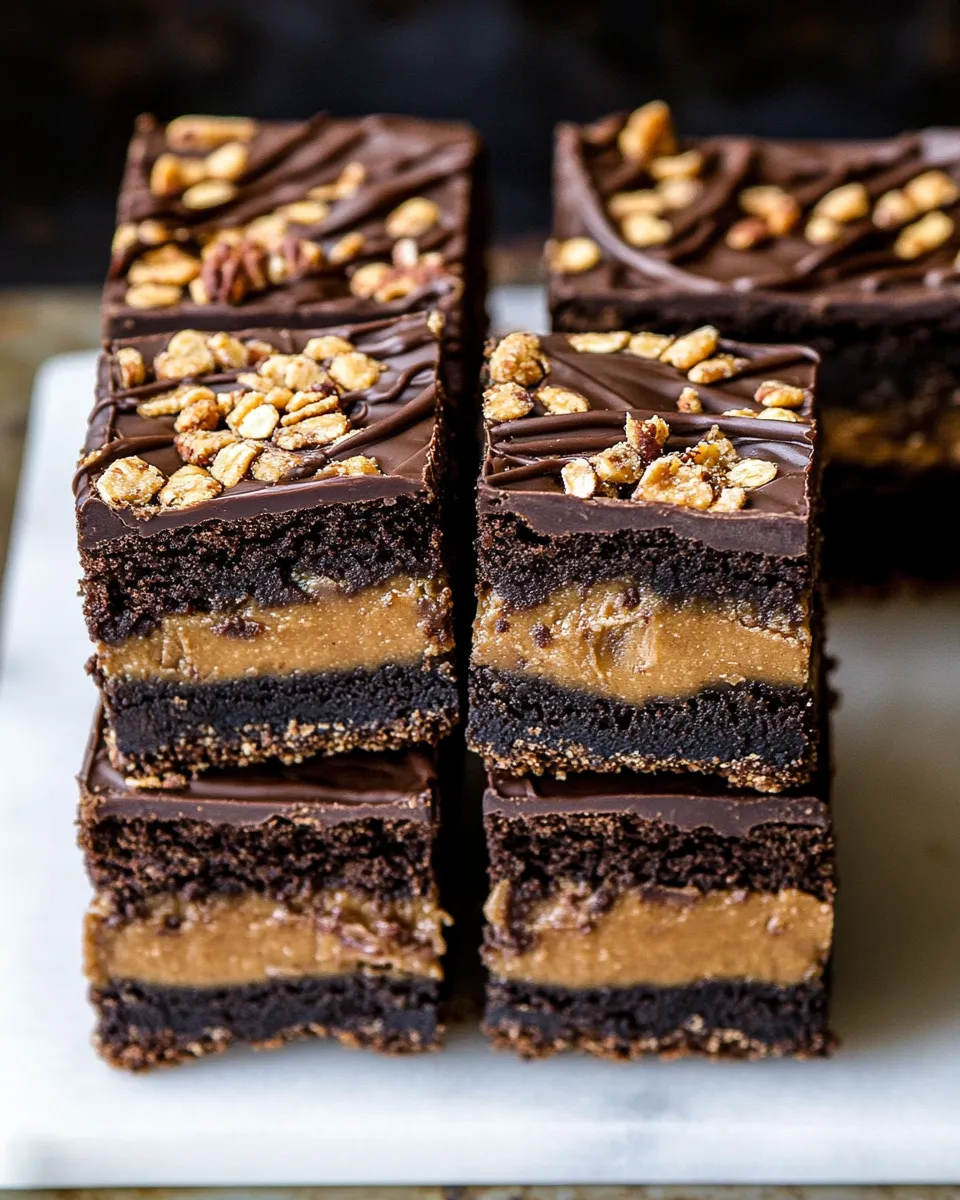
These brownies are exactly what the name promises: a fudgy brownie base, a creamy peanut butter middle, and a crunchy chocolate-Rice Krispies top. I make them when I want something that hits multiple textures in every bite—rich, smooth, and snappy. They travel well and cut into neat squares thanks to the parchment overhang, which I always recommend.
No frills, just dependable steps and a few small tricks so your layers stay distinct and the top sets glossy. The method uses simple pantry staples and a short chill time instead of complicated tempering. If you bake regularly, you can get these on the table in under two hours including cooling time.
I’ll walk you through the ingredients, the exact step-by-step directions, swaps, what can go wrong (and how to fix it), and how to store the finished bars. Read once, then bake once. These are crowd-pleasers—bring them to a potluck and watch them disappear.
What’s in the Bowl
Ingredients
- 2 sticks (1 cup) salted butter — melted with milk chocolate to form the rich fat base for the brownies.
- 4 ounces milk chocolate, chopped — adds creaminess and a touch of milk chocolate flavor to the brownie batter.
- 1 1/2 cups granulated sugar — sweetens and helps create a slightly crisp top on the brownie layer.
- 1 tablespoon vanilla extract — rounds and brightens the chocolate flavor.
- 4 large eggs — provide structure and a fudgy crumb when whisked into the chocolate mixture.
- 1 cup unsweetened cocoa powder — the primary chocolate intensity; use a good-quality cocoa for deeper flavor.
- 1 cup all-purpose flour — holds the brownie together; measure gently to avoid a dry texture.
- 1/4 teaspoon kosher salt — balances sweetness and enhances chocolate notes.
- 1 cup creamy peanut butter — makes the smooth peanut butter layer; creamy spreads more evenly than chunky.
- 2 tablespoons salted butter, at room temperature — beaten with peanut butter to loosen the filling so it spreads thinly and evenly.
- 2-3 cups semi-sweet chocolate chips — melted to form the glossy top layer; quantity varies depending on how thick you want the chocolate cap.
- 1 cup Rice Krispies cereal — provides the crunch and light texture contrast on top.
Triple Layer Peanut Butter Crunch Brownies Made Stepwise
- Preheat the oven to 350°F. Line a 9×13-inch baking dish with parchment paper, leaving an overhang on two sides for easy removal.
- Place 2 sticks (1 cup) salted butter and 4 ounces chopped milk chocolate in a medium, microwave-safe bowl. Microwave in 30-second intervals, stirring after each interval, until the mixture is fully melted and smooth. (Alternatively, melt over a double boiler.)
- Whisk the melted butter and chocolate with 1 1/2 cups granulated sugar, 1 tablespoon vanilla extract, and 4 large eggs until smooth and combined.
- Add 1 cup unsweetened cocoa powder, 1 cup all-purpose flour, and 1/4 teaspoon kosher salt to the chocolate mixture. Stir with a spatula until just combined and no streaks of flour remain; the batter will be thick. Do not overmix.
- Pour the batter into the prepared pan and spread into an even layer. Bake for 25–30 minutes, until the top is set and a toothpick inserted near the center comes out with a few moist crumbs (not wet batter). Remove from the oven and let the brownies cool completely in the pan (about 30–60 minutes) before proceeding.
- In a small bowl, beat 1 cup creamy peanut butter with 2 tablespoons salted butter (room temperature) until smooth and creamy.
- Drop tablespoon-sized dollops of the peanut butter mixture evenly over the cooled brownie surface. Use an offset spatula or the back of a spoon to gently spread the dollops into an even layer over the brownies. Place the pan in the freezer for 10 minutes to firm the peanut butter layer.
- While the peanut butter firms, melt 2–3 cups semi-sweet chocolate chips in a microwave-safe bowl in 30-second intervals, stirring after each interval until smooth, or melt over a double boiler. Stir well and do not overheat.
- Evenly sprinkle 1 cup Rice Krispies cereal over the peanut butter layer. Immediately pour the melted semi-sweet chocolate over the Rice Krispies, using a spatula to spread and cover the surface as needed.
- Refrigerate the pan until the chocolate is set, about 20 minutes. Use the parchment overhang to lift the slab from the pan and transfer to a cutting board.
- Cut into squares. Store the brownies in the refrigerator or in a cool, dark spot in your kitchen.
Why This Triple Layer Peanut Butter Crunch Brownies Stands Out

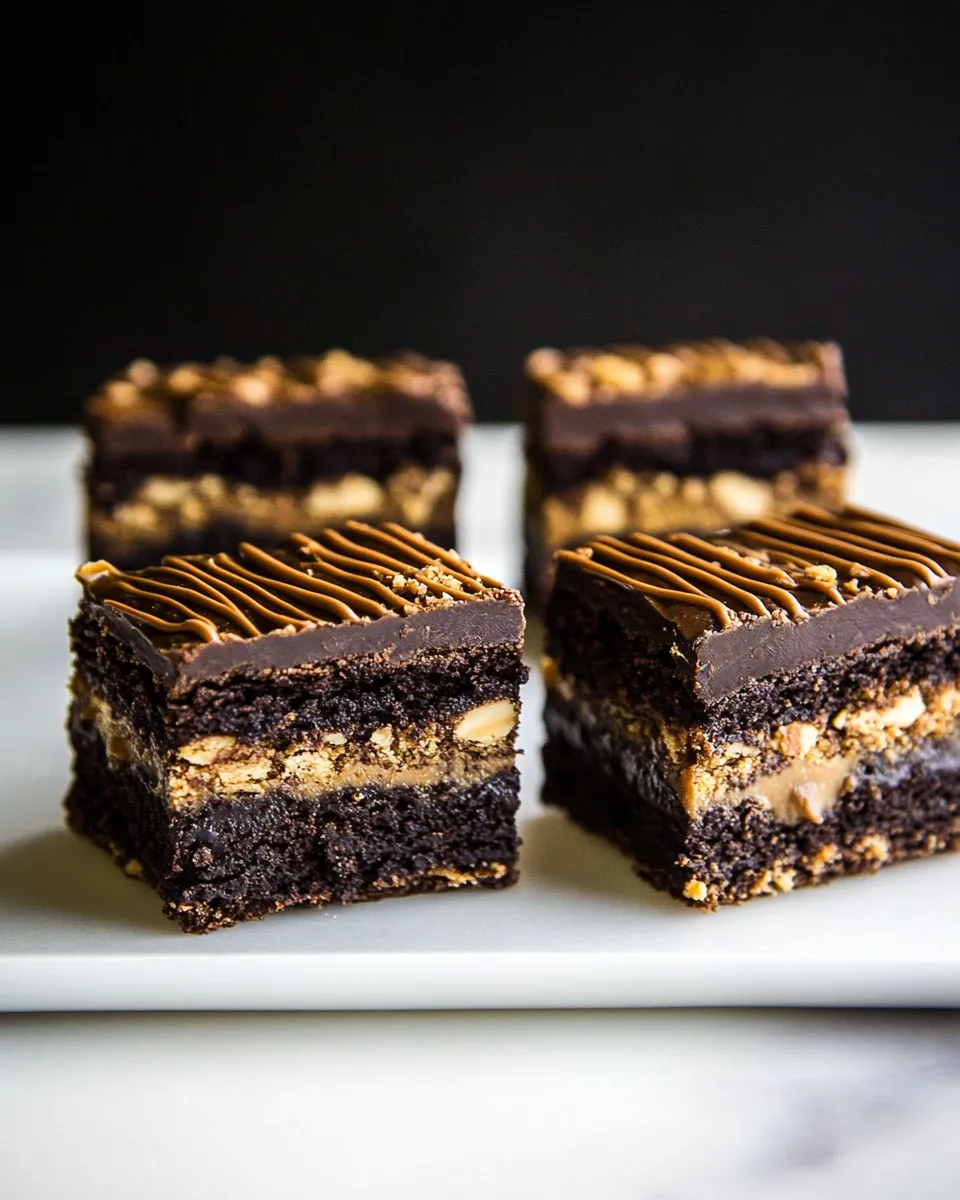
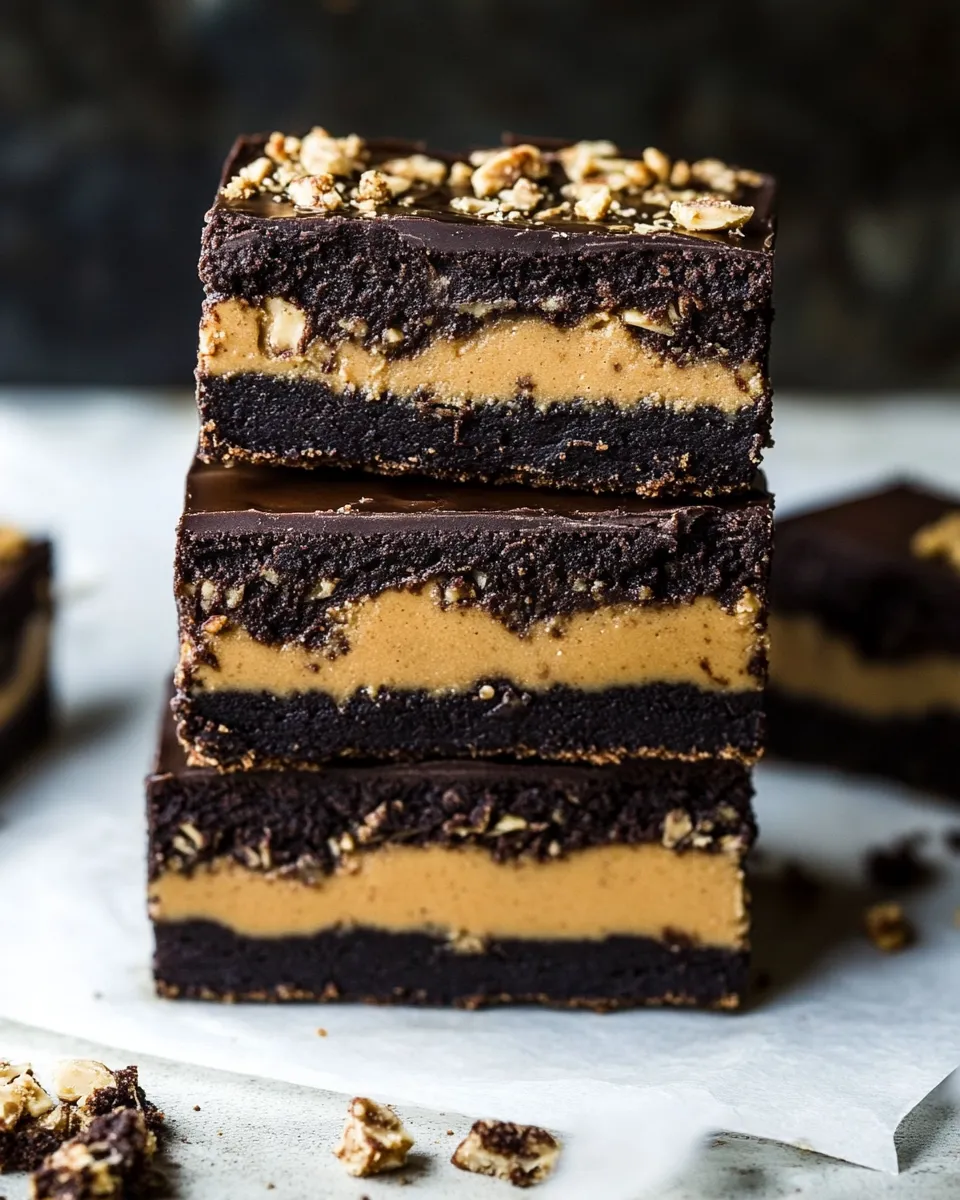
I keep returning to this recipe because it balances textures without being fussy. The brownie layer is dense and fudgy, not cakey. The peanut butter layer is smooth and lightly aerated by the butter, so it doesn’t sink into the brownie. Finally, the Rice Krispies under the glossy chocolate top give each bite a satisfying crackle.
There’s also visual contrast: the dark brownie, the pale peanut butter, and the shiny chocolate top. It’s an impressive-looking bar that’s very forgiving—undercook the brownies slightly for extra fudginess, or bake a minute longer if you prefer a firmer base. The method uses chilling to set rather than precision tempering, which makes the finish predictable and glossy enough for serving.
Swap Guide
Substitutions are possible, but be conservative so the texture stays right.
Chocolate
If you don’t have milk chocolate for the base, use an equal amount of chopped semi-sweet chocolate. The brownie will be slightly less sweet and more chocolate-forward.
Peanut butter
Natural peanut butter can work, but it’s thinner and may not spread as cleanly; stir until smooth and, if needed, add a teaspoon more butter to achieve the same spreadable consistency. Do not replace with chunky unless you want extra texture in the filling.
Cereal
If Rice Krispies aren’t available, use another plain puffed rice cereal. Avoid sweetened or flavored cereals; they alter the balance of sweetness and can get soggy.
Chocolate chips for the top can be semi-sweet or dark if you prefer less sweetness. The recipe lists 2–3 cups; use 2 cups for a thinner cap or 3 cups for a thicker chocolate layer.
Appliances & Accessories
Essentials:
- 9×13-inch baking dish — the dimensions are important for layer thickness.
- Parchment paper — leaving an overhang on two sides makes removing and slicing much easier.
- Microwave-safe bowl or double boiler — for melting chocolate and butter.
- Offset spatula or the back of a spoon — for smoothing the peanut butter and chocolate layers.
- Mixing bowls and whisk/spatula — for combining the batter and the filling.
Optional but helpful:
- Hand mixer or stand mixer — speeds up creaming the peanut butter and butter, though a vigorous stir works too.
- Instant-read thermometer — to ensure melted chocolate isn’t overheated (keep under about 115°F/46°C).
Things That Go Wrong
Brownies are too cakey
You probably over-measured flour or overmixed. Spoon the flour into the cup and level with a knife next time. Mix until just combined.
Peanut butter layer sinks into the brownies
If you spread the peanut butter while the brownies are still warm, it will liquefy and sink. Always cool the base completely before adding the peanut butter. The quick freezer step helps set it.
Top chocolate looks dull or streaky
That usually means the chocolate got too hot or wasn’t stirred enough. Melt slowly in intervals, stir thoroughly, and pour while still fluid but slightly cooled so it spreads without running into the edges.
Rice Krispies lose their snap
They’ll soften if exposed to moisture. Add them and immediately pour the melted chocolate so they’re sealed. Don’t let the cereal sit exposed to steam or humidity before the chocolate goes on.
Seasonal Flavor Boosts
Small seasonal tweaks can be delightful:
- Fall: Stir 1/2 teaspoon ground cinnamon into the peanut butter layer, or add a pinch of ground nutmeg to the brownie batter.
- Winter: Use dark chocolate chips and sprinkle flaky sea salt on top once the chocolate is just set for a salted-chocolate finish.
- Spring: Fold a handful of chopped toasted peanuts into the top after pouring chocolate for a nut-forward crunch.
- Summer: Add a thin layer of sliced bananas on top of the peanut butter before chilling, then proceed as written; slice and serve promptly.
Behind-the-Scenes Notes
I designed this method to be repeatable in a home kitchen. The keys are temperature control and timing: melt chocolate gently, cool the brownie fully, and firm the peanut butter briefly. Those three checkpoints prevent blending and keep the clean, distinct layers.
Also: the Rice Krispies give visual lift without adding heaviness. If you’re baking for kids, they’ll love the crunch. If for adults, a sprinkle of flaky salt after the chocolate sets elevates the flavor profile.
Storage & Reheat Guide
Store these bars in a single layer in the refrigerator or in a cool, dark spot in the kitchen. If your kitchen is warm, refrigerate. They’ll keep well for 4–6 days chilled.
To serve, remove from the fridge 10–15 minutes before eating so the chocolate and peanut butter soften slightly. If you prefer them warmer, microwave a single square for 6–8 seconds—watch carefully so the chocolate doesn’t melt through.
Frequently Asked Questions
Can I use natural peanut butter? Yes, but it’s thinner. Stir well and consider adding a teaspoon of butter to match the spreadability called for.
Do I have to refrigerate the finished brownies? Not strictly. If your kitchen stays cool, they can sit in a cool, dark spot. In warmer climates or during summer, refrigerate to keep the top firm.
Can I make this in an 8×8 pan? You can, but the layers will be thicker. Baking time for the brownie layer will likely increase; check doneness with a toothpick and expect a denser slab.
What if my melted chocolate seizes? If it becomes grainy from moisture, stir in a small amount of vegetable oil or warm cream to smooth it, but add sparingly so the chocolate still sets firm.
Time to Try It
Gather the ingredients, preheat the oven, and line that pan. The recipe is straightforward, and the payoff is a multi-textured bar that’s great for sharing or keeping all to yourself. Start with the brownie base; take your time with the cooling and the quick freeze—those steps are what make the layers clean and the final presentation tidy.
Make a batch this weekend. Cut into squares, wrap a few individually, and bring them to work or a friend’s house. Then come back and tell me whether you kept one—or all—on the counter for “quality control.”
Triple Layer Peanut Butter Crunch Brownies.
Ingredients
Ingredients
- 2 sticks 1 cupsalted butter
- 4 ouncesmilk chocolate chopped
- 1 1/2 cupsgranulated sugar
- 1 tablespoonvanilla extract
- 4 large eggs
- 1 cupunsweetened cocoa powder
- 1 cupall-purpose flour
- 1/4 teaspoonkosher salt
- 1 cupcreamy peanut butter
- 2 tablespoonssalted butter at room temperature
- 2-3 cupssemi-sweet chocolate chips
- 1 cupRice Krispies cereal
Instructions
Instructions
- Preheat the oven to 350°F. Line a 9×13-inch baking dish with parchment paper, leaving an overhang on two sides for easy removal.
- Place 2 sticks (1 cup) salted butter and 4 ounces chopped milk chocolate in a medium, microwave-safe bowl. Microwave in 30-second intervals, stirring after each interval, until the mixture is fully melted and smooth. (Alternatively, melt over a double boiler.)
- Whisk the melted butter and chocolate with 1 1/2 cups granulated sugar, 1 tablespoon vanilla extract, and 4 large eggs until smooth and combined.
- Add 1 cup unsweetened cocoa powder, 1 cup all-purpose flour, and 1/4 teaspoon kosher salt to the chocolate mixture. Stir with a spatula until just combined and no streaks of flour remain; the batter will be thick. Do not overmix.
- Pour the batter into the prepared pan and spread into an even layer. Bake for 25–30 minutes, until the top is set and a toothpick inserted near the center comes out with a few moist crumbs (not wet batter). Remove from the oven and let the brownies cool completely in the pan (about 30–60 minutes) before proceeding.
- In a small bowl, beat 1 cup creamy peanut butter with 2 tablespoons salted butter (room temperature) until smooth and creamy.
- Drop tablespoon-sized dollops of the peanut butter mixture evenly over the cooled brownie surface. Use an offset spatula or the back of a spoon to gently spread the dollops into an even layer over the brownies. Place the pan in the freezer for 10 minutes to firm the peanut butter layer.
- While the peanut butter firms, melt 2–3 cups semi-sweet chocolate chips in a microwave-safe bowl in 30-second intervals, stirring after each interval until smooth, or melt over a double boiler. Stir well and do not overheat.
- Evenly sprinkle 1 cup Rice Krispies cereal over the peanut butter layer. Immediately pour the melted semi-sweet chocolate over the Rice Krispies, using a spatula to spread and cover the surface as needed.
- Refrigerate the pan until the chocolate is set, about 20 minutes. Use the parchment overhang to lift the slab from the pan and transfer to a cutting board.
- Cut into squares. Store the brownies in the refrigerator or in a cool, dark spot in your kitchen.
Equipment
- 9x13 inch Baking Dish
- Parchment Paper
- Microwave-safe Bowl
- Double Boiler
- Whisk
- Spatula
- Offset Spatula
- Freezer
- Refrigerator
- Cutting Board
Notes
Store in the refrigerator or a cool, dark spot.


