

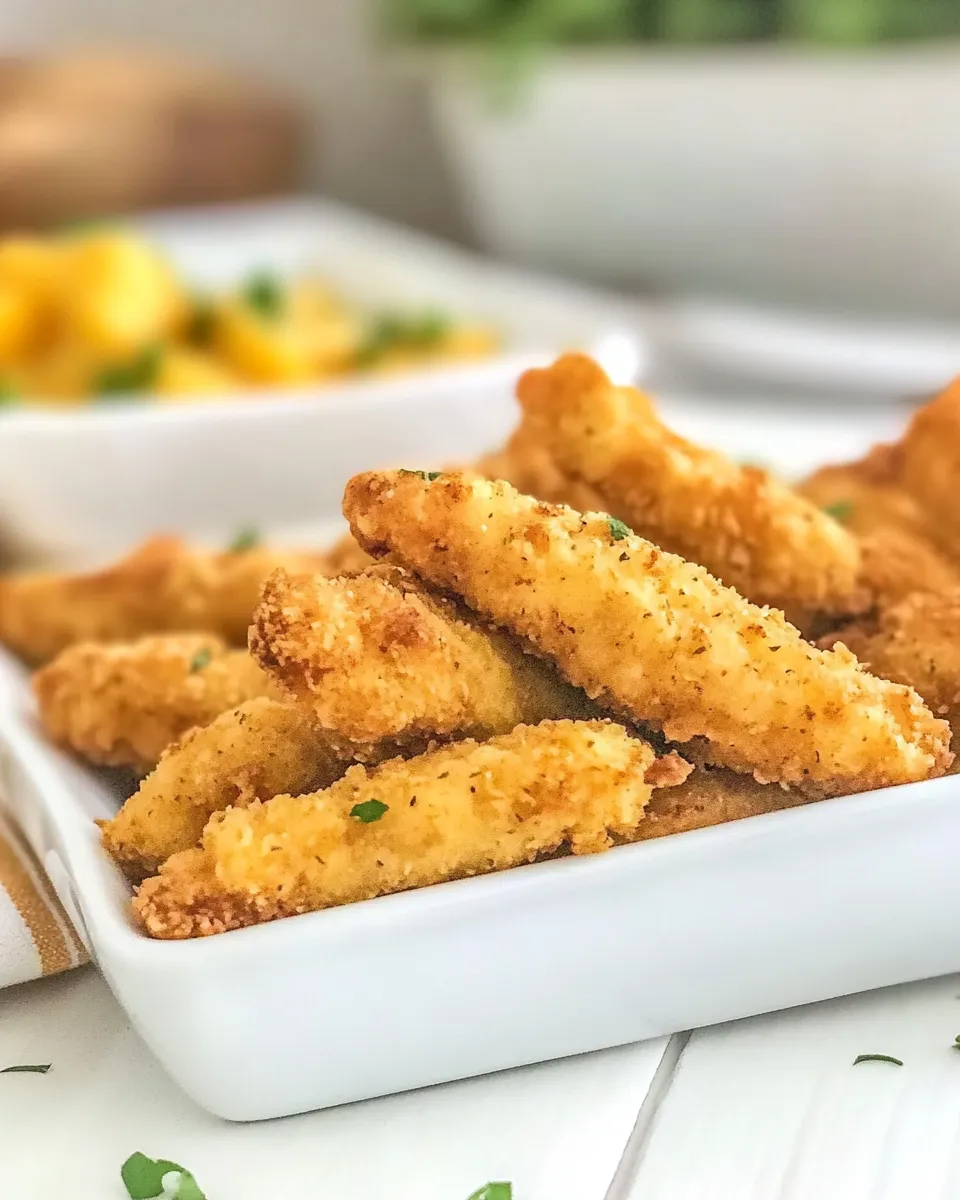
These chicken fingers are the kind I make when I want dinner to be both unfussy and impressive. They come together fast, crisp up beautifully, and hit that comforting, familiar spot without leaning on a fryer. I tested this version until the coating stayed crunchy and the meat stayed tender—no drying out, no cardboard coating. Just honest chicken fingers that kids and adults fight over.
The technique is straightforward: a simple egg wash and a seasoned Bisquick-Parmesan mix give you a golden crust with a hint of garlic and a savory finish from the cheese. Baking at a high temperature and giving the pieces some space on the pan is the key. You don’t need a lot of equipment or exotic pantry items.
Read on for the ingredient list, exact baking steps, troubleshooting tips from my test kitchen, allergy-friendly swaps, and storage notes. This post gives you a clear plan so you can make these tonight and have them turn out the way you want—crisp on the outside, juicy inside.
Gather These Ingredients
Ingredients
- 1½lb chicken tenderloins — the most tender cut for quick, even cooking; trim any thin edges for uniform thickness.
- ⅔cup Bisquick — provides the bulk of the dry coating and browning; quick and easy binder for crispness.
- ½cup grated Parmesan cheese — adds savory umami and helps the crust brown attractively.
- 1tsp garlic salt — seasons the coating so every bite has flavor.
- ½tsp paprika — gives color and a touch of warm flavor without heat.
- 1large egg, slightly beaten — the wet binder that helps the dry mix adhere to the chicken.
- pepper — to taste; freshly ground is best for a clean peppery note.
- cooking spray — a light mist helps the tops brown in the oven and keeps the crust crisp.
Mastering Ultimate Chicken Fingers: How-To
- Preheat oven to 450°F. Line a baking sheet with foil and spray the foil with cooking spray.
- In a shallow plate or dish, combine 2/3 cup Bisquick, 1/2 cup grated Parmesan cheese, 1 tsp garlic salt, and 1/2 tsp paprika; set aside.
- In a separate shallow dish, slightly beat 1 large egg.
- Season the 1½ lb chicken tenderloins with pepper to taste.
- Working one at a time (or in batches), dip each tenderloin into the beaten egg, letting excess egg drip off, then press and turn it in the Bisquick mixture to coat evenly. Shake off any excess coating.
- Arrange the coated chicken on the prepared baking sheet in a single layer, leaving space between pieces. Lightly spray the tops of the coated chicken with cooking spray.
- Bake at 450°F for 12–14 minutes, flipping once about halfway through (after ~6–7 minutes), until the chicken reaches an internal temperature of 165°F when measured at the thickest part.
- Remove from the oven and let rest 1–2 minutes before serving.
Why This Recipe Works
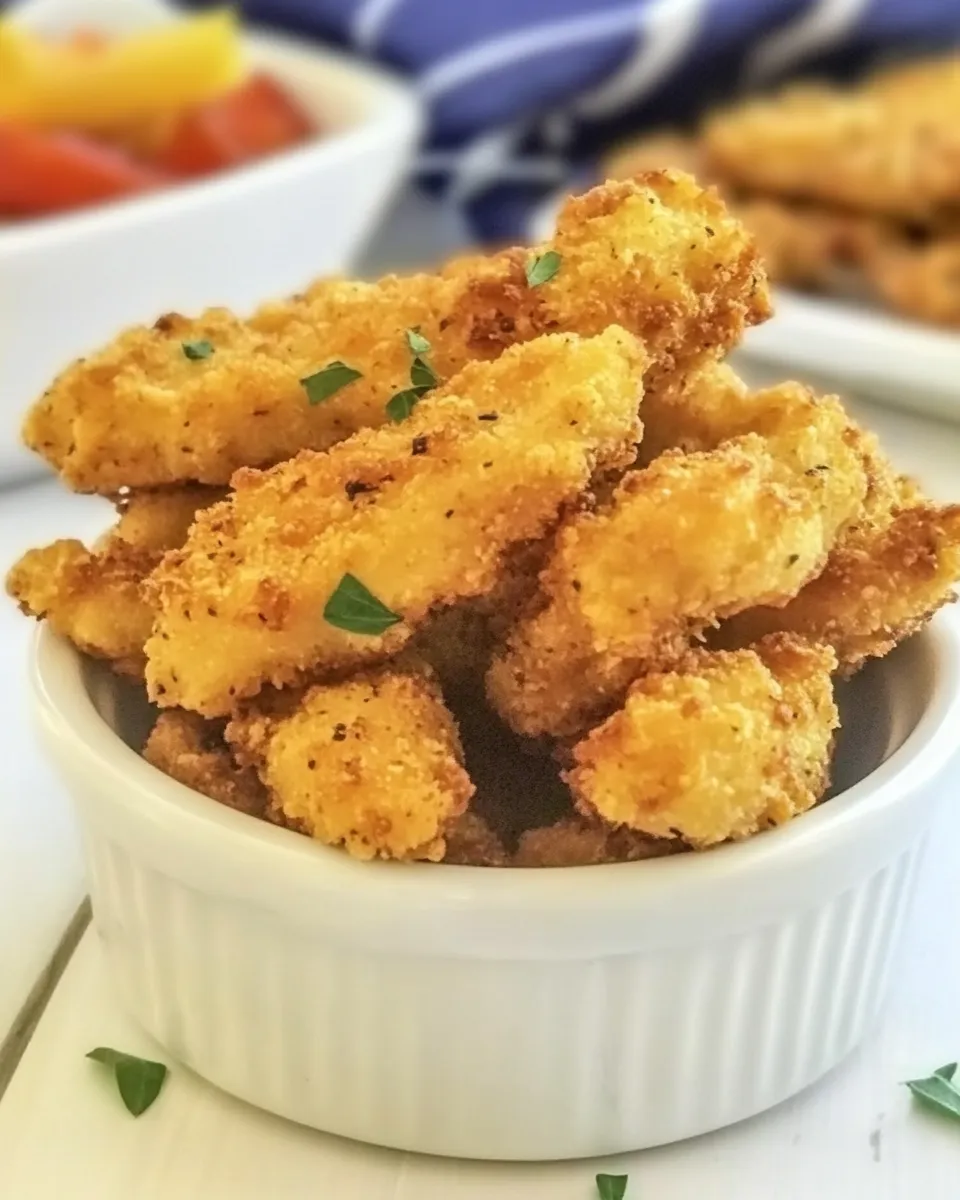
There are a few simple reasons this method reliably delivers great chicken fingers. First, the high oven temperature (450°F) promotes rapid browning without overcooking the interior. The short bake time keeps the tenderloins juicy.
Second, the combination of Bisquick and grated Parmesan strikes the right balance between structure and flavor. Bisquick gives the crust body and a biscuit-like crispness when baked, while the Parmesan adds salt and savory depth. Garlic salt seasons the coating uniformly, so you don’t need to season each piece separately.
Finally, the single egg wash is enough to bind the dry mix while allowing excess to drip—this prevents a soggy, gloppy coating. Lightly spraying the coated tops mid-prep encourages even, golden coloration on the surface.
Texture-Safe Substitutions
- Panko instead of Bisquick — for extra crunch and a flakier, more open crust texture.
- Crushed cornflakes for a crisp, brittle coating — great if you want a very crunchy bite.
- Finely crushed crackers or breadcrumbs mixed with Parmesan — if you prefer a finer, uniform crust.
- Omit Parmesan for a milder crust; add a pinch more garlic salt to maintain flavor balance.
Hardware & Gadgets
- Rimmed baking sheet — gives airflow and keeps juices contained; don’t use a sheet that warps at high heat.
- Instant-read thermometer — essential for checking that the thickest part reaches 165°F without overcooking.
- Shallow dishes or pie plates — make the dip-and-coat step quick and efficient.
- Cooking spray or an oil mister — for a light, even coating of oil on the tops so they brown in the oven.
- Wire rack (optional) — set the pieces on a wire rack over the sheet for 360° airflow if you want maximum crispness.
Mistakes Even Pros Make
- Overcrowding the pan — cramming pieces together traps steam and softens the coating. Give each strip breathing room.
- Skipping the flip — the top side won’t brown evenly without turning around the halfway mark, especially at high heat.
- Not using an instant-read thermometer — relying on cook time alone can leave the center underdone or dry. Aim for 165°F at the thickest spot.
- Applying too much egg — if the egg clings in puddles, the coating will clump and stay soft. Let excess drip off before dredging in the dry mix.
- Baking at too-low a temperature — lower heat increases cooking time and risks dried meat and soggy crust.
Allergy-Friendly Swaps
If you’re cooking for someone with allergies, you can adapt the method while keeping textures close to the original.
- Gluten-free: Use a gluten-free biscuit mix or gluten-free panko in place of Bisquick; check the grated Parmesan for any cross-contamination warnings.
- Dairy-free: Skip the Parmesan and boost savory flavor with a sprinkle of nutritional yeast or a pinch more garlic salt; for color use smoked paprika or a touch of turmeric (small amount) if desired.
- Egg-free: Use a commercial egg replacer or a mixture of 1 tbsp of neutral oil and 2 tbsp water to help the coating adhere; press the coating firmly to the chicken so it stays on during baking.
- Low-sodium: Use a reduced-sodium biscuit mix if available and omit or reduce the garlic salt; add more black pepper and a squeeze of lemon when serving to brighten the flavor.
Notes from the Test Kitchen
I ran these across several ovens and a few variations of coatings to land on a dependable approach. Two patterns emerged: a) thinner tenderloins cook quickly and benefit from extra attention to avoid overbaking, and b) when using heavier coatings (like panko mixed with Parmesan) a very light mist of oil yields a crisper finish than none at all.
When I used a wire rack, the underside crisped beautifully, but the pan rack method takes a little longer to reach that crisp level—so stick with the 12–14 minute window and check for doneness early if your strips are on the thin side. I also learned that a short rest matters; the meat stays juicier if you let it sit 1–2 minutes off the heat before serving.
Save for Later: Storage Tips
- Refrigerate: Cool to room temperature, then store in an airtight container for up to 3 days. Place a paper towel under the chicken to absorb moisture and help keep the crust crisper.
- Freeze: Freeze laid flat on a tray until solid, then transfer to a freezer bag for up to 2 months. Reheat from frozen for best texture.
- Reheating: Reheat in a 375°F oven on a wire rack over a sheet pan for 8–12 minutes (longer if frozen) until hot and the crust re-crisped. Avoid the microwave if you want the coating to stay crunchy.
Ultimate Chicken Fingers FAQs
- Can I use regular chicken breasts? Yes—slice them into finger-sized strips and adjust baking time; thicker strips will need a few extra minutes. Aim for 165°F internal temperature.
- Can I bread ahead of time? You can bread and hold uncooked fingers in the fridge for a few hours. If you bread much earlier, the coating can soften, so it’s best to bake within a few hours of breading.
- Why didn’t my coating stick? Excess egg or a wet surface prevents adhesion. Pat the tenderloins dry before seasoning and make sure to let extra egg drip off before dredging in the dry mix.
- How do I get the coating darker? Lightly mist the tops with oil or use a slightly higher proportion of Parmesan; you can also broil for 30–60 seconds at the end—watch closely.
- Is Bisquick essential? Bisquick creates a particular biscuit-like structure in the crust. You can substitute with a similar biscuit mix or a blend of flour and baking powder, but results will vary.
Make It Tonight
This recipe is a great weeknight anchor because it’s quick, predictable, and crowd-pleasing. Preheat your oven, lay out two shallow dishes for the egg and the dry mix, and plan for about 20–25 minutes from start to table for a single batch. Pair with a simple green salad, carrot sticks, or fries and a dipping sauce—ranch, honey mustard, or a quick garlic-yogurt sauce all work well.
One more practical note: line your baking sheet with foil for easy cleanup, and be ready to flip about halfway through. Follow the steps above, and you’ll have crisp, juicy chicken fingers without the mess or fuss of frying. Enjoy—serve hot, and expect requests for seconds.

Ultimate Chicken Fingers
Ingredients
Ingredients
- 1 1/2 lbchicken tenderloins
- 2/3 cupBisquick
- 1/2 cupgrated Parmesan cheese
- 1 tspgarlic salt
- 1/2 tsppaprika
- 1 largeegg slightly beaten
- pepper ,to taste
- cooking spray
Instructions
Instructions
- Preheat oven to 450°F. Line a baking sheet with foil and spray the foil with cooking spray.
- In a shallow plate or dish, combine 2/3 cup Bisquick, 1/2 cup grated Parmesan cheese, 1 tsp garlic salt, and 1/2 tsp paprika; set aside.
- In a separate shallow dish, slightly beat 1 large egg.
- Season the 1½ lb chicken tenderloins with pepper to taste.
- Working one at a time (or in batches), dip each tenderloin into the beaten egg, letting excess egg drip off, then press and turn it in the Bisquick mixture to coat evenly. Shake off any excess coating.
- Arrange the coated chicken on the prepared baking sheet in a single layer, leaving space between pieces. Lightly spray the tops of the coated chicken with cooking spray.
- Bake at 450°F for 12–14 minutes, flipping once about halfway through (after ~6–7 minutes), until the chicken reaches an internal temperature of 165°F when measured at the thickest part.
- Remove from the oven and let rest 1–2 minutes before serving.
Equipment
- Cookie Sheet
- Parchment Paper
- Meat Thermometer
Notes
If you need a gluten-free dish, you can use Gluten-Free Bisquick.
Can the Ultimate Chicken Fingers be made in advance? Yes! You can coat the chicken and refrigerate it overnight.
Can Homemade Chicken Tenders be frozen? Yes. Coat the chicken and place on a baking sheet. Place the sheet in the freezer until the chicken is frozen. Transfer the chicken to a freezer bag. The chicken will keep up to 3 months in the freezer.You can bake the chicken frozen. Simply add a few minutes to the cooking time.
You can bake the chicken frozen. Simply add a few minutes to the cooking time.
Can Chicken Fingers be cooked in the air fryer? Yes. You can coat the chicken and cook it in the air fryer at 375ºF for 8 minutes.


