
This white chocolate bark is one of those holiday projects that looks far fancier than the work it takes. It’s mostly melting, swirling, and sprinkling — nothing fussy, and the payoff is big. I love how a simple sheet of candy becomes something you can gift, snack on, or turn into a centerpiece on a cookie platter.
It’s forgiving, fast, and ideal for doing with kids around the kitchen counter. You don’t need tempering skills or special chocolate tools. The bright white candy melts give you a clean canvas; the green and red melts create festive swirls in minutes. Add sprinkles and you’ve got immediate charm.
Below I’ll walk you through exactly what to do, what to watch for, and a few ways to customize it so each batch feels personal. Read the steps once, gather your ingredients, and you’ll have gorgeous bark before your guests arrive.
The Essentials
This recipe is built around candy melts rather than couverture chocolate, so the melting process is straightforward and the finish stays glossy and stable at room temperature. You’ll be working mostly with three types: bright white, dark green, and red candy melts, finished with holiday sprinkles. No tempering required, which makes this perfect for quick holiday trays or last-minute edible gifts.
Timing is short. Most of the work is melting and spreading; the bark sets at room temperature in a matter of minutes to an hour depending on how cool your kitchen is. If you need it faster, the freezer will shave off a few minutes — use it sparingly and only to speed setting, not to harden the candy rapidly and risk bloom.
Basic skills required: melting in the microwave, piping from a bag, and a little dragging with a knife to get a marbled effect. I’ll point out shortcuts and safety tips so you can move through the steps confidently.
Ingredients
- 12oz.bright white candy melts — the base of the bark; provides the smooth, sweet white canvas.
- 2tbspdark green candy melts — used for the green spiral; adds color contrast and festive tone.
- 2tbspred candy melts — used for the red spiral; pairs with green for a classic holiday look.
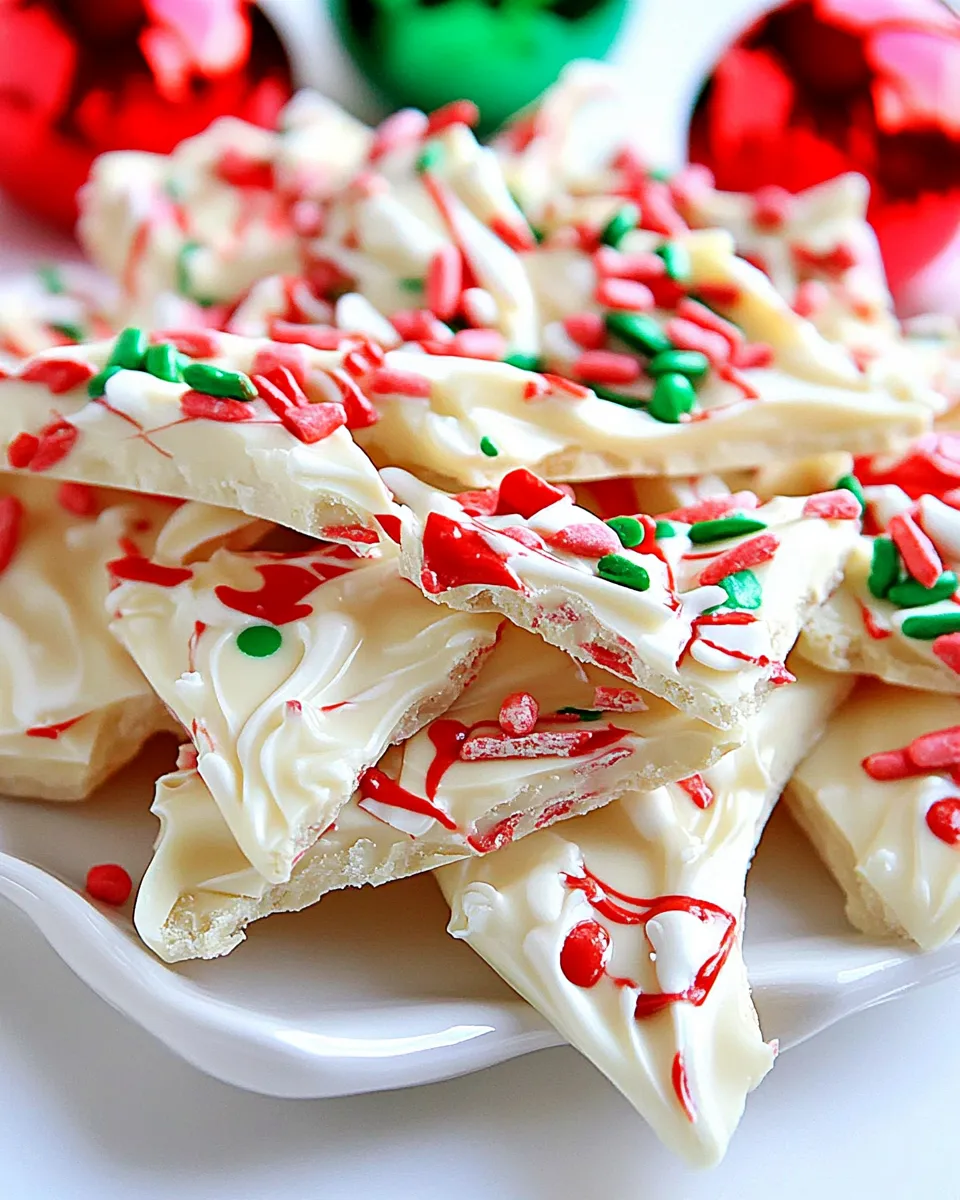
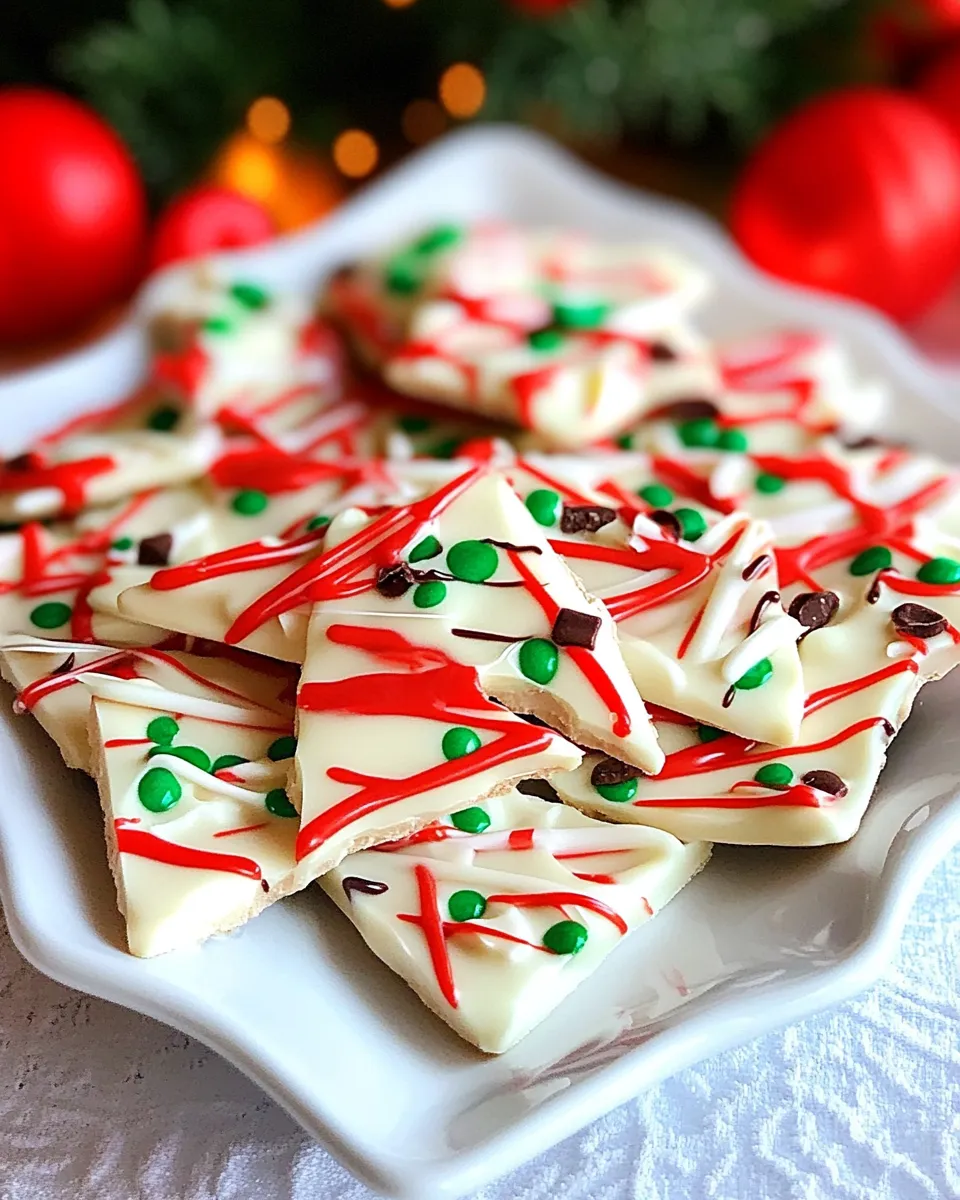
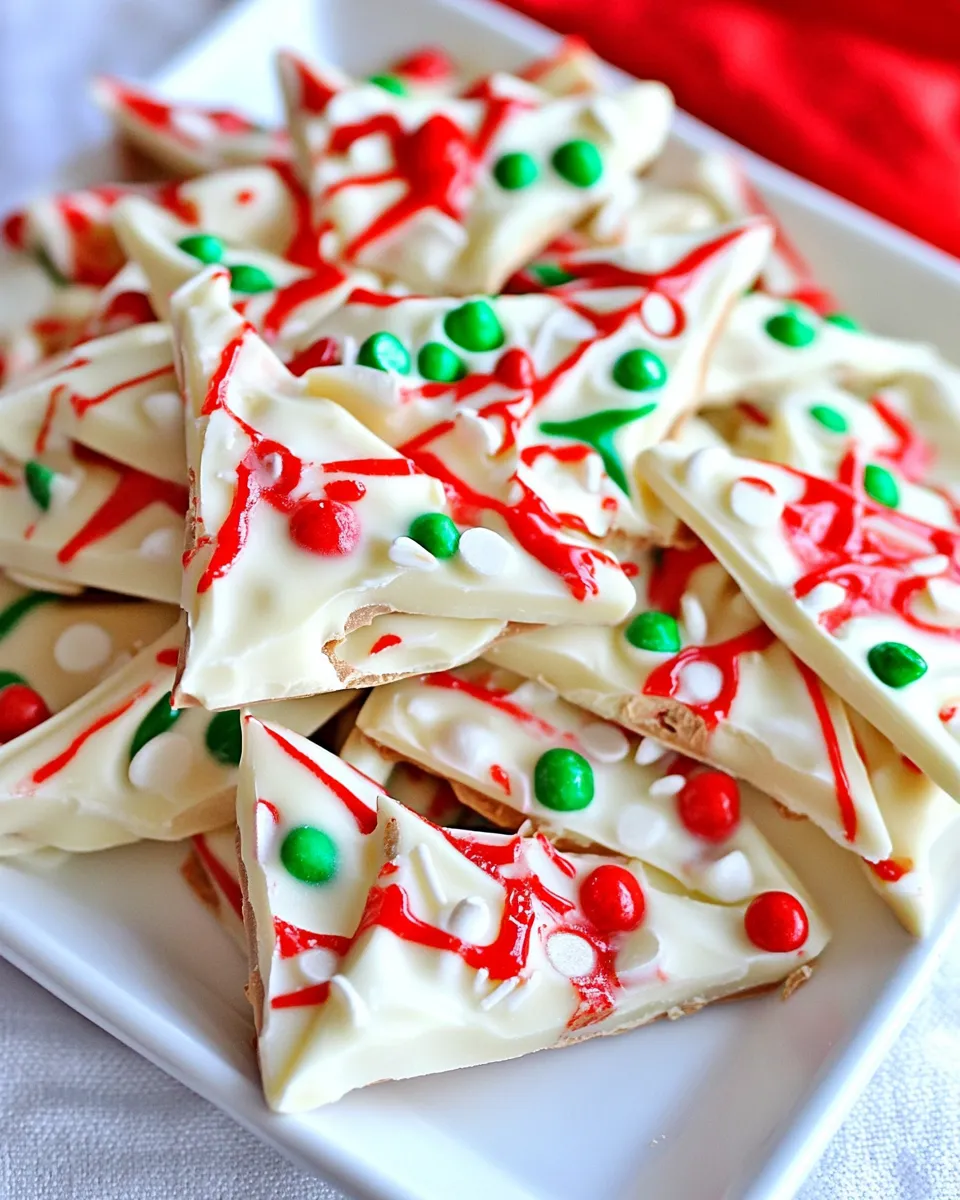
- holiday sprinkles — decorative finish; sprinkle immediately so they stick while the candy is still soft.
From Start to Finish: White Chocolate Bark
- Line a baking sheet with parchment paper; set aside.
- Place the dark green candy melts (2 tbsp) into a resealable sandwich bag and place the red candy melts (2 tbsp) into a separate resealable sandwich bag. Do not seal the bags yet.
- Put the bright white candy melts (12 oz) in a microwave‑safe bowl. Microwave at 50% power for 60 seconds, stir, then continue heating at 50% power in 15–20 second increments, stirring between each interval, until melted and smooth. Set aside and keep warm.
- Put the unsealed bags of dark green and red candy melts in the microwave. Heat at 50% power for 30 seconds, carefully remove, then knead each bag and flip it over. Continue microwaving in 15–20 second increments at 50% power, kneading after each interval, until each color is completely melted and smooth.
- Seal each bag and snip a very small corner from the tip to create a piping opening.
- Working quickly, pour the melted white candy onto the prepared parchment and spread with a spatula to an even thickness of about 1/8 inch.
- Starting at the center of the white layer, pipe a spiral of dark green melted candy outward. Repeat by piping a spiral of red melted candy starting at the center as well.
- Use a knife to drag from the center outward through the spirals (repeat a few times as desired) to create a marbled swirl effect.
- Immediately sprinkle holiday sprinkles over the top while the candy is still soft.
- Let the bark stand until completely hardened at room temperature. To speed setting, place in the freezer for up to 5 minutes.
Why This Recipe Belongs in Your Rotation

It’s reliable. With candy melts you remove the variable of tempering real chocolate, so every batch turns out glossy and set. That reliability makes this bark perfect for busy holidays and last-minute entertaining. You can crank out several sheets in a single afternoon and have them on hand for dessert trays, hostess gifts, or easy party favors.
It’s versatile. The same method works with any color combo or sprinkle mix, so you can adapt it for birthdays, Valentine’s Day, or any celebration. It’s also a great technique to teach kids: the steps are safe, and the visual payoff is immediate. If you’re short on time, keep the design simple — a few swirls and a sprinkle shower is very effective.
It’s portable and gift-ready. Once set, bark breaks into pieces that can be wrapped in cellophane, placed in tins, or used as edible toppers. Because it’s made with candy melts, it’s less sensitive to temperature than tempered chocolate, which helps during the transport of holiday treats.
International Equivalents
If you don’t have candy melts in your market, look for similar confectionery coating products marketed as candy coating, candy wafers, or melting wafers. They’re essentially the same thing: confectionery coating that melts easily and resets with a stable finish. In some countries they’re sold by brand names rather than “candy melts.”
Substituting real white chocolate is possible but changes the technique: you’ll need to temper the chocolate or accept a softer, potentially bloom-prone finish. For a no-temper approach that still tastes like real chocolate, search for couverture-style melting blocks labeled for coating that include cocoa butter.
Before You Start: Equipment
Gather these basic, everyday tools so you don’t slow down mid-process. You probably already own most of them.
- Microwave‑safe bowl for melting the white candy melts.
- Resealable sandwich bags for the colored melts (two bags).
- Baking sheet and parchment paper to set the bark on.
- Spatula for spreading the white layer evenly to about 1/8 inch thickness.
- Sharp knife for dragging swirls and for breaking the set bark into pieces.
- Optional: a cooling rack and a second baking sheet underneath the parchment if you want easier handling when moving to the freezer.
Avoid These Mistakes
Don’t overheat. Candy melts scorch if left too long. Heat at 50% power and use short intervals. Stir regularly; even a few seconds beyond “melted” can make them grainy.
Don’t seal the bags until the melts are hot and you’re ready to snip. The directions call for unsealed bags while warming — that helps steam escape and keeps the texture smooth. Seal only after the melts are fully liquefied and you’re ready to pipe.
Work swiftly with the white layer. The marbling effect depends on the white base being soft enough to accept the colored spirals and dragging motions. If the white sets before you pipe, reheat very briefly to soften, or spread a thinner layer next time so it cools slower.
Don’t pour too thick. The recipe suggests about 1/8 inch — thicker slabs take longer to set and are harder to break cleanly. Thinner bark snaps more crisply and looks more elegant.
Customize for Your Needs
Color and Flavor Options
You can substitute the green and red candy melts with any colors you like. Pastel palettes for spring, metallics for a special occasion, or neon for a party all work. If you want a flavor change, look for flavored candy melts (peppermint, strawberry, etc.) and use the same method. Be mindful of contrasting colors — the white base is your canvas, so pick accents that pop.
Decoration Ideas
Holiday sprinkles are the quickest finish, but you can mix in chopped nuts, crushed cookies, freeze-dried fruit pieces, or tiny candy canes. Add them immediately after creating the marbled top so they adhere while the candy is still soft.
Pro Perspective
As a test kitchen trick, I keep a small heatproof cup of warm water nearby. If a spatula or knife picks up any hard bits of candy, dip and wipe it before continuing — it keeps lines clean and the surface smooth. Also, when piping from bags, snip as small a hole as you can manage: smaller openings give you finer control over swirl width and require less heat in the bag to keep the melt moving.
Another pro tip: use a silicone baking mat under the parchment if you plan to lift the whole sheet to the freezer. It prevents slippage and makes transferring the set bark to a cutting surface easier. Work on a cool, dry countertop — humidity can affect how quickly candy sets.
Leftovers & Meal Prep
Store the bark in a single layer or separated by parchment in an airtight container at room temperature, away from direct heat and sunlight. If your kitchen is warm, keep it in the coolest dry spot; you can refrigerate briefly but be aware that condensation can form when bringing pieces back to room temperature and dull the shine.
For gifting, stack pieces between sheets of parchment and place in tins or boxes. If you need to make this in advance, you can prepare multiple sheets and store them for a week or two — just package them airtight so they don’t absorb pantry odors or moisture.
Helpful Q&A
Q: Can I use real white chocolate instead of candy melts?
A: Yes, but real white chocolate often needs tempering to keep a smooth, non-bloomed finish. If you skip tempering, expect a softer texture and a greater chance of fat bloom over time. For ease and consistent results, candy melts are recommended.
Q: What if my colored melts seize or get grainy?
A: That usually means they were overheated or got water in them. Stop microwaving, stir, and if the texture is salvageable, return to very short heat bursts at lower power. If they’ll not smooth out, you may need a fresh pouch.
Q: Can I melt the candy melts on the stovetop?
A: You can use a double boiler (a heatproof bowl over simmering water) to melt them gently if you prefer. Keep the water from touching the bowl and avoid steam/water droplets in the melts, as moisture causes graininess.
Q: How thin should I spread the white layer?
A: Aim for about 1/8 inch. It spreads and sets nicely, offers the right balance between snap and melt, and makes marbling effective without being too thick to break cleanly.
Before You Go
This white chocolate bark is my go-to for quick, pretty holiday treats. The method is simple and repeatable, and the results always look intentional. Keep your workspace organized, use small snips in the piping bags for control, and don’t rush the cooling — patience at the end gives you the best-looking pieces. Try one batch with classic red and green, then experiment with other colors or toppings. You’ll find this technique pops up in my seasonal trays more often than you’d expect.
If you give this a try, come back and tell me which color combo you made. I love seeing how readers personalize simple recipes like this.
White Chocolate Bark
Ingredients
Ingredients
- 12 oz.bright white candy melts
- 2 tbspdark green candy melts
- 2 tbspred candy melts
- holiday sprinkles
Instructions
Instructions
- Line a baking sheet with parchment paper; set aside.
- Place the dark green candy melts (2 tbsp) into a resealable sandwich bag and place the red candy melts (2 tbsp) into a separate resealable sandwich bag. Do not seal the bags yet.
- Put the bright white candy melts (12 oz) in a microwave‑safe bowl. Microwave at 50% power for 60 seconds, stir, then continue heating at 50% power in 15–20 second increments, stirring between each interval, until melted and smooth. Set aside and keep warm.
- Put the unsealed bags of dark green and red candy melts in the microwave. Heat at 50% power for 30 seconds, carefully remove, then knead each bag and flip it over. Continue microwaving in 15–20 second increments at 50% power, kneading after each interval, until each color is completely melted and smooth.
- Seal each bag and snip a very small corner from the tip to create a piping opening.
- Working quickly, pour the melted white candy onto the prepared parchment and spread with a spatula to an even thickness of about 1/8 inch.
- Starting at the center of the white layer, pipe a spiral of dark green melted candy outward. Repeat by piping a spiral of red melted candy starting at the center as well.
- Use a knife to drag from the center outward through the spirals (repeat a few times as desired) to create a marbled swirl effect.
- Immediately sprinkle holiday sprinkles over the top while the candy is still soft.
- Let the bark stand until completely hardened at room temperature. To speed setting, place in the freezer for up to 5 minutes.
Equipment
- Baking Sheet
- Parchment Paper
- ziplock baggies
Notes
How to Store Chocolate Bark
Can be stored on the counter at room temp in an air-tight container or ziplock back for up to 2 weeks. Store in fridge for up to a month.
Please see the full article for additional topping suggestions.


