
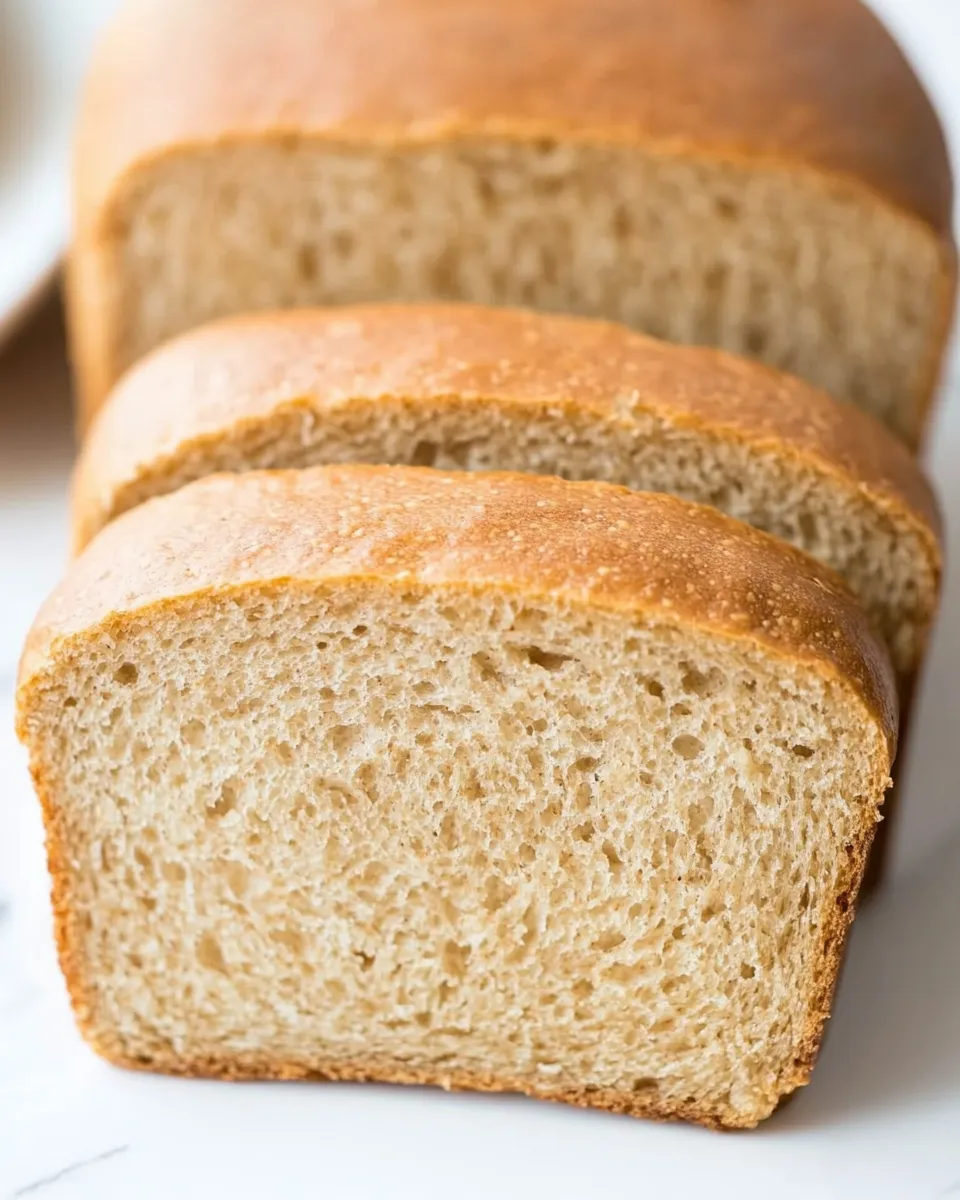
I bake a lot of loaves, but this Whole Wheat Sandwich Bread has earned a permanent spot in my rotation. It’s a method-driven recipe that leans on an overnight biga and a hydrated soaker to give the bread depth, structure, and a tender crumb—without relying on white flour alone. The result is a loaf that slices predictably for sandwiches but tastes like something you’d find at a neighborhood bakery.
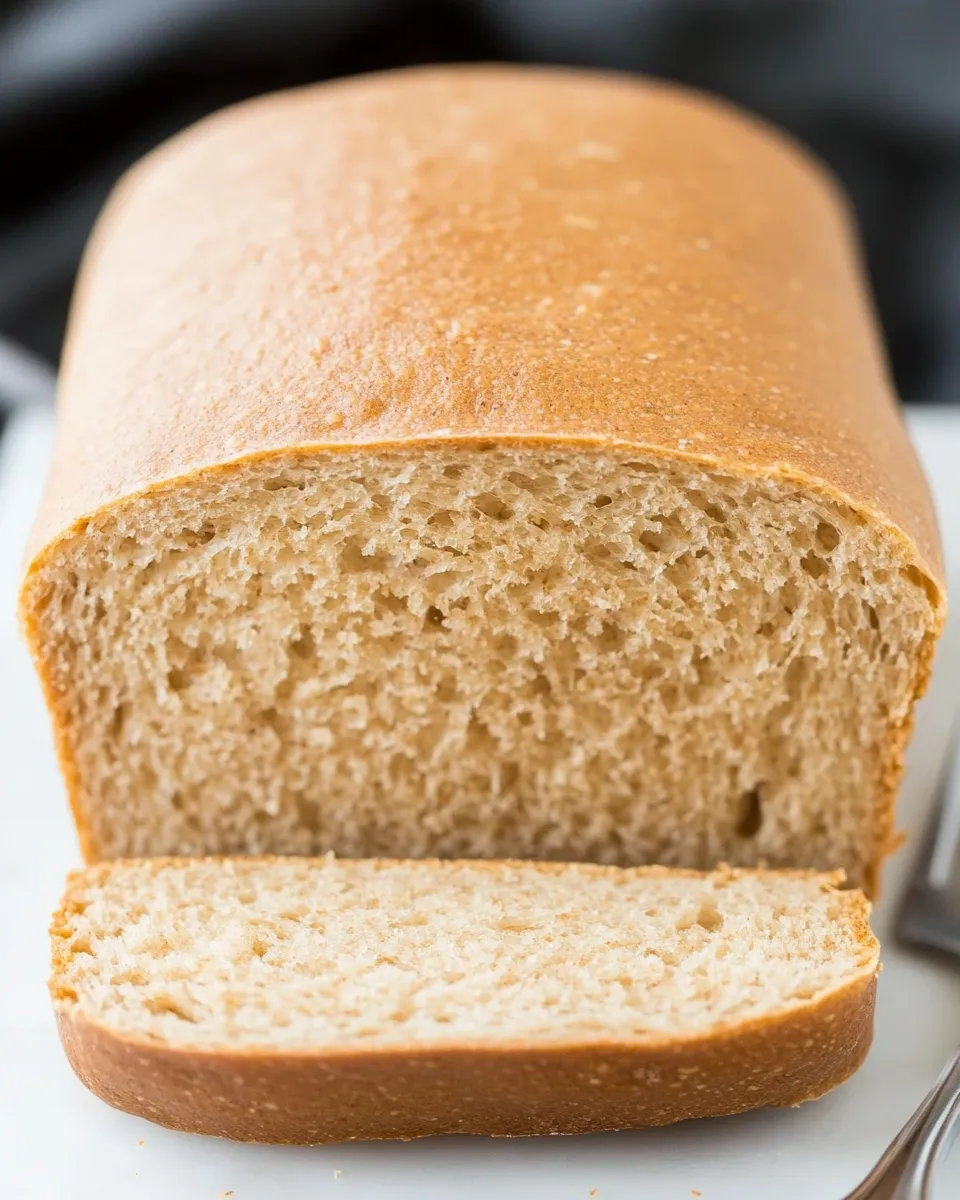
Don’t be intimidated by the multiple steps: the overnight rests do the heavy lifting. Most of the hands-on time is concentrated in a few key sessions—mixing, folding, shaping, and baking. Between those sessions you can work, run errands, or sleep. If you follow the order and temperatures below, you’ll get consistent loaves with a deep brown crust and soft, wheaty interior.
I’ll walk you through the ingredient intent, the exact step sequence, common pitfalls to avoid, and ways to tweak flavor without breaking the chemistry. This is practical baking—warm, precise, and focused on results.
Ingredient Rundown
- 2cups(312g)bread flour — Builds gluten structure; reserve extra for dusting and kneading as noted.
- 1cup(240ml)warm water (100-110 degrees F) — Activates the yeast for the biga; should feel comfortably warm, not hot.
- ½teaspoon(0.5teaspoon)instant or rapid-rise yeast — Yeast for the biga; small amount gives slow ferment flavor overnight.
- 3cups(468g)whole-wheat flour, plus extra for kneading — The primary flour for flavor and nutrition; whole wheat soaker tenderizes the crumb.
- ½cup(57g)wheat germ — Adds nutty flavor and a nutritional boost; also absorbs liquid in the soaker.
- 2cups(480ml)whole milk — Hydrates the soaker and enriches the dough for a softer crumb and longer shelf life.
- ¼cup(85g)honey — Natural sweetener and tenderizer; contributes browning and flavor balance.
- 4teaspoonstable salt — Controls fermentation and enhances flavor; measured as written for balance.
- 2tablespoonsinstant or rapid-rise yeast — Main yeast for bulk fermentation and final rise; the larger dose speeds the process.
- 6tablespoonsunsalted butter, softened — Adds tenderness and richness; softened so it incorporates easily into the slack dough.
- 2tablespoonsvegetable oil — A little fat to improve softness and shelf life without adding butter flavor.
- Bread flour,for work surface — For dusting while shaping; prevents sticking without altering the dough hydration significantly.
How to Prepare (Whole Wheat Sandwich Bread)
- Make the biga: In a large bowl, combine 2 cups (312 g) bread flour, 1 cup (240 ml) warm water (100–110°F / 38–43°C), and ½ teaspoon instant or rapid-rise yeast. Stir with a wooden spoon until a uniform mass forms and no dry flour remains, about 1 minute. Cover tightly with plastic wrap and let stand at room temperature overnight (at least 8 hours and up to 24 hours).
- Make the soaker: In a separate large bowl, combine 3 cups (468 g) whole-wheat flour, ½ cup (57 g) wheat germ, and 2 cups (480 ml) whole milk. Stir with a wooden spoon until a shaggy mass forms, about 1 minute. Cover tightly with plastic wrap and refrigerate overnight (at least 8 hours and up to 24 hours).
- Assemble the dough: Tear the chilled soaker into roughly 1-inch pieces and place them in the bowl of a stand mixer fitted with the dough hook. Add the biga, ¼ cup (85 g) honey, 4 teaspoons table salt, 2 tablespoons instant or rapid-rise yeast, 6 tablespoons (unsalted) butter softened, and 2 tablespoons vegetable oil.
- Mix and knead in the mixer: Mix on low speed until a cohesive mass begins to form, about 2 minutes. Increase mixer speed to medium and knead until the dough is smooth and elastic, 8 to 10 minutes. The dough will be very soft and slack.
- Brief hand shaping and first rise: Turn the dough out onto a lightly floured work surface (use bread flour) and knead by hand one minute to form a ball. Transfer the dough to a large, lightly greased bowl, cover tightly with plastic wrap, and let rise at room temperature for 45 minutes.
- Perform folds: Lightly flour your fingertips. Gently press down the center of the dough to deflate it. Holding an edge of the dough with your fingertips, lift the edge and fold it toward the middle. Rotate the bowl 90° and repeat. Continue until you have completed a total of 8 folds. Cover the bowl and allow the dough to rise at room temperature until doubled in volume, about 45 minutes.
- Prepare for shaping and preheat oven: Adjust oven racks to the middle and lowest positions and place a baking stone on the middle rack. Preheat the oven to 400°F (200°C). Spray two 9×5-inch loaf pans with nonstick cooking spray. Place an empty (not glass) baking pan on the bottom rack to receive boiling water later.
- Shape the loaves: Turn the dough out onto a well-floured work surface (bread flour) and divide into two equal pieces. Working with one piece at a time, pat it into an 8×17-inch rectangle with the short side facing you. Roll the dough toward you into a firm cylinder, keeping the roll taut by tucking the dough under itself as you go. Turn the loaf seam side up and pinch the seam closed, then place the loaf seam side down into a prepared loaf pan, pressing gently into the corners. Repeat with the second piece.
- Final rise: Loosely cover the loaves with plastic wrap and let rise at room temperature until almost doubled and the tops rise about 1 inch above the edge of the pans, 60 to 90 minutes.
- Add steam, slash, and bake: Bring 2 cups of water to a boil on the stove. Using a sharp serrated knife or single-edge razor blade, make one ¼-inch-deep slash lengthwise down the center of each loaf. Carefully pour the boiling water into the empty baking pan on the bottom rack to create steam, then immediately place the loaf pans on the baking stone on the middle rack. Reduce oven temperature to 350°F (177°C). Bake until the crust is dark brown and the internal temperature registers 200°F (93°C), 40 to 50 minutes, rotating the pans 180° and side to side halfway through baking.
- Cool and store: Transfer the pans to a wire rack and let cool in the pans for 5 minutes. Remove the loaves from the pans and return them to the wire rack to cool to room temperature, about 2 hours. Double-wrap the cooled loaves in plastic wrap and store at room temperature for up to 3 days, or wrap in an additional layer of aluminum foil and freeze for up to 1 month.
Reasons to Love (Whole Wheat Sandwich Bread)
This loaf hits three important marks: texture, flavor, and shelf life. The overnight biga gives background fermentation for nutty complexity, while the milk-soaked whole-wheat blend keeps the crumb tender and sliceable. You get a sandwich loaf that stands up to fillings without being dry or gummy.
It’s forgiving. Slack dough can be unsettling, but the folding routine builds strength without aggressive kneading. The method also separates the time-consuming chemistry (overnights) from the quick hands-on sessions, which fits into busy days.
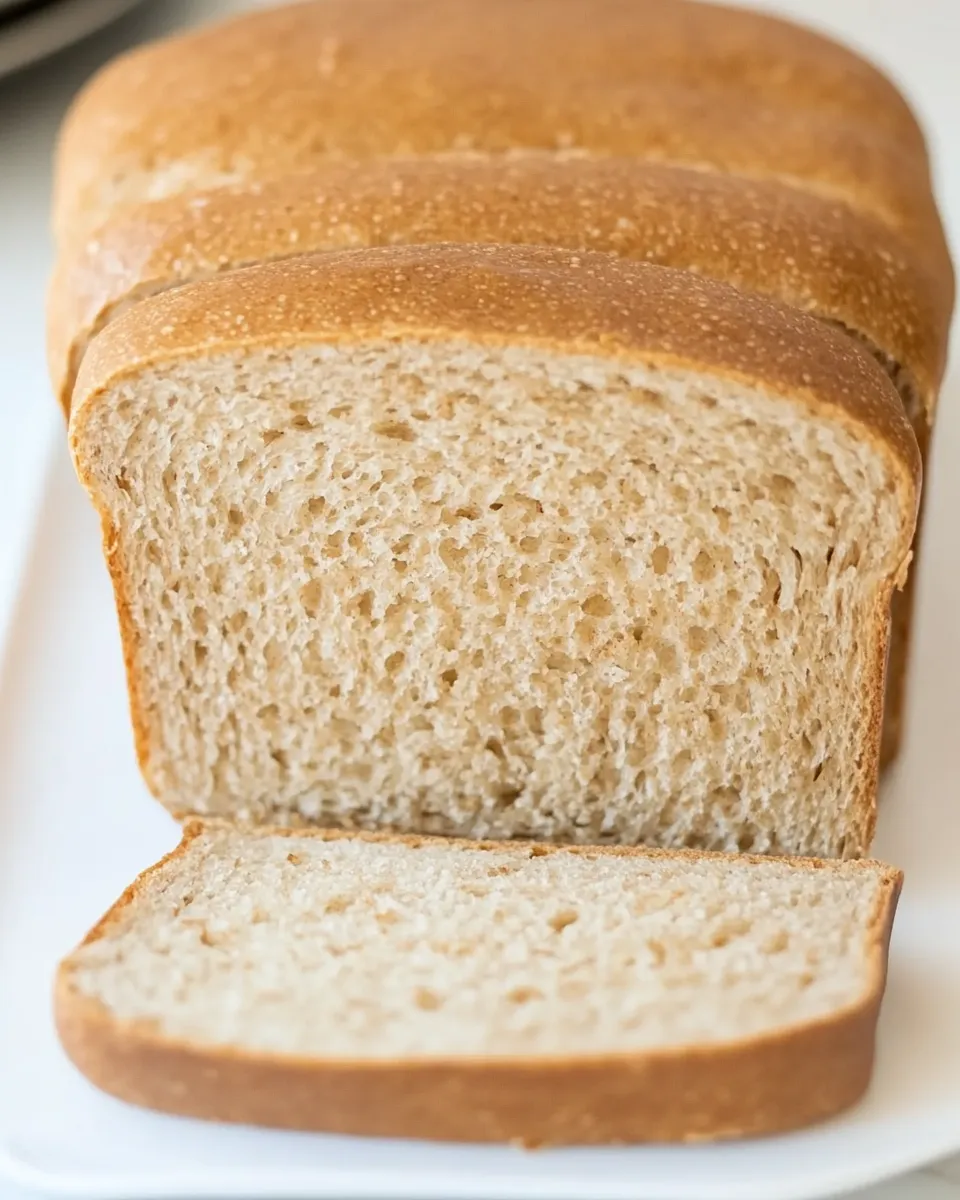
Finally, the loaf stores and freezes well, which makes it practical. Slice and freeze for quick sandwiches or toast one or two slices for weekday breakfasts—this bread performs well both fresh and reheated.
Flavor-Forward Alternatives
- Boosted nuttiness: Add a tablespoon or two of toasted sunflower seeds or finely chopped toasted nuts into the dough at the end of mixing for texture and flavor. Fold them in gently so you don’t overwork the dough.
- Seeded crust: Brush the tops with a little water or milk before baking and press sesame or poppy seeds into the crust for a more aromatic finish.
- Molasses swap: Replace part or all of the honey with dark molasses (equal weight) for a deeper, slightly smoky sweetness—adjust to taste. This will also darken the crumb slightly.
- Herbed loaf: Fold in a tablespoon of finely minced fresh herbs (rosemary, thyme) to the dough for savory sandwiches—add at the end of mixing.
Toolbox for This Recipe

- Stand mixer with dough hook — Makes kneading the soft, slack dough reliable and hands-off.
- Two 9×5-inch loaf pans — For shaping and baking; use metal for even browning.
- Baking stone and an extra oven-safe pan — The stone stabilizes oven temperature; the bottom pan is for steam.
- Instant-read thermometer — To check that the internal temperature reaches 200°F (93°C).
- Sharp serrated knife or razor blade — For clean slashes prior to baking.
- Plastic wrap and wire rack — For covered rises and proper cooling.
Easy-to-Miss Gotchas
Room temperature matters. The biga and soaker are meant to sit overnight; if your kitchen is very warm, they’ll ferment faster and could overproof. If it’s cold, they may be sluggish—aim for a stable kitchen temperature around 68–75°F if possible.
Don’t over-flour. The recipe calls for extra bread flour for the work surface, but the dough should remain soft and slack. Adding too much flour during shaping will dry the crumb and produce a tighter, less tender loaf.
Steam timing is critical. Pour the boiling water into the bottom pan right before the loaves go in. If you delay too long, the steam dissipates and you’ll get a blunter crust. Use boiling water only—cold water won’t produce the same burst of steam.
Watch the internal temperature. Darker crust doesn’t necessarily mean done inside; use a thermometer and aim for 200°F (93°C) for fully baked crumb structure.
In-Season Flavor Ideas
Whole wheat plays beautifully with seasonal ingredients. In fall, a touch of grated apple and a teaspoon of cinnamon can add brightness when folded into the dough near the end of mixing. Late summer, fold in a small handful of chopped sun-dried tomatoes and a teaspoon of dried oregano for savory sandwiches. In winter, replace half the honey with maple syrup for a cozy, warming note.
Keep additions modest. Whole-wheat dough is dense by nature; large quantities of add-ins can weigh down the loaf and interfere with proper rising. Think small and strategic—one to two tablespoons of strong-flavored ingredients or a quarter cup of textured add-ins per two-loaf batch is usually enough.
Notes on Ingredients
Bread flour is higher in protein than all-purpose; it’s listed for structure and chew. Whole-wheat flour and wheat germ add flavor and nutrients but absorb more liquid, which is why the soaker and biga are essential: they modify hydration and make the dough manageable.
Instant or rapid-rise yeast is used in both the biga (small amount) and the main dough (larger dose). The different quantities control the rate and timing of fermentation. If you prefer active dry yeast, proof it in the warm water before mixing and adjust timing as needed.
Butter and vegetable oil both add softness; butter gives flavor while oil boosts tenderness and makes the loaf easier to slice. If you use salted butter, reduce the measured table salt slightly to avoid over-seasoning.
Storing, Freezing & Reheating
Store double-wrapped at room temperature for up to 3 days as the recipe directs. For longer storage, freeze whole loaves for up to 1 month. Wrap tightly in plastic wrap and then in foil. To use, thaw at room temperature still wrapped so moisture redistributes and the crumb softens.
For single slices, freeze separated by parchment or plastic wrap so you can pull out just what you need. Reheat slices straight from frozen in a toaster or toaster oven for 2–4 minutes until warmed through and slightly crisped.
To refresh a slightly stale loaf, sprinkle the exterior lightly with water, wrap in foil, and place in a 300°F (150°C) oven for 10–12 minutes. This refreshes the crust and reinvigorates the crumb without overbrowning.
FAQ
Q: My dough feels too slack to shape—what should I do? A: That’s expected with this formula. Use well-floured hands and surface and handle gently. The folding steps build strength; avoid adding large amounts of flour during mixing. If the dough tears continuously, a brief cold rest (10–15 minutes) in the refrigerator can firm it slightly and make shaping easier.
Q: Can I use all-purpose flour instead of bread flour? A: You can, but the loaf will be slightly less chewy and might spread a bit more. Bread flour gives better structure for sandwich slices. If only all-purpose is available, you may need a slightly longer knead to develop gluten.
Q: Can the recipe be made without a baking stone? A: Yes. A baking stone creates more even heat but a preheated heavy baking sheet will work. Place the loaves on the preheated sheet and use the bottom pan for steam as directed.
Q: How will I know if I overproofed? A: Overproofed loaves will rise quickly and then collapse or be very flat after baking. The tops may not brown deeply and the crumb can be gummy. If overproofing occurs in the final rise, gentle refrigeration for 20–30 minutes can slow activity and help regain some structure before baking.
That’s a Wrap
This Whole Wheat Sandwich Bread rewards a little planning: two simple overnights and a focused shaping session yield a dependable loaf that’s flavorful, versatile, and practical. Follow the timed steps, keep your hands light with flour, and use steam for a deep brown crust. Whether you’re making sandwiches, toast, or simply slicing for the week, this formula gives you bakery-quality loaves at home.
Make a double batch of biga and soaker if you bake often—you can refrigerate and use them within the stated windows. Once you get comfortable with the rhythm—overnight rests, short active sessions, steam and a thermometer—you’ll find this bread becomes one of your kitchen staples.
Whole Wheat Sandwich Bread
Ingredients
Ingredients
- 2 cups 312 gbread flour
- 1 cup 240 mlwarm water (100-110 degrees F)
- 1/2 teaspoon 0.5 teaspooninstant or rapid-rise yeast
- 3 cups 468 gwhole-wheat flour, plus extra for kneading
- 1/2 cup 57 gwheat germ
- 2 cups 480 mlwhole milk
- 1/4 cup 85 ghoney
- 4 teaspoonstable salt
- 2 tablespoonsinstant or rapid-rise yeast
- 6 tablespoonsunsalted butter softened
- 2 tablespoonsvegetable oil
- Bread flour for work surface
Instructions
Instructions
- Make the biga: In a large bowl, combine 2 cups (312 g) bread flour, 1 cup (240 ml) warm water (100–110°F / 38–43°C), and ½ teaspoon instant or rapid-rise yeast. Stir with a wooden spoon until a uniform mass forms and no dry flour remains, about 1 minute. Cover tightly with plastic wrap and let stand at room temperature overnight (at least 8 hours and up to 24 hours).
- Make the soaker: In a separate large bowl, combine 3 cups (468 g) whole-wheat flour, ½ cup (57 g) wheat germ, and 2 cups (480 ml) whole milk. Stir with a wooden spoon until a shaggy mass forms, about 1 minute. Cover tightly with plastic wrap and refrigerate overnight (at least 8 hours and up to 24 hours).
- Assemble the dough: Tear the chilled soaker into roughly 1-inch pieces and place them in the bowl of a stand mixer fitted with the dough hook. Add the biga, ¼ cup (85 g) honey, 4 teaspoons table salt, 2 tablespoons instant or rapid-rise yeast, 6 tablespoons (unsalted) butter softened, and 2 tablespoons vegetable oil.
- Mix and knead in the mixer: Mix on low speed until a cohesive mass begins to form, about 2 minutes. Increase mixer speed to medium and knead until the dough is smooth and elastic, 8 to 10 minutes. The dough will be very soft and slack.
- Brief hand shaping and first rise: Turn the dough out onto a lightly floured work surface (use bread flour) and knead by hand one minute to form a ball. Transfer the dough to a large, lightly greased bowl, cover tightly with plastic wrap, and let rise at room temperature for 45 minutes.
- Perform folds: Lightly flour your fingertips. Gently press down the center of the dough to deflate it. Holding an edge of the dough with your fingertips, lift the edge and fold it toward the middle. Rotate the bowl 90° and repeat. Continue until you have completed a total of 8 folds. Cover the bowl and allow the dough to rise at room temperature until doubled in volume, about 45 minutes.
- Prepare for shaping and preheat oven: Adjust oven racks to the middle and lowest positions and place a baking stone on the middle rack. Preheat the oven to 400°F (200°C). Spray two 9×5-inch loaf pans with nonstick cooking spray. Place an empty (not glass) baking pan on the bottom rack to receive boiling water later.
- Shape the loaves: Turn the dough out onto a well-floured work surface (bread flour) and divide into two equal pieces. Working with one piece at a time, pat it into an 8×17-inch rectangle with the short side facing you. Roll the dough toward you into a firm cylinder, keeping the roll taut by tucking the dough under itself as you go. Turn the loaf seam side up and pinch the seam closed, then place the loaf seam side down into a prepared loaf pan, pressing gently into the corners. Repeat with the second piece.
- Final rise: Loosely cover the loaves with plastic wrap and let rise at room temperature until almost doubled and the tops rise about 1 inch above the edge of the pans, 60 to 90 minutes.
- Add steam, slash, and bake: Bring 2 cups of water to a boil on the stove. Using a sharp serrated knife or single-edge razor blade, make one ¼-inch-deep slash lengthwise down the center of each loaf. Carefully pour the boiling water into the empty baking pan on the bottom rack to create steam, then immediately place the loaf pans on the baking stone on the middle rack. Reduce oven temperature to 350°F (177°C). Bake until the crust is dark brown and the internal temperature registers 200°F (93°C), 40 to 50 minutes, rotating the pans 180° and side to side halfway through baking.
- Cool and store: Transfer the pans to a wire rack and let cool in the pans for 5 minutes. Remove the loaves from the pans and return them to the wire rack to cool to room temperature, about 2 hours. Double-wrap the cooled loaves in plastic wrap and store at room temperature for up to 3 days, or wrap in an additional layer of aluminum foil and freeze for up to 1 month.
Equipment
- Large Bowl
- Stand mixer
- dough hook
- Measuring Cups
- Measuring Spoons
- Wooden Spoon
- Plastic Wrap
- 9x5-inch loaf pans
- baking stone
- baking pan (for steam)
- Oven
- sharp serrated knife or razor blade
Notes
Nutritional values are based on one serving


