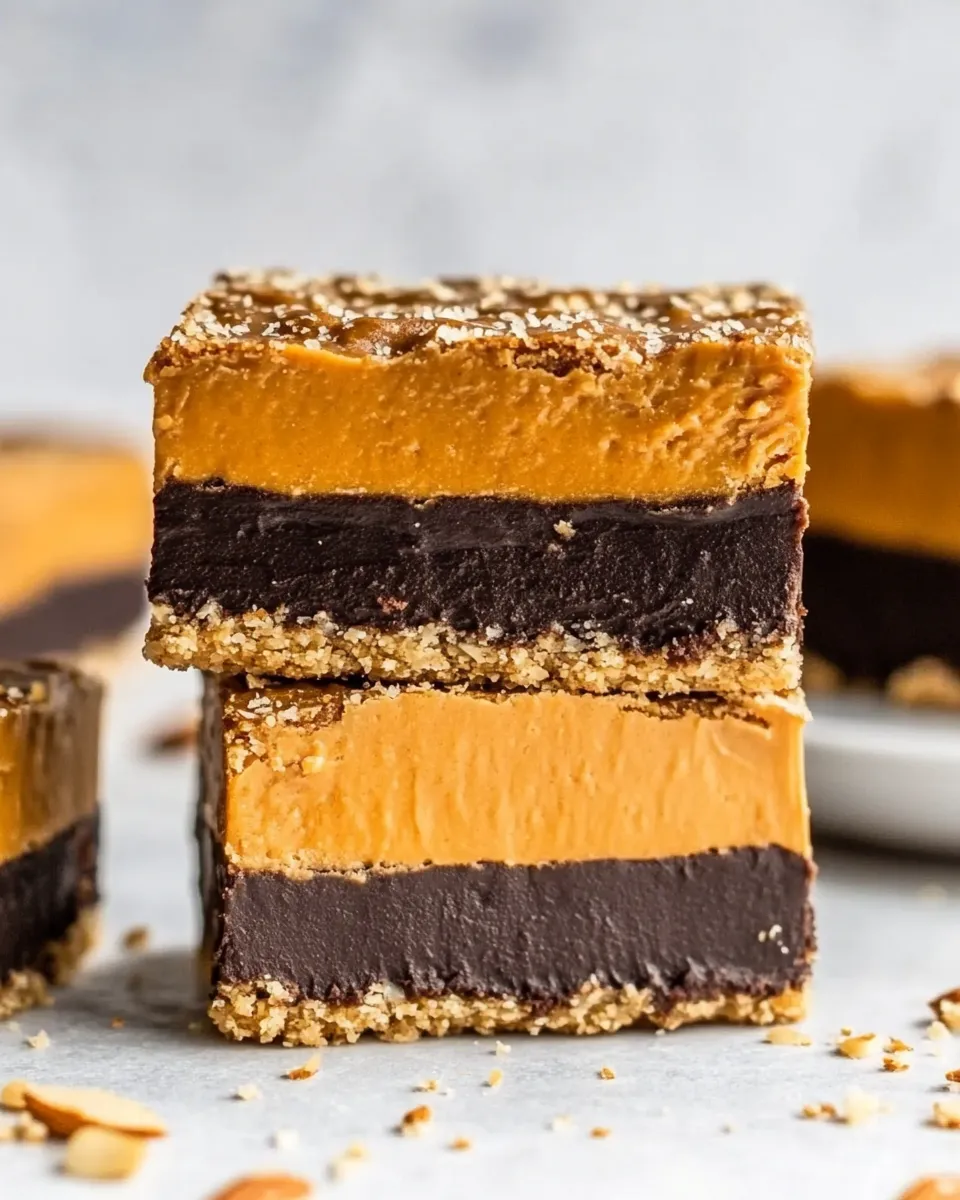
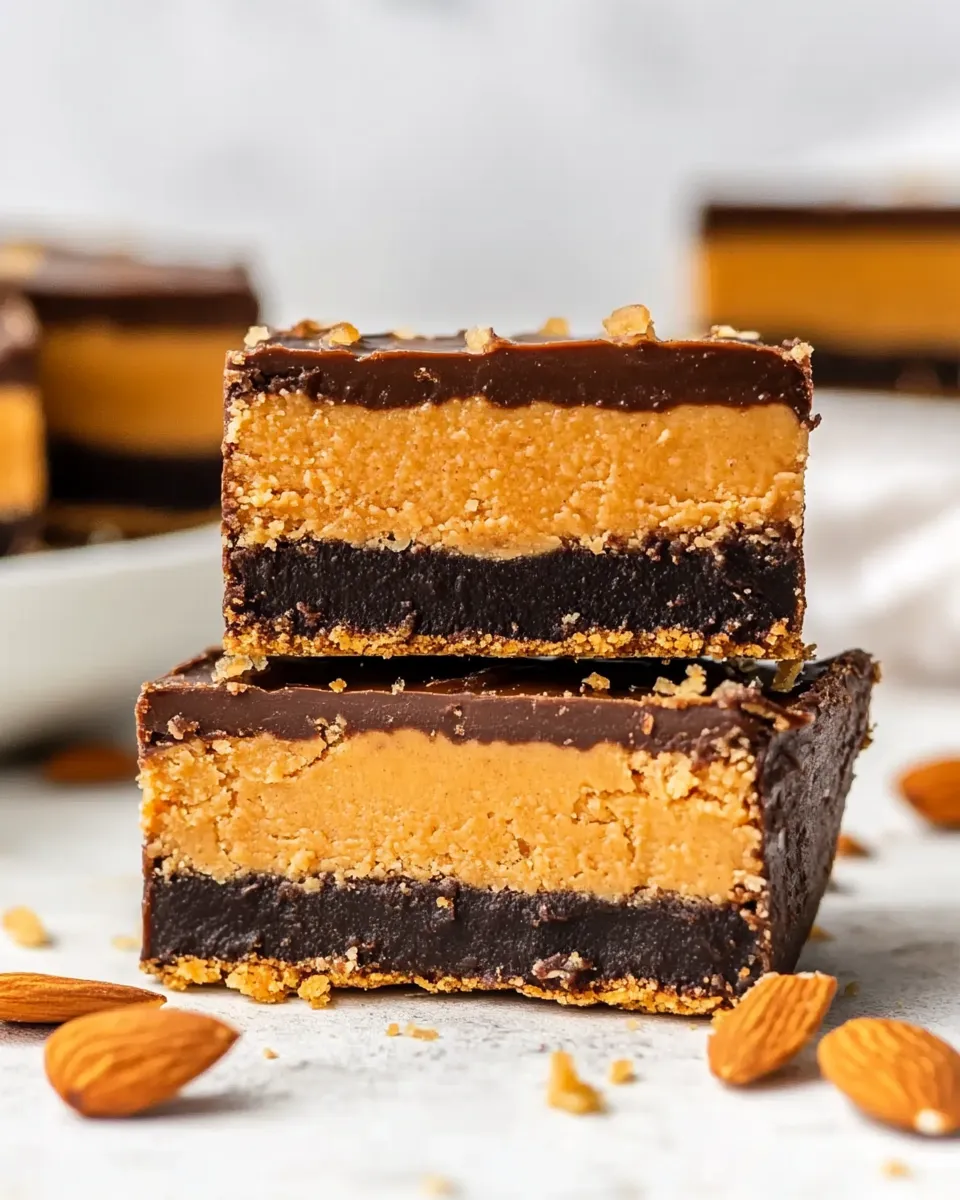
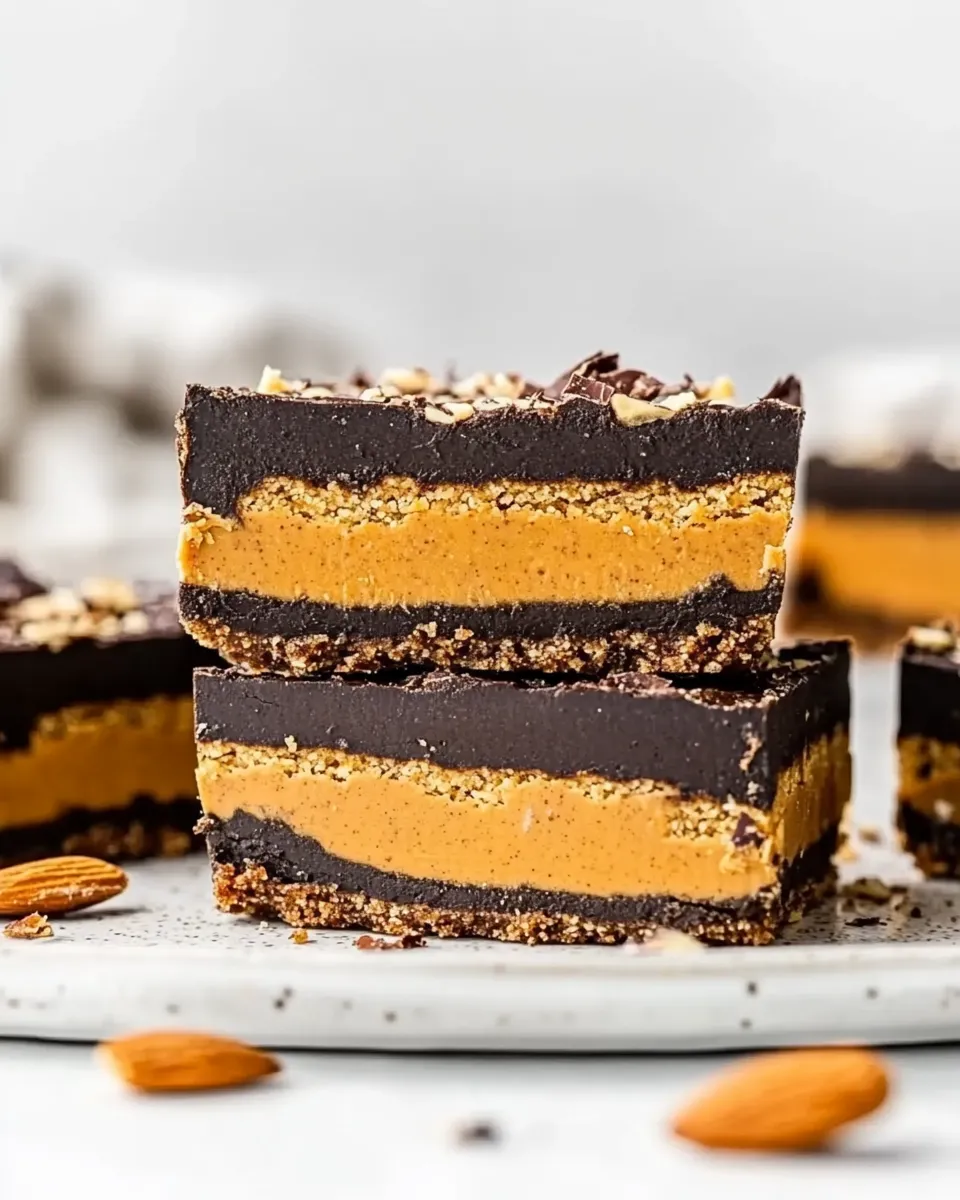
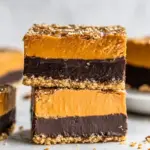
These almond butter bars are a small, reliable dessert that actually fits into a busy weeknight or a grab-and-go snack routine. No baking, just a few bowls and a short chill time. The finished bars have a dense, almond-forward base, a silky almond butter middle, and a glossy dark chocolate top.
I developed this recipe to be straightforward and ingredient-focused. It leans on pantry staples you probably already have, and uses grade A maple syrup and refined coconut oil to control texture and flavor without fuss. The steps are simple, but timing and temperature matter for clean slices and good layering.
If you want a make-ahead treat for lunches, parties, or an afternoon pick-me-up, these bars hold up well and travel easily. Read through the steps before you start, line your pan, and have your spatula ready. The process moves quickly once you begin.
Gather These Ingredients
Ingredients
- 3/4 cup almond flour — forms the base; gives structure and a tender, nutty crumb.
- 3 tablespoons cocoa or cacao powder — adds chocolate depth and balances the sweetness in the base.
- Pinch of salt — brightens the flavors in the base.
- 3 tablespoons grade A maple syrup (at room temperature) — sweetens and helps bind the base.
- 1 cup almond butter (unsalted) — the primary flavor and texture of the filling; use a creamy, spreadable jar.
- 1/4 cup grade A maple syrup (at room temperature) — sweetens the almond butter layer and keeps it tender.
- 1/4 cup refined coconut oil (melted and cooled) — thins and stabilizes the filling while keeping it dairy-free; refined has neutral coconut flavor.
- 1/2 teaspoon vanilla extract — adds background sweetness and rounds the almond flavor.
- 1/4 teaspoon fine sea salt — add only if your almond butter is unsalted; balances the sweetness and enhances flavor.
- 3 ounces high-quality dairy-free dark chocolate (chopped) — the shiny top and flavor contrast; use a brand you like to eat on its own.
- 1 teaspoon refined coconut oil — optional; helps the chocolate melt smooth and pour more evenly.
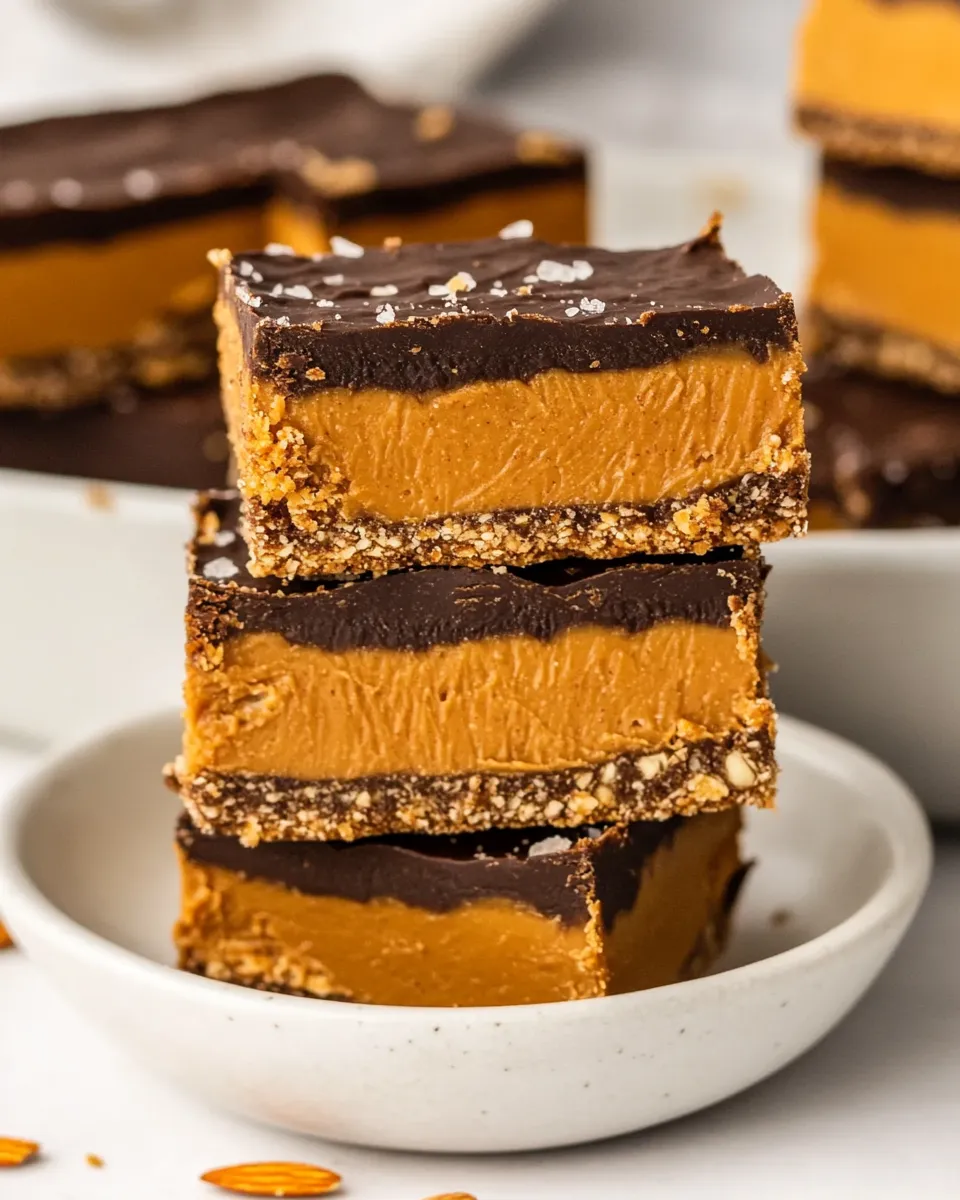
- Flaky salt — garnish; adds contrast and finishes each bite.
Build Almond Butter Bars (No-Bake) Step by Step
- Line an 8″ x 3″ loaf pan with parchment paper, leaving an overhang on two opposite sides to make removal easier.
- Make the base: in a medium bowl whisk together 3/4 cup almond flour, 3 tablespoons cocoa or cacao powder, and a pinch of salt. Add 3 tablespoons grade A maple syrup (at room temperature) and stir with a spatula until the flour has absorbed the syrup and the mixture sticks together when pinched; you may need to finish mixing with your hands.
- Transfer the base mixture to the lined pan. Use a damp spatula or your fingertips to press it evenly into the bottom of the pan. Place the pan in the freezer while you make the almond butter layer (about 10–15 minutes) so the base firms.
- Prepare the almond butter layer: in a separate medium bowl combine 1 cup unsalted almond butter, 1/4 cup grade A maple syrup (at room temperature), and 1/2 teaspoon vanilla extract. Add 1/4 teaspoon fine sea salt only if your almond butter is unsalted. Stir with a spatula until smooth.
- Add the coconut oil: stir in 1/4 cup refined coconut oil (melted and cooled) to the almond butter mixture until fully incorporated and the filling becomes slightly runny but cohesive.
- Remove the pan from the freezer and pour the almond butter filling over the chilled base. Use a spatula to smooth the top into an even layer. Return the pan to the freezer to firm for 10–20 minutes while you melt the chocolate.
- Melt the chocolate: place 3 ounces chopped high-quality dairy-free dark chocolate and 1 teaspoon refined coconut oil (optional) in a microwave-safe bowl. Microwave in 20–30 second intervals, stirring thoroughly between each interval, until the chocolate is completely melted and smooth. Do not overheat.
- Pour the melted chocolate over the chilled almond butter layer. Gently spread with a spatula or very lightly shake the pan to help it level. Sprinkle flaky salt over the chocolate to garnish.
- Freeze the pan until the bars are fully set, at least 30 minutes.
- To slice: run a sharp knife around the unlined edges of the pan, then lift the bars out using the parchment paper overhang. Place on a cutting board. For cleaner cuts, score the top chocolate layer first with a shallow cut, then cut all the way through into 12–18 pieces (or your preferred size). Wiping a hot knife clean between cuts can improve slice appearance.
- Serve slightly chilled. Store leftovers in an airtight container in the refrigerator for up to 10 days for a fudgier texture, or in the freezer for up to 2 months for a firmer bar.
Why This Recipe Belongs in Your Rotation
It’s fast, consistent, and forgiving. Once you measure and prepare, the recipe comes together in a single afternoon with no oven time. That matters when you want a homemade treat without the hot kitchen or the babysitting a bake needs. The flavors are straightforward: nut, chocolate, and a hint of salt. They appeal to kids and adults alike.
Texture-wise, the bars hit three notes: a slightly crumbly, cocoa-spiked base; a creamy, cohesive almond butter center; and a thin, crisp chocolate top. That contrast makes each bite interesting. The bars also keep well in the fridge or freezer, so you can make a batch and portion them out over days or weeks.
Quick Replacement Ideas
If you need small adjustments, here are practical swaps that keep the method intact without changing quantities:
– Nut-free option: swap almond butter for sunflower seed butter and omit the extra salt if using a salted spread. Expect a slightly different color and flavor, but the method stays the same.
– Different chocolate: use any dairy-free chocolate you prefer; darker chocolate gives more bite, while a slightly sweeter bar comes from a higher-cocoa butter milk-style alternative.
– Sweetener alternatives: a similar volume of liquid sweetener—honey or mild agave—can replace maple syrup where permitted. Keep them at room temperature so the base and filling bind properly.
Prep & Cook Tools
You don’t need specialized equipment. Get an 8″ x 3″ loaf pan, parchment paper, two medium bowls, a spatula, a whisk, a microwave-safe bowl for the chocolate, and a sharp knife for slicing. A small offset spatula makes smoothing the layers easier, but a regular rubber spatula works fine. If you prefer not to microwave, use a double boiler to melt the chocolate gently.
Avoid These Mistakes
Don’t skip lining the pan with an overhang. Removing the set bars becomes fiddly without it. Also, make sure the maple syrup is at room temperature when you use it; cold syrup doesn’t incorporate as well and makes the base harder to bind. When melting chocolate, heat in short bursts and stir between intervals. Overheating will seize the chocolate and ruin the glossy finish.
Another common error: pouring warm almond butter filling onto a warm base. Chill the base until firm. That keeps the layers distinct and prevents the filling from sinking into the bottom.
Fit It to Your Goals
Want a lower-sugar bite? Cut pieces smaller. The recipe’s proportions produce a rich bar, so modest portions satisfy. If you need more calories or a higher-fat snack for endurance training, eat the bars slightly chilled from the freezer—they feel denser and more satiating.
For allergy accommodation, as noted above, sunbutter works as a straight swap for almond butter in this method. If avoiding coconut fat, the refined coconut oil can be replaced with any neutral, solid-at-room-temperature fat in similar volume to achieve a comparable texture—test one small batch first to confirm setting and mouthfeel.
Notes from the Test Kitchen
Texture tweaks
We tested this recipe with a slightly higher and lower coconut oil percentage. The 1/4 cup in the formula gives a filling that’s smooth and slightly yielding at refrigerator temperature. Reduce the coconut oil slightly if you want a firmer, less melty center. Increase it a touch for a silkier, almost ganache-like filling.
Chocolate tips
Use a good-quality dairy-free dark chocolate. A higher-quality chocolate sets shinier and cuts cleaner. Adding the optional 1 teaspoon refined coconut oil loosens the melted chocolate just enough to pour and level without thinning it too much.
During testing, we found that a quick chill between layers (as described) is the single step that delivers neat, even bars. Skipping that pause produces a less-defined filling and more mixing at the layer junctions.
Best Ways to Store
Keep the bars in an airtight container. For a fudgier texture, store in the refrigerator for up to 10 days. They’ll be easy to bite into straight from the fridge. For longer storage and a firmer bite, freeze up to 2 months. Thaw on the counter for 10–15 minutes before serving if you prefer a softer chew, or slice and serve frozen for an ice-cream-bar-style crunch.
If you’re packing these for school or work, keep them chilled until just before eating. They hold shape well, but warm environments will soften the filling and the chocolate cap.
Questions People Ask
Q: Can I use raw coconut oil?
A: Refined coconut oil is recommended because it has a neutral flavor; unrefined (virgin) coconut oil will add coconut notes that may compete with the almond flavor. The melting and setting behavior is similar.
Q: My almond butter is salted—should I still add the extra 1/4 teaspoon sea salt?
A: No. The ingredient list notes to omit the 1/4 teaspoon fine sea salt if your almond butter is salted. Taste as you mix if you’re unsure.
Q: How do I get clean slices?
A: Warm your knife under hot water, dry it, and make one smooth cut. Wipe the blade clean and repeat. Scoring the chocolate first helps prevent cracking and gives a cleaner edge.
Q: Can I double the recipe?
A: Yes, but use two pans rather than one much larger pan to preserve the same thickness and chilling times. The method and proportion stay the same.
That’s a Wrap
These Almond Butter Bars (No-Bake) are practical, reliable, and satisfying. They come together quickly, require no oven, and reward you with layered texture and clear flavors. Make a batch, label a portion for the week, and keep extras in the freezer for a quick, homemade treat anytime. Simple to prep, simple to portion, and always appreciated by anyone who loves nut-forward sweets.
Almond Butter Bars (No-Bake)
Ingredients
Ingredients
- 3/4 cupalmond flour
- 3 tablespoonscocoa or cacao powder
- Pinchof salt
- 3 tablespoonsgrade A maple syrupat room temperature
- 1 cupalmond butterunsalted
- 1/4 cupgrade A maple syrupat room temperature
- 1/4 cuprefined coconut oil*melted and cooled
- 1/2 teaspoonvanilla extract
- 1/4 teaspoonfine sea saltomit if nut butter is salted
- 3 ounceshigh-quality dairy-free dark chocolate*chopped
- 1 teaspoonrefined coconut oilOptional; this makes the chocolate easier to pour
- Flaky saltfor garnish
Instructions
Instructions
- Line an 8″ x 3″ loaf pan with parchment paper, leaving an overhang on two opposite sides to make removal easier.
- Make the base: in a medium bowl whisk together 3/4 cup almond flour, 3 tablespoons cocoa or cacao powder, and a pinch of salt. Add 3 tablespoons grade A maple syrup (at room temperature) and stir with a spatula until the flour has absorbed the syrup and the mixture sticks together when pinched; you may need to finish mixing with your hands.
- Transfer the base mixture to the lined pan. Use a damp spatula or your fingertips to press it evenly into the bottom of the pan. Place the pan in the freezer while you make the almond butter layer (about 10–15 minutes) so the base firms.
- Prepare the almond butter layer: in a separate medium bowl combine 1 cup unsalted almond butter, 1/4 cup grade A maple syrup (at room temperature), and 1/2 teaspoon vanilla extract. Add 1/4 teaspoon fine sea salt only if your almond butter is unsalted. Stir with a spatula until smooth.
- Add the coconut oil: stir in 1/4 cup refined coconut oil (melted and cooled) to the almond butter mixture until fully incorporated and the filling becomes slightly runny but cohesive.
- Remove the pan from the freezer and pour the almond butter filling over the chilled base. Use a spatula to smooth the top into an even layer. Return the pan to the freezer to firm for 10–20 minutes while you melt the chocolate.
- Melt the chocolate: place 3 ounces chopped high-quality dairy-free dark chocolate and 1 teaspoon refined coconut oil (optional) in a microwave-safe bowl. Microwave in 20–30 second intervals, stirring thoroughly between each interval, until the chocolate is completely melted and smooth. Do not overheat.
- Pour the melted chocolate over the chilled almond butter layer. Gently spread with a spatula or very lightly shake the pan to help it level. Sprinkle flaky salt over the chocolate to garnish.
- Freeze the pan until the bars are fully set, at least 30 minutes.
- To slice: run a sharp knife around the unlined edges of the pan, then lift the bars out using the parchment paper overhang. Place on a cutting board. For cleaner cuts, score the top chocolate layer first with a shallow cut, then cut all the way through into 12–18 pieces (or your preferred size). Wiping a hot knife clean between cuts can improve slice appearance.
- Serve slightly chilled. Store leftovers in an airtight container in the refrigerator for up to 10 days for a fudgier texture, or in the freezer for up to 2 months for a firmer bar.
Equipment
- 8 x 3-inch loaf pan
- Parchment Paper
- Mixing bowls
- Spatula
- Microwave-safe Bowl
- Knife
- Cutting Board
- Freezer
Notes
Chocolate:I recommend using a chocolate bar over chocolate chips in this recipe because chocolate chips are made with food-grade wax and do not melt as smoothly. I used a strong 88% dark chocolate, but if you prefer your bars to be sweeter you can use a bar with a lower cacao percentage.
Other Substitutions:I have not tested any substitutions foralmond flour. Maple syrup can be replaced with any other liquid sweetener of choice. Almond butter can also be replaced for any nut or seed butter of choice – the thicker the butter, the thicker the bars will be