
These bars are a weekday-friendly treat that feels like more than the sum of a few pantry staples. They come together fast, don’t require baking, and deliver the classic peanut butter + chocolate combo with a satisfying oat chew. I love making a pan at the weekend and slicing pieces to have on hand for snacks, lunchboxes, or a quick dessert.
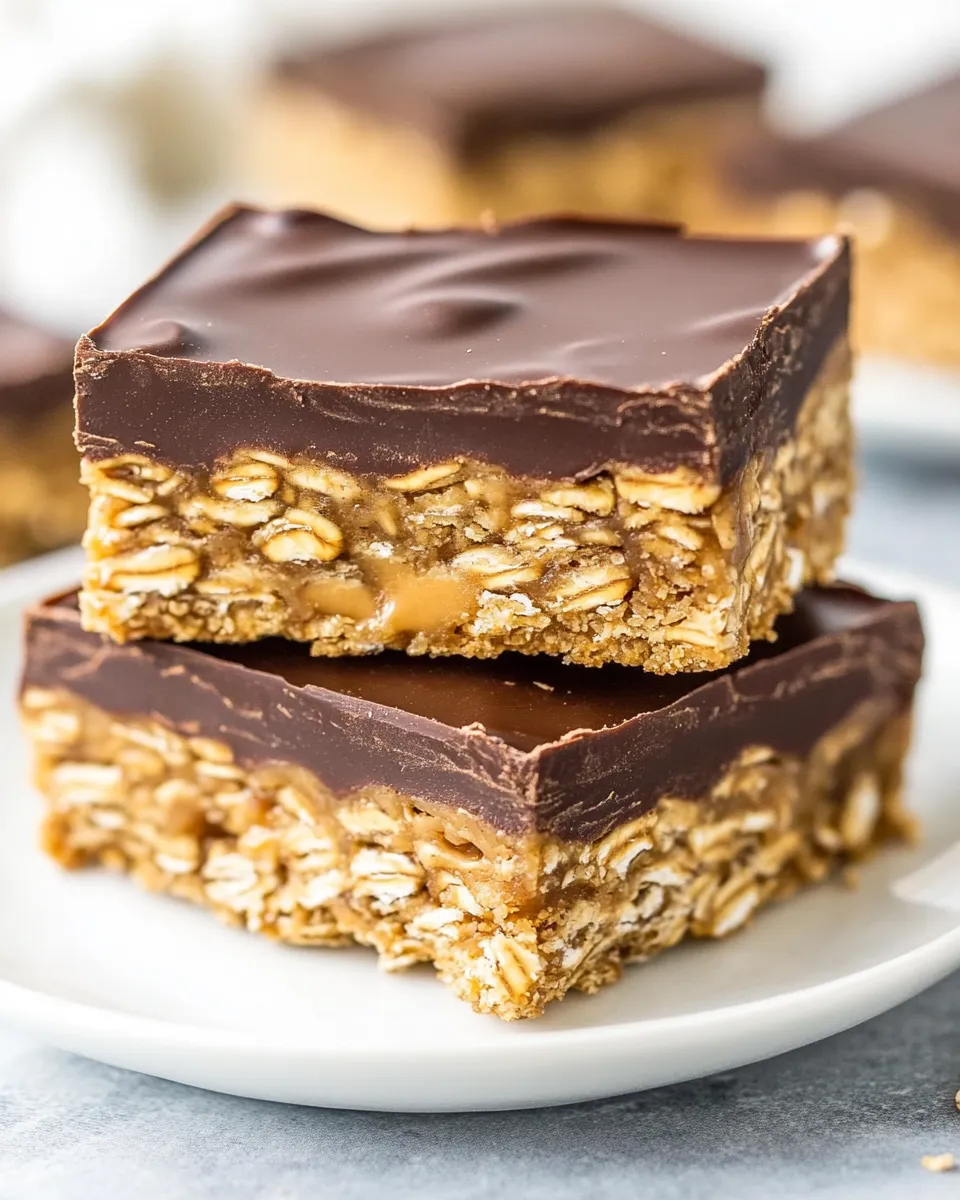
The texture is dense and chewy from the oats and peanut butter, with a glossy chocolate layer on top. The recipe uses simple ingredients you probably already have: creamy peanut butter, oats, a little sweetener, and chocolate chips. No eggs, no flour, and minimal equipment—perfect for busy nights or for feeding a crowd with almost no fuss.
I’ll walk you through the ingredients, the exact steps, what can go wrong, easy swaps for allergies, and tips that make clean slices and a perfect set. Read through the “Keep It Fresh” section so your bars stay at their best for days.
What Goes Into Chocolate Peanut Butter Oatmeal Bars
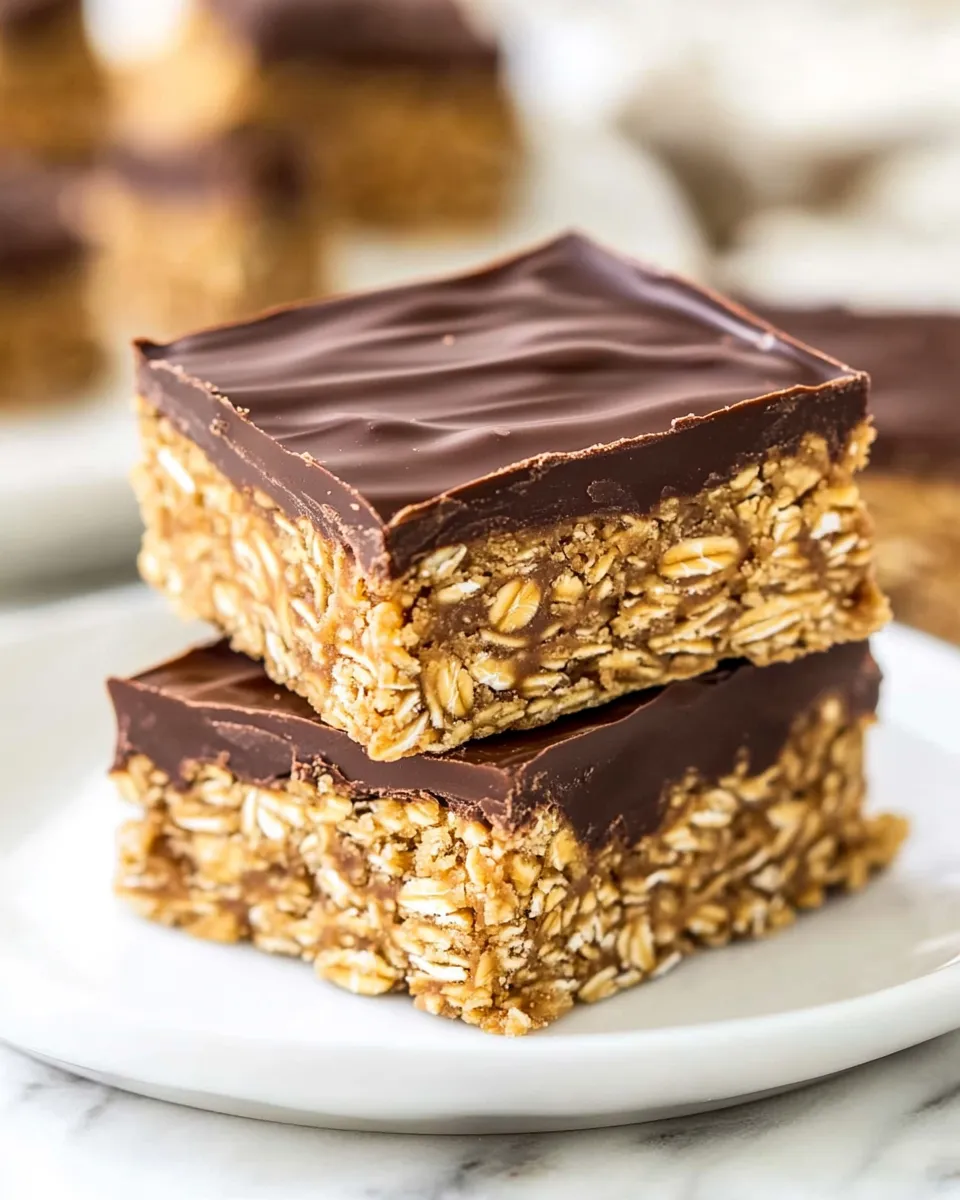
At heart this is an oat-and-peanut-butter slab topped with a rich chocolate layer. The base binds together with peanut butter and a liquid sweetener (maple syrup or honey), and the oats provide chew and structure. The top is simply melted dark chocolate blended with a touch more peanut butter to keep it glossy and easier to cut.
Ingredients
- 1 ½ cups (360 g) creamy peanut butter — the main binder and source of rich peanut flavor; use a smooth, runny-style creamy peanut butter for best texture.
- ½ cup (80 ml) maple syrup or honey — sweetens and helps the oat layer stick together; choose maple for a deeper, slightly smoky note or honey for floral sweetness.
- 1 ½ cups (150 g) old-fashioned oats — provides chew and body; do not swap in instant oats if you want the intended texture.
- 1 teaspoon pure vanilla extract — lifts the flavors and rounds the sweetness.
- 1 ½ cups dark chocolate chips — the chocolate topping; pick a quality chocolate with at least 60% cacao if you like balance against the sweetness.
- ¼ cup creamy peanut butter — mixed into the chocolate to create a shiny, cuttable topping and to echo the peanut butter flavor.
Chocolate Peanut Butter Oatmeal Bars in Steps
- Grease and line a 9×9-inch pan with parchment paper (leave an overhang on two sides for easy removal).
- In a microwave-safe bowl, add 1 ½ cups (360 g) creamy peanut butter. Microwave for 60 seconds or until the peanut butter has melted and is smooth.
- Add ½ cup (80 ml) maple syrup or honey, 1 ½ cups (150 g) old-fashioned oats, and 1 teaspoon pure vanilla extract to the melted peanut butter. Stir with a spatula until fully combined and the mixture holds together when pressed.
- Press the mixture evenly into the prepared pan using the back of a spoon or an offset spatula.
- For the chocolate topping, place 1 ½ cups dark chocolate chips and ¼ cup creamy peanut butter in a medium microwave-safe bowl. Microwave in 30-second increments, stirring between each increment, until the mixture is smooth.
- Spread the melted chocolate evenly over the peanut butter-oat layer. If desired, create decorative swirls with a toothpick.
- Chill in the refrigerator until firm, about 2–3 hours. Remove from the fridge and let sit at room temperature for 15 minutes before using the parchment overhang to lift the slab from the pan and cut into 9, 12, or 18 squares.
Why Cooks Rave About It
These bars are reliable. The formula is simple—fat, sweetener, oats, and chocolate—yet it produces a bar that’s not crumbly or greasy. The peanut butter does double duty as flavor and binder, so you don’t need eggs, flour, or added oil. The chill time sets everything into a firm slab that’s easy to portion.
Cooks also appreciate the minimal equipment and short active time. Most of the work is stirring and pressing. The chocolate layer feels elevated: melting chocolate with a little peanut butter creates a shiny top that cuts cleanly once chilled. Finally, the ratio of oat layer to chocolate topping is generous, so every bite still tastes like peanut butter and oats, not just candy.
Allergy-Friendly Substitutes

- Nut-free option: Swap the peanut butter for sunflower seed butter. It behaves similarly as a binder and has a comparable oil content; flavor will be different but still rich.
- Vegan / honey-free: Use maple syrup instead of honey. The recipe already lists maple syrup or honey, so pick maple for a fully vegan version.
- Gluten-free: Use certified gluten-free old-fashioned oats to avoid cross-contamination if needed.
- Dairy-free chocolate: Choose dairy-free dark chocolate chips to keep the topping vegan and dairy-free.
Setup & Equipment
Keep the list short and practical. You need a 9×9-inch square pan, parchment paper, a microwave-safe bowl (or double boiler if you prefer stovetop melting), an offset spatula or the back of a spoon, and a rubber spatula for stirring. A sharp knife or bench scraper helps to get tidy squares.
If you plan to make bars regularly, a small baking scale is handy for measuring ingredients by weight (the recipe includes weights for clarity). Otherwise, measuring cups work fine.
Things That Go Wrong
- Oat layer too loose: If the oat-peanut butter mix won’t hold when pressed, it likely needs a bit more peanut butter or syrup. Stir thoroughly and press very firmly into the pan; chilling helps firm it up.
- Chocolate topping grainy or seizing: Chocolate can seize if water gets in. Make sure bowls and utensils are dry. If using the microwave, stir between increments so heat distributes evenly; stop microwaving once nearly melted and let residual heat finish it.
- Bars are too hard to cut: If the chocolate sets rock-hard, let the slab sit at room temperature for 10–15 minutes after removing from the fridge before slicing. This prevents cracking and keeps edges neat.
- Oats are gummy: This usually results from overmixing or using quick oats. Stick to old-fashioned oats for the intended chew and texture.
Holiday & Seasonal Touches
These bars are a great canvas for small seasonal changes without changing the core recipe. For a festive feel, after spreading the chocolate, sprinkle a few finely chopped roasted peanuts or a light dusting of flaky sea salt on top before chilling. For winter holidays, a scatter of crushed peppermint or orange zest over the chocolate gives a bright, seasonal lift.
Keep additions minimal—small garnishes add visual and flavor interest without upsetting the texture or the set of the chocolate.
Insider Tips
Pressing the Base
Press the oat mixture evenly and firmly into the pan. I use the bottom of a flat cup or the back of a spoon to get uniform compression so the slab sets consistently and slices cleanly.
Melting Chocolate
Stir the chocolate every 30 seconds while microwaving. The last few stirs are what smooth the mixture; stop heating when there are just a few soft blobs left, as they will melt fully from residual heat. Adding the ¼ cup of peanut butter to the chocolate not only flavors it but also softens the set so you can cut neat squares without shattering the top.
Cutting Neat Squares
Use a sharp chef’s knife warmed under hot water and dried between passes for the cleanest cuts. Alternatively, chill until firm, then let sit 10–15 minutes at room temp before cutting to avoid splitting the chocolate layer.
Keep It Fresh: Storage Guide
Store the bars in an airtight container. Kept in the refrigerator they will last about 1–2 weeks—cold storage keeps the chocolate and peanut butter firm. For longer storage, freeze individual squares wrapped tightly in plastic wrap and placed in a freezer-safe bag for up to 3 months. Thaw in the fridge or let sit at room temperature for 20–30 minutes before serving.
If you prefer a softer, chewier bar, store at room temperature in a cool, dry place for up to 3 days. Warm environments will soften the chocolate and can make the bars greasy, so refrigeration is the safer bet in summer.
Questions People Ask
- Can I bake these? No baking is needed. This is a no-bake recipe; the bars set in the fridge thanks to the natural oils and the cooled chocolate.
- Can I use crunchy peanut butter? Yes, but the texture will be different—the base will have extra crunch from peanuts. The recipe calls for creamy for a smoother, more cohesive bar.
- What if my peanut butter is very thick? If your peanut butter is unusually thick, warm it briefly so it becomes stirrable. The recipe expects a spreadable, creamy peanut butter.
- How can I make smaller or larger portions? Use the parchment overhang to lift the whole slab and cut into 9, 12, or 18 squares as suggested. For bite-sized pieces, cut smaller; just keep an eye on portion size for storage and presentation.
Time to Try It
These Chocolate Peanut Butter Oatmeal Bars are a dependable, crowd-pleasing recipe you can keep in your back pocket. The technique is forgiving: melt, mix, press, top, chill. Follow the few timed steps and the bars will come out firm, flavorful, and easy to slice. Make a pan this afternoon and you’ll have portable snacks for the week—just remember to let them sit a short while at room temperature before slicing for the cleanest edges.
If you try them, take note of the peanut butter you use and whether you prefer maple or honey—those small choices change the personality of the bar more than you’d think. Enjoy, and if you tweak anything, keep the basic ratios the same and you’ll be rewarded with consistent results.
Chocolate Peanut Butter Oatmeal Bars
Ingredients
Ingredients
- ?1 1/2 cups 360 gcreamy peanut butter
- ??cup 80 mlmaple syrupor honey
- ?1 1/2 cup 150 gold fashioned oats
- ?1 teaspoonpure vanilla extract
- ?1 1/2 cupsdark chocolate chips
- ?1/4 cupcreamy peanut butter
Instructions
Instructions
- Grease and line a 9×9-inch pan with parchment paper (leave an overhang on two sides for easy removal).
- In a microwave-safe bowl, add 1 ½ cups (360 g) creamy peanut butter. Microwave for 60 seconds or until the peanut butter has melted and is smooth.
- Add ½ cup (80 ml) maple syrup or honey, 1 ½ cups (150 g) old-fashioned oats, and 1 teaspoon pure vanilla extract to the melted peanut butter. Stir with a spatula until fully combined and the mixture holds together when pressed.
- Press the mixture evenly into the prepared pan using the back of a spoon or an offset spatula.
- For the chocolate topping, place 1 ½ cups dark chocolate chips and ¼ cup creamy peanut butter in a medium microwave-safe bowl. Microwave in 30-second increments, stirring between each increment, until the mixture is smooth.
- Spread the melted chocolate evenly over the peanut butter-oat layer. If desired, create decorative swirls with a toothpick.
- Chill in the refrigerator until firm, about 2–3 hours. Remove from the fridge and let sit at room temperature for 15 minutes before using the parchment overhang to lift the slab from the pan and cut into 9, 12, or 18 squares.
Equipment
- 9×9 pan
- Mixing Bowl
- Measuring cups and spoons
Notes
Add coconut:replace½cup of the oats with the same amount of shredded coconut for a different flavor.
To Store:Keep these in an airtight container in the fridge for up to 1 week, or freeze for up to 3 months.


