
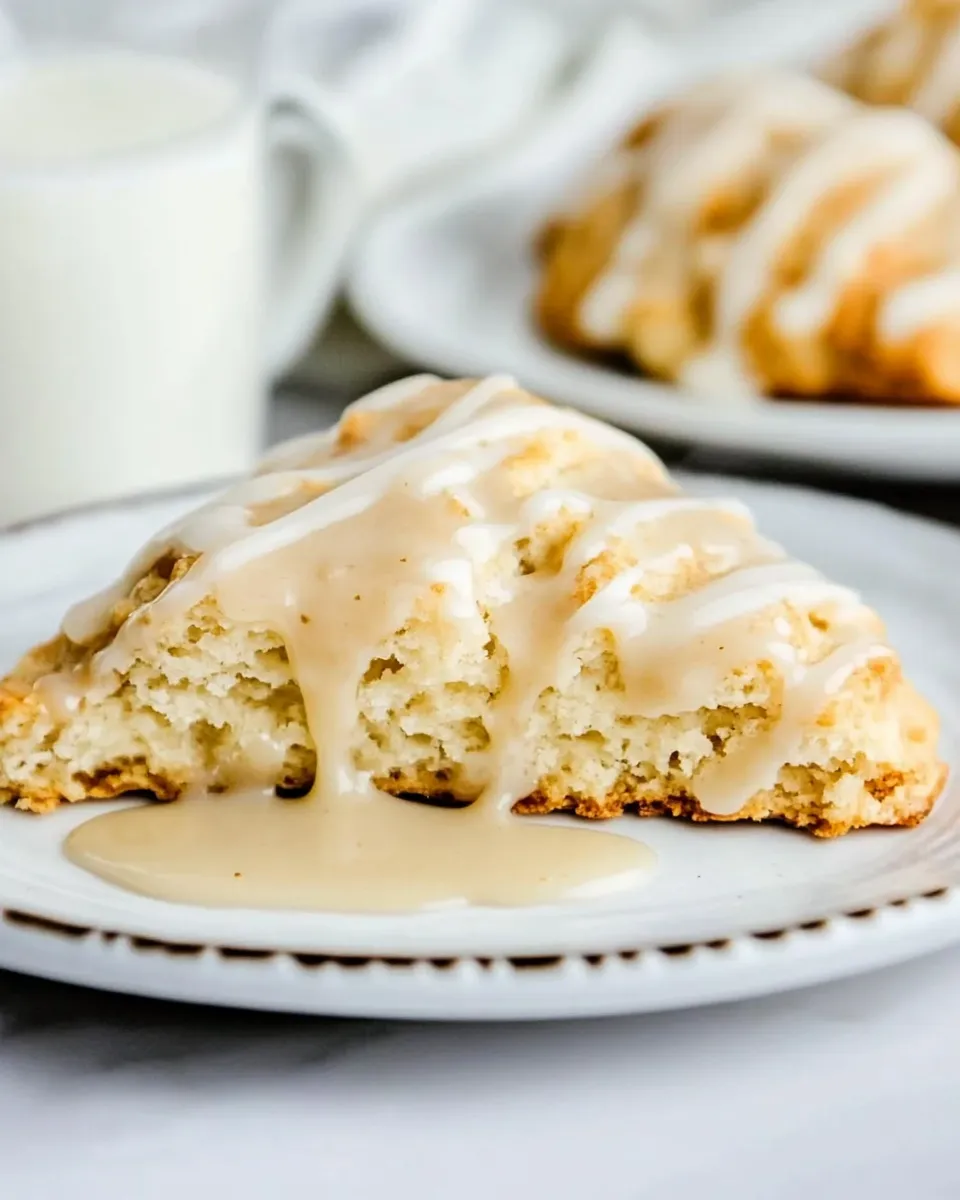
I love recipes that feel fancy but land on the table with almost no drama. These banana scones do exactly that: simple ingredients, straightforward technique, and a maple glaze that turns them from “breakfast” into “moment.” They’re forgiving, quick to come together, and perfect when your bananas are too spotted to eat but too sweet to ignore.
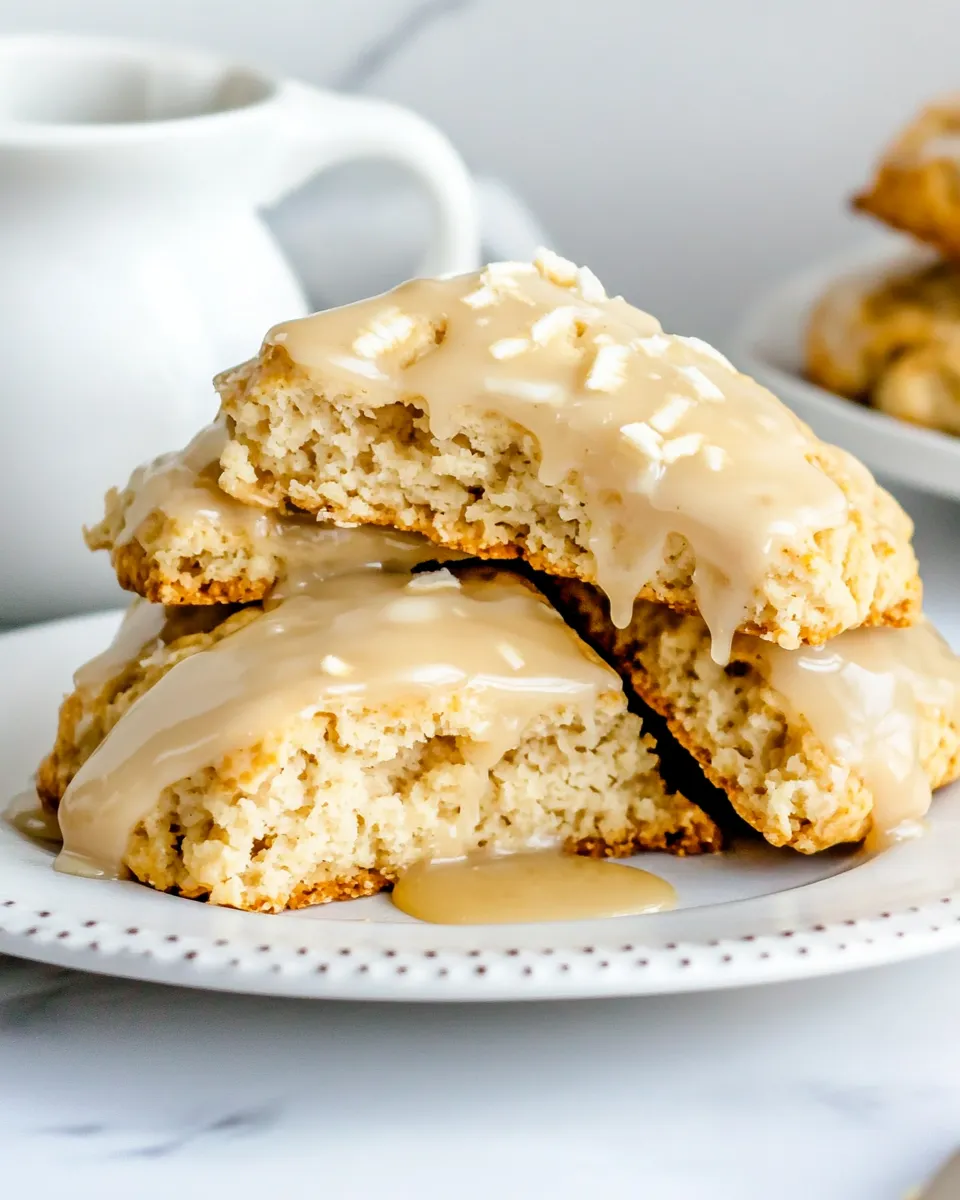
Expect tender, slightly crumbly scones with warm cinnamon notes and a clear banana backbone. The maple glaze is just sweet enough to complement rather than overwhelm. Make a batch for coffee, for a light dessert, or to send a little homemade love with a friend’s lunch.
Below I’ll walk you through what goes in, the exact steps to follow, options for swaps, and practical tips to avoid common mistakes. No fluff—just honest, reliable baking guidance so you get dependable results every time.
What Goes In
- 2 cups all-purpose flour — the structure and bulk of the scones; measure by spooning into the cup and leveling for accuracy.
- 1/4 cup granulated sugar — adds mild sweetness and helps with browning.
- 1 tablespoon baking powder — the leavening agent; ensures rise and lightness.
- 1 teaspoon ground cinnamon — warm spice to complement the banana.
- 1/2 teaspoon salt — balances sweetness and enhances flavor.
- 1/4 cup cold unsalted butter, cubed — creates flakiness and tenderness; keep it cold for the best texture.
- 1/2 cup mashed ripe banana — about 1 large or 2 medium bananas. For lower carb scones, use ½–1 teaspoon banana extract and increase the milk to 1/3 cup.
- 1/4 cup milk — hydrates the dough and softens crumb; whole or reduced-fat works here.
- 1 teaspoon vanilla extract — flavor enhancer; use real vanilla if you have it.
- 1 egg, lightly beaten — binds and adds richness.
- 1 cup confectioners’ sugar, sifted — for the maple glaze; sift to avoid lumps.
- 2 tablespoons real maple syrup — flavors the glaze; real maple gives the best depth.
- 1–2 teaspoons heavy cream — optional for the glaze to reach desired drizzle consistency.
From Start to Finish: Banana Scones with Maple Glaze
- Preheat oven to 400°F (200°C). Line a baking sheet with parchment paper or a silicone baking mat.
- In a food processor, combine 2 cups all-purpose flour, 1/4 cup granulated sugar, 1 tablespoon baking powder, 1 teaspoon ground cinnamon, and 1/2 teaspoon salt. Pulse briefly to mix.
- Add 1/4 cup cold unsalted butter, cubed, to the dry mixture. Pulse until the mixture resembles coarse crumbs with some pea-sized pieces remaining. Transfer this mixture to a large mixing bowl.
- In a separate bowl, combine 1/2 cup mashed ripe banana, 1/4 cup milk, 1 teaspoon vanilla extract, and 1 lightly beaten egg. Stir until evenly combined.
- Pour the banana mixture into the dry ingredients. Stir gently with a spatula or wooden spoon until just combined and a slightly sticky dough forms. Do not overmix.
- Turn the dough out onto a lightly floured surface. Gently knead 3–5 times to bring the dough together; add only enough flour to the surface to prevent sticking so the dough does not become dry.
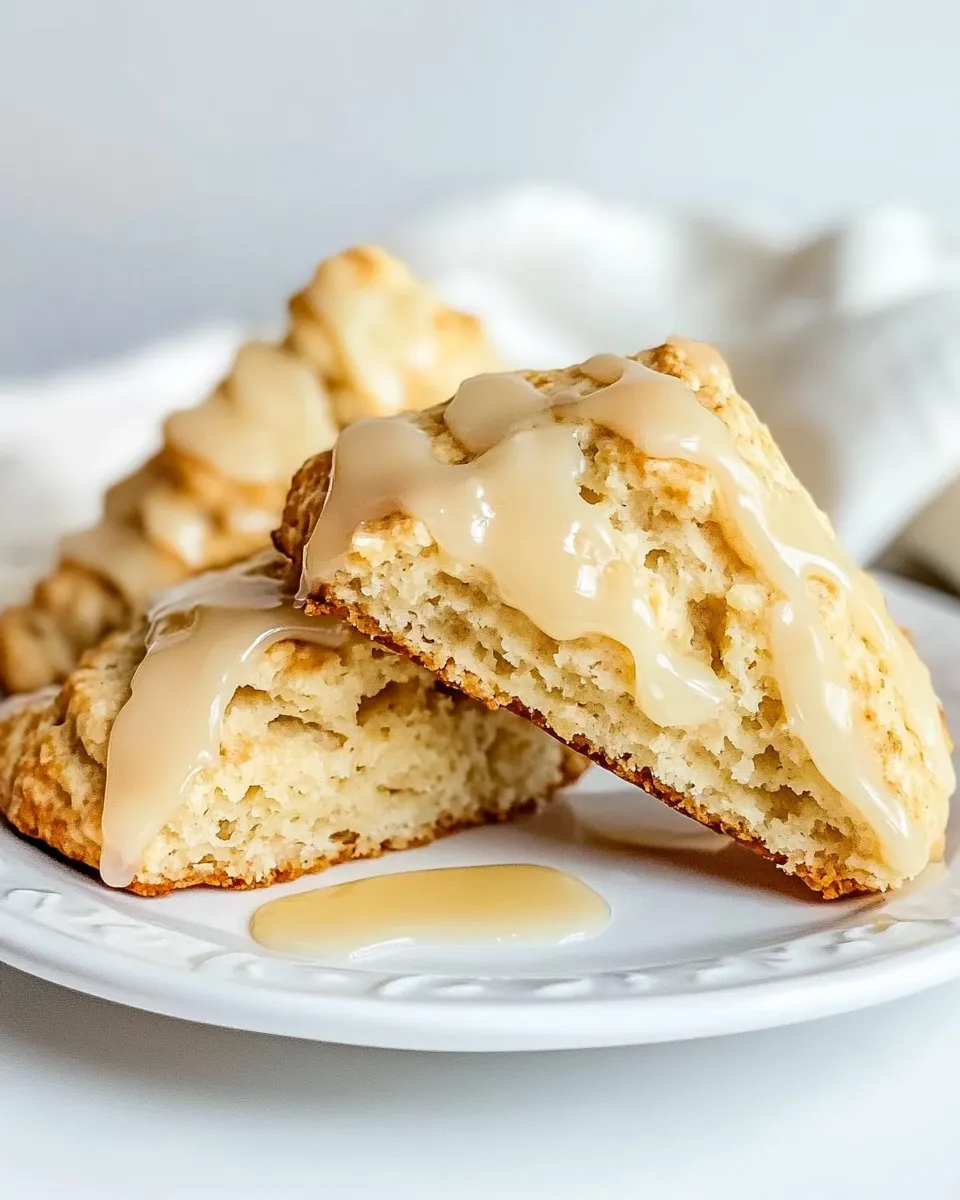
- Pat the dough into an 8-inch (about 20 cm) circle about 1 inch thick. Using a sharp knife or bench scraper, cut the circle into 8 equal wedges. Separate the wedges slightly and transfer them to the prepared baking sheet, leaving space between each scone.
- Bake for 18–20 minutes, or until the scones are golden brown and a toothpick inserted into the center comes out clean.
- Let the scones cool on the baking sheet for 5 minutes, then transfer to a wire rack to cool completely before glazing.
- To make the maple glaze, sift 1 cup confectioners’ sugar into a medium bowl. Add 2 tablespoons real maple syrup and stir. If the glaze is too thick, add heavy cream 1 teaspoon at a time (up to 2 teaspoons) until you reach the desired drizzle consistency.
- Drizzle the maple glaze over the cooled scones and allow the glaze to set for a few minutes before serving.
What Sets This Recipe Apart
These scones strike a balance between easy and reliable. A few things that make them stand out:
- Banana-forward flavor without making the dough overly wet—the balance of banana to dry ingredients is tuned so you get banana taste without gummy texture.
- Cold butter pulses in a food processor for quick, even blending; leaving some pea-sized butter bits gives you small pockets of tenderness and flake.
- Simple maple glaze uses real maple syrup for depth; it’s a small finish that lifts the whole scone.
In short: minimal fuss, maximum flavor. The method is forgiving, which is great when you want freshly baked scones without a baking marathon.
Ingredient Flex Options

Small swaps to accommodate what you have or dietary needs—keep in mind these will change texture and flavor slightly.
- Flour: You can try a 1:1 gluten-free blend, but results will vary; scones may be more fragile.
- Sugar: Swap the granulated sugar for coconut sugar for a deeper note; the texture will be similar.
- Butter: Salted butter can be used—skip or reduce added salt if you do.
- Milk: Any milk (dairy or unsweetened plant milk) works; choose a bit thicker milk if you want a slightly richer dough.
- Banana: If bananas are scarce, the recipe notes a lower-carb option using banana extract—follow that guidance precisely to keep balance.
- Glaze: If you prefer, thin the confectioners’ sugar with milk instead of heavy cream, but that slightly alters the maple flavor intensity.
Before You Start: Equipment
You don’t need fancy gear, but a few tools make this faster and more consistent.
- Food processor — speeds mixing and keeps butter cold; you can use a pastry cutter if you prefer.
- Baking sheet with parchment or silicone mat — prevents sticking and promotes even browning.
- Mixing bowls — one for dry, one for wet; keep it tidy to avoid overmixing.
- Wire rack — cools the scones so glaze won’t run off.
- Sharp knife or bench scraper — to cut the circle into even wedges.
Avoid These Traps
Common mistakes that ruin scone texture are easy to hit if you’re not paying attention—here’s how to avoid them:
- Overworking the dough: Stir until just combined and knead only 3–5 times. Overmixing develops gluten and leads to dense scones.
- Warm butter: Keep butter cold and pulse briefly. If it melts into the flour, you lose flakiness.
- Excess flour while shaping: Use only enough flour to prevent sticking. Too much dry flour dries the dough out.
- Glazing too soon: Let scones cool completely before glazing or the glaze will run and the scones will become soggy.
- Baking unevenly: Space wedges with room on the sheet so heat circulates; rotate the pan if your oven runs hot or uneven.
Make It Fit Your Plan
Timing and batch ideas so these scones fit into real life:
- Make-ahead: Bake, cool completely, then store at room temperature for up to 24 hours. Re-glaze just before serving for the freshest look.
- Freezing: Freeze unglazed cooled scones in a single layer, then transfer to a freezer bag. Reheat from frozen at 325°F for 10–12 minutes and glaze when warm.
- Scaling: The recipe is straightforward to double; divide mixed dough into two discs and bake in separate batches for even baking.
- Serving: Warm briefly in a 300°F oven for 5–7 minutes before serving for that just-baked aroma.
Chef’s Rationale
Why these ingredients and steps? I keep the method minimal to reduce handling—overworking is the biggest enemy of tender scones. Cold butter and brief mixing produces a desirable crumb. The ratio of banana to dry ingredients gives pronounced banana flavor without adding excess moisture that would require more flour (which makes scones heavy).
The maple glaze is intentionally simple: confectioners’ sugar provides smooth texture while real maple adds complexity you can’t get from vanilla alone. Adding cream a teaspoon at a time allows you to control how thick or thin the drizzle is so you can adapt to humidity and confectioners’ sugar packing variations.
How to Store & Reheat
Short-term storage: Keep glazed scones at room temperature in an airtight container for up to 24 hours. For the best texture, store unglazed and glaze when ready to eat.
Long-term storage: Freeze unglazed scones wrapped tightly for up to 1 month. To reheat, thaw at room temperature for 10–20 minutes, then warm in a 325°F oven for 8–12 minutes. Glaze after reheating.
Microwave tip: Quick warming in the microwave works (15–20 seconds) but can make the scone a bit softer; use the oven if you want the original texture back.
Questions People Ask
Q: Can I use overripe bananas? A: Yes. The riper they are, the more banana flavor, but be mindful of moisture—measure 1/2 cup mashed, not “one banana” by eye.
Q: My scones came out dense. What happened? A: Most likely overmixing or adding too much flour while shaping. Mix gently and knead as little as possible.
Q: Can I skip the glaze? A: Absolutely. They’re delicious plain or topped with a light dusting of confectioners’ sugar. The glaze is optional but adds a nice finishing touch.
Make It Tonight
If you want fresh scones in under an hour, start now. Preheat the oven, pulse the dry ingredients and butter, mix the wet, and you’ll be sliding wedges into the oven within 20 minutes. While they bake, whisk together the glaze so it’s ready when the scones cool.
These scones are dependable, fast, and forgiving—perfect for a weekday treat or a relaxed weekend breakfast. Bake a batch, pour the maple glaze, and enjoy the way the kitchen smells. Then share a few; they’re too good kept to yourself.
Easy Banana Scones Recipe with Maple Glaze
Ingredients
Ingredients
- 2 cupsall-purpose flour
- 1/4 cupgranulated sugar
- 1 tablespoonbaking powder
- 1 teaspoonground cinnamon
- 1/2 teaspoonsalt
- 1/4 cupcold unsalted buttercubed
- 1/2 cupmashed ripe bananasabout 1 large or 2 medium bananas. For lower carb scones use 1/2-1 teaspoon banana extract and increase the milk to 1/3 cup.
- 1/4 cupmilk
- 1 teaspoonvanilla extract
- 1 egglightly beaten
- Maple Glaze Drizzle –
- 1 cupconfectioners’ sugarsifted
- 2 tablespoonsreal maple syrup
- 1-2 teaspoonsheavy creamoptional until desired consistency is reached.
Instructions
Instructions
- Preheat oven to 400°F (200°C). Line a baking sheet with parchment paper or a silicone baking mat.
- In a food processor, combine 2 cups all-purpose flour, 1/4 cup granulated sugar, 1 tablespoon baking powder, 1 teaspoon ground cinnamon, and 1/2 teaspoon salt. Pulse briefly to mix.
- Add 1/4 cup cold unsalted butter, cubed, to the dry mixture. Pulse until the mixture resembles coarse crumbs with some pea-sized pieces remaining. Transfer this mixture to a large mixing bowl.
- In a separate bowl, combine 1/2 cup mashed ripe banana, 1/4 cup milk, 1 teaspoon vanilla extract, and 1 lightly beaten egg. Stir until evenly combined.
- Pour the banana mixture into the dry ingredients. Stir gently with a spatula or wooden spoon until just combined and a slightly sticky dough forms. Do not overmix.
- Turn the dough out onto a lightly floured surface. Gently knead 3–5 times to bring the dough together; add only enough flour to the surface to prevent sticking so the dough does not become dry.
- Pat the dough into an 8-inch (about 20 cm) circle about 1 inch thick. Using a sharp knife or bench scraper, cut the circle into 8 equal wedges. Separate the wedges slightly and transfer them to the prepared baking sheet, leaving space between each scone.
- Bake for 18–20 minutes, or until the scones are golden brown and a toothpick inserted into the center comes out clean.
- Let the scones cool on the baking sheet for 5 minutes, then transfer to a wire rack to cool completely before glazing.
- To make the maple glaze, sift 1 cup confectioners’ sugar into a medium bowl. Add 2 tablespoons real maple syrup and stir. If the glaze is too thick, add heavy cream 1 teaspoon at a time (up to 2 teaspoons) until you reach the desired drizzle consistency.
- Drizzle the maple glaze over the cooled scones and allow the glaze to set for a few minutes before serving.
Equipment
- Food Processor
- Baking Sheet
- Parchment Paperor baking mat
- Sharp knifeor pizza cutter
- Mixing bowls
Notes
Mix just until the ingredients are combined. Overmixing can lead to dense, tough scones.
If your kitchen is warm or you’ve handled the dough too much, pop it into the fridge for 10-15 minutes before baking. This helps the butter stay cold, resulting in flakier scones.
Whether you’re cutting them into wedges or rounds, try to shape them to a similar size to ensure even baking.


