
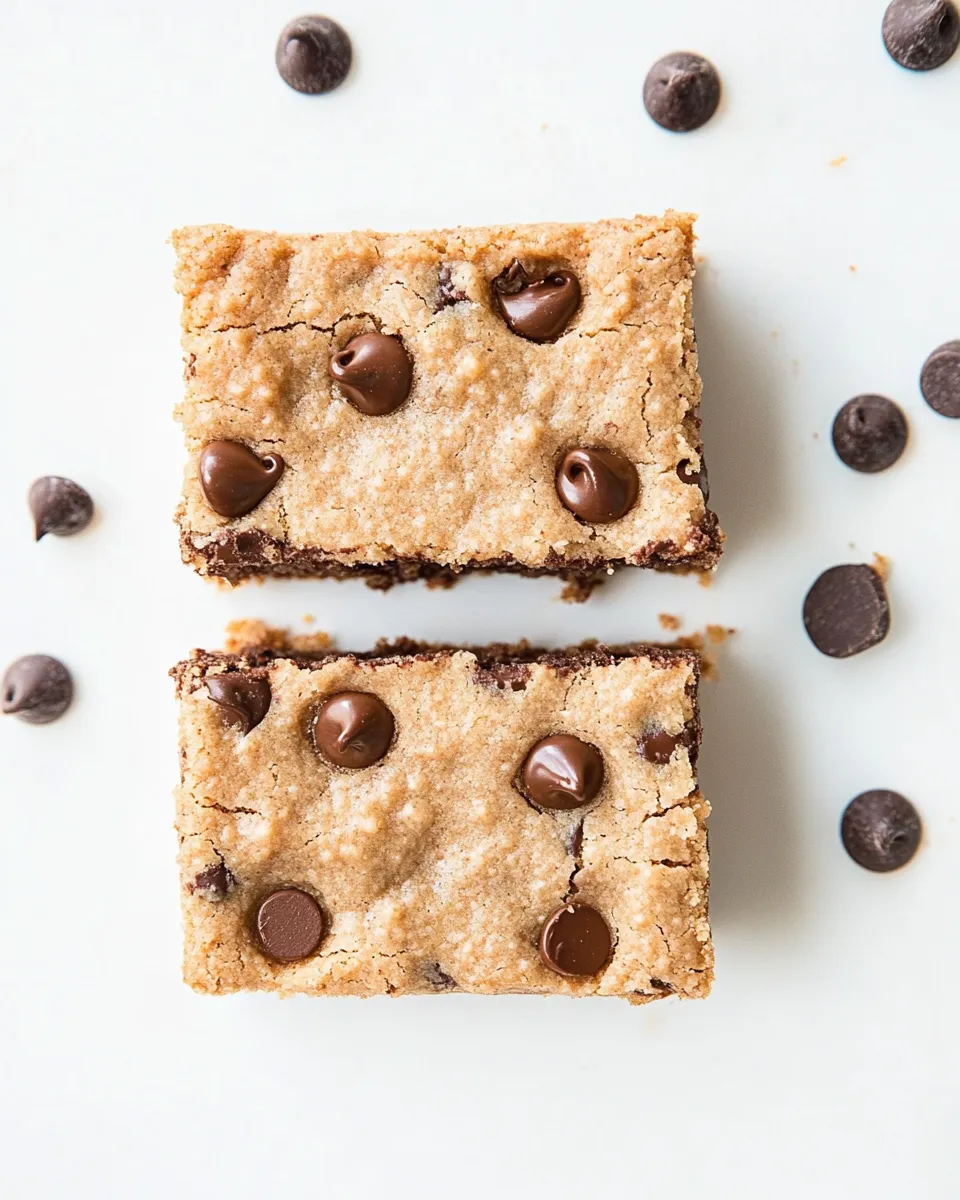
There’s something truly comforting about a warm, gooey chocolate chip cookie. Now imagine that classic treat transformed into thick, chewy cookie bars that are gluten-free! These Gluten-Free Chocolate Chip Cookie Bars are not just a delicious dessert; they’re a crowd-pleaser that everyone can enjoy. Whether you’re gluten-sensitive, have friends or family with dietary restrictions, or simply want a delightful treat, these bars will satisfy your sweet tooth and make your kitchen smell heavenly.
Why It’s Crowd-Pleasing

These bars are the ultimate indulgence, striking the perfect balance between chewy and crispy. The rich flavor of the chocolate chips combined with the buttery undertones creates a symphony of taste that appeals to both kids and adults alike. Plus, they are incredibly easy to make, which means you can whip them up for any occasion—be it a birthday party, a potluck, or just a cozy night in with your family. The best part? No one will even realize they’re gluten-free!
What You’ll Need
To create these delicious bars, gather the following ingredients:
- 1 stick (½ cup) unsalted butter, cold
- 1 teaspoon pure vanilla extract
- ¾ cup brown sugar
- 1 large egg
- 1 cup gluten-free flour
- ½ teaspoon ground cinnamon (optional)
- ½ teaspoon baking powder
- ½ teaspoon baking soda
- ¼ teaspoon sea salt
- 1 cup chocolate chips
Cook’s Kit
Before you start baking, make sure you have the following kitchen tools ready:
- Mixing Bowl: A large bowl for mixing your ingredients.
- Measuring Cups and Spoons: Accurate measurements are key to a successful recipe.
- Spatula: Perfect for mixing and spreading the batter.
- Baking Pan: An 8×8 inch pan works best for these bars.
- Parchment Paper: To line the baking pan for easy removal.
- Oven Mitts: Safety first when handling hot items!
Gluten-Free Chocolate Chip Cookie Bars in Steps
Step 1: Preheat the Oven
Start by preheating your oven to 350°F (175°C). This ensures your bars bake evenly and come out perfectly golden.
Step 2: Prepare the Baking Pan
Line your 8×8 inch baking pan with parchment paper, leaving some overhang on the sides. This will make it easy to lift the bars out later.
Step 3: Cream the Butter and Sugar
In a large mixing bowl, combine the cold unsalted butter and brown sugar. Using a spatula or an electric mixer, cream them together until the mixture is light and fluffy.
Step 4: Add the Egg and Vanilla
Beat in the large egg and pure vanilla extract until well combined. The mixture should be smooth and creamy.
Step 5: Combine Dry Ingredients
In a separate bowl, whisk together the gluten-free flour, ground cinnamon (if using), baking powder, baking soda, and sea salt. This ensures that the leavening agents are evenly distributed.
Step 6: Mix Dry Ingredients into Wet
Gradually add the dry ingredient mixture to the butter mixture. Stir until just combined, being careful not to overmix.
Step 7: Fold in the Chocolate Chips
Gently fold in the chocolate chips until they are evenly distributed throughout the dough.
Step 8: Bake
Spread the batter evenly into the prepared baking pan. Bake in the preheated oven for 25-30 minutes, or until the edges are golden brown and a toothpick inserted into the center comes out mostly clean.
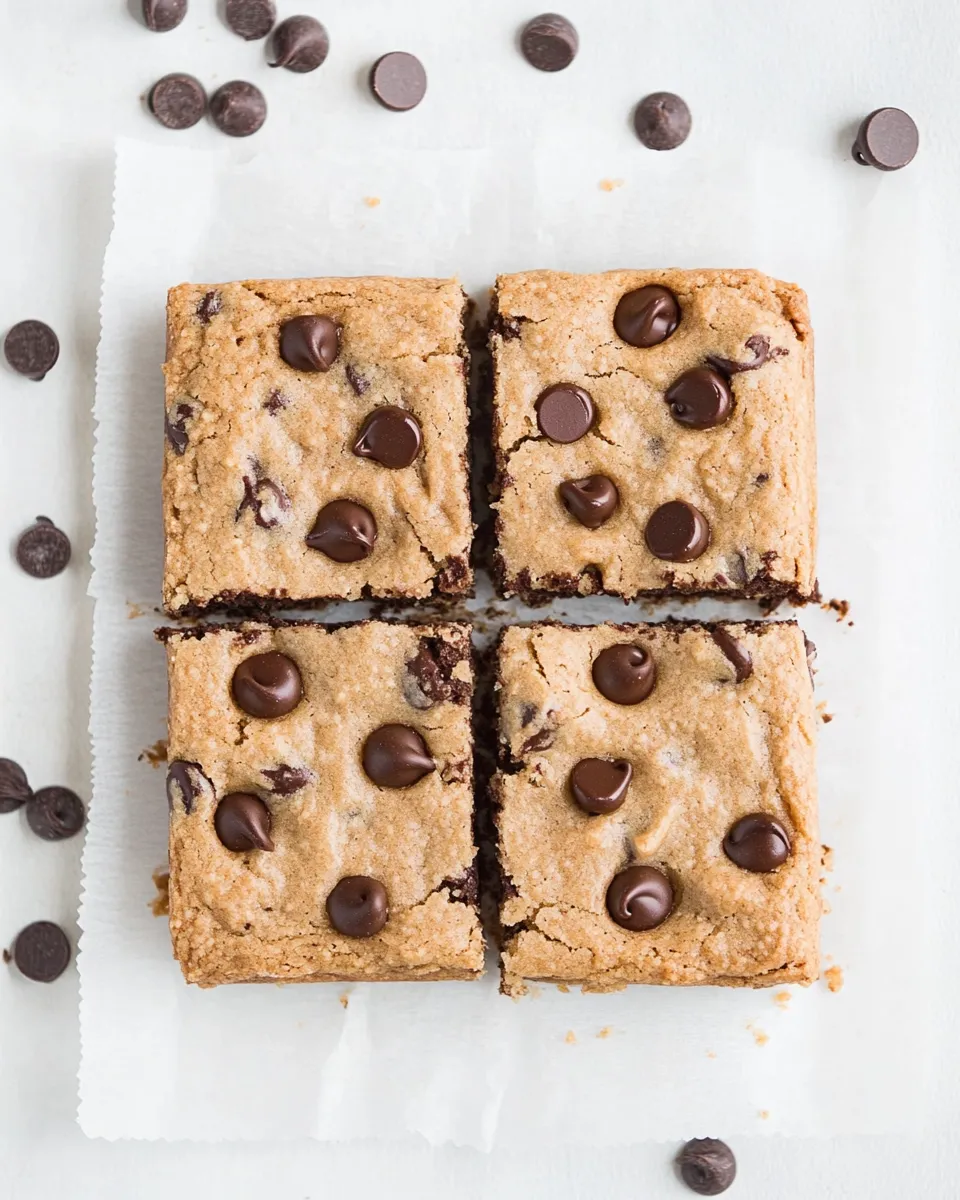
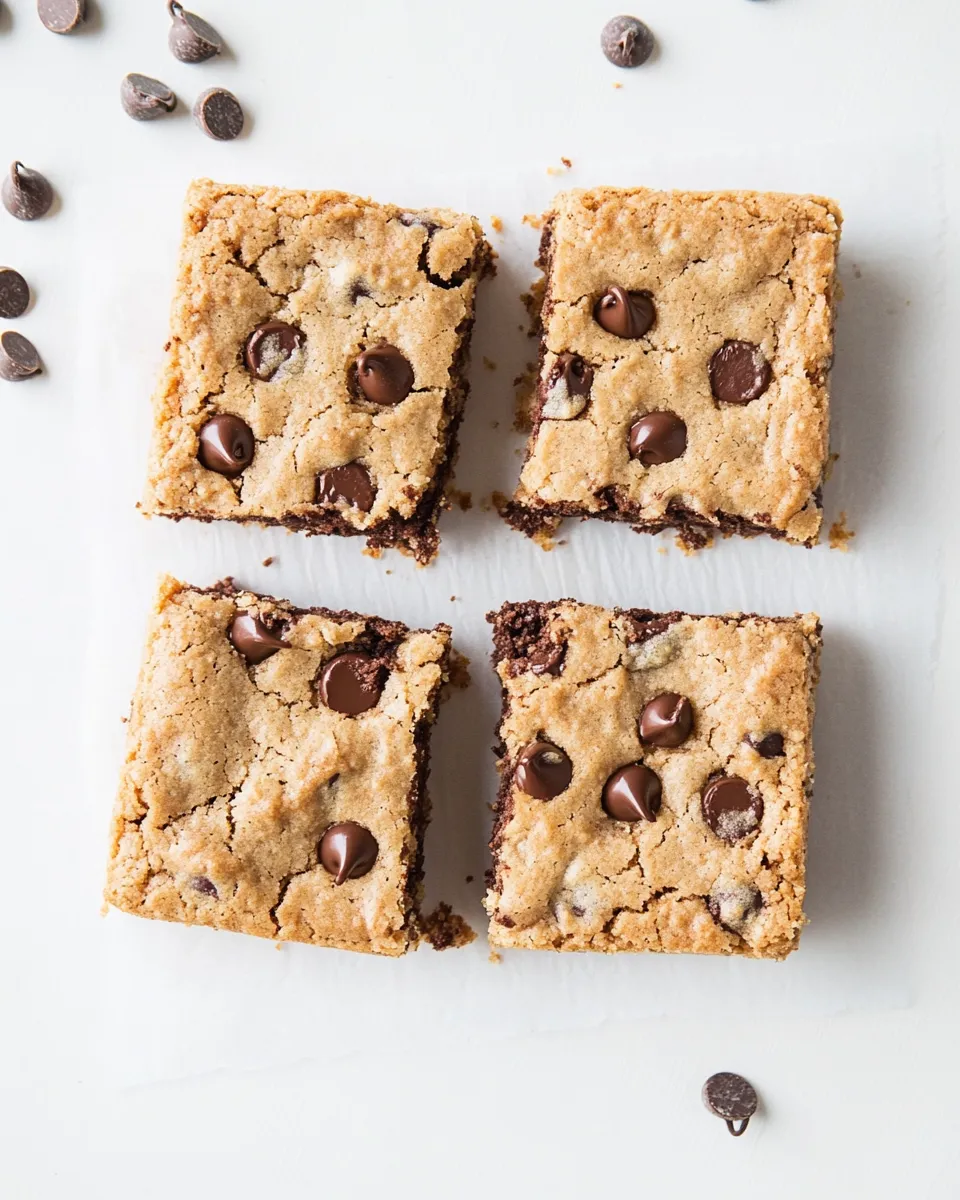
Step 9: Cool and Slice
Allow the bars to cool in the pan for about 10 minutes, then lift them out using the parchment paper. Transfer to a wire rack to cool completely before slicing them into squares.
Tailor It to Your Diet
If you have specific dietary needs, here are some ways to customize your Gluten-Free Chocolate Chip Cookie Bars:
- Use dairy-free butter or coconut oil if you need a dairy-free option.
- Substitute coconut sugar for brown sugar for a healthier alternative.
- Replace chocolate chips with dark chocolate or carob chips for a different flavor profile.
- Experiment with nut butter for added richness and a nutty flavor.
If You’re Curious
These cookie bars are not only simple to make but also versatile. You can add nuts, dried fruit, or even a sprinkle of sea salt on top before baking for a gourmet touch. They are perfect for lunchboxes or as a quick snack when you need a sweet pick-me-up. Plus, they store well, making them a great option for meal prepping!
Store, Freeze & Reheat
To keep your Gluten-Free Chocolate Chip Cookie Bars fresh, follow these tips:
- Store in an airtight container at room temperature for up to 5 days.
- For longer storage, freeze the bars wrapped tightly in plastic wrap and then in foil. They can last up to 3 months in the freezer.
- To reheat, simply microwave a bar for about 10-15 seconds until warm, or pop them in a preheated oven at 350°F (175°C) for a few minutes.
Gluten-Free Chocolate Chip Cookie Bars Q&A
Can I use a different type of flour?
Yes! You can use a blend of gluten-free flours, such as almond flour or oat flour, but make sure to adjust the ratios for the best results.
Can I make these bars vegan?
Absolutely! Substitute the egg with a flax egg (1 tablespoon flaxseed meal mixed with 2.5 tablespoons water) and use a dairy-free butter alternative.
What should I do if my bars are too crumbly?
If your bars turn out crumbly, it may be due to too much flour. Make sure to measure your flour correctly and consider adding a little more melted butter to the mixture.
Can I add additional mix-ins?
Definitely! Feel free to add nuts, dried fruits, or even a swirl of peanut butter for extra flavor and texture.
If you’re looking for more sweet treats to complement your , check out these delightful recipes:
Final Thoughts
These Gluten-Free Chocolate Chip Cookie Bars are not just a treat; they are a celebration of flavor and texture that everyone can enjoy. With their simple ingredients and easy preparation, they are bound to become a favorite in your household. So, gather your ingredients, put on your apron, and get ready to indulge in a batch of deliciousness that’s perfect for any occasion. Happy baking!
Gluten-Free Chocolate Chip Cookie Bars
Ingredients
For the Cookie Bars:
- 1/2 cup unsalted butter cold
- 1 teaspoon pure vanilla extract
- 3/4 cup brown sugar
- 1 large egg
- 1 cup gluten-free flour
- 1/2 teaspoon ground cinnamon optional
- 1/2 teaspoon baking powder
- 1/2 teaspoon baking soda
- 1/4 teaspoon sea salt
- 1 cup chocolate chips
Instructions
Instructions
- Step 1: Preheat the Oven - Start by preheating your oven to 350°F (175°C).
- Step 2: Prepare the Baking Pan - Line your 8x8 inch baking pan with parchment paper.
- Step 3: Cream the Butter and Sugar - In a large mixing bowl, combine the cold unsalted butter and brown sugar. Cream them together until light and fluffy.
- Step 4: Add the Egg and Vanilla - Beat in the egg and vanilla extract until well combined.
- Step 5: Combine Dry Ingredients - In a separate bowl, whisk together the gluten-free flour, ground cinnamon, baking powder, baking soda, and sea salt.
- Step 6: Mix Dry Ingredients into Wet - Gradually add the dry ingredients to the butter mixture and stir until just combined.
- Step 7: Fold in the Chocolate Chips - Gently fold in the chocolate chips until evenly distributed.
- Step 8: Bake - Spread the batter into the prepared baking pan and bake for 25-30 minutes.
- Step 9: Cool and Slice - Allow to cool for about 10 minutes, then lift out and transfer to a wire rack to cool completely before slicing.
Equipment
- Mixing Bowl
- Measuring cups and spoons
- Spatula
- Baking Pan
- Parchment Paper
- Oven mitts
Notes
- Store in an airtight container at room temperature for up to 5 days.
- Freeze wrapped tightly for up to 3 months.
- Reheat in the microwave for 10-15 seconds or in the oven at 350°F.


